CFR Race #2: British Grand Prix at Silverstone

October 14th, 2017

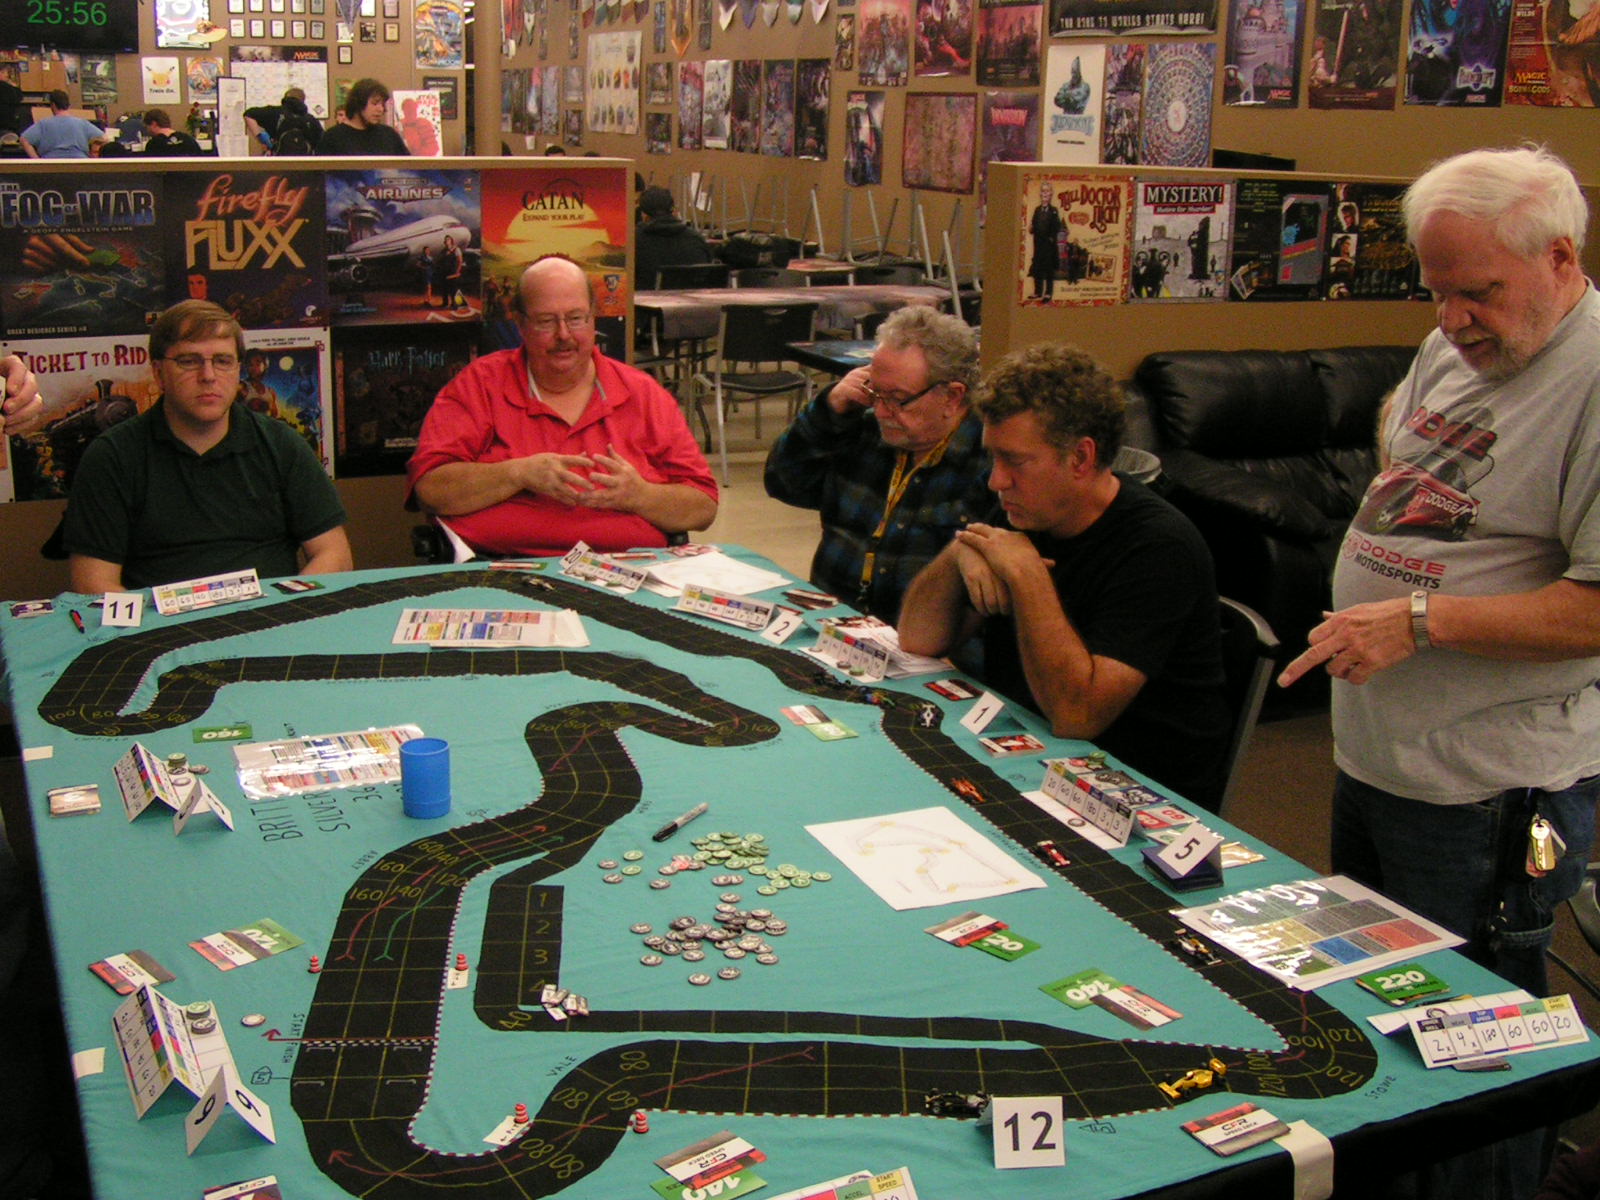
The second race of the 2017-2018 season of Championship Formula Racing (CFR) in Detroit, the British Grand Prix, was held on Friday, October 13, at RIW Hobbies & Games in Livonia, Michigan. Nine drivers participated. When all was said and done, Garry Kaluzny won the race after starting 6th. Other podium finishers were Gary Sturgeon and Mike Cook. Garry Kaluzny now leads the points standings, 13 to 12 over Jack Beckman. The race was on the current version of the Silverstone track, where the start/finish line had been moved from near the Woodcote corner to just past the Club corner, and with more corners added to try to slow the track some from its previous high speed configuration.

The real Silverstone track diagram.

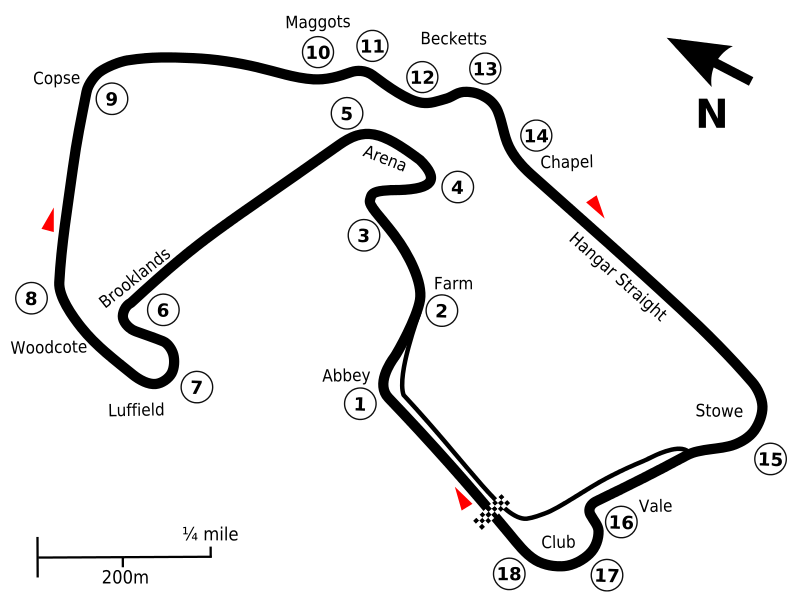
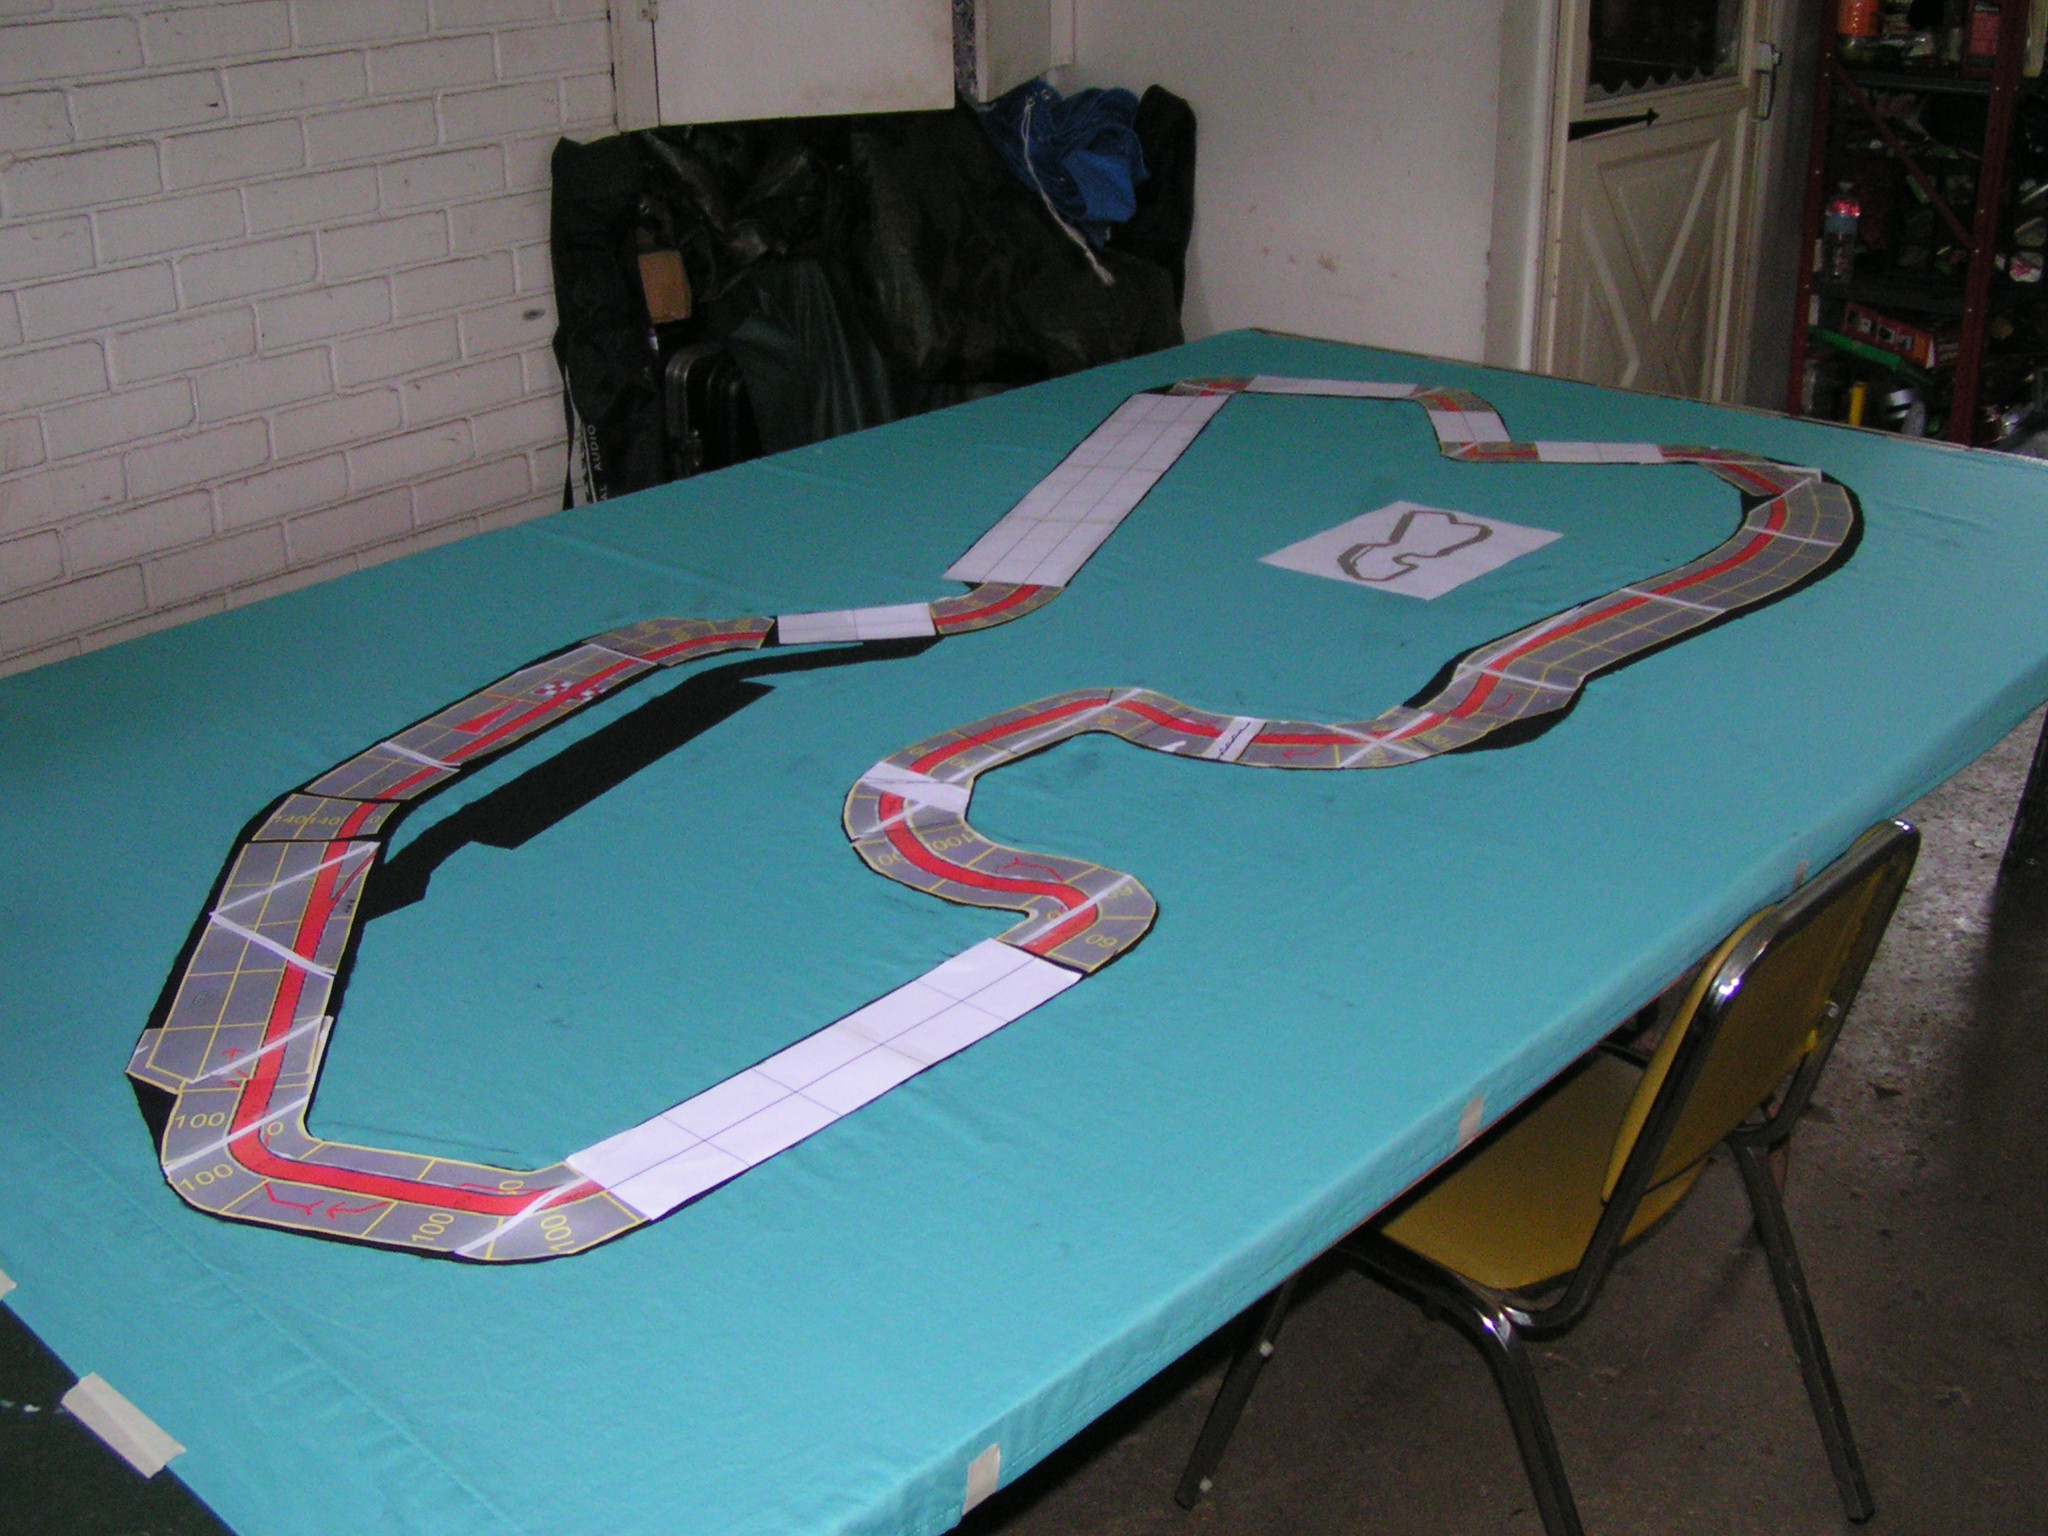
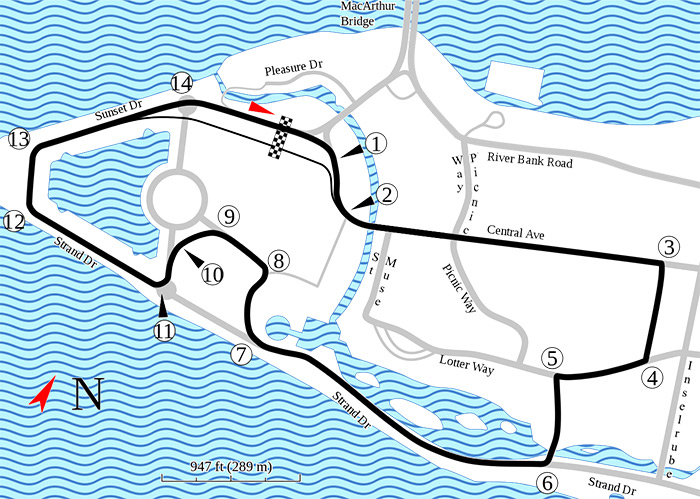
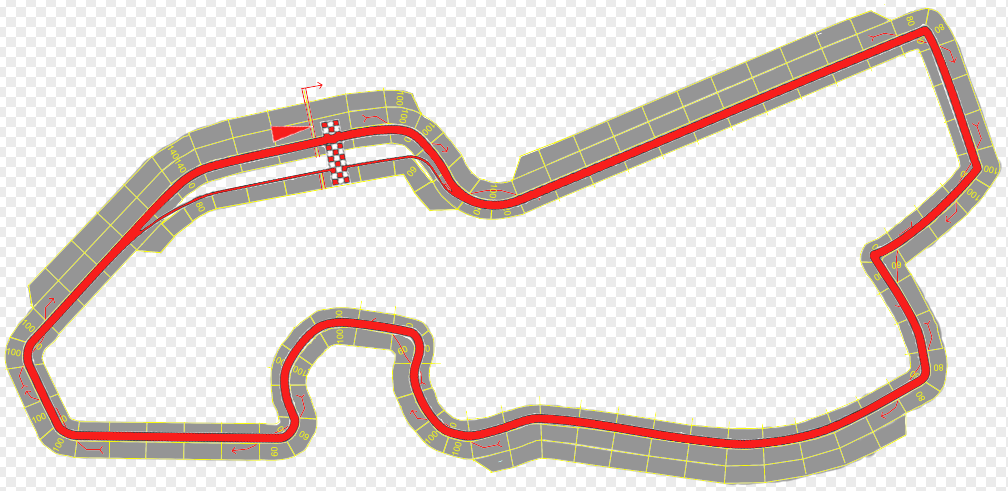
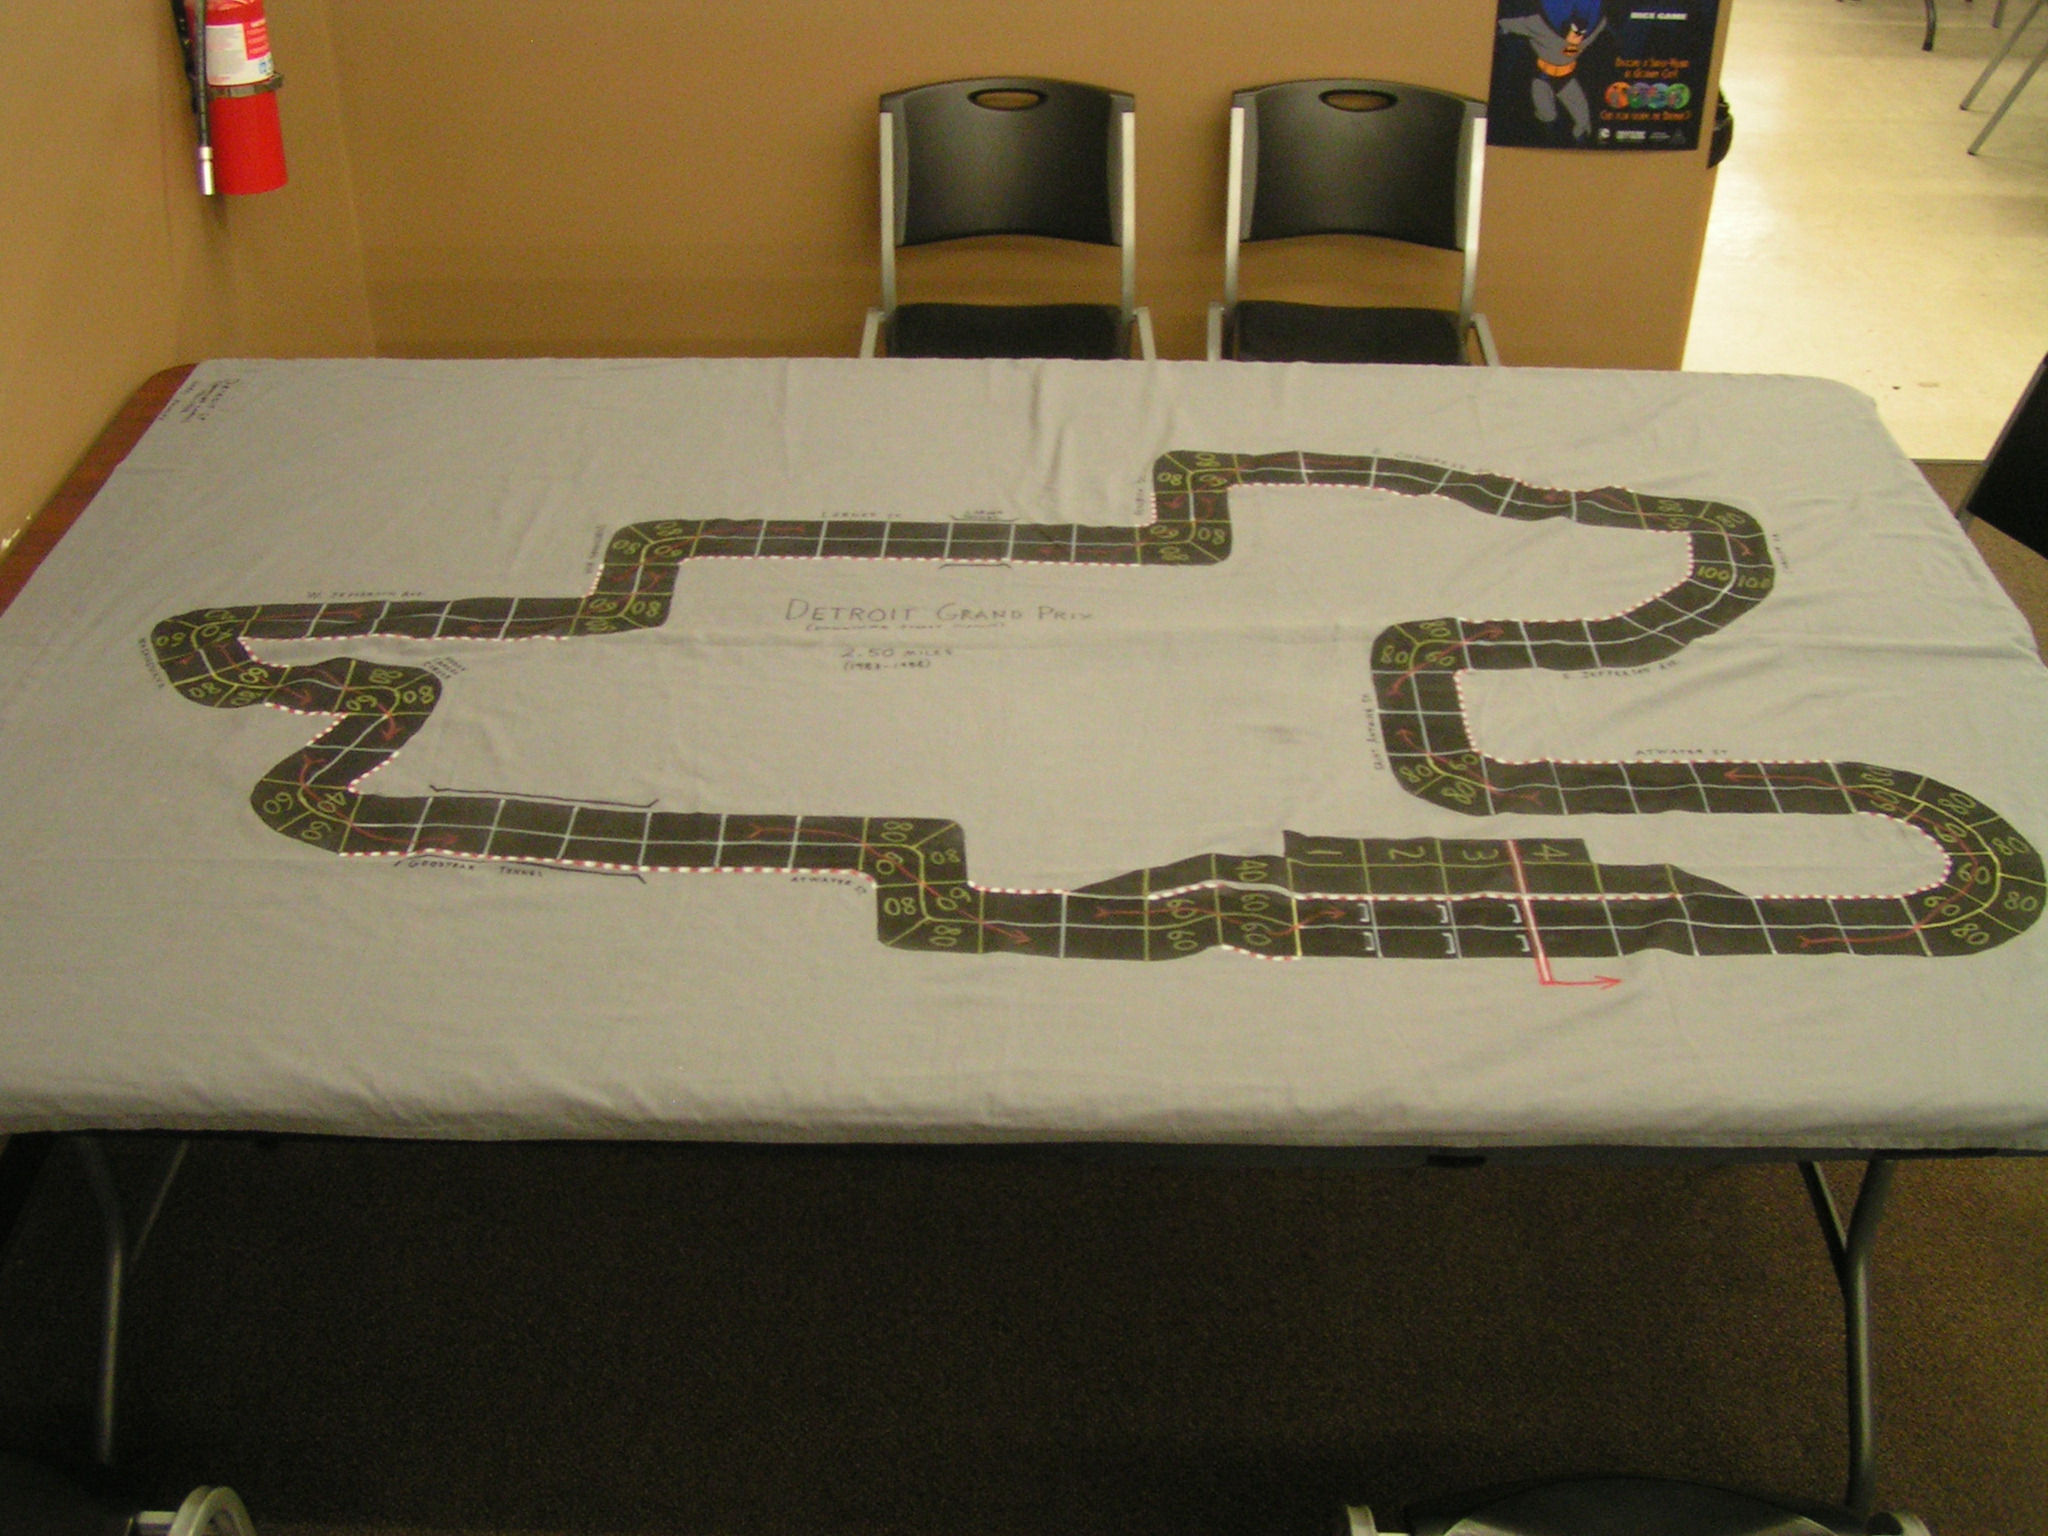
The real Silverstone track diagram. This is the version of the track used since 2011.


The modern Silverstone track.

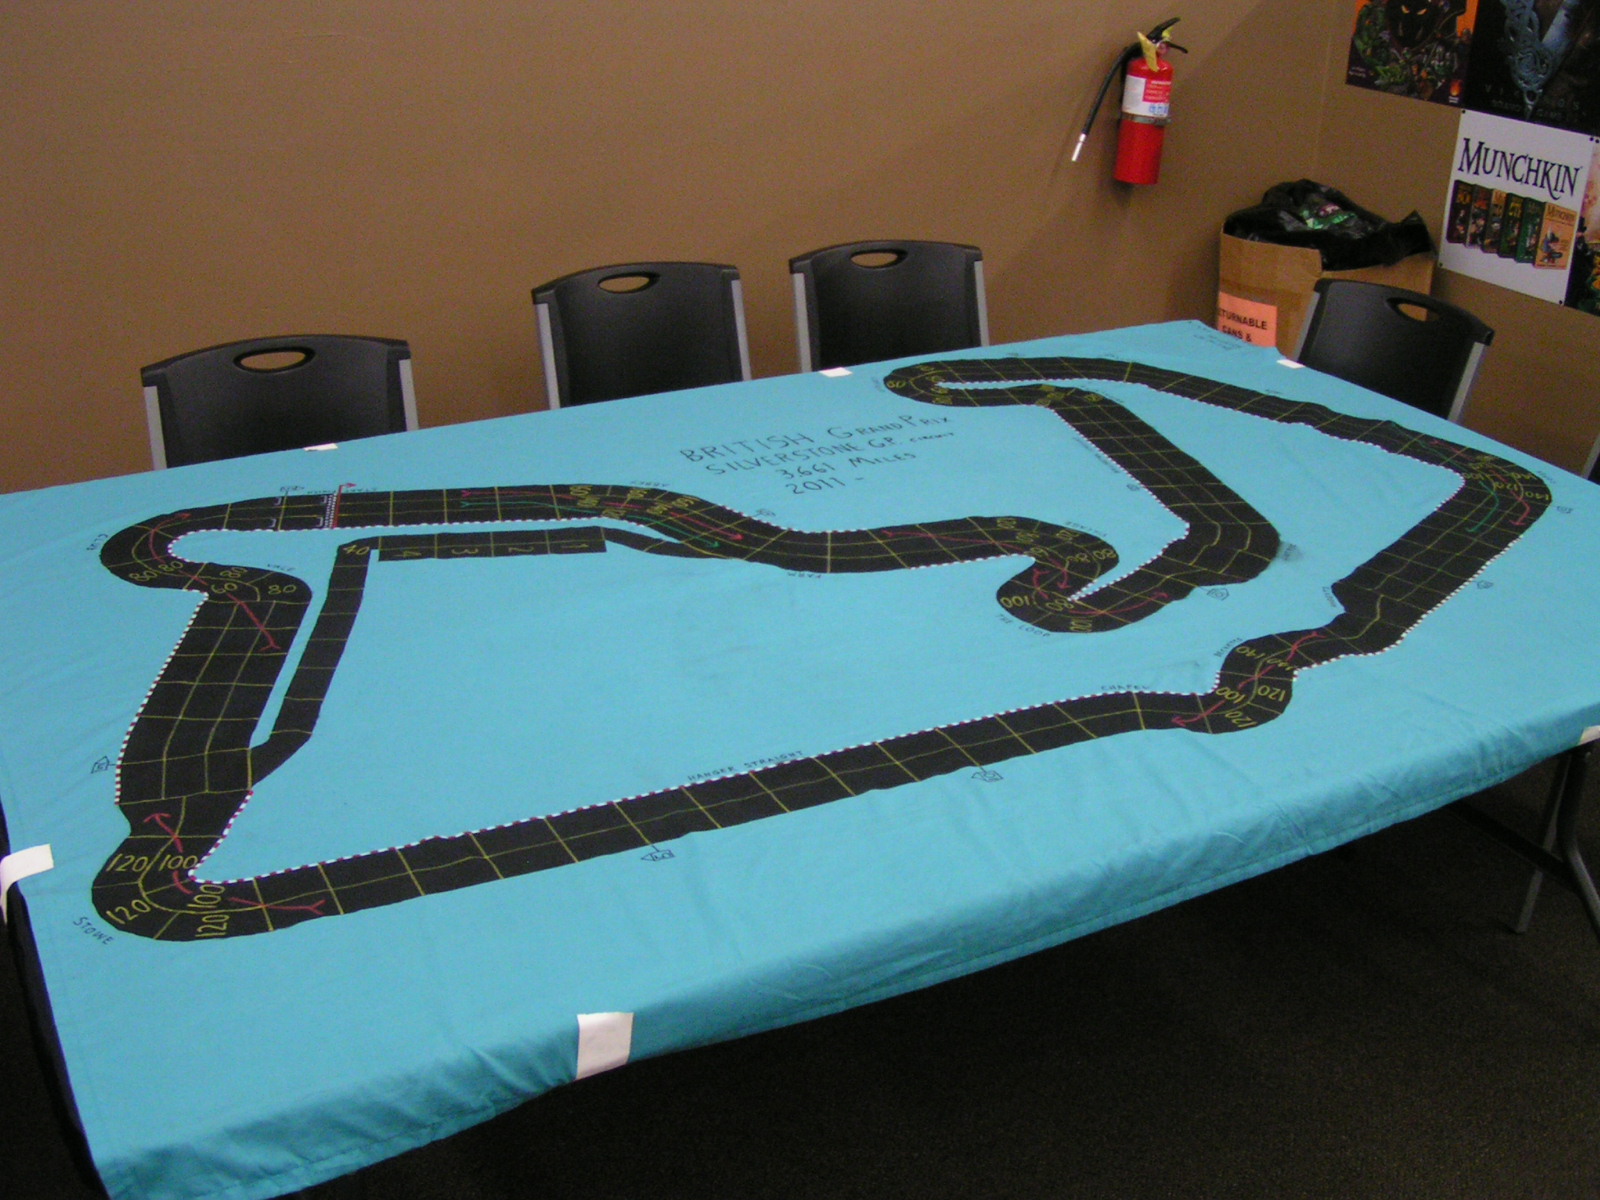
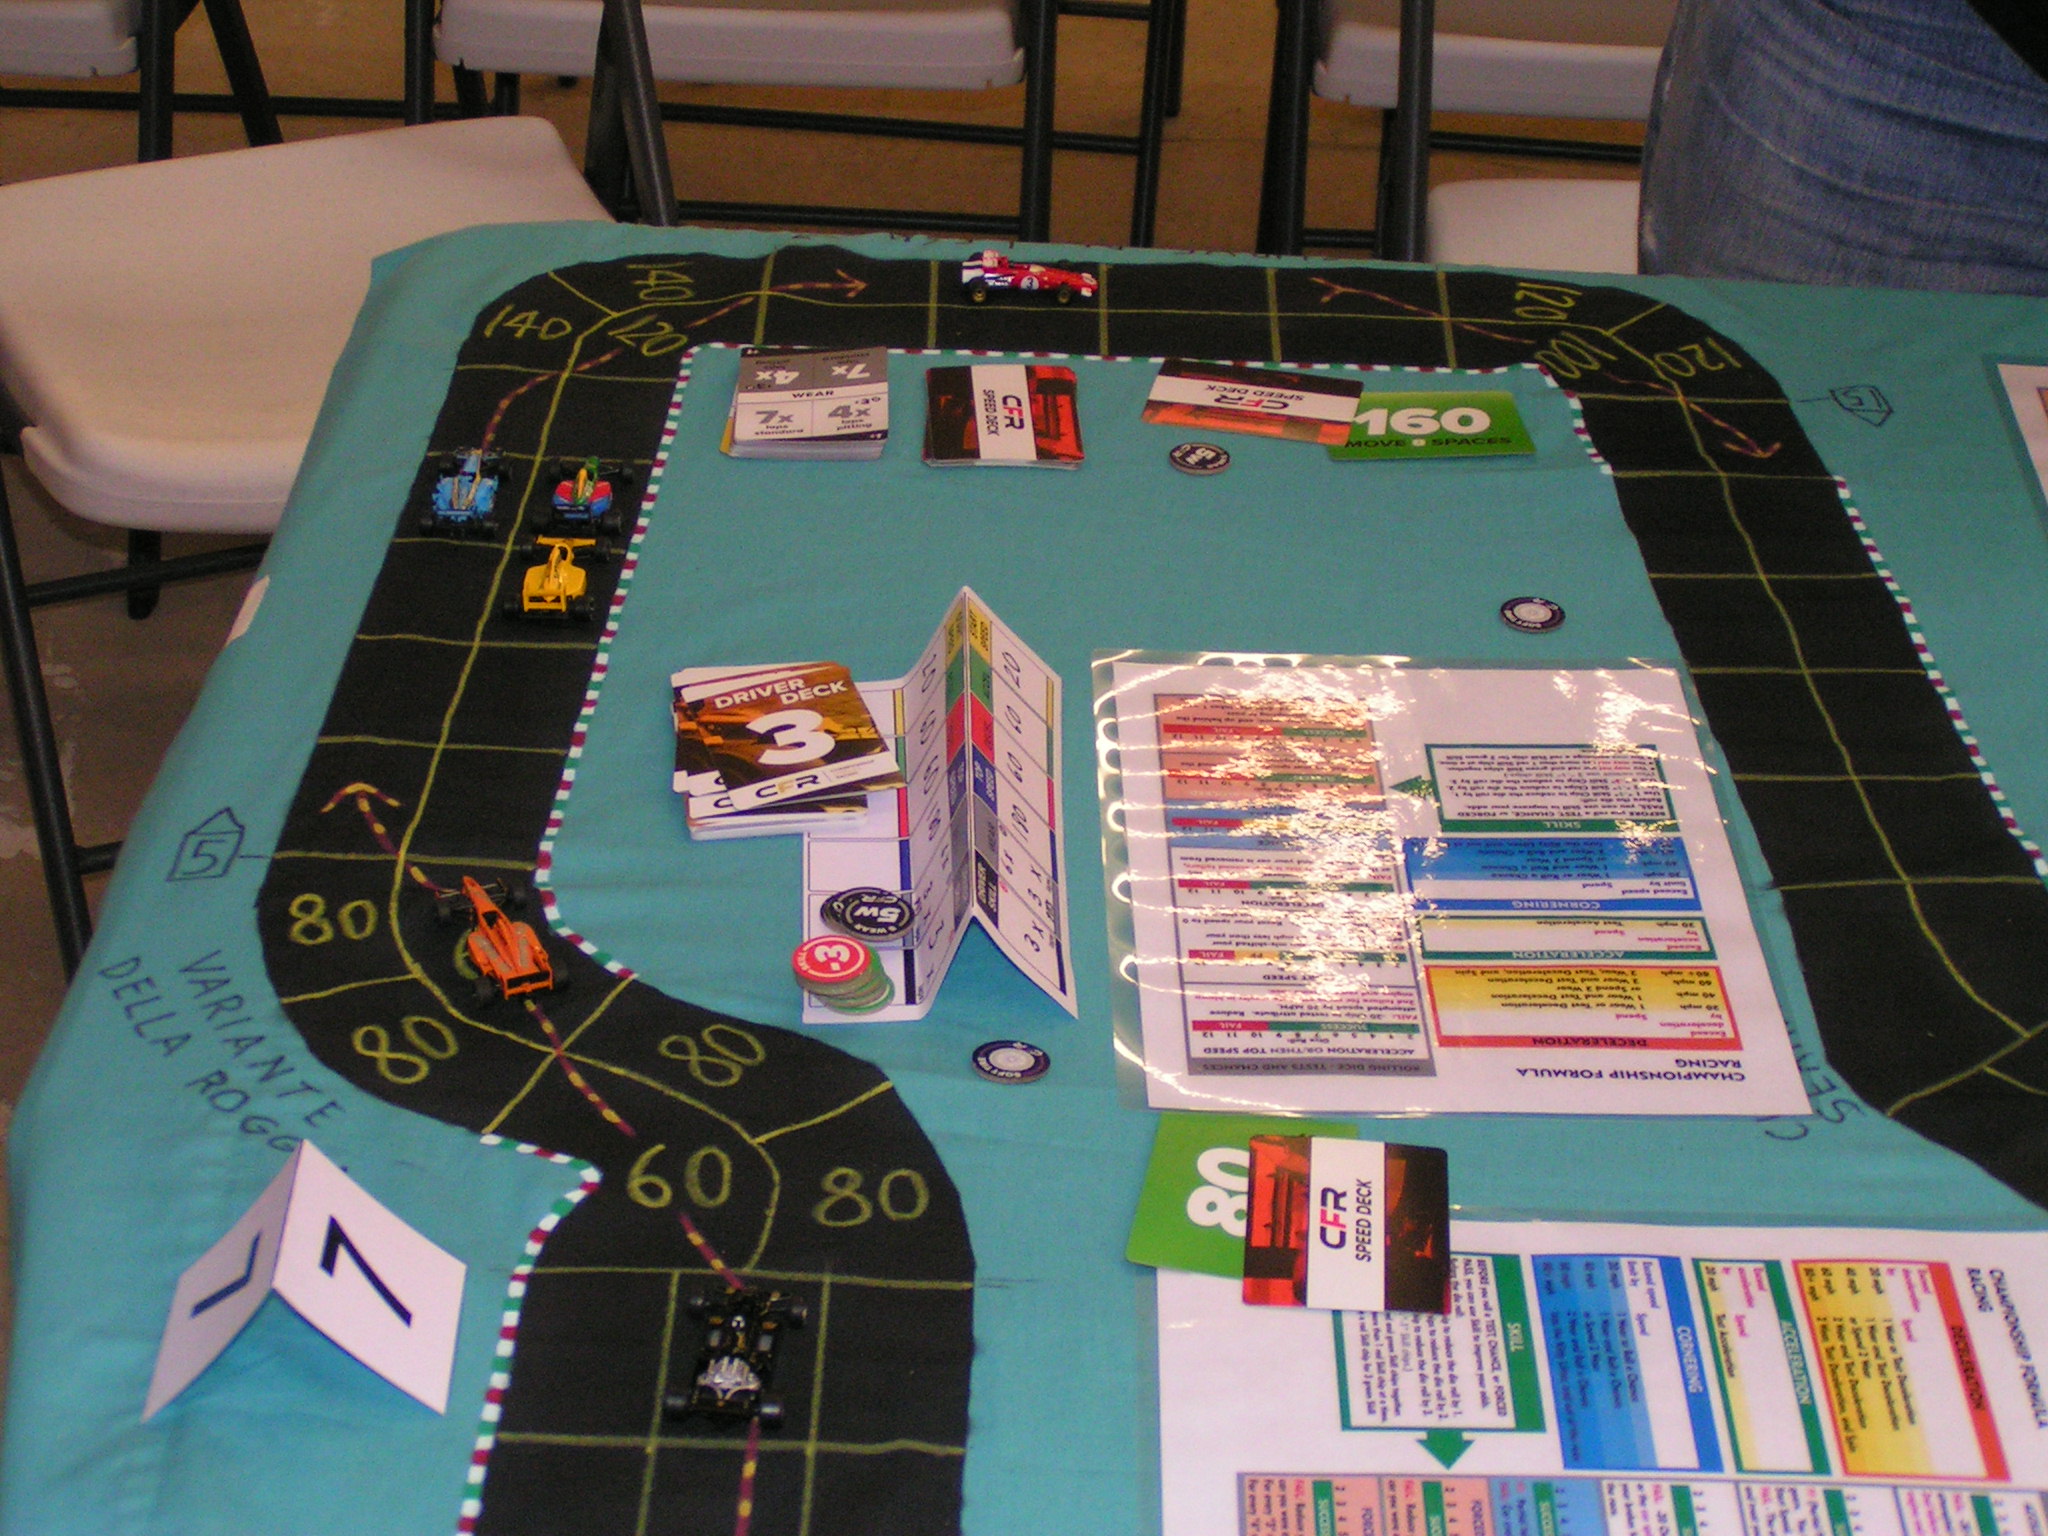
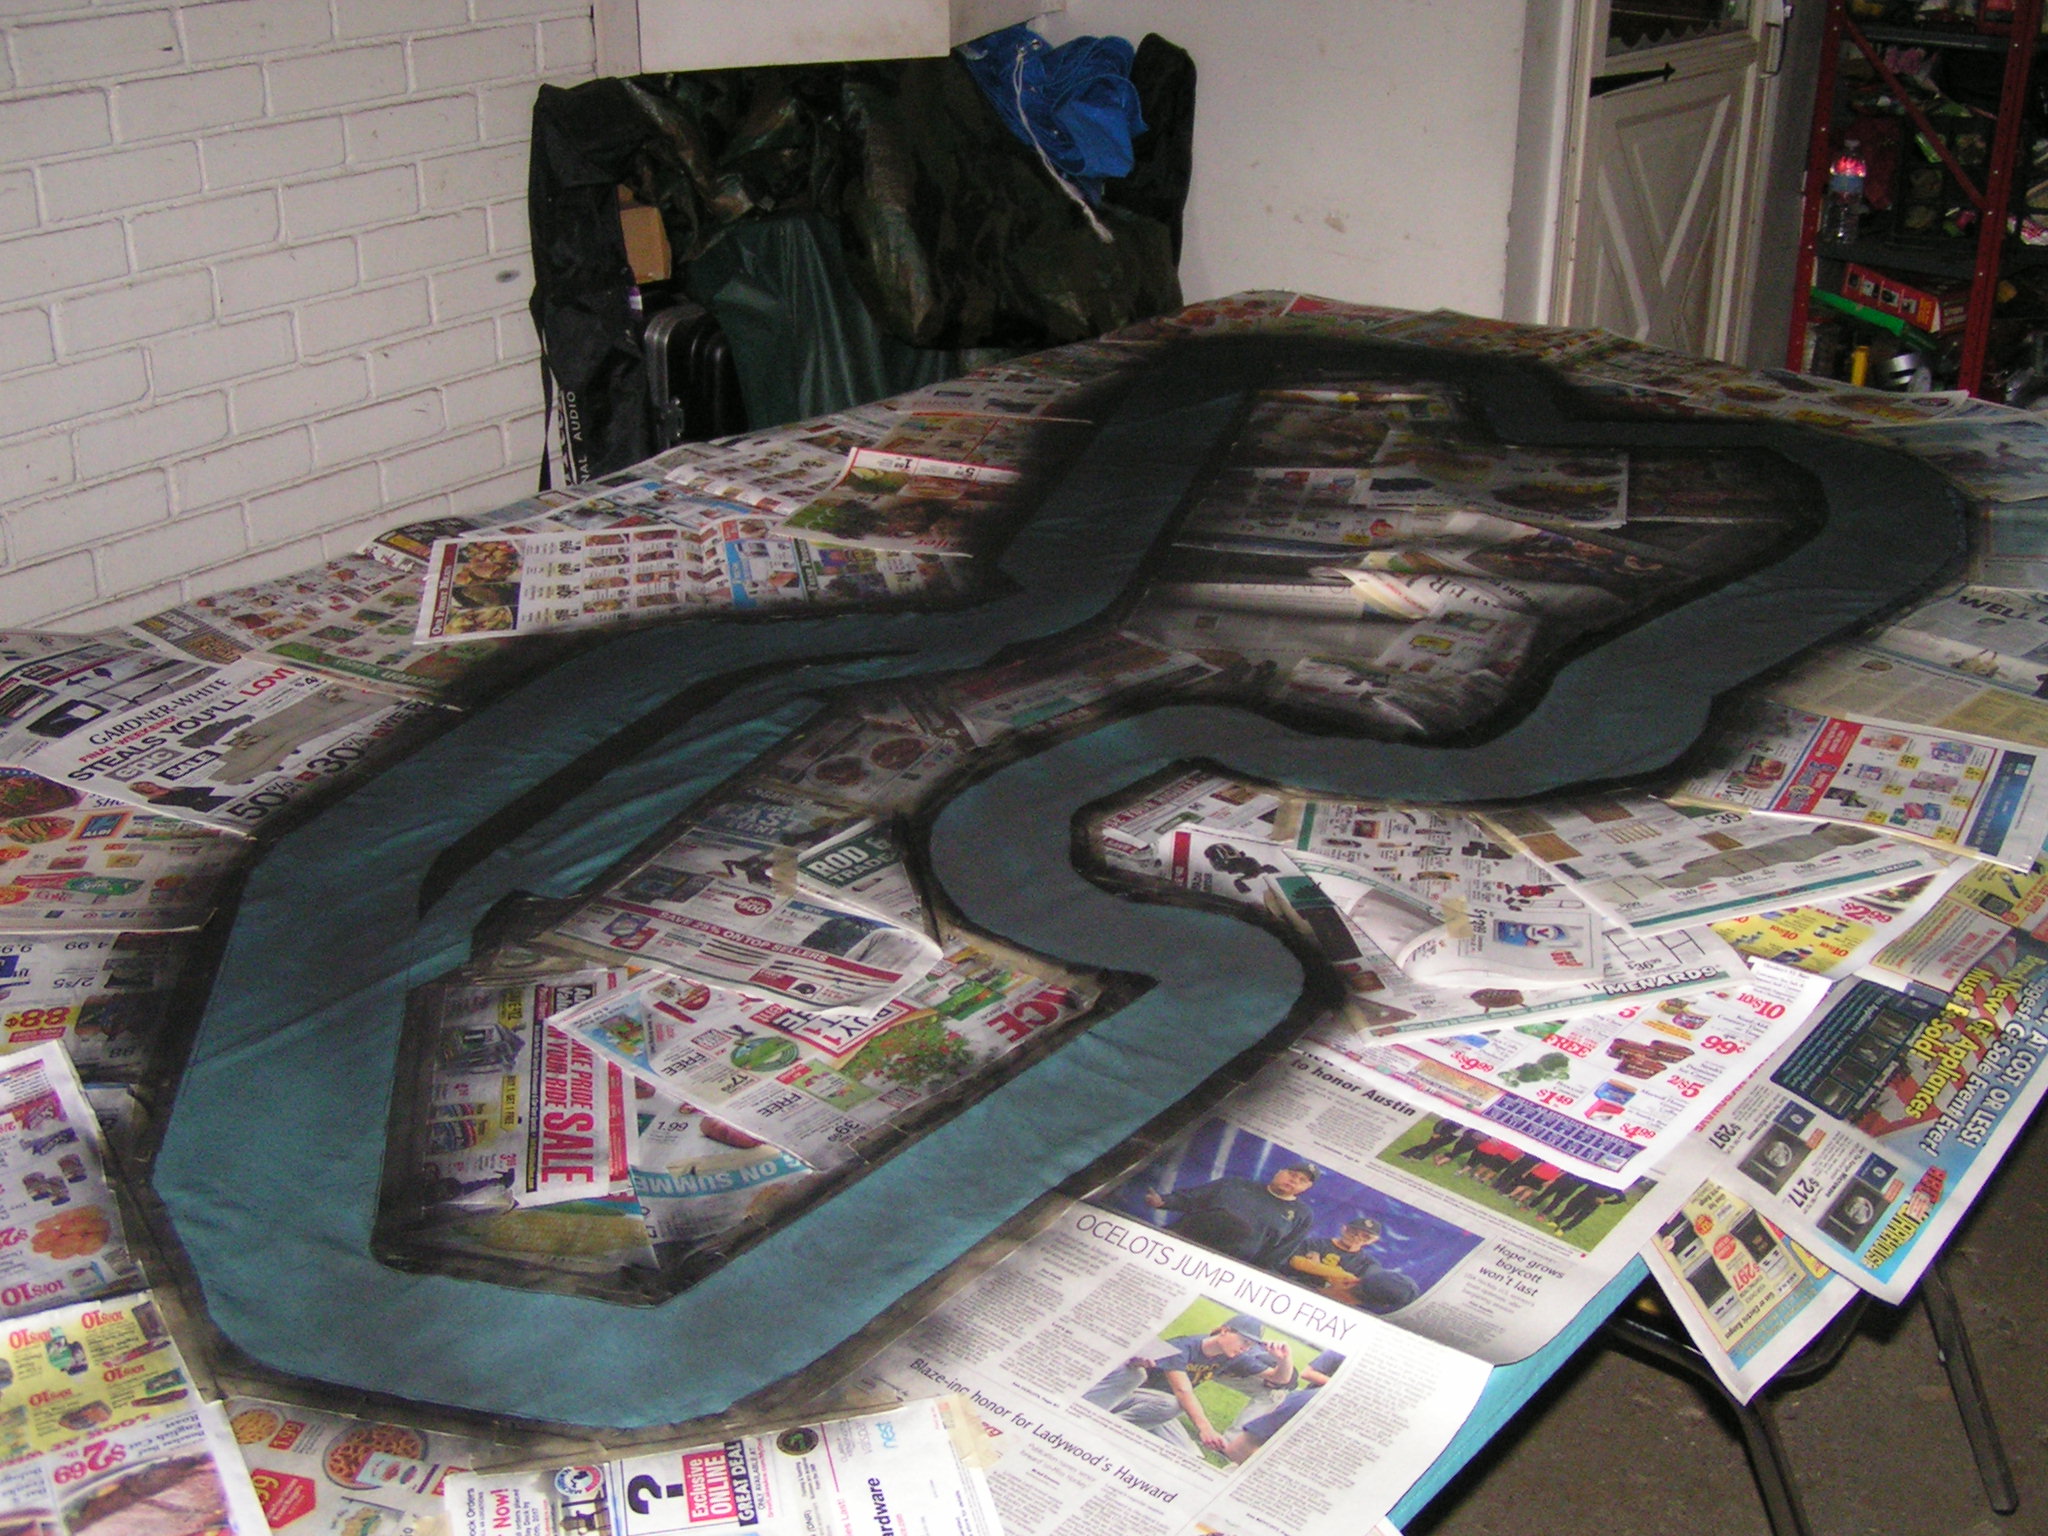
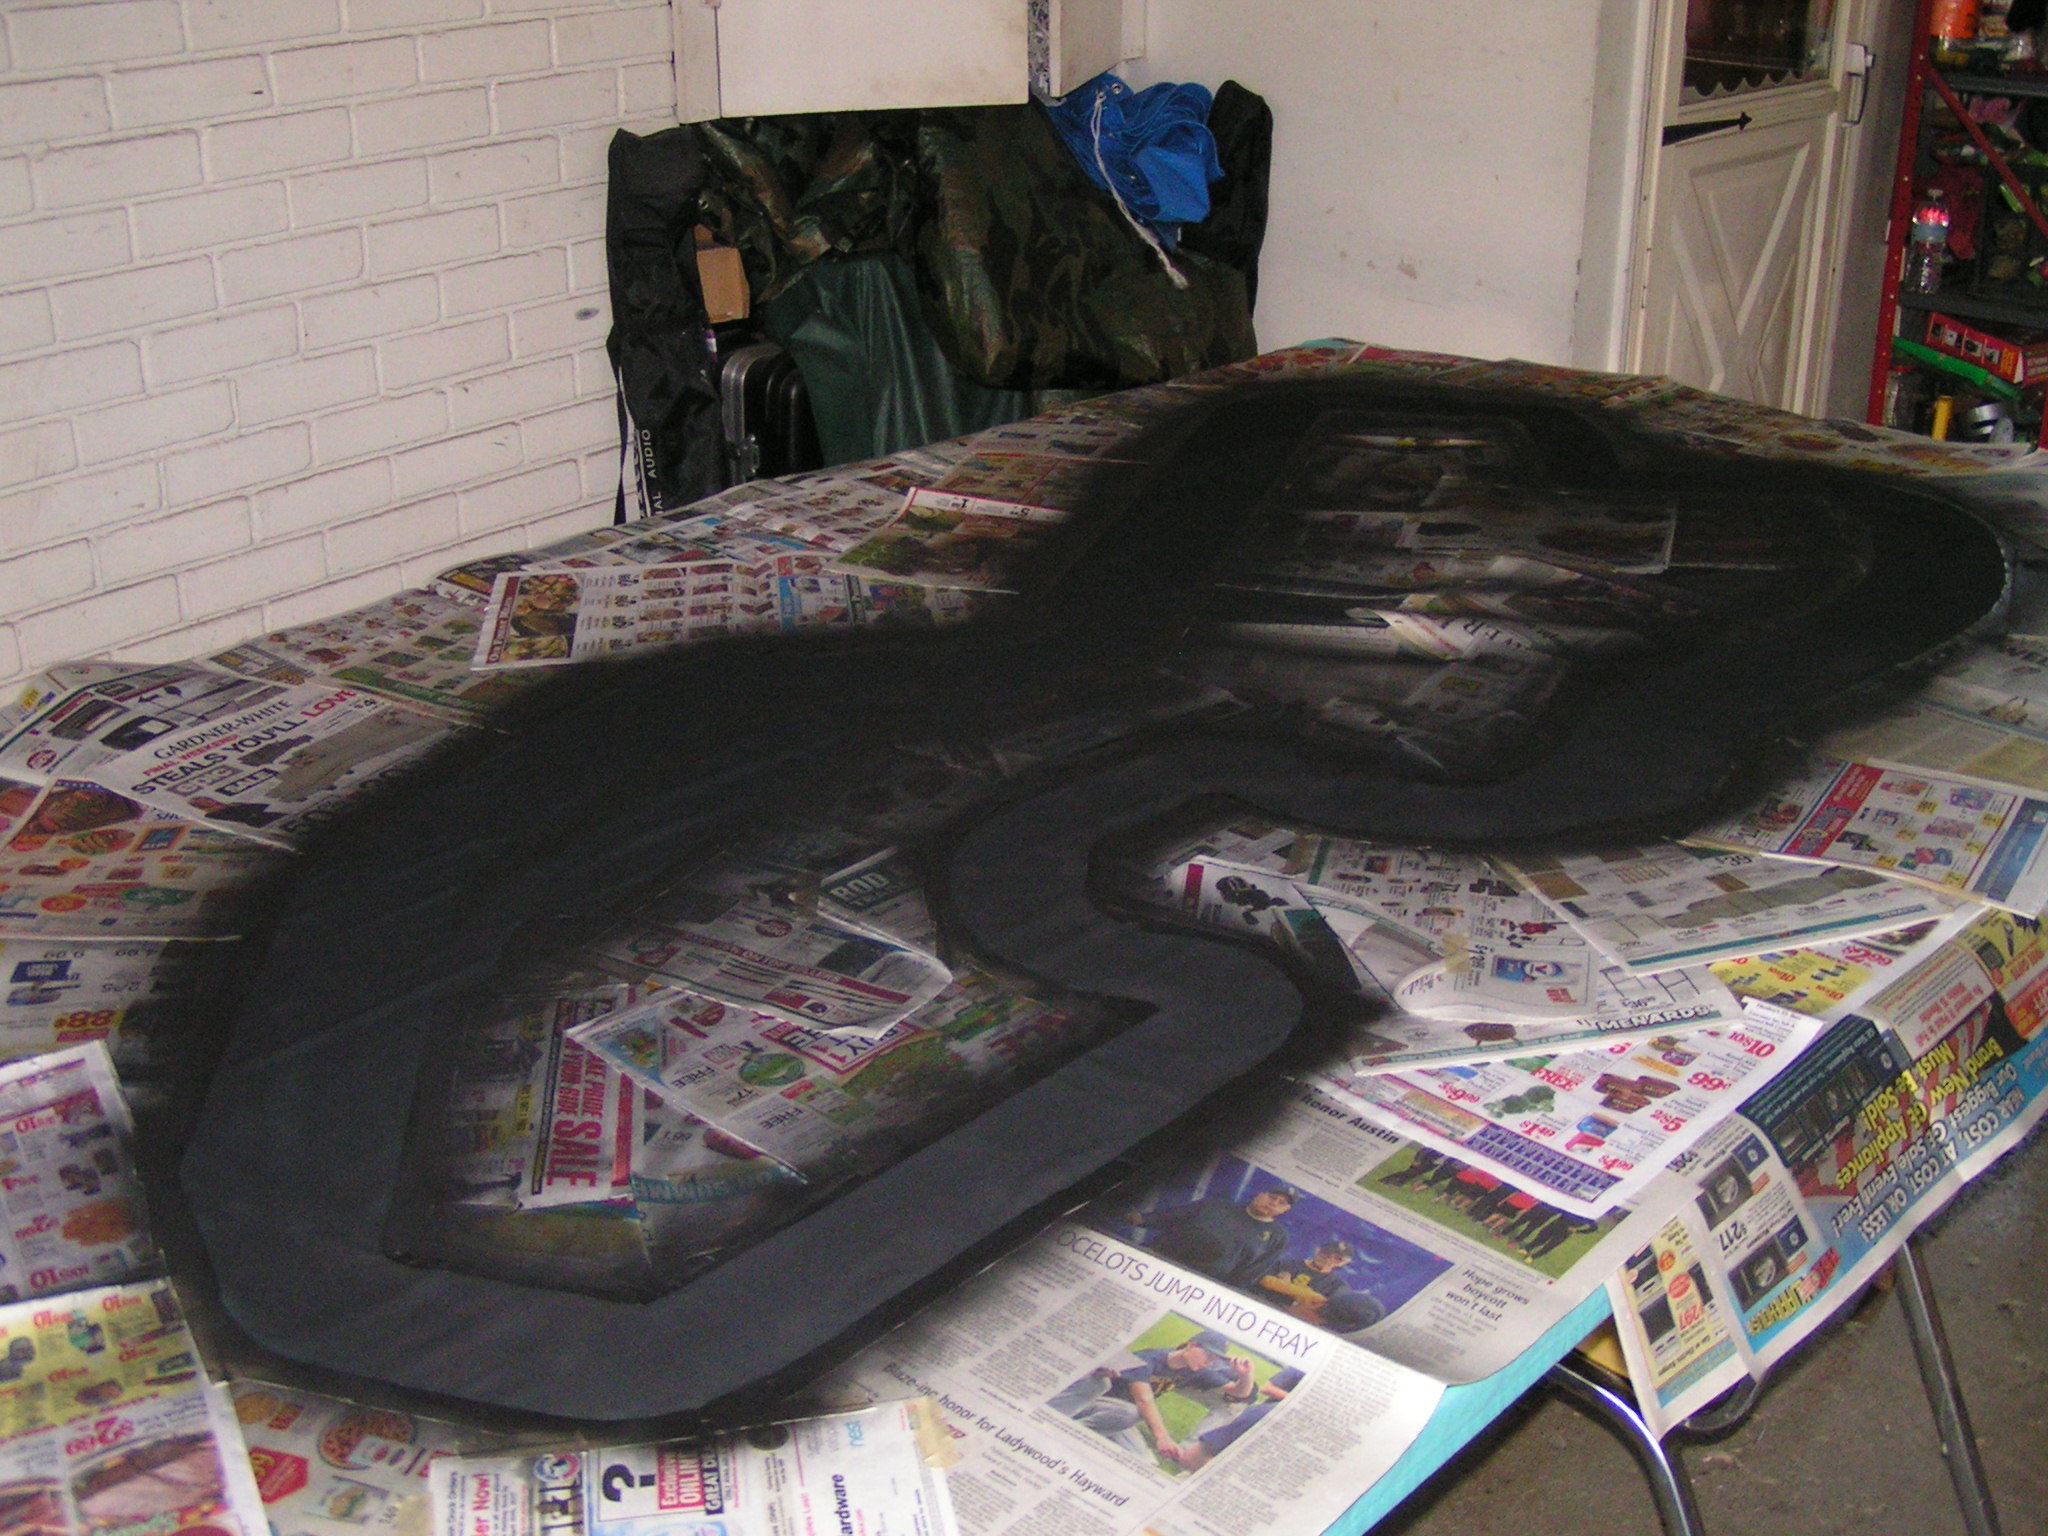
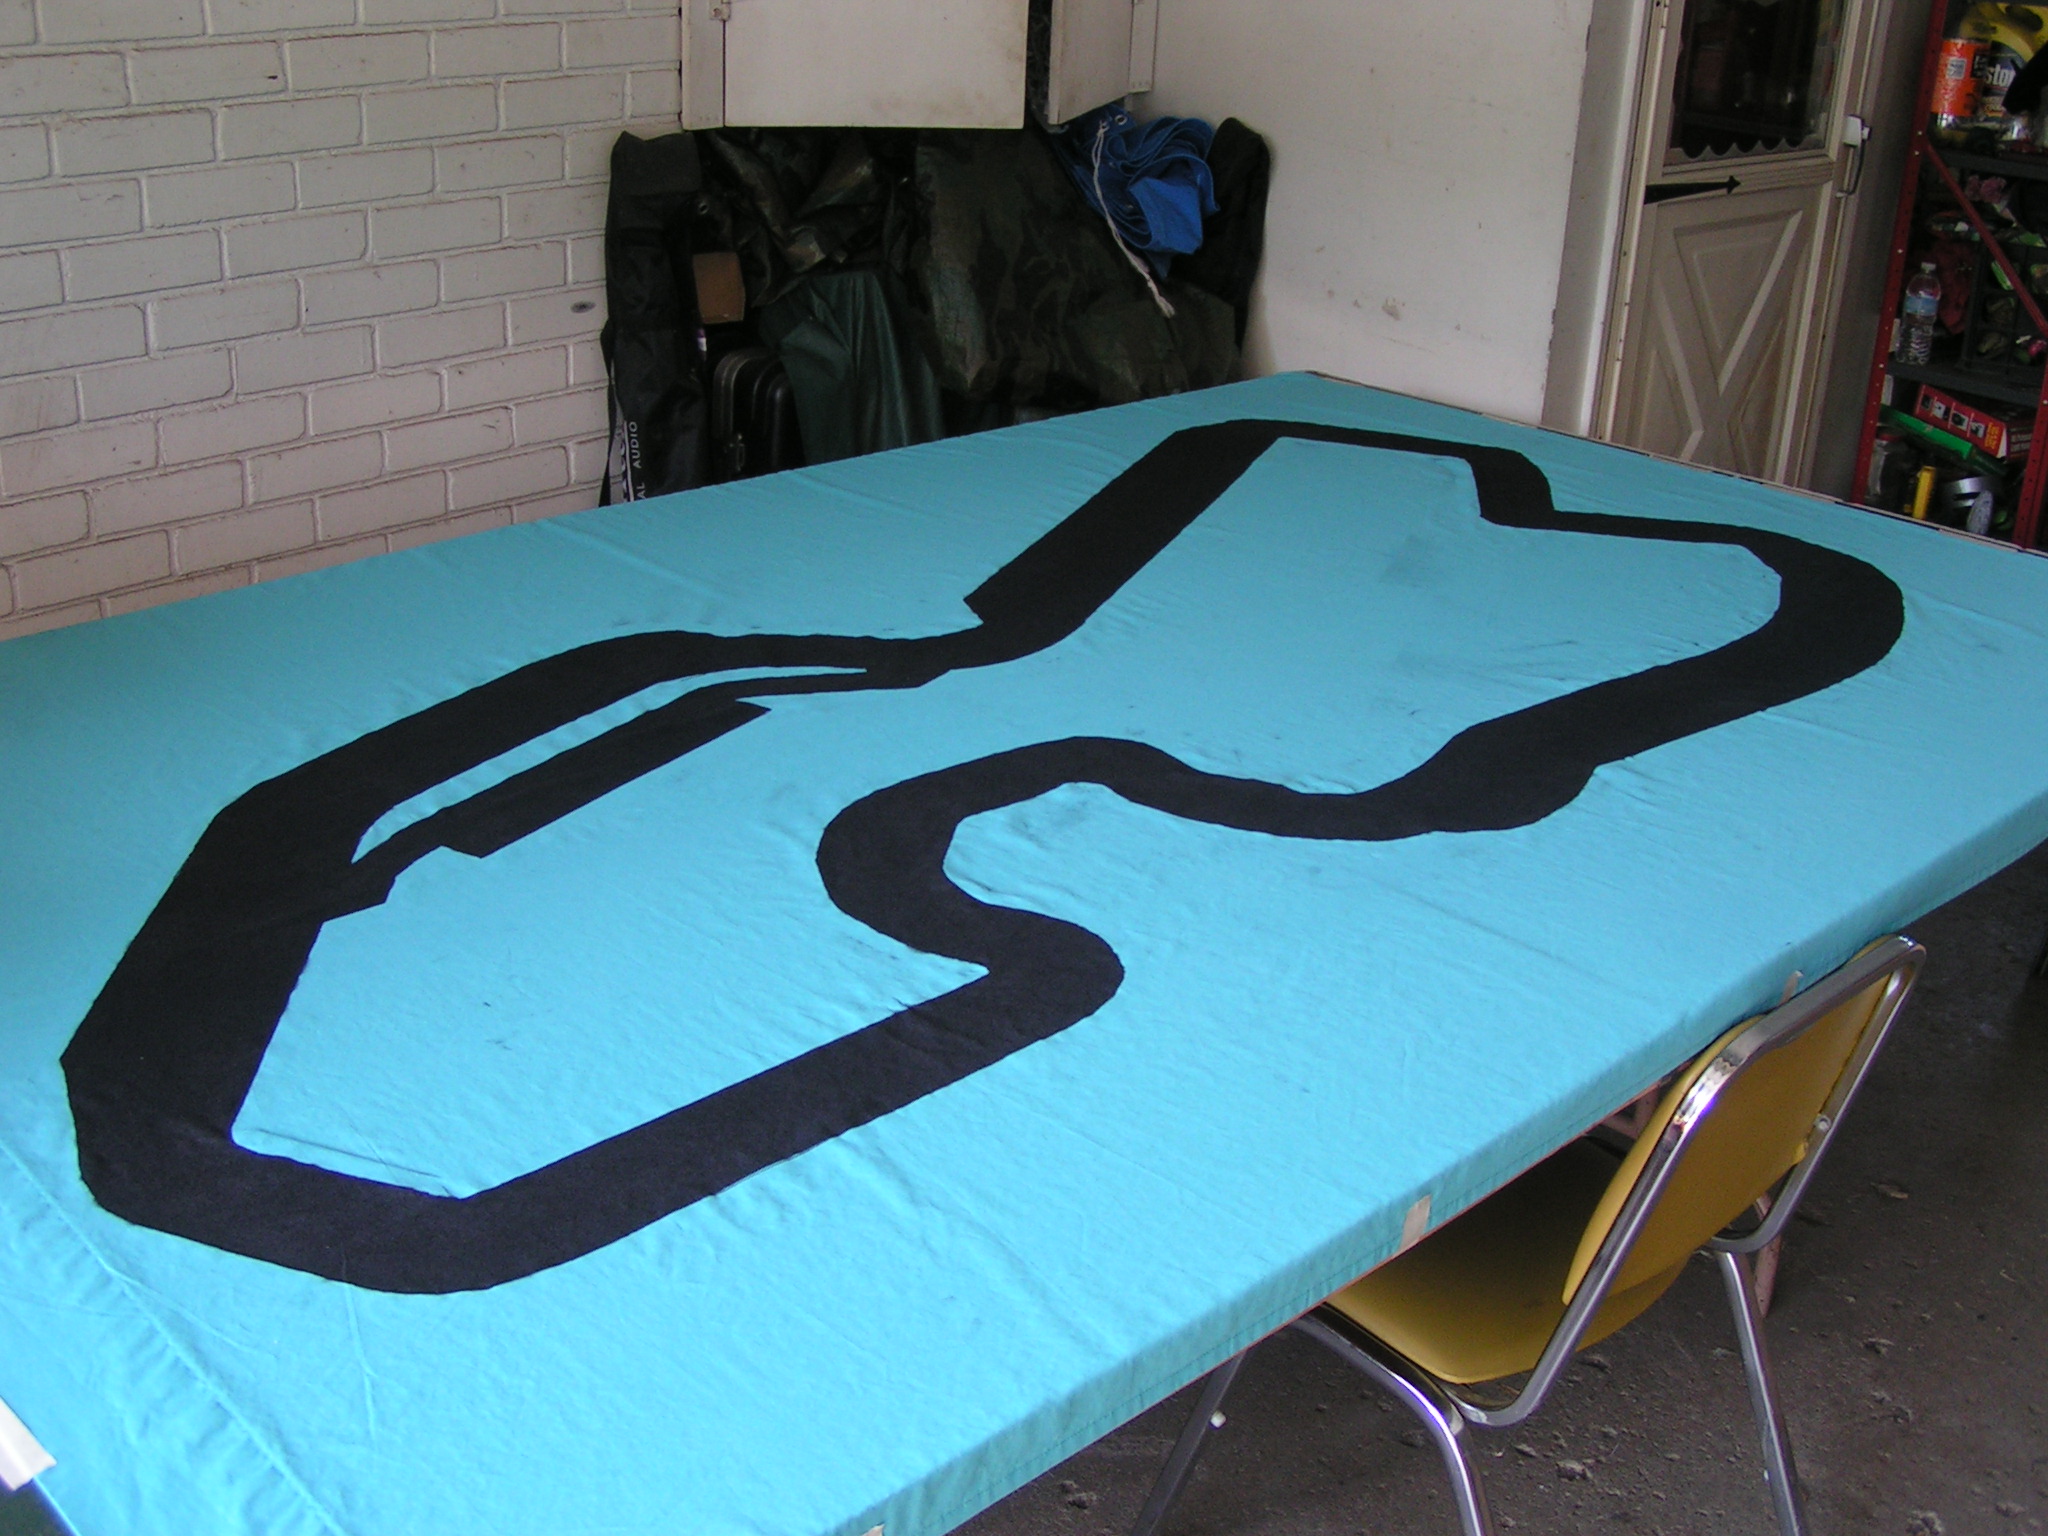
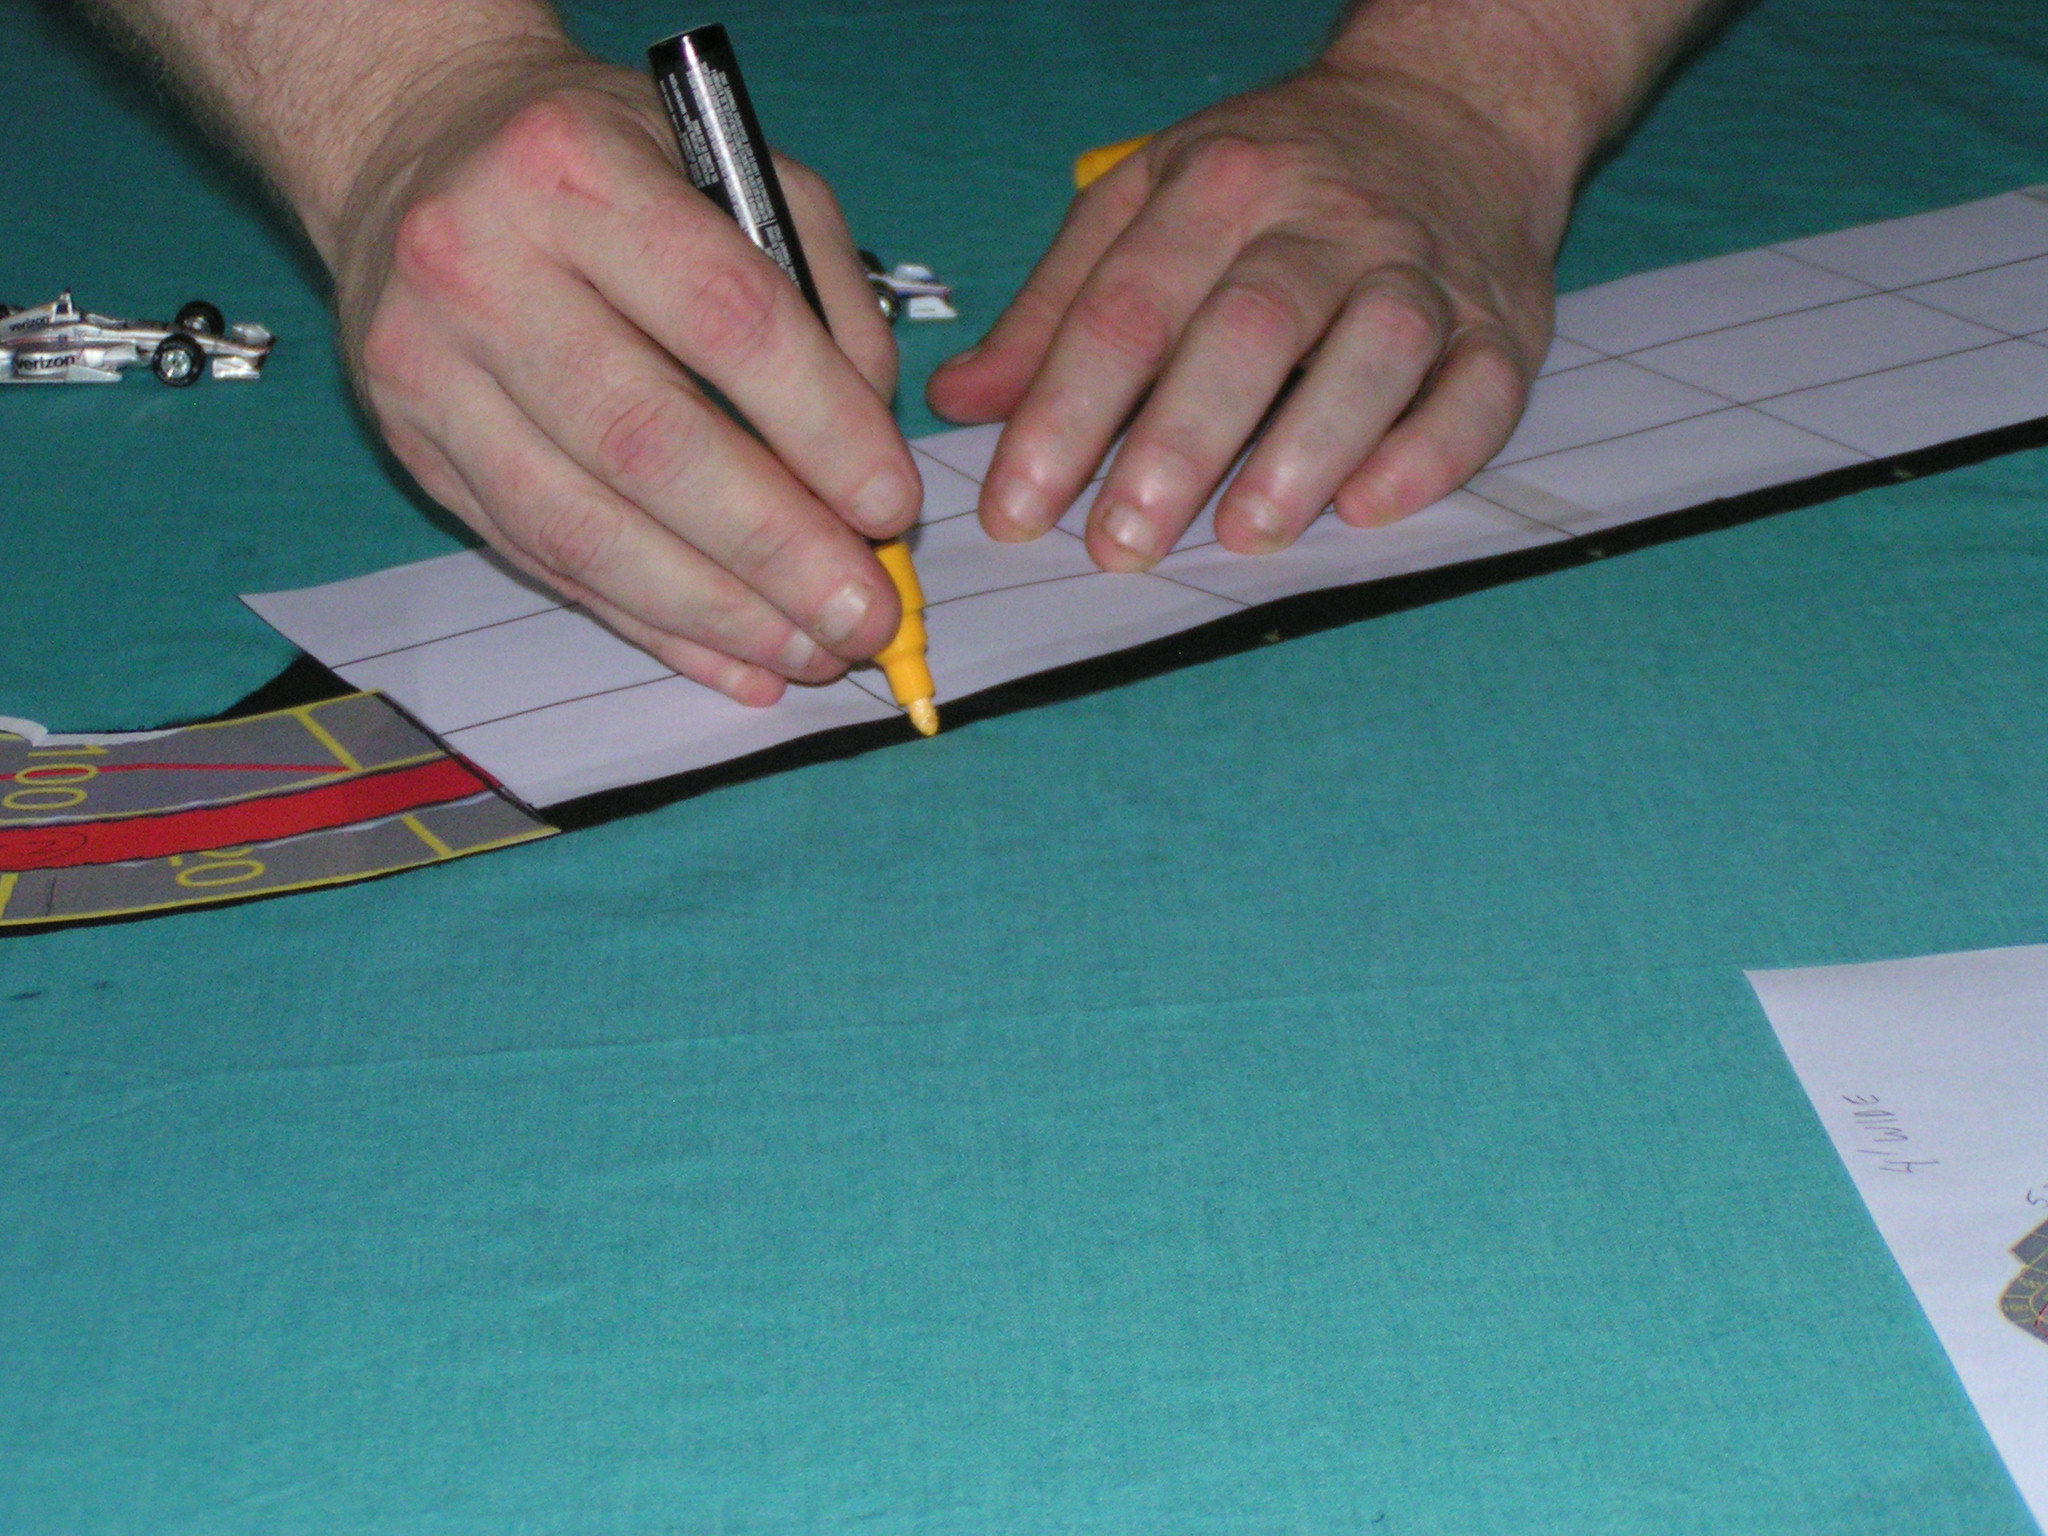
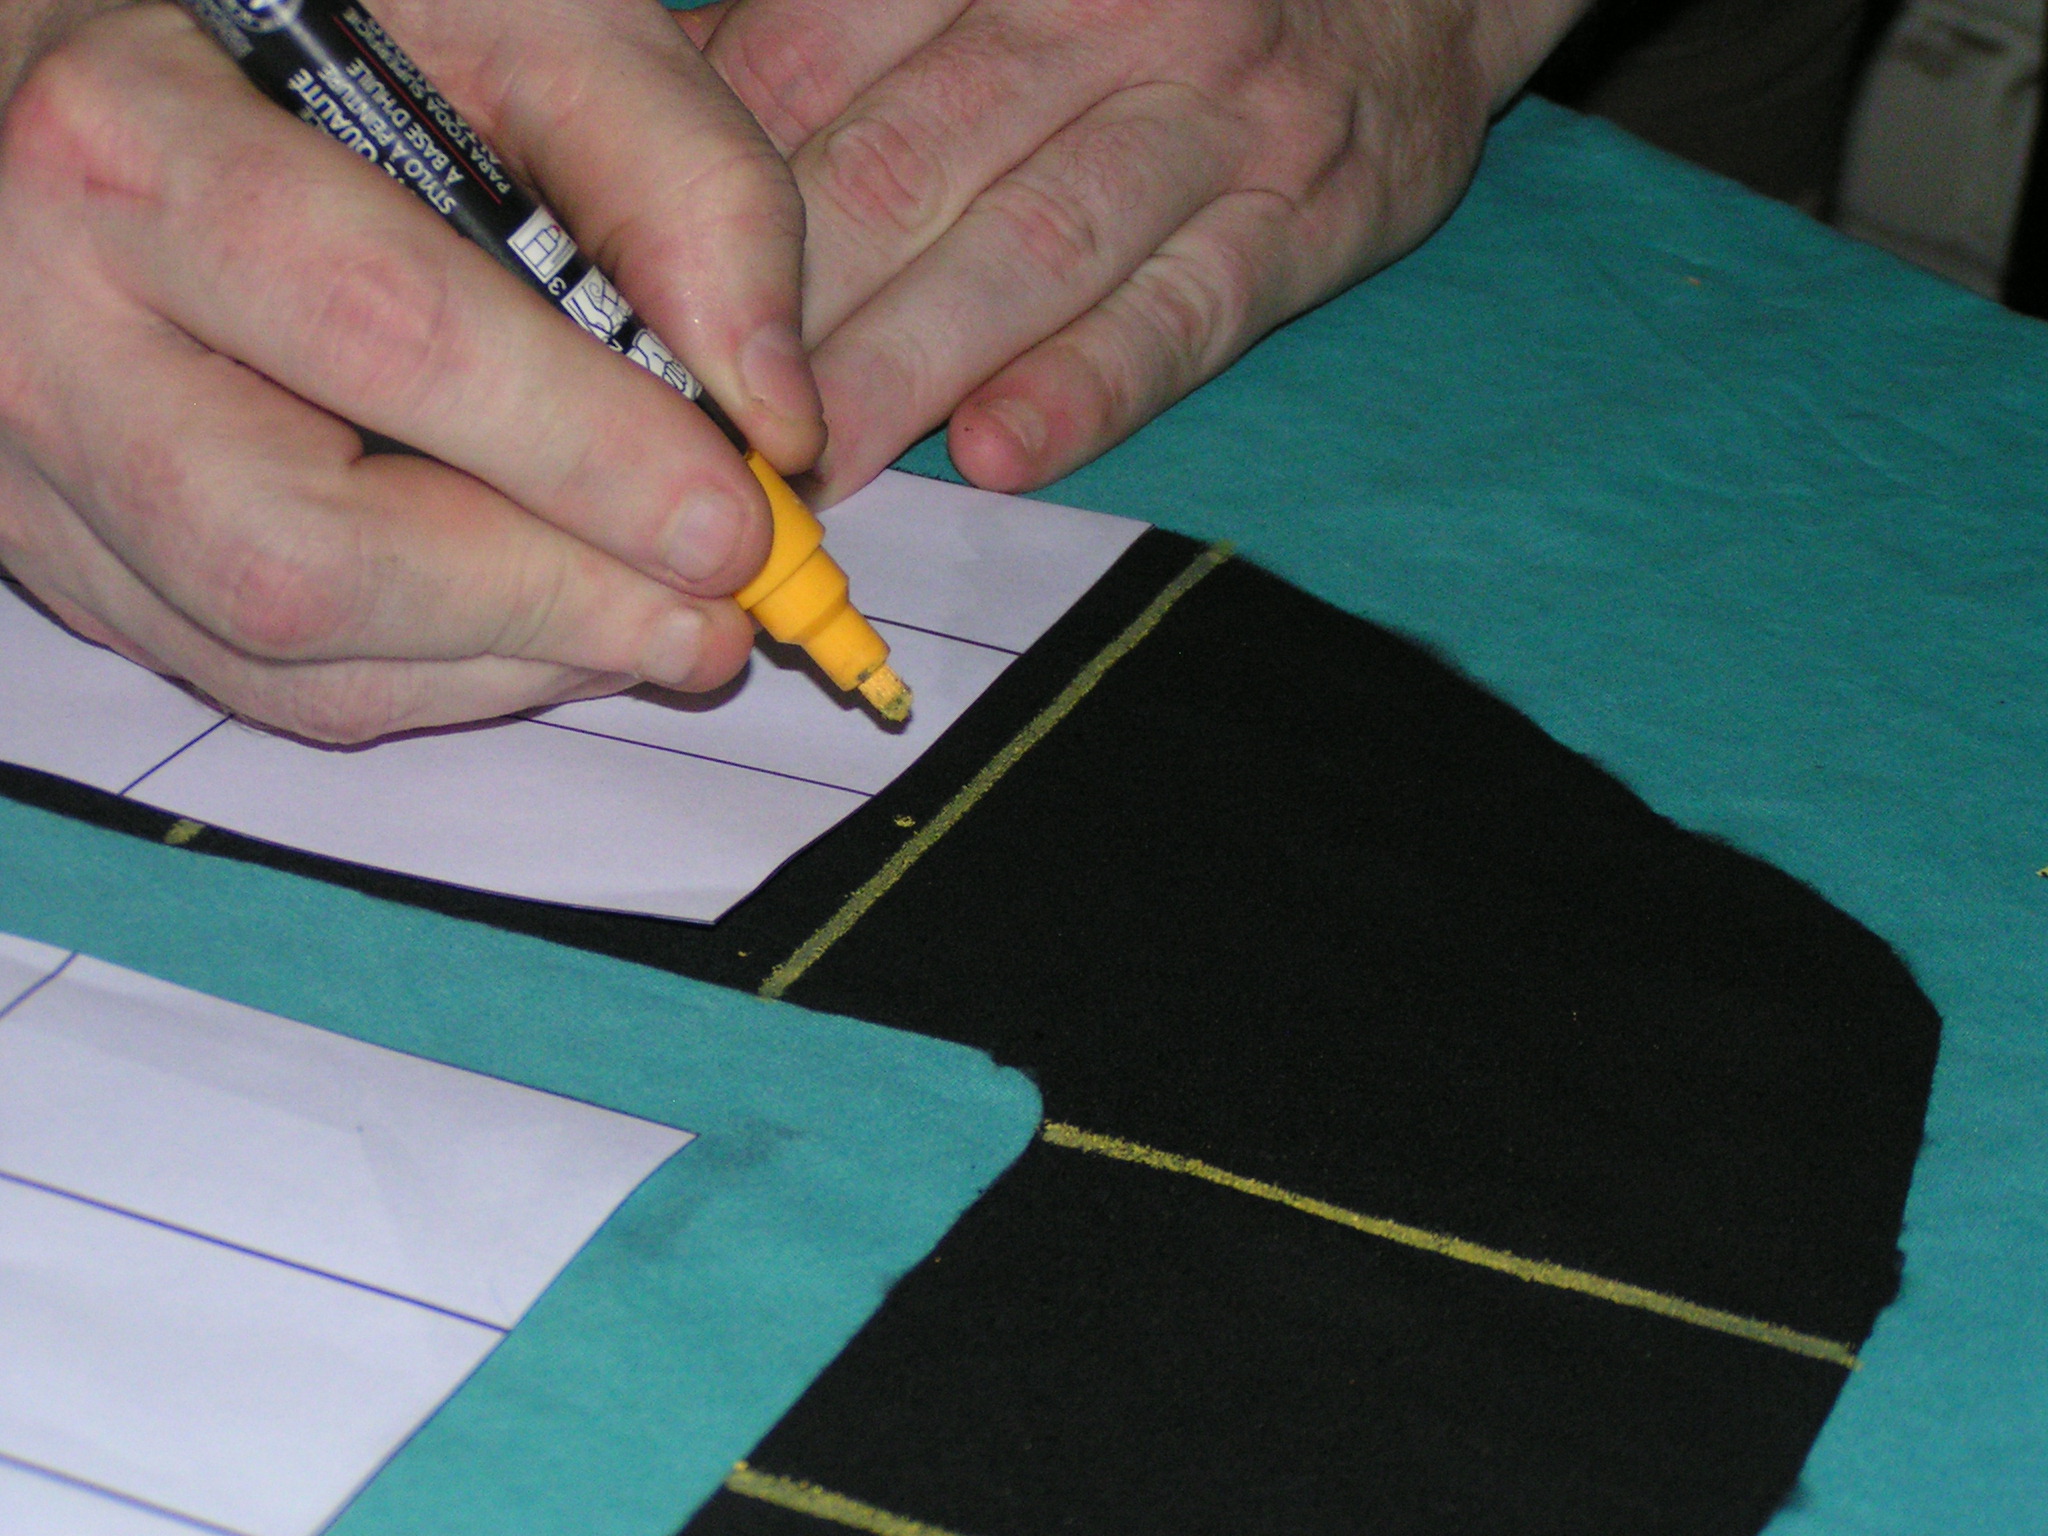
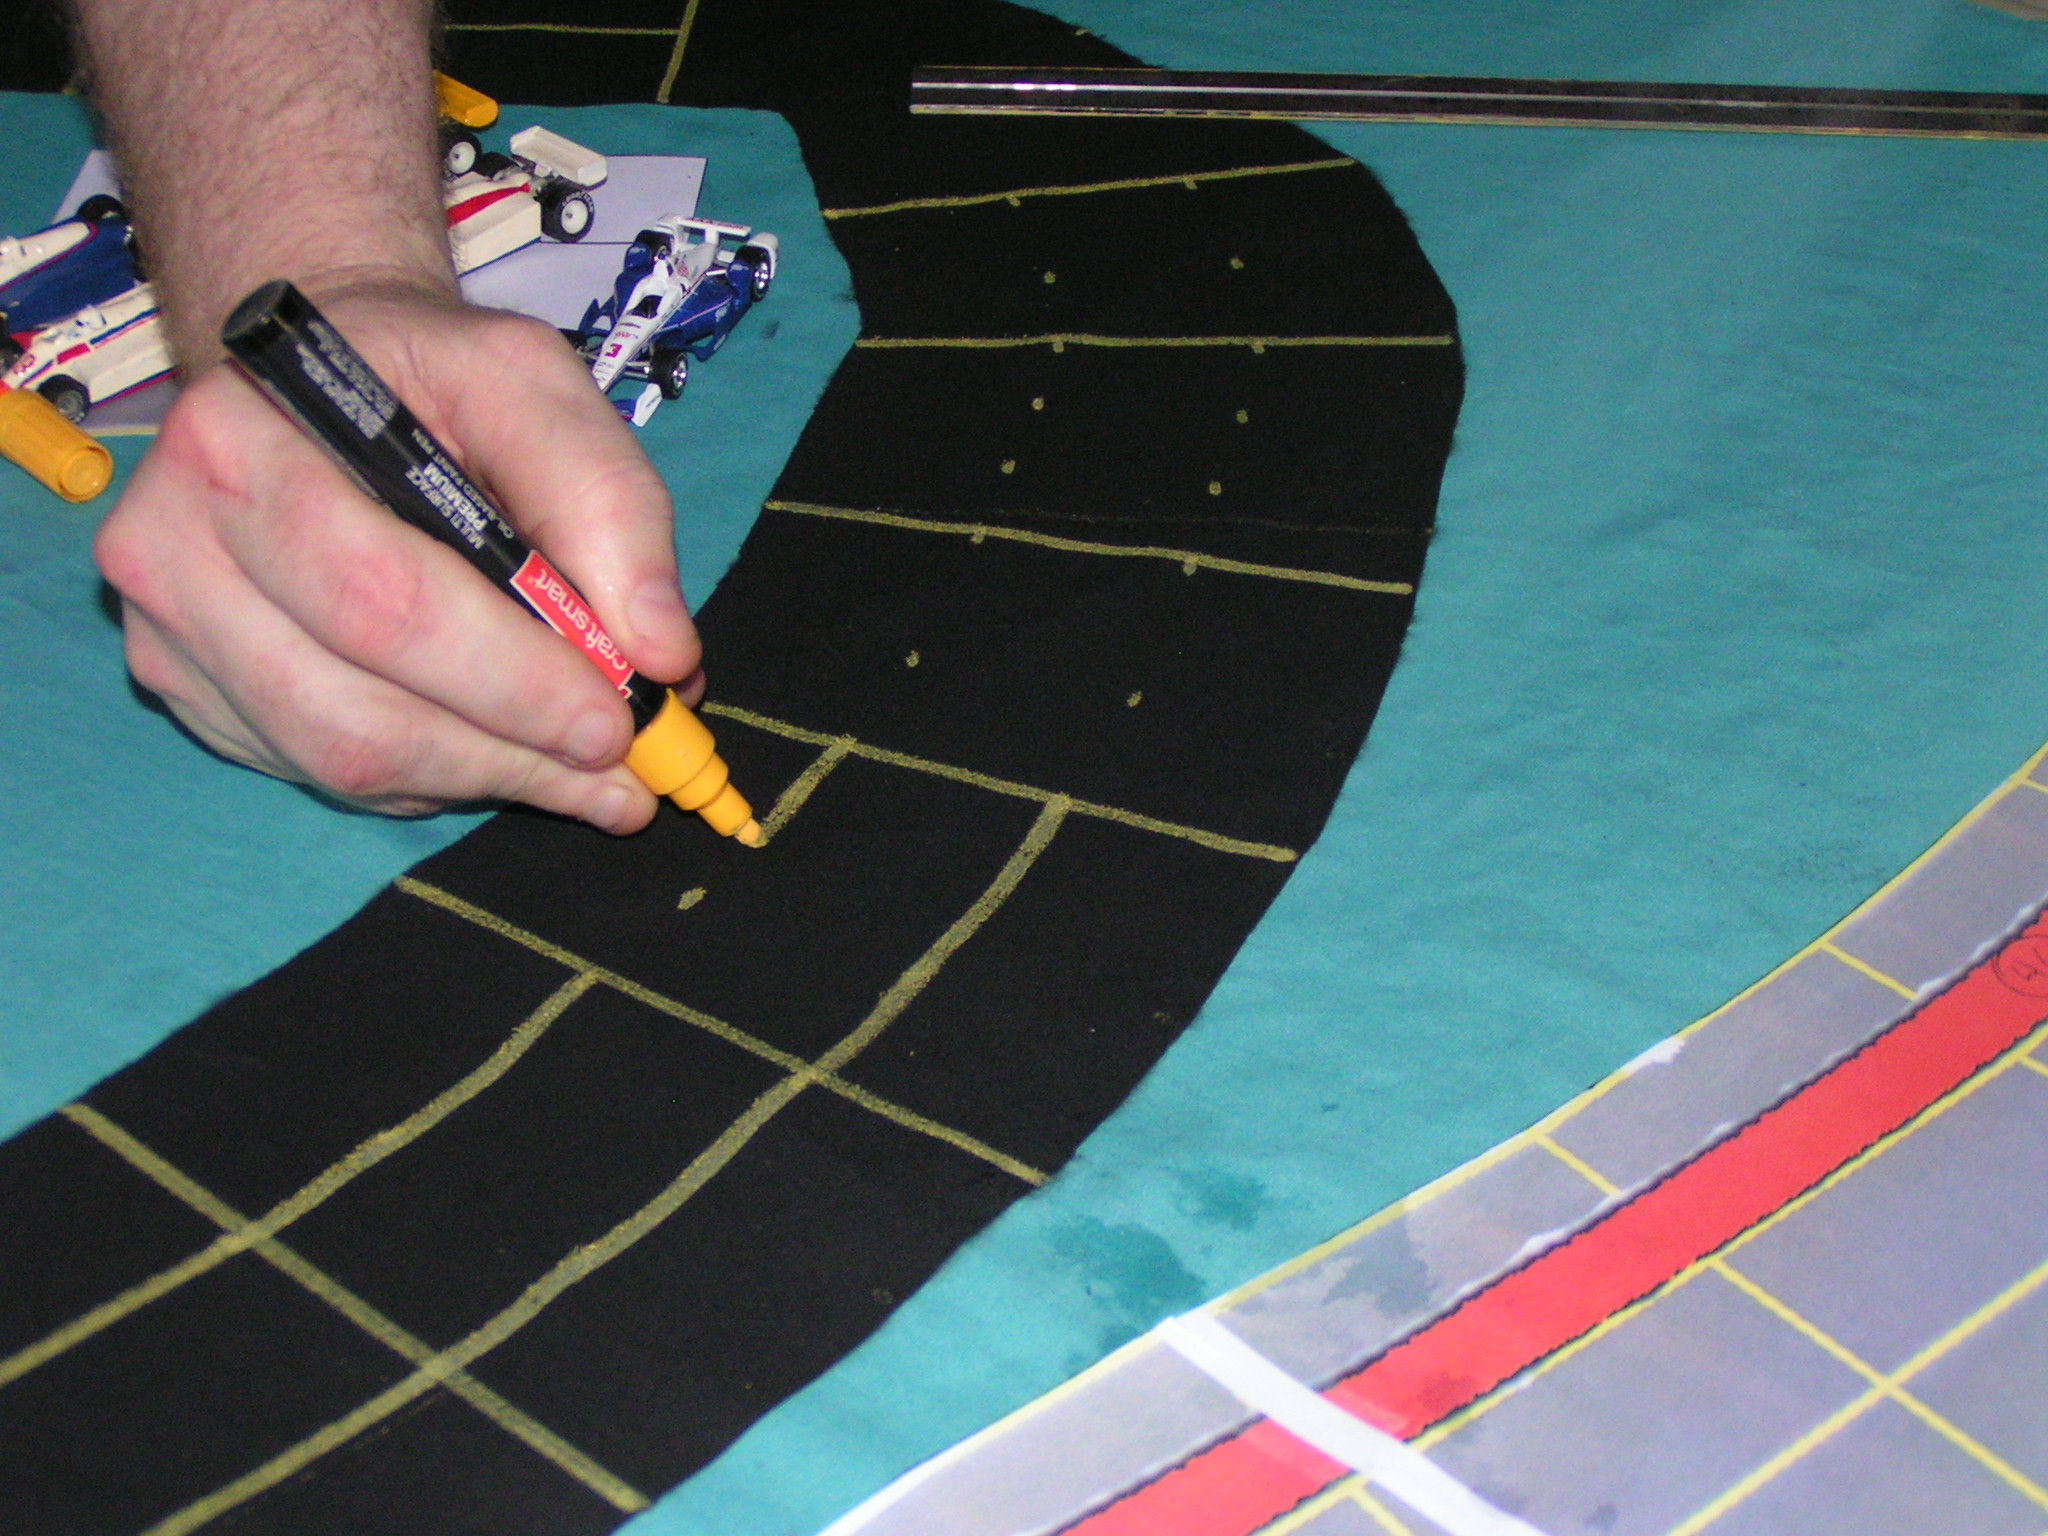
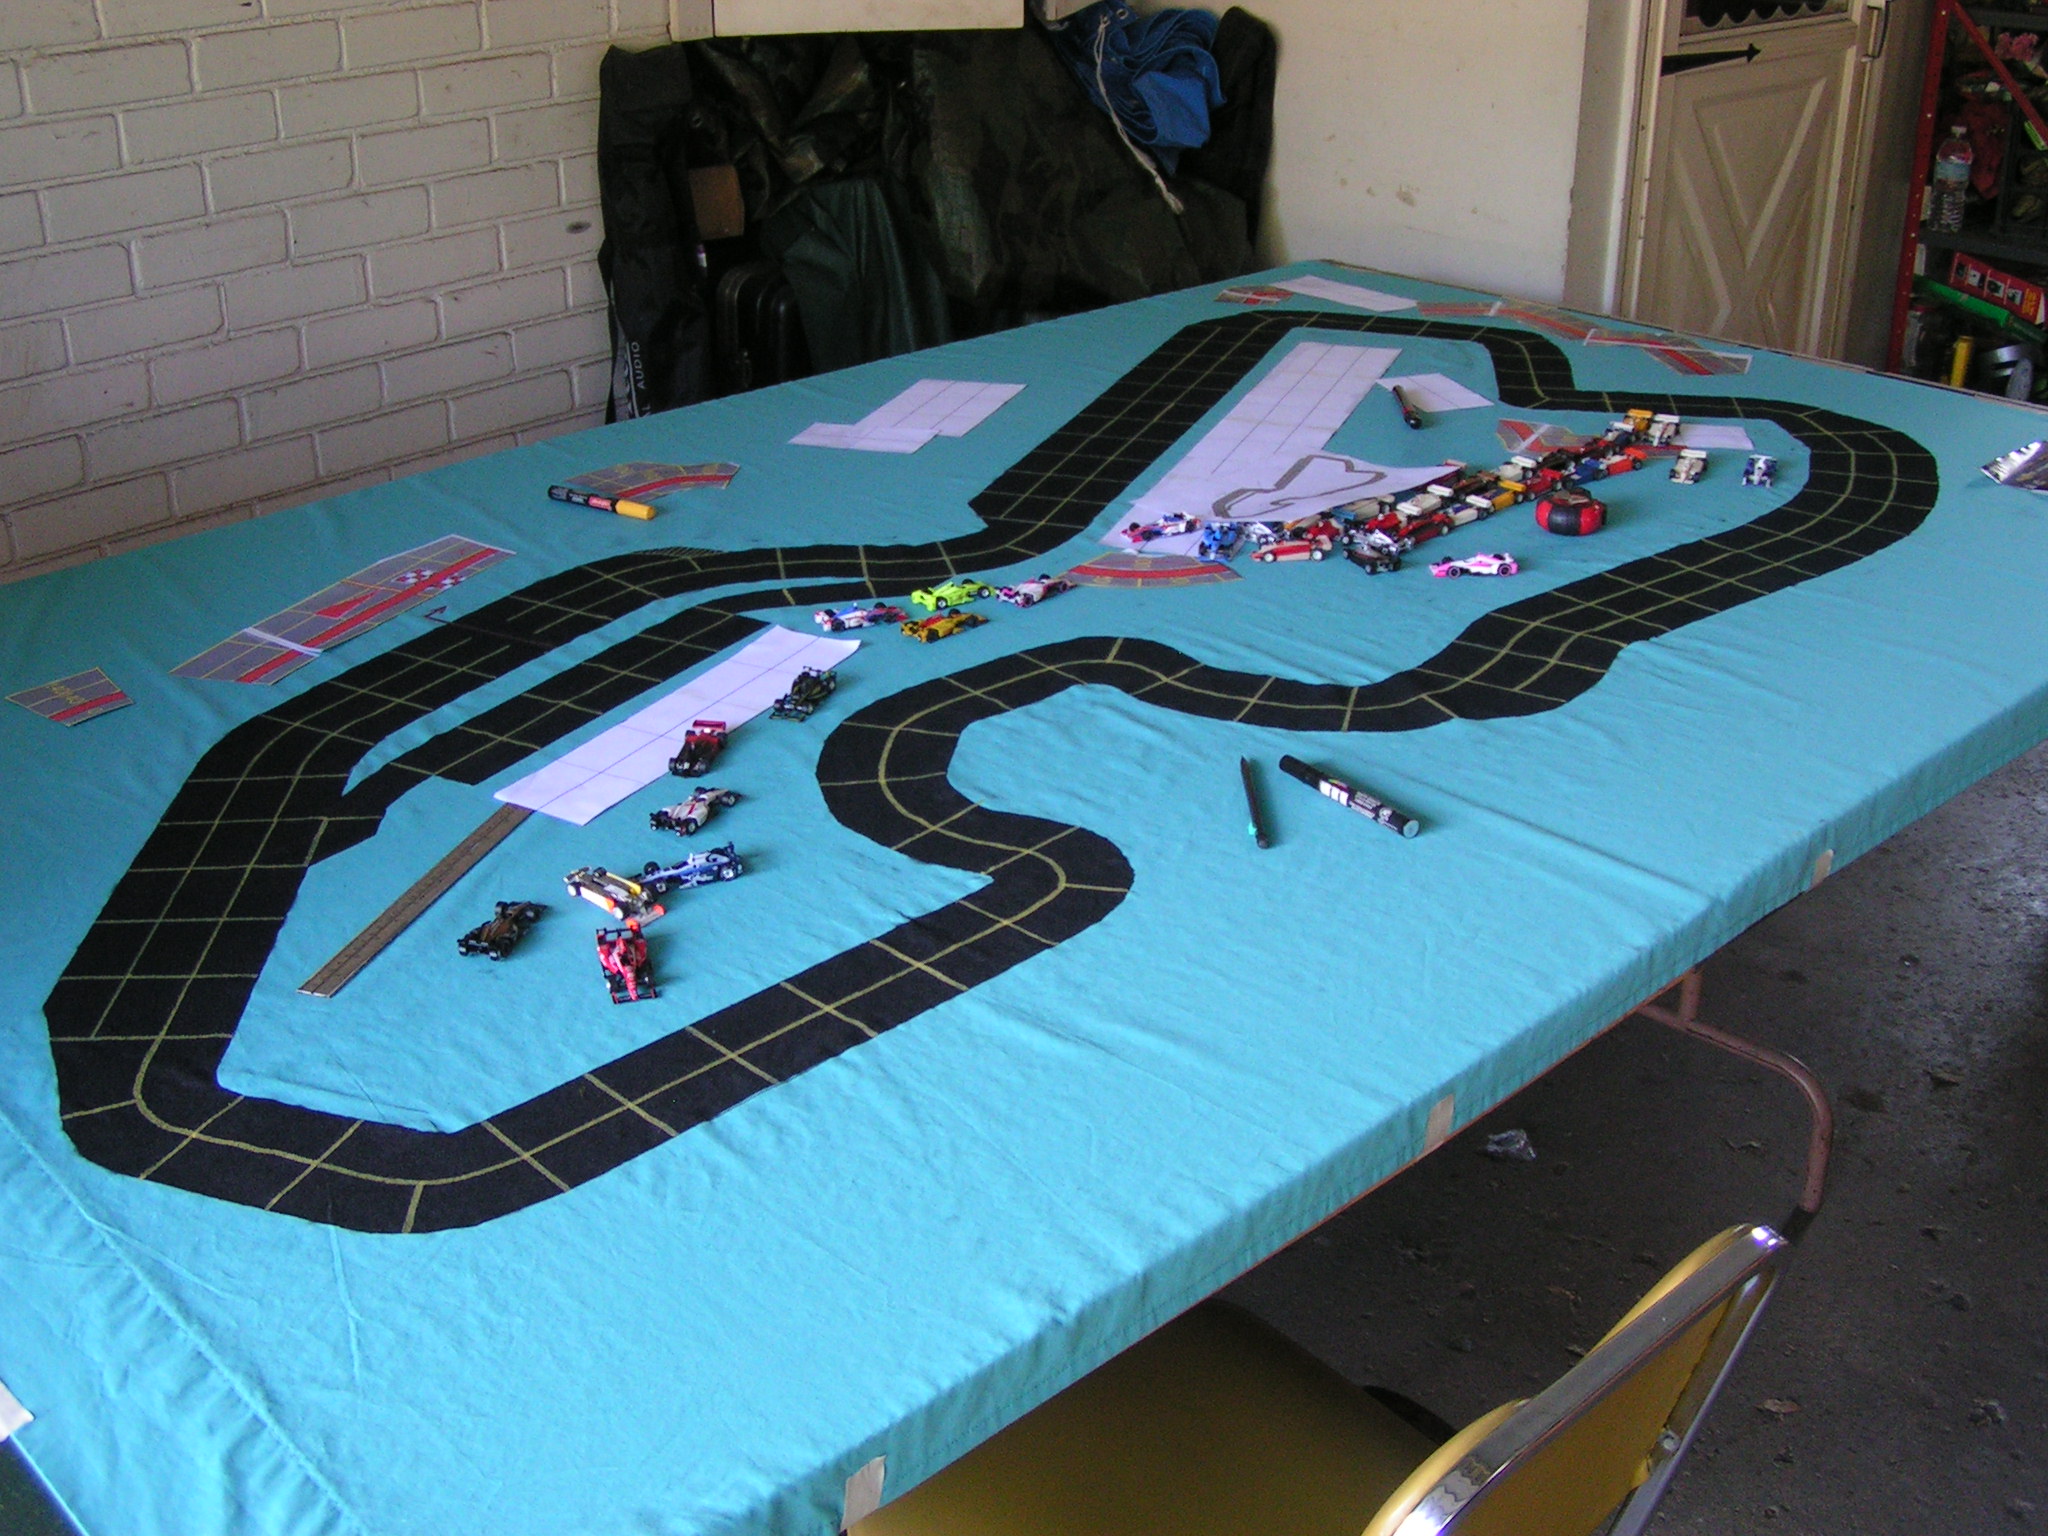
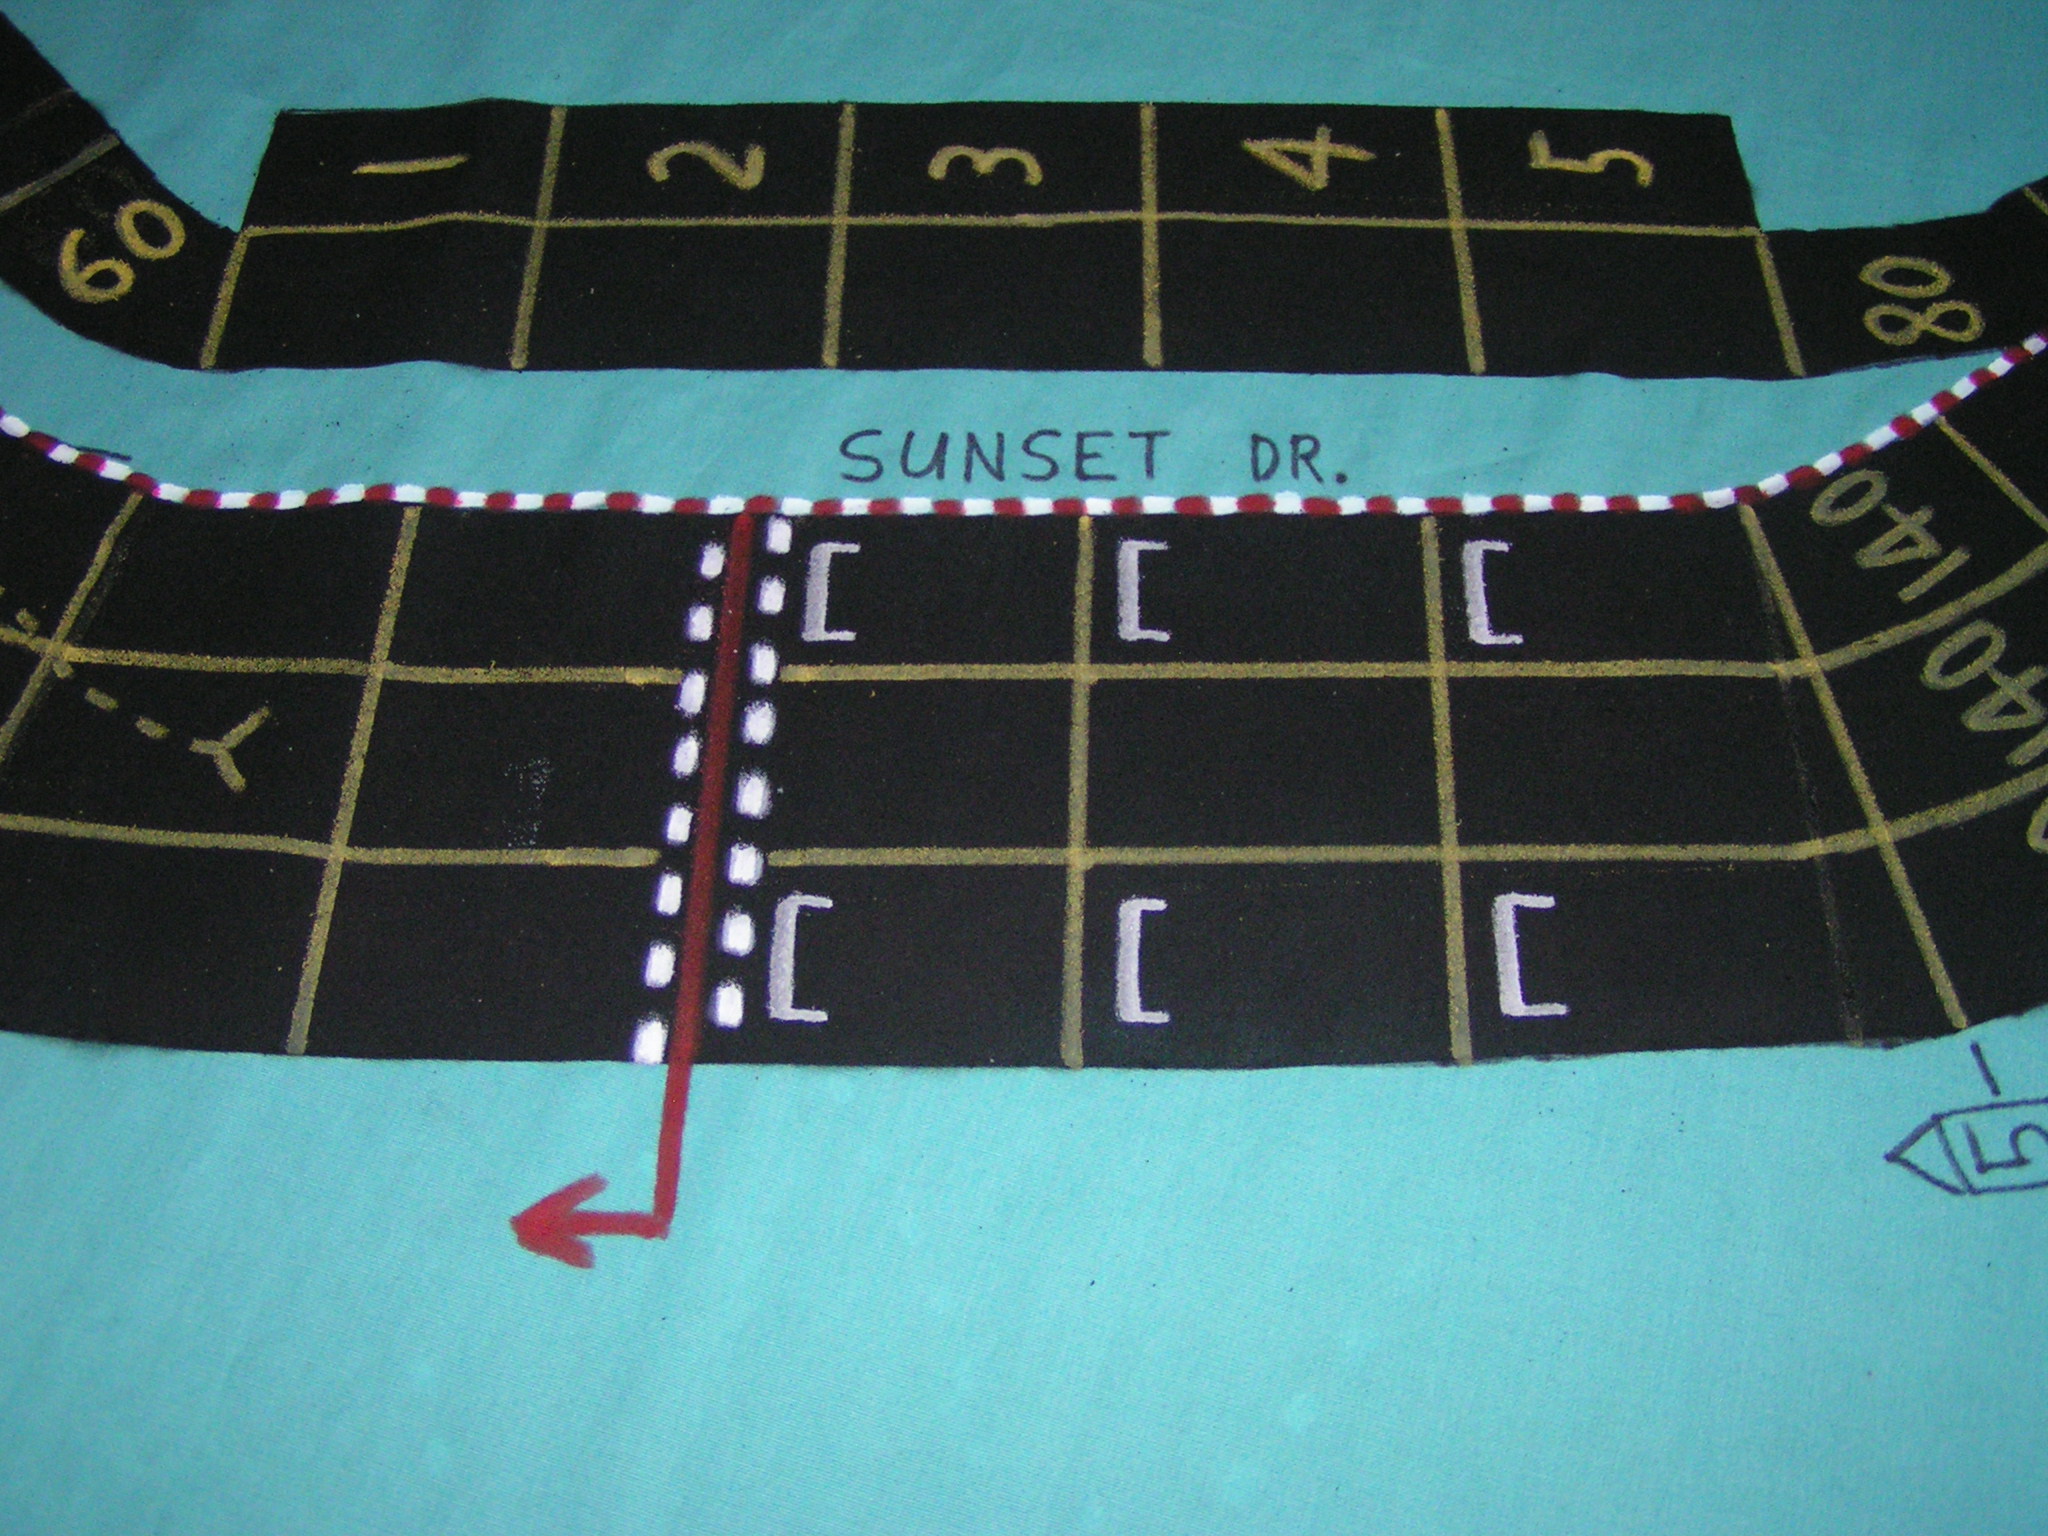
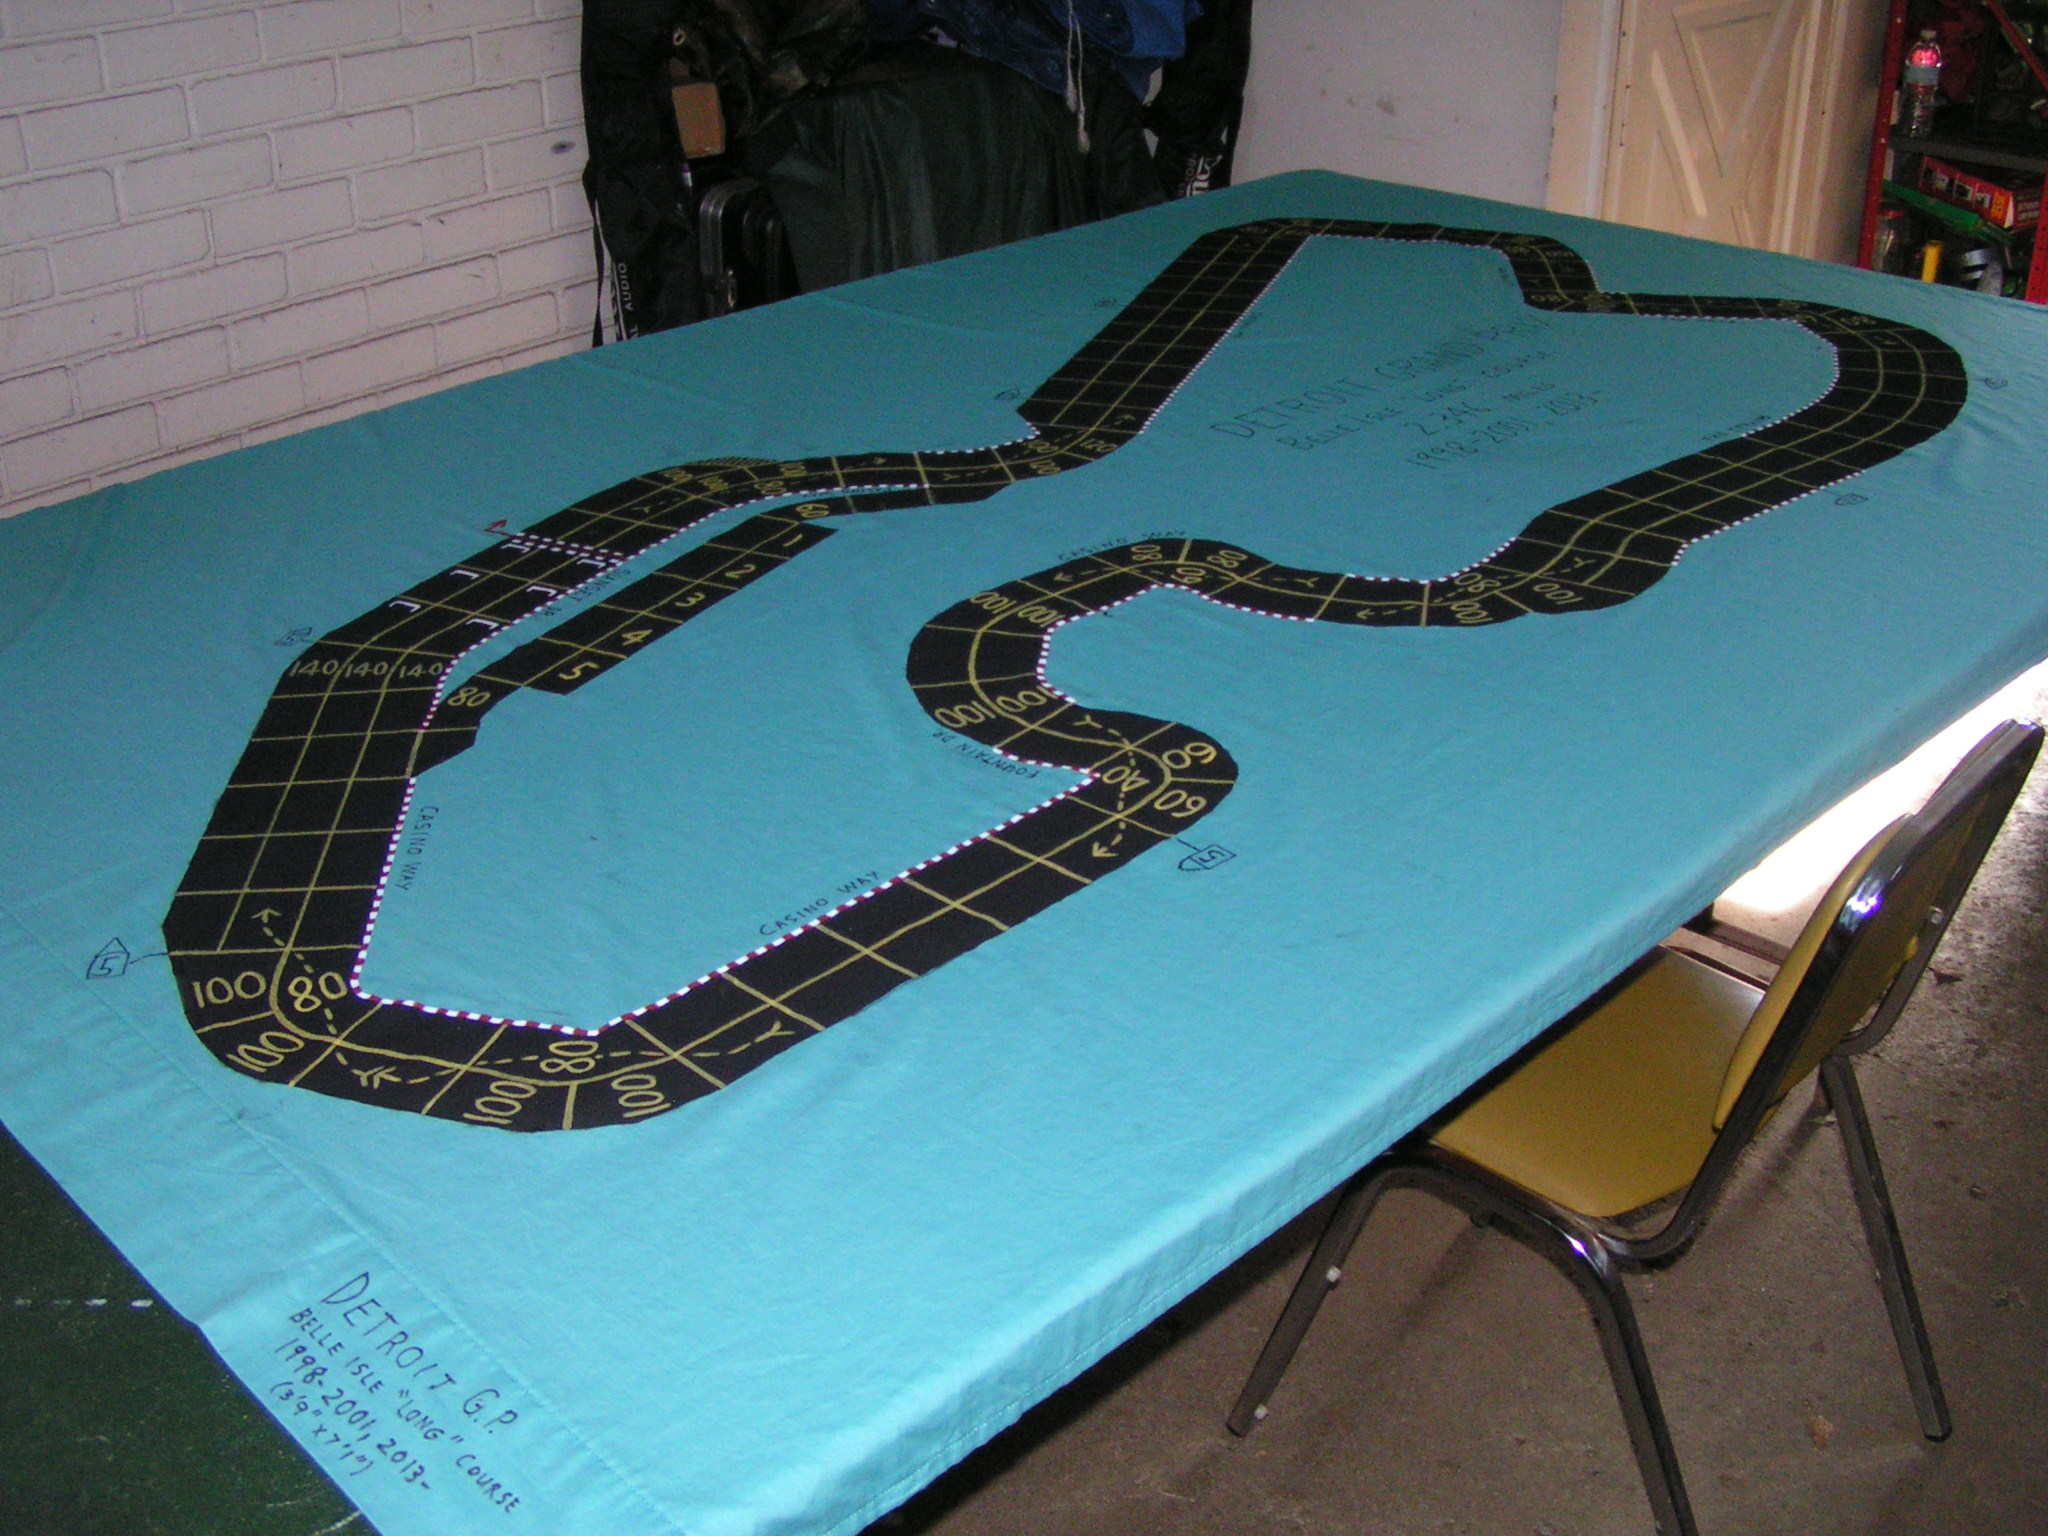
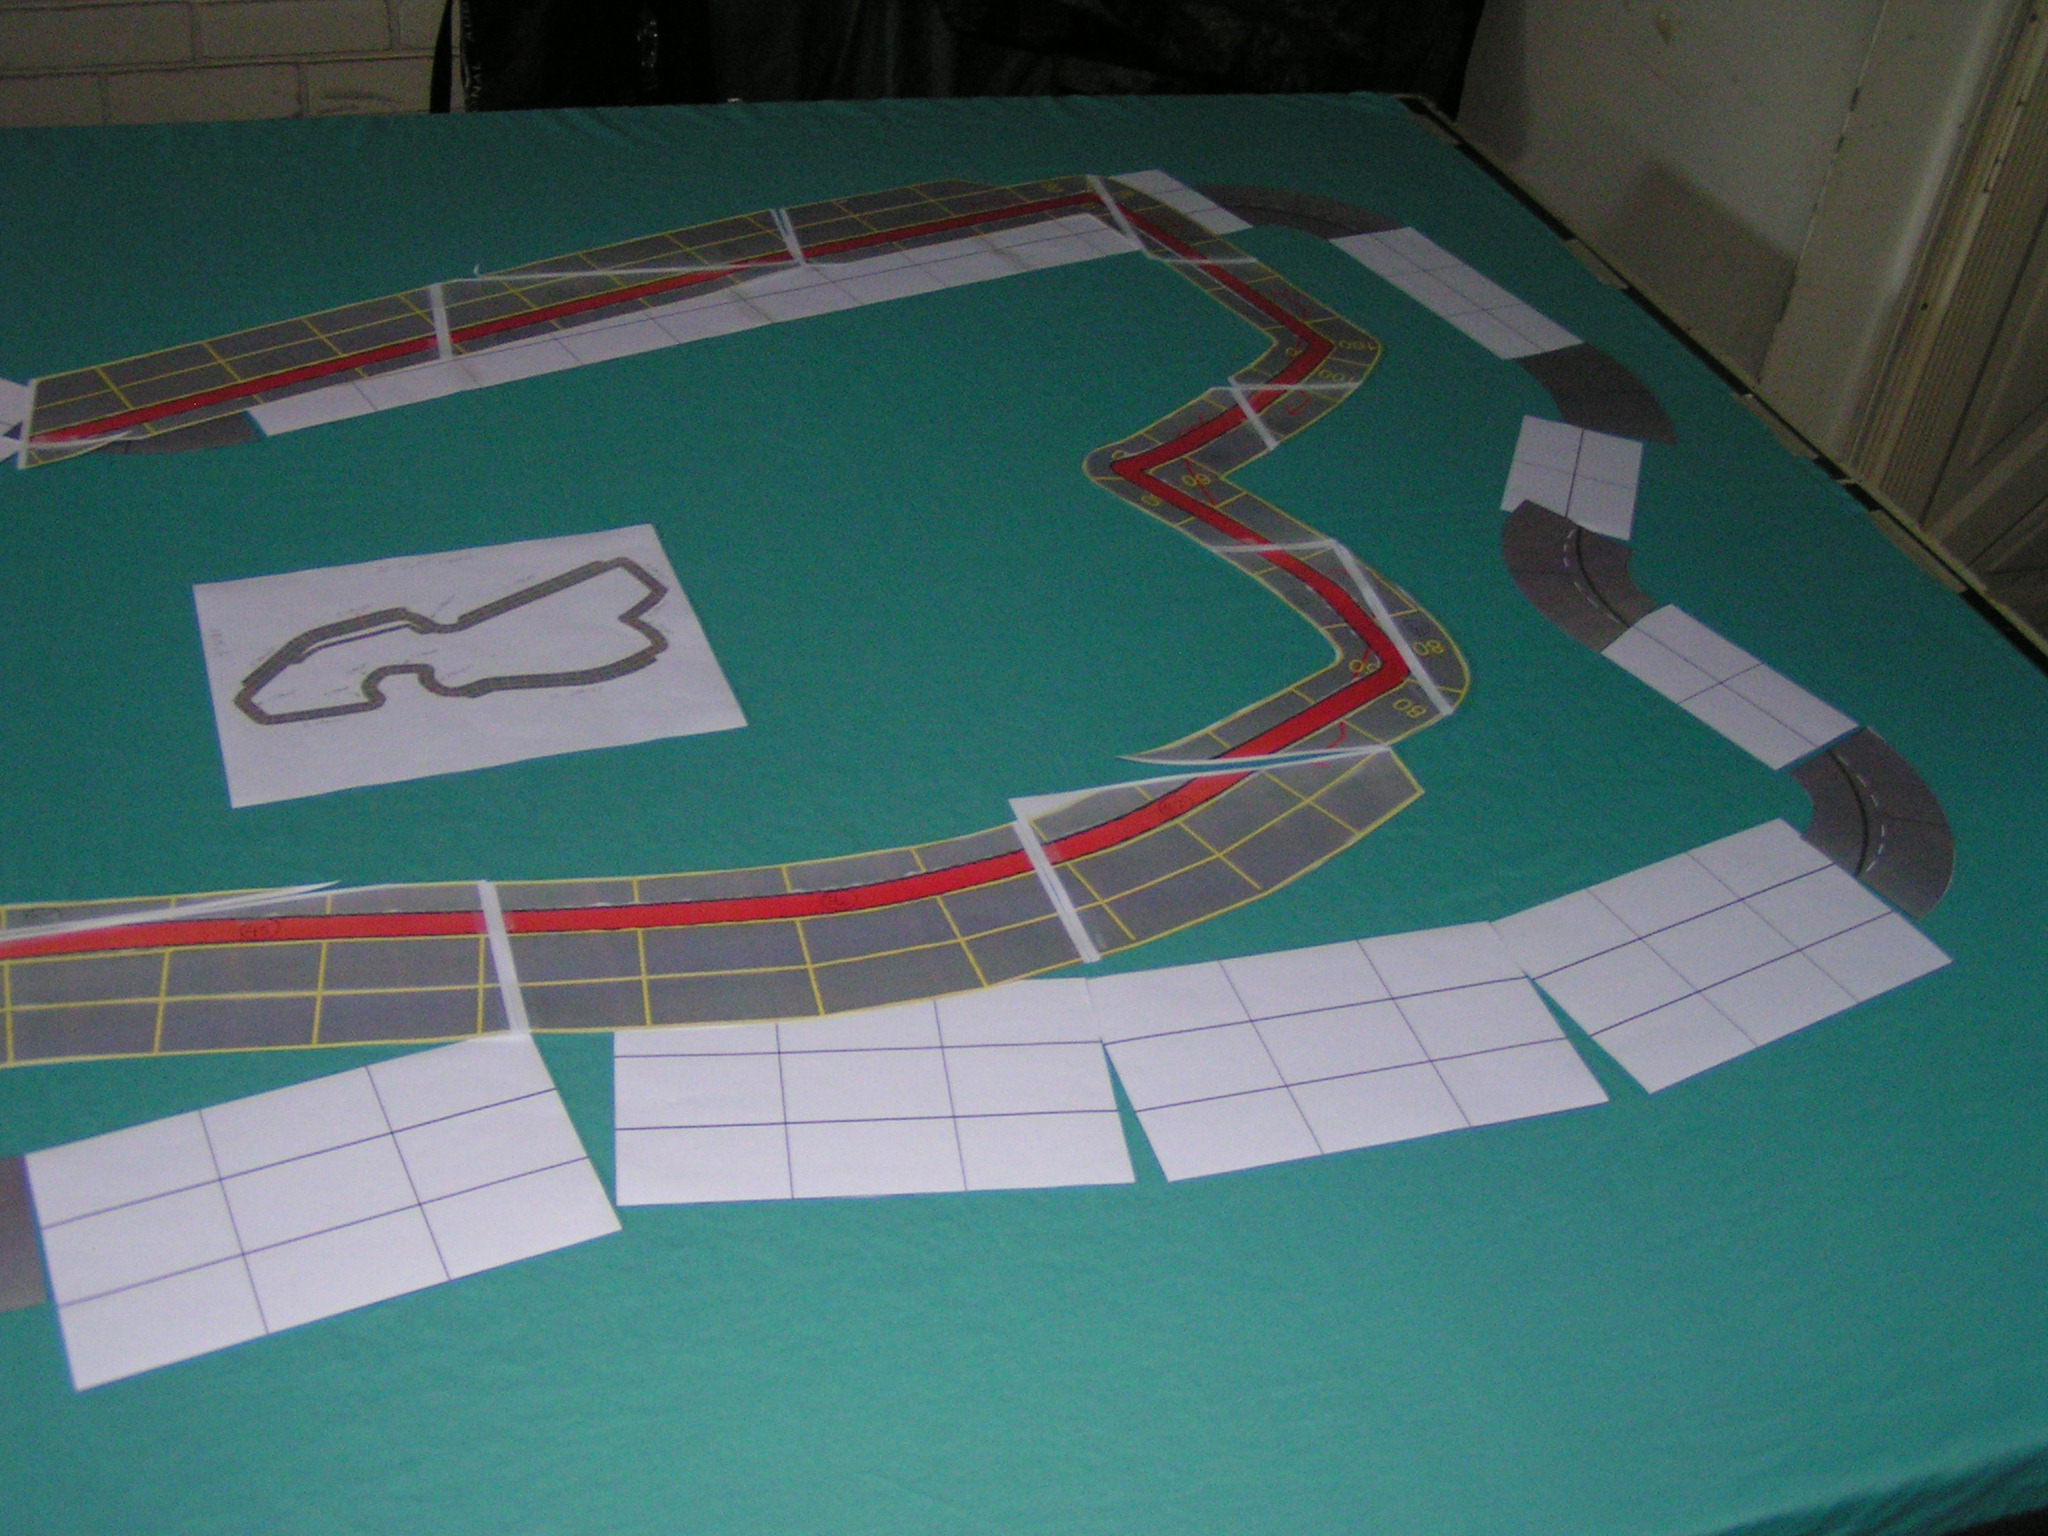
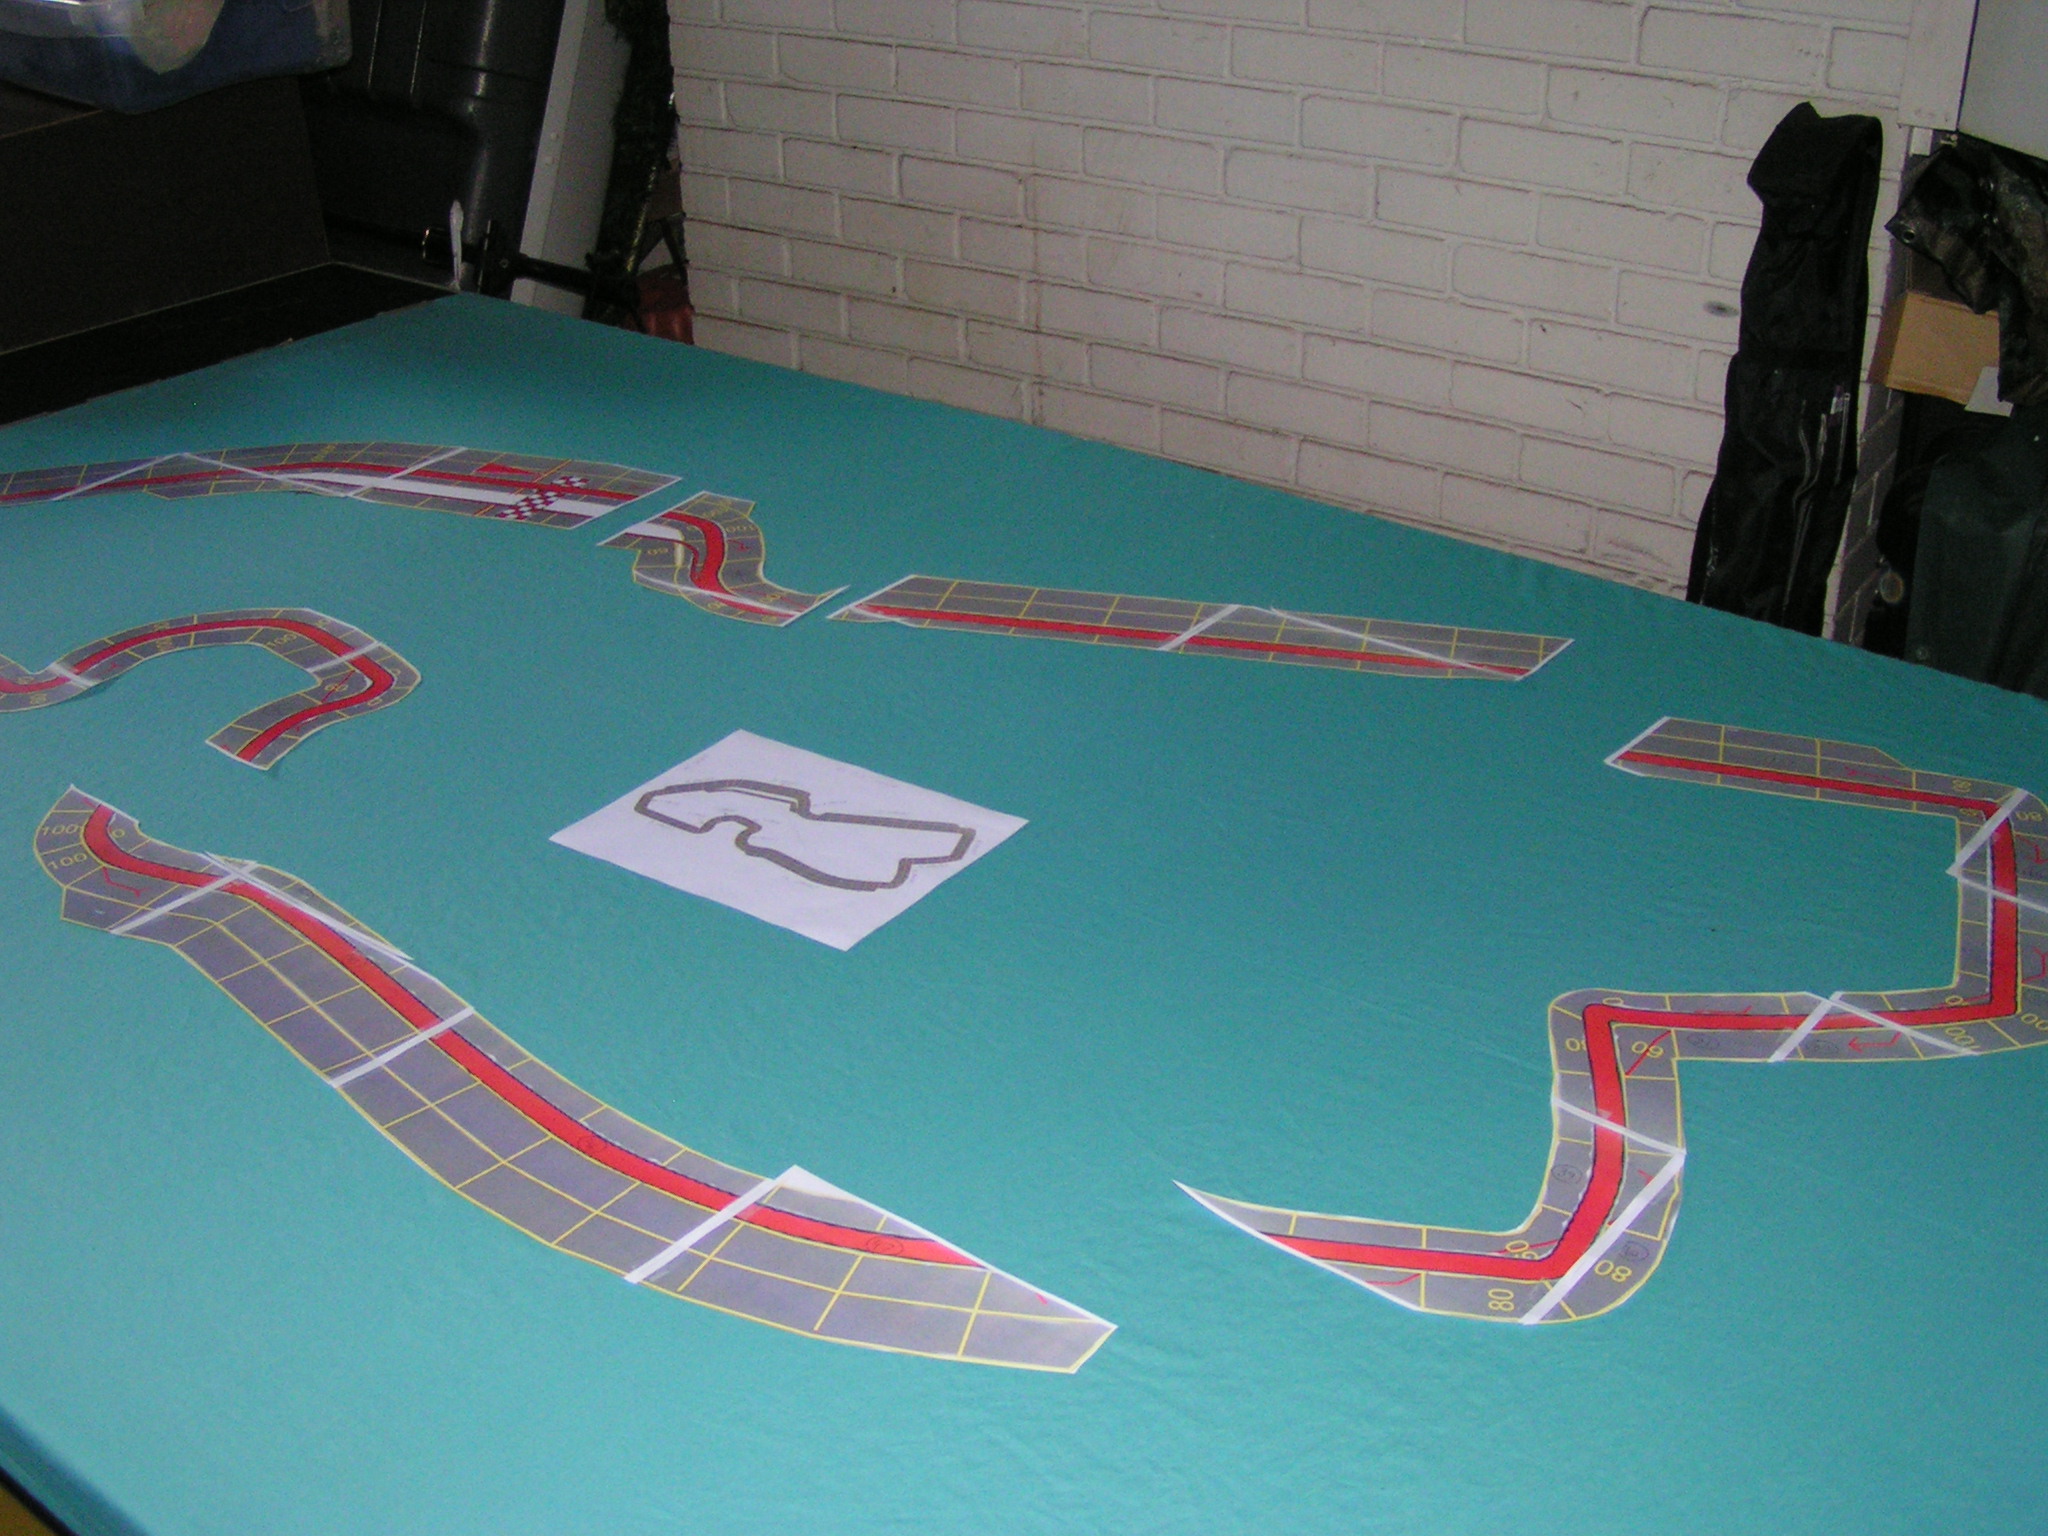
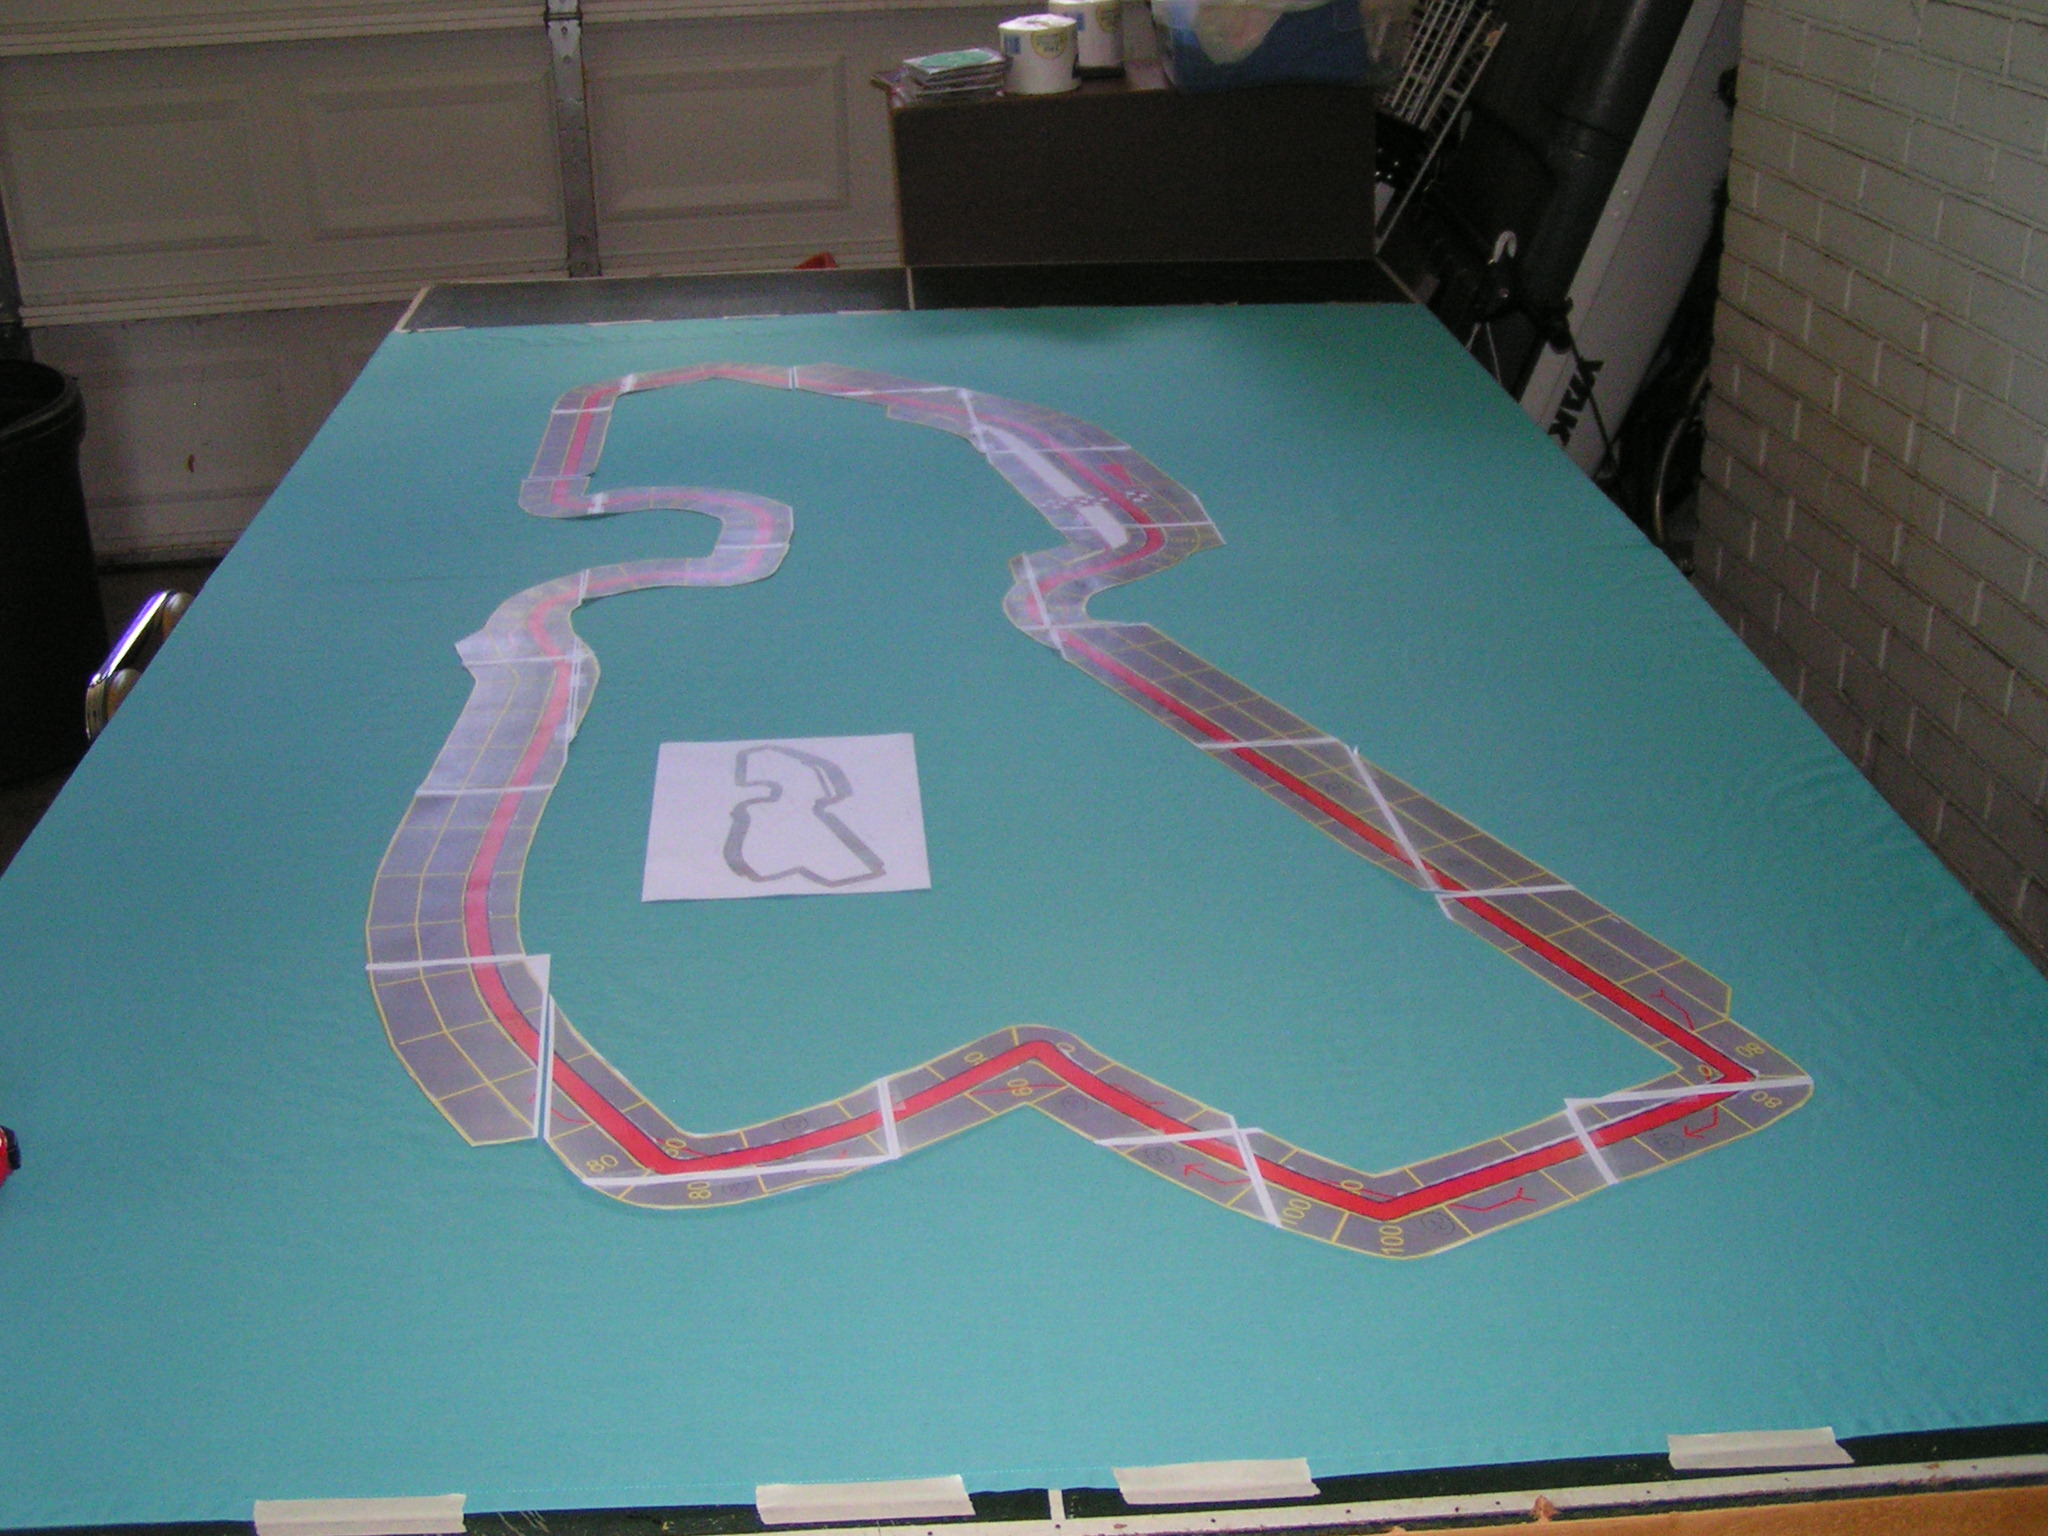
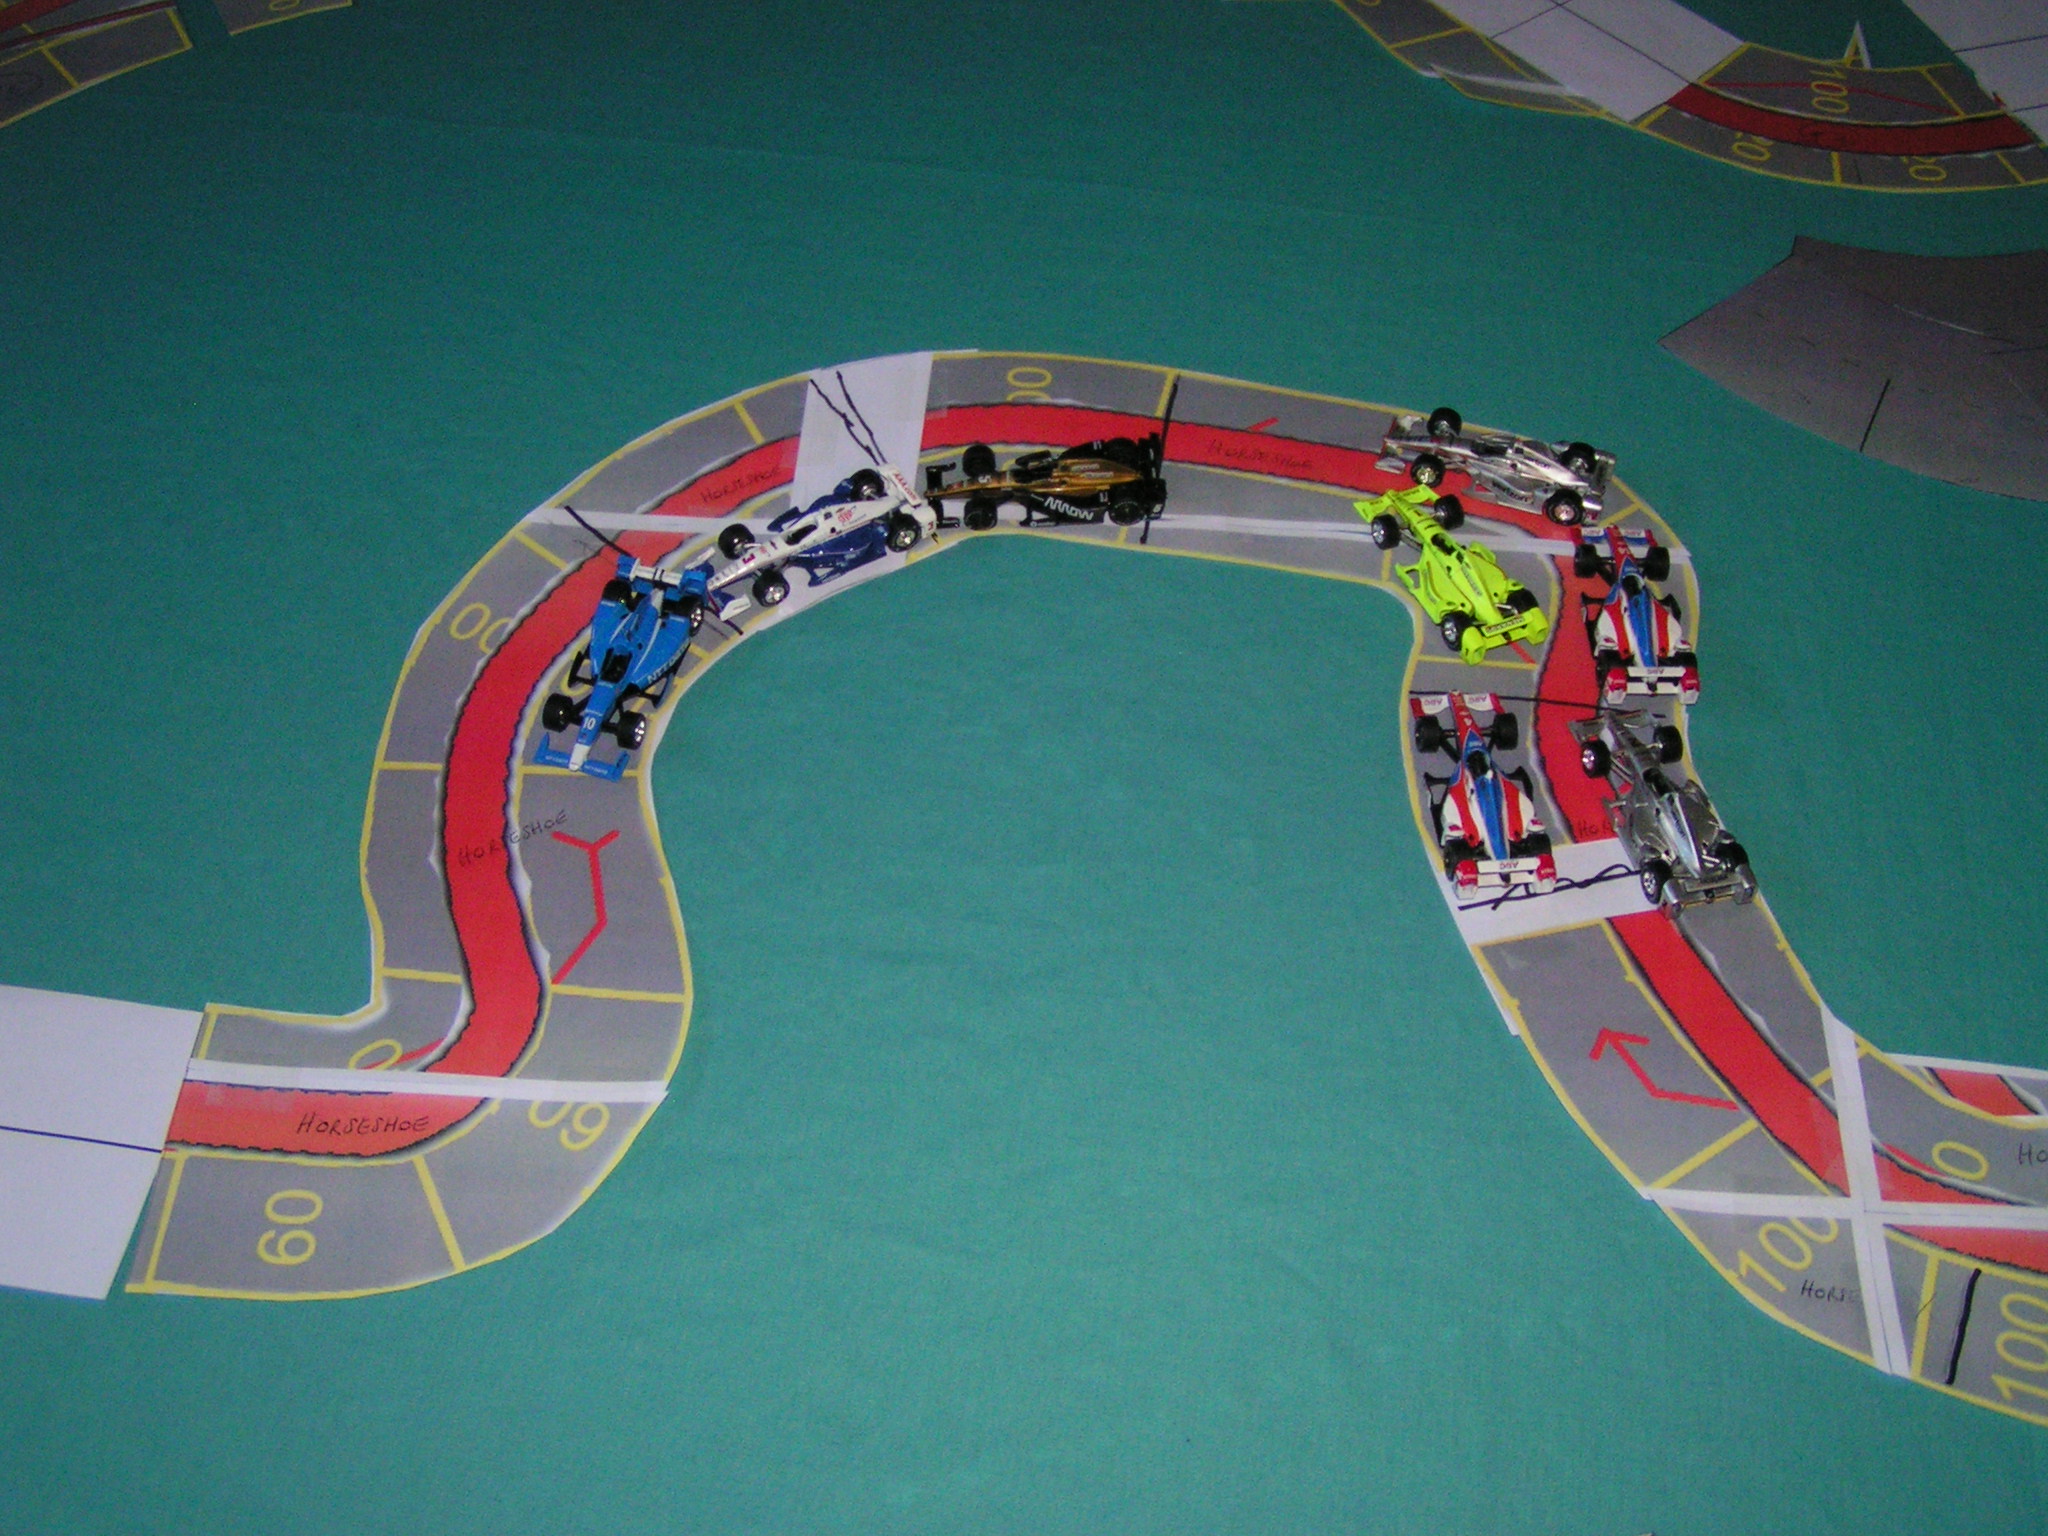
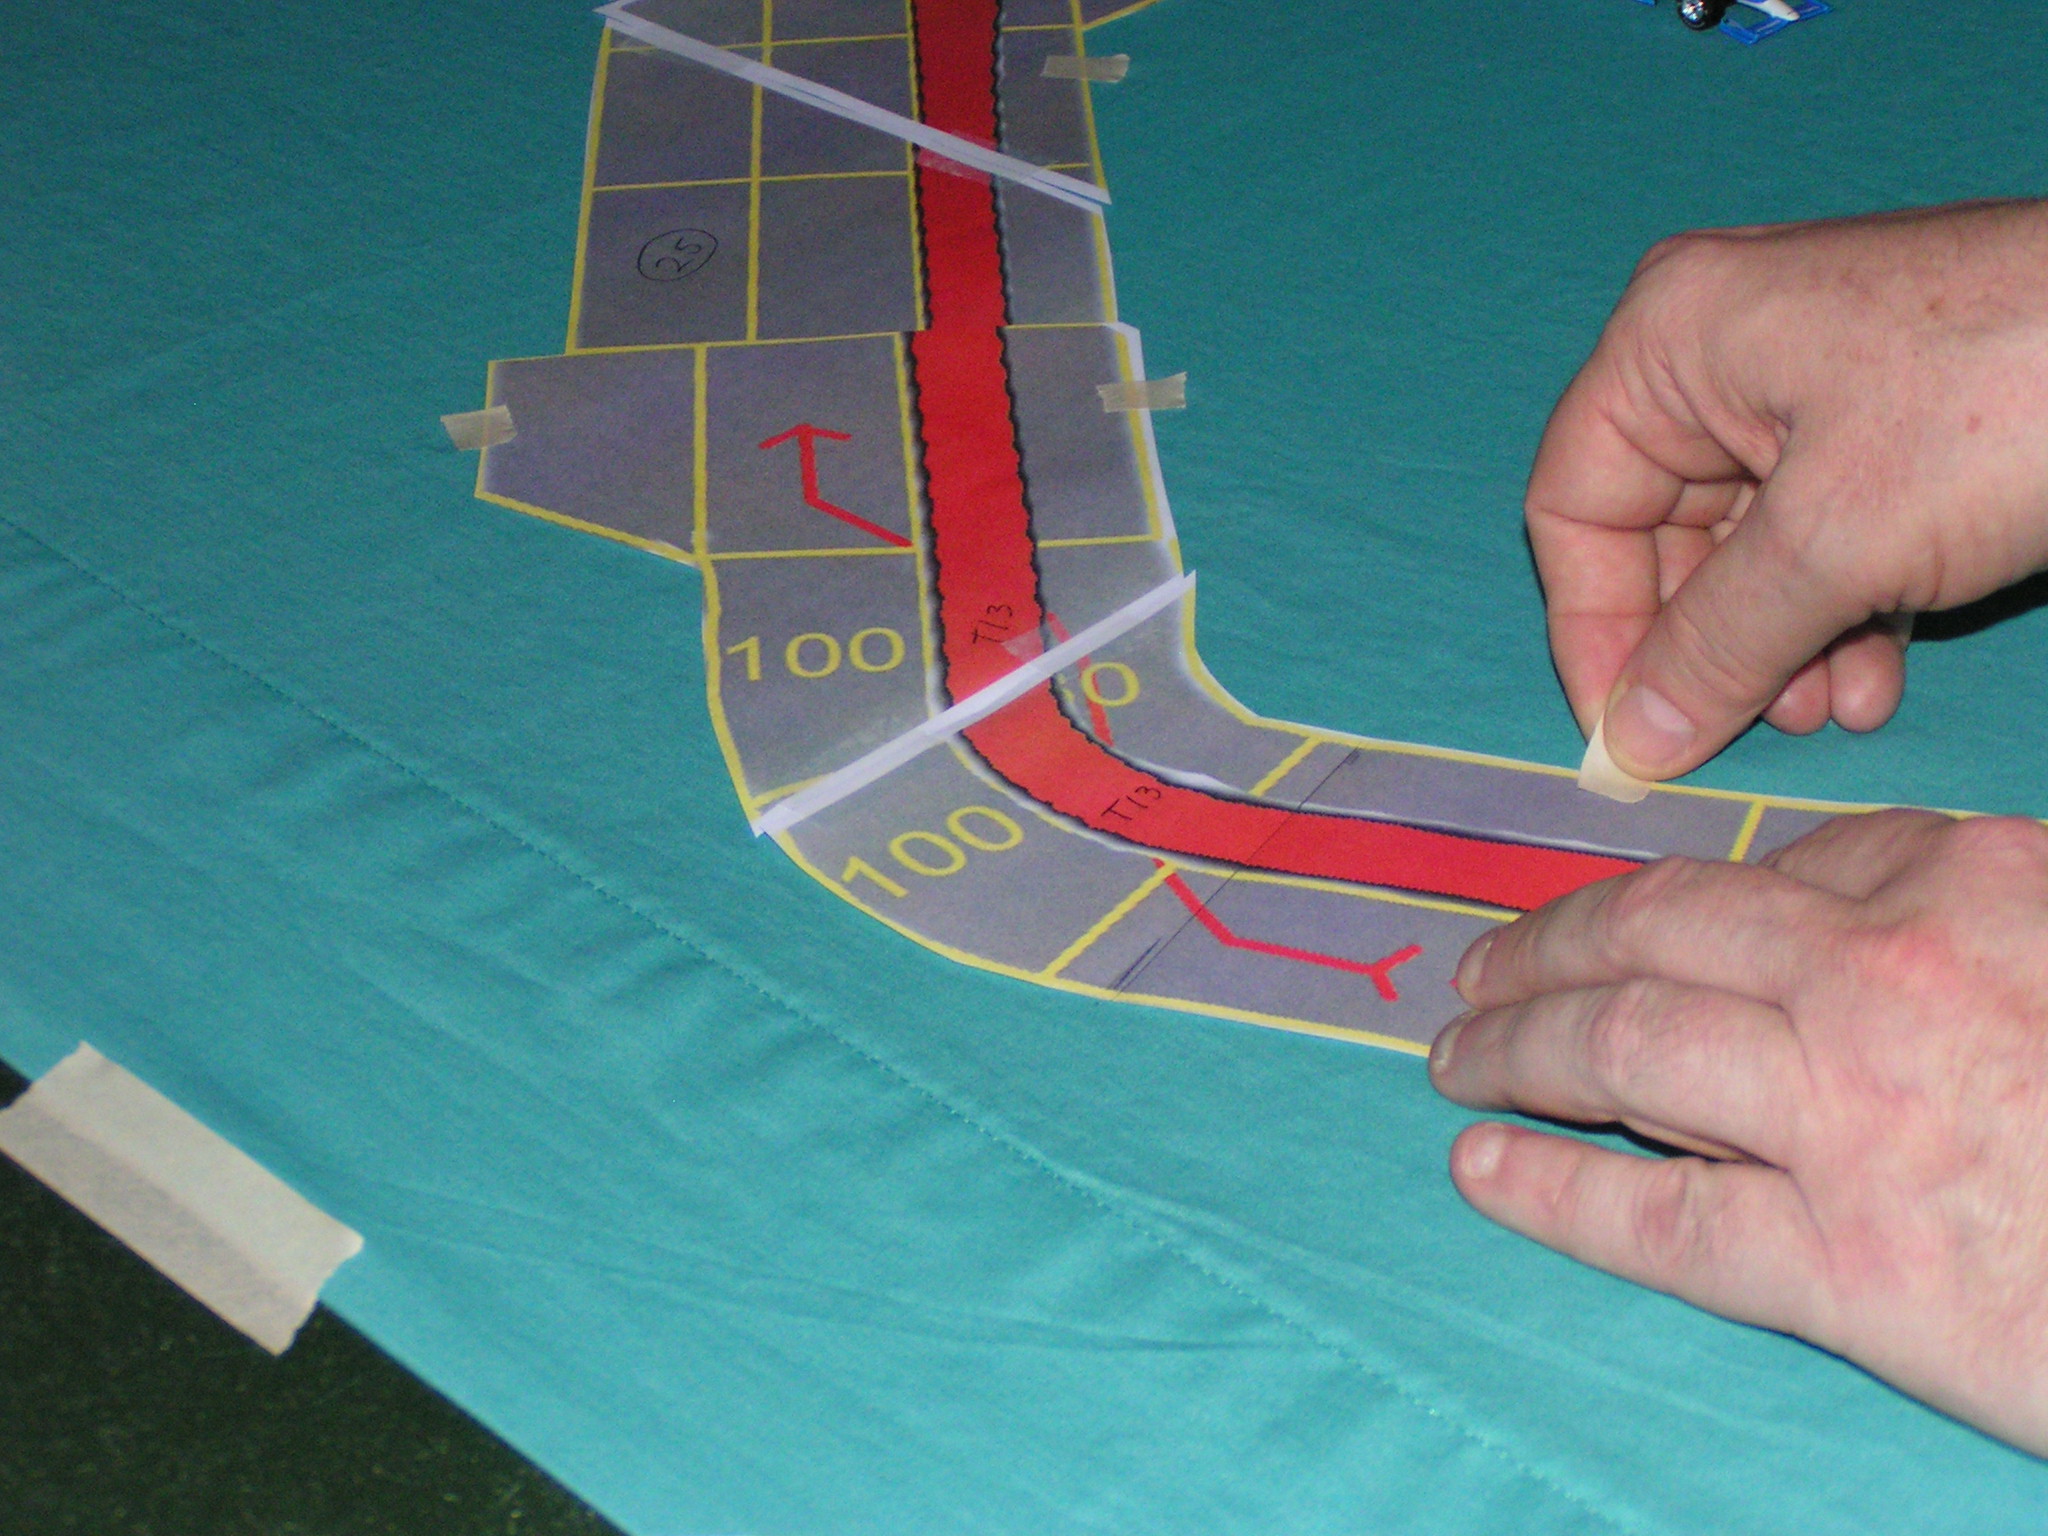
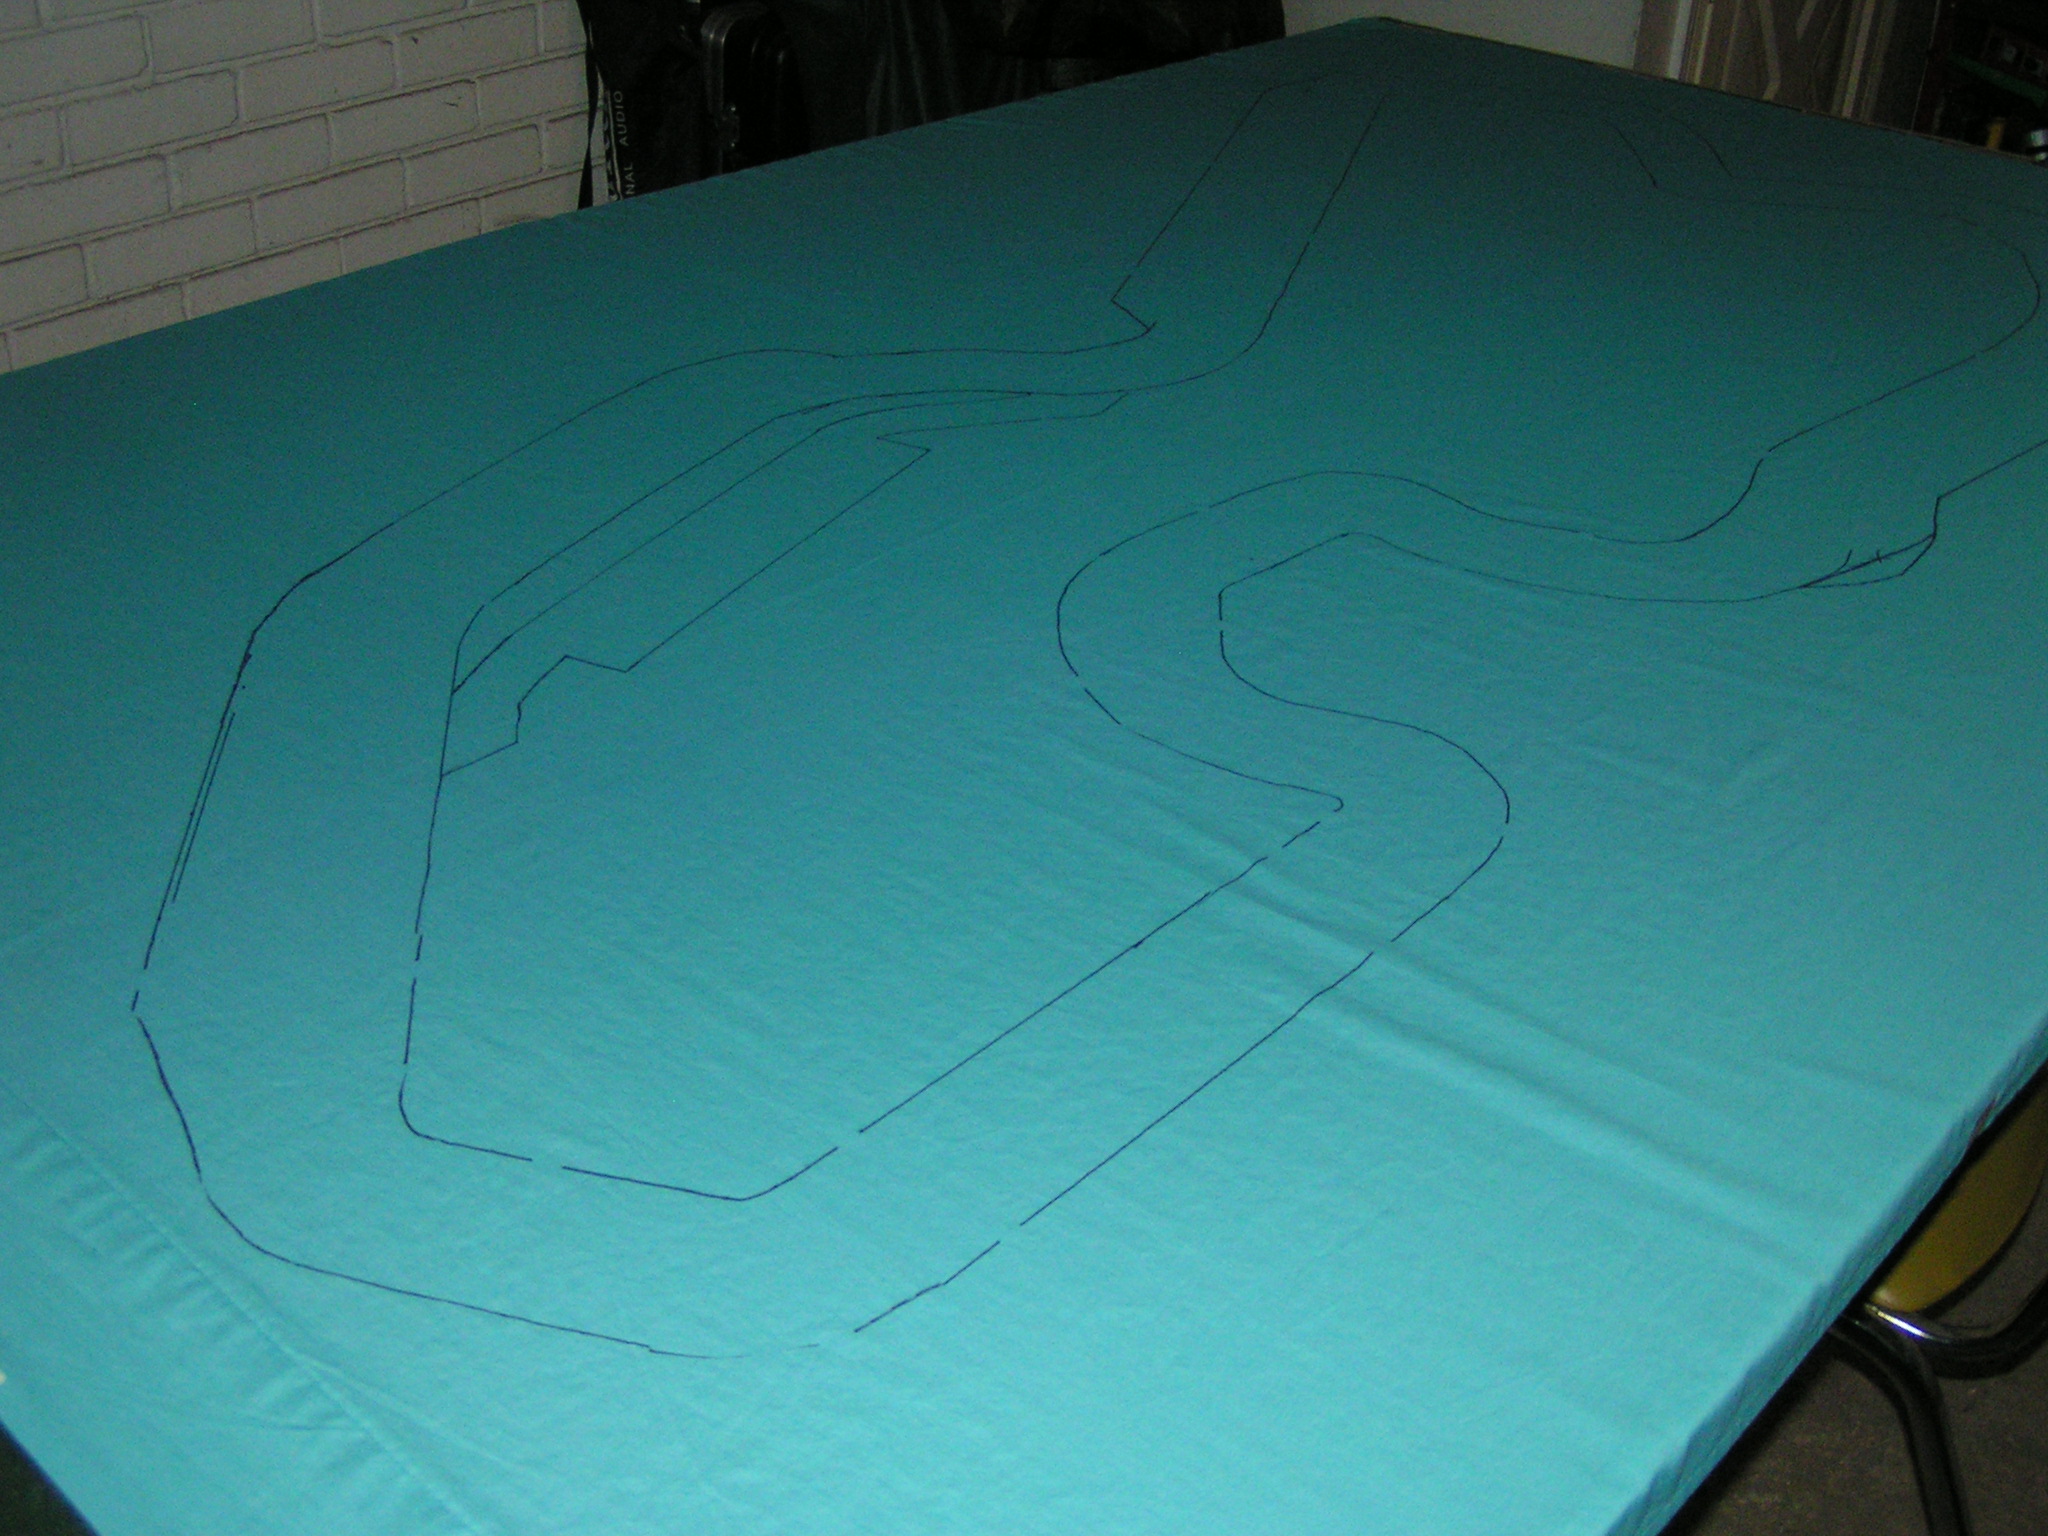
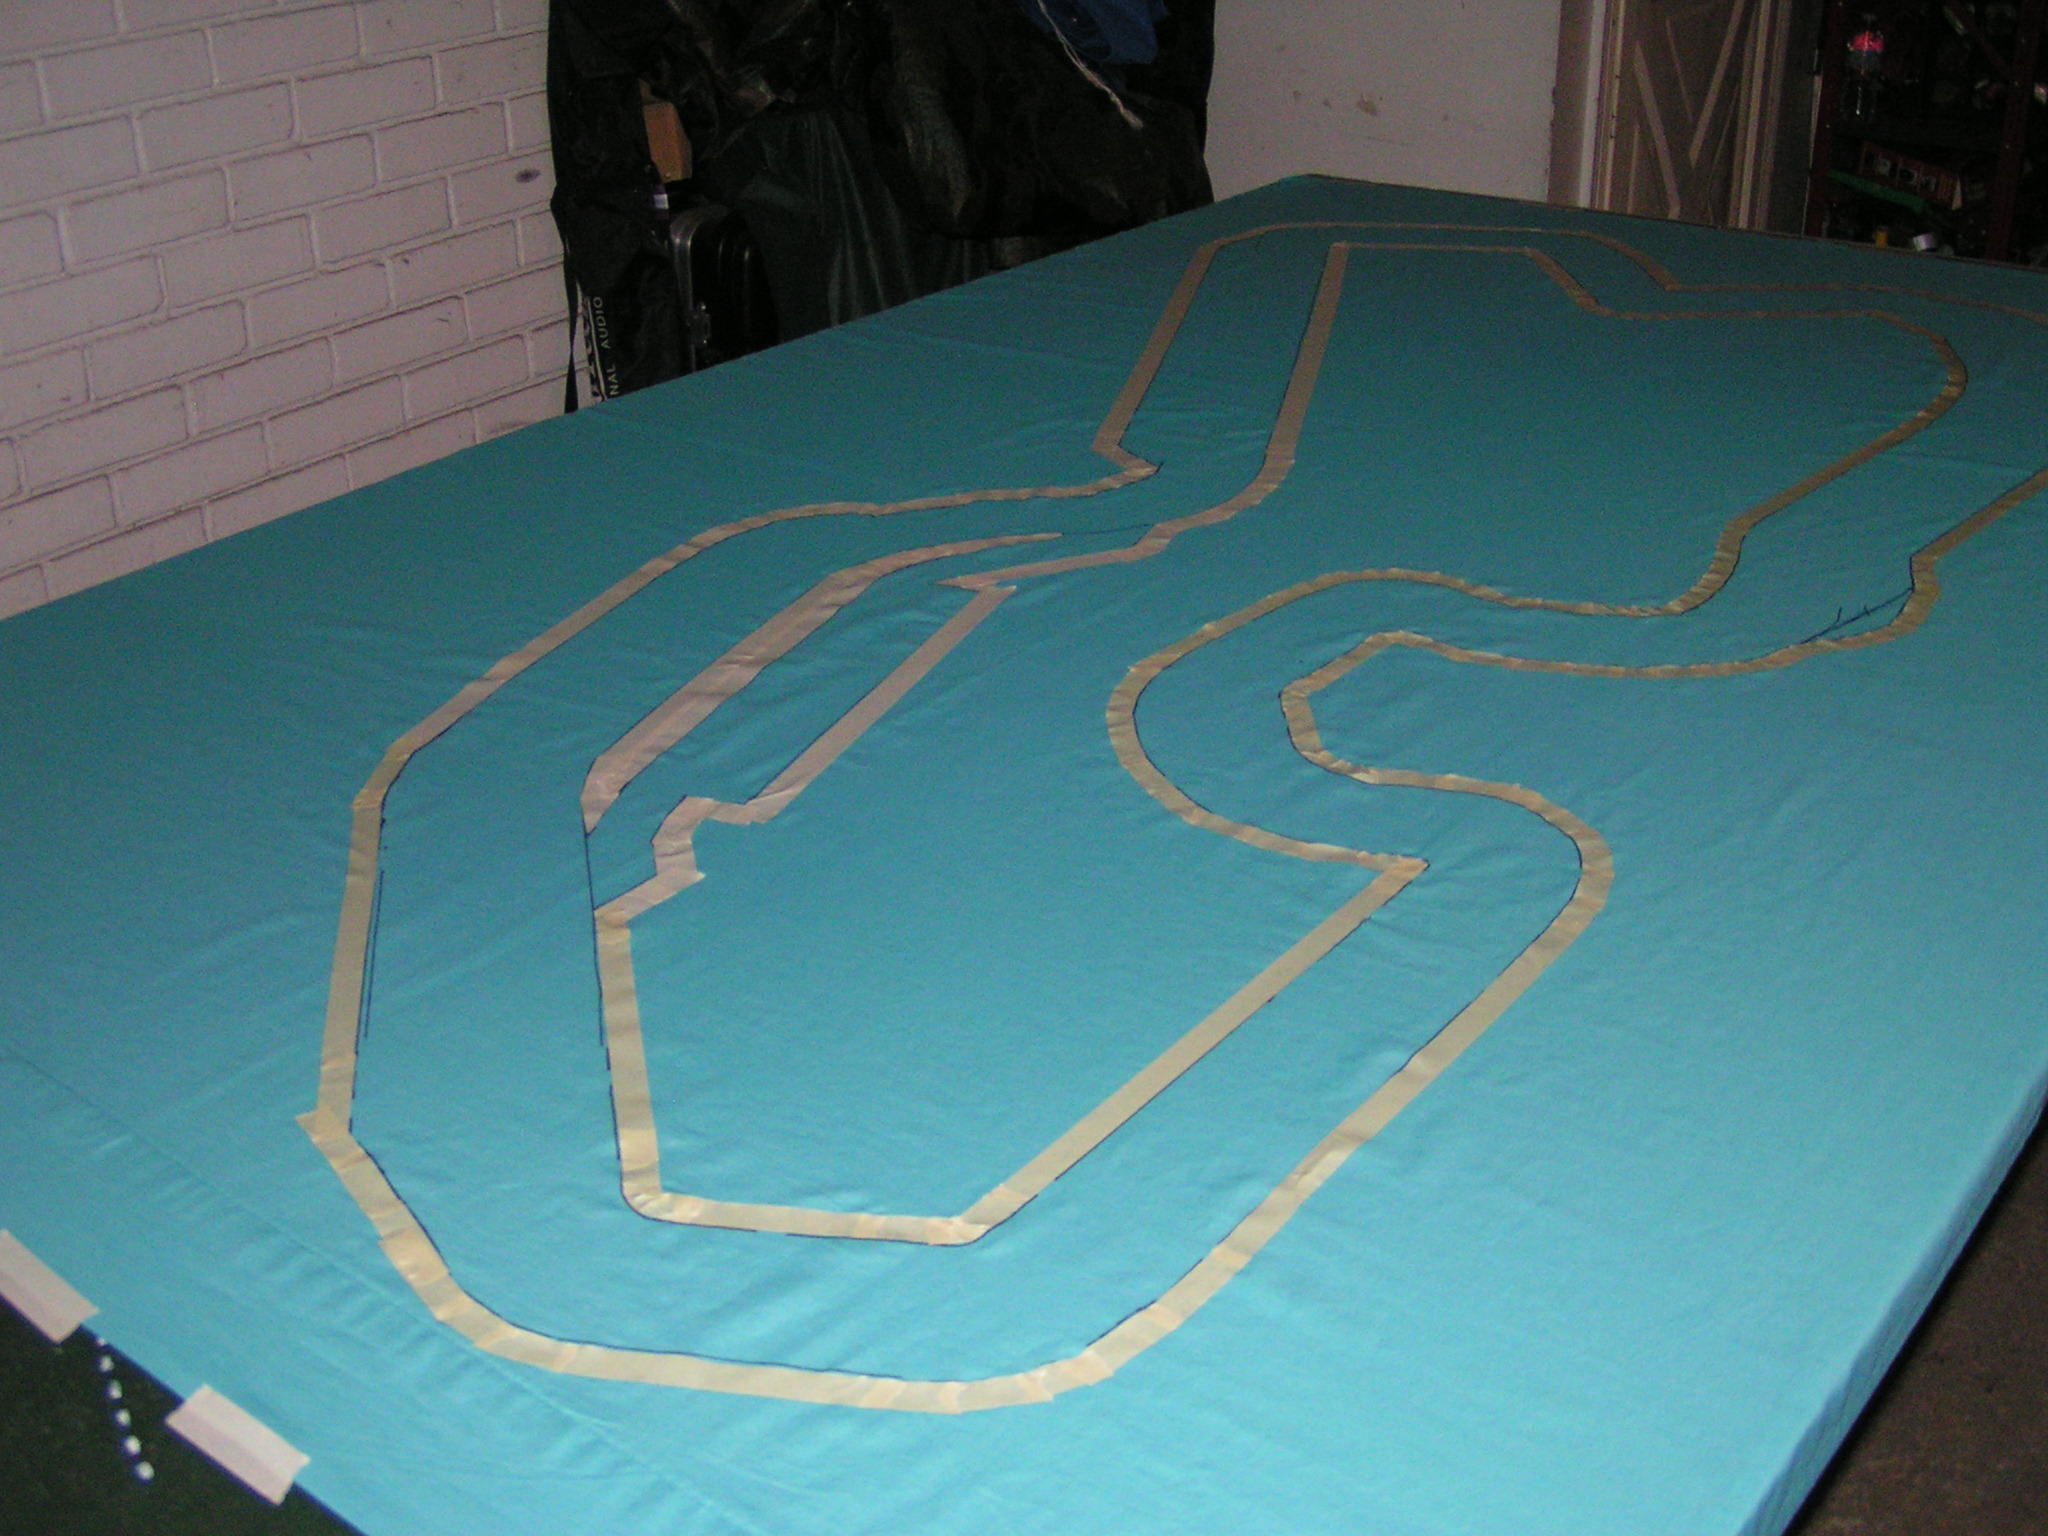
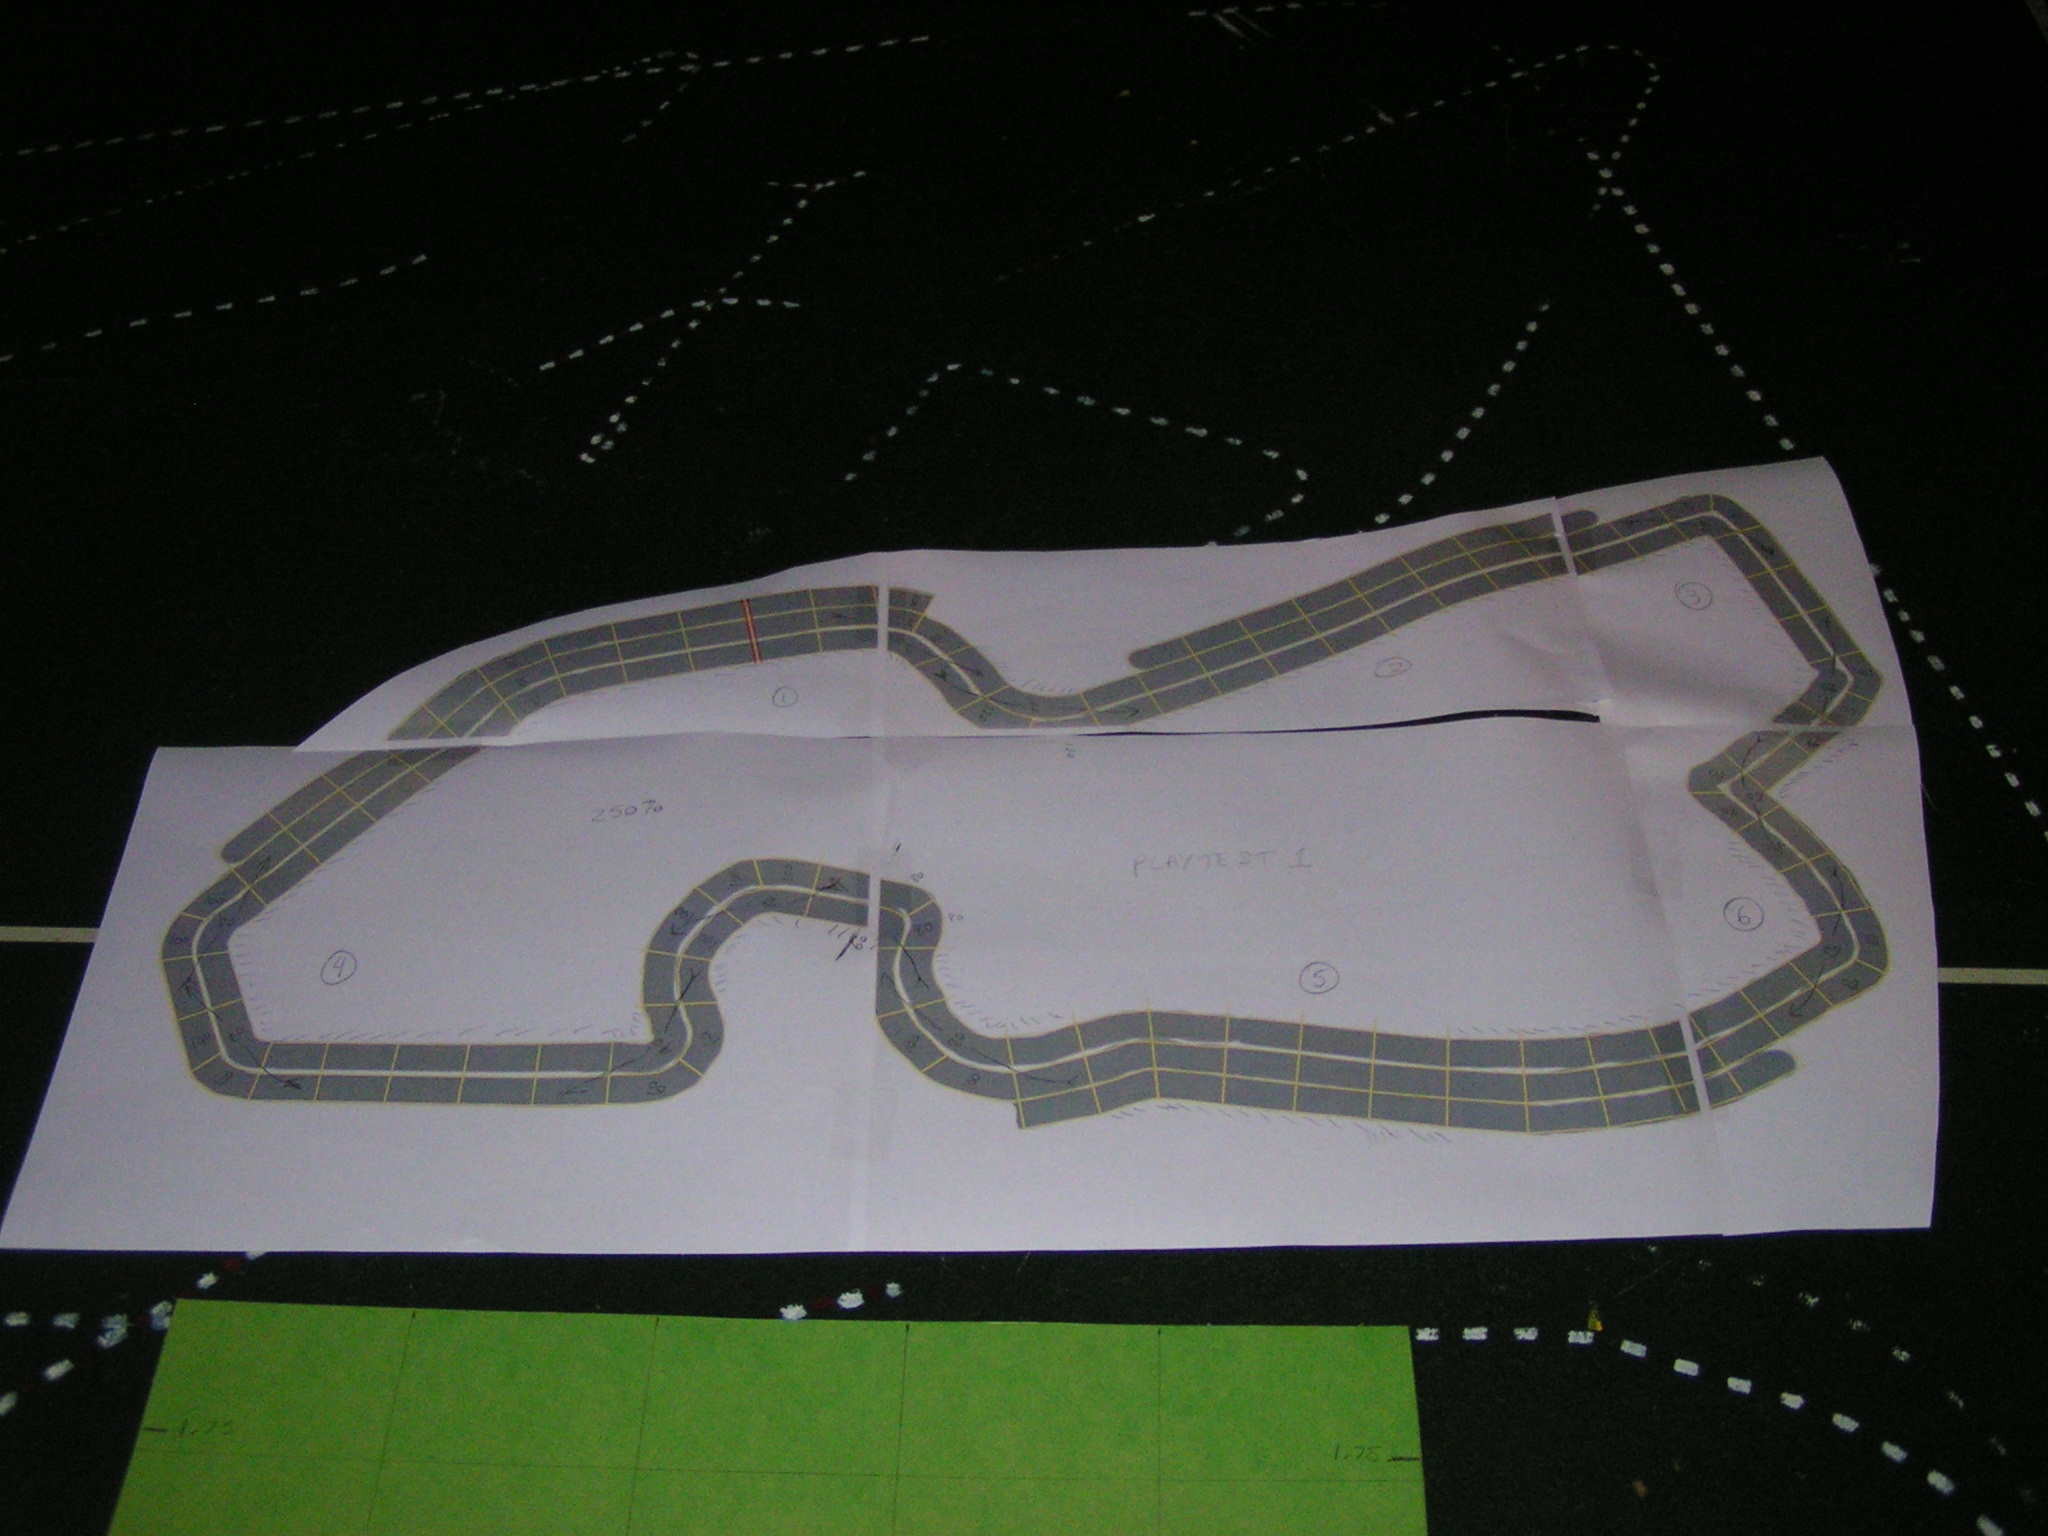
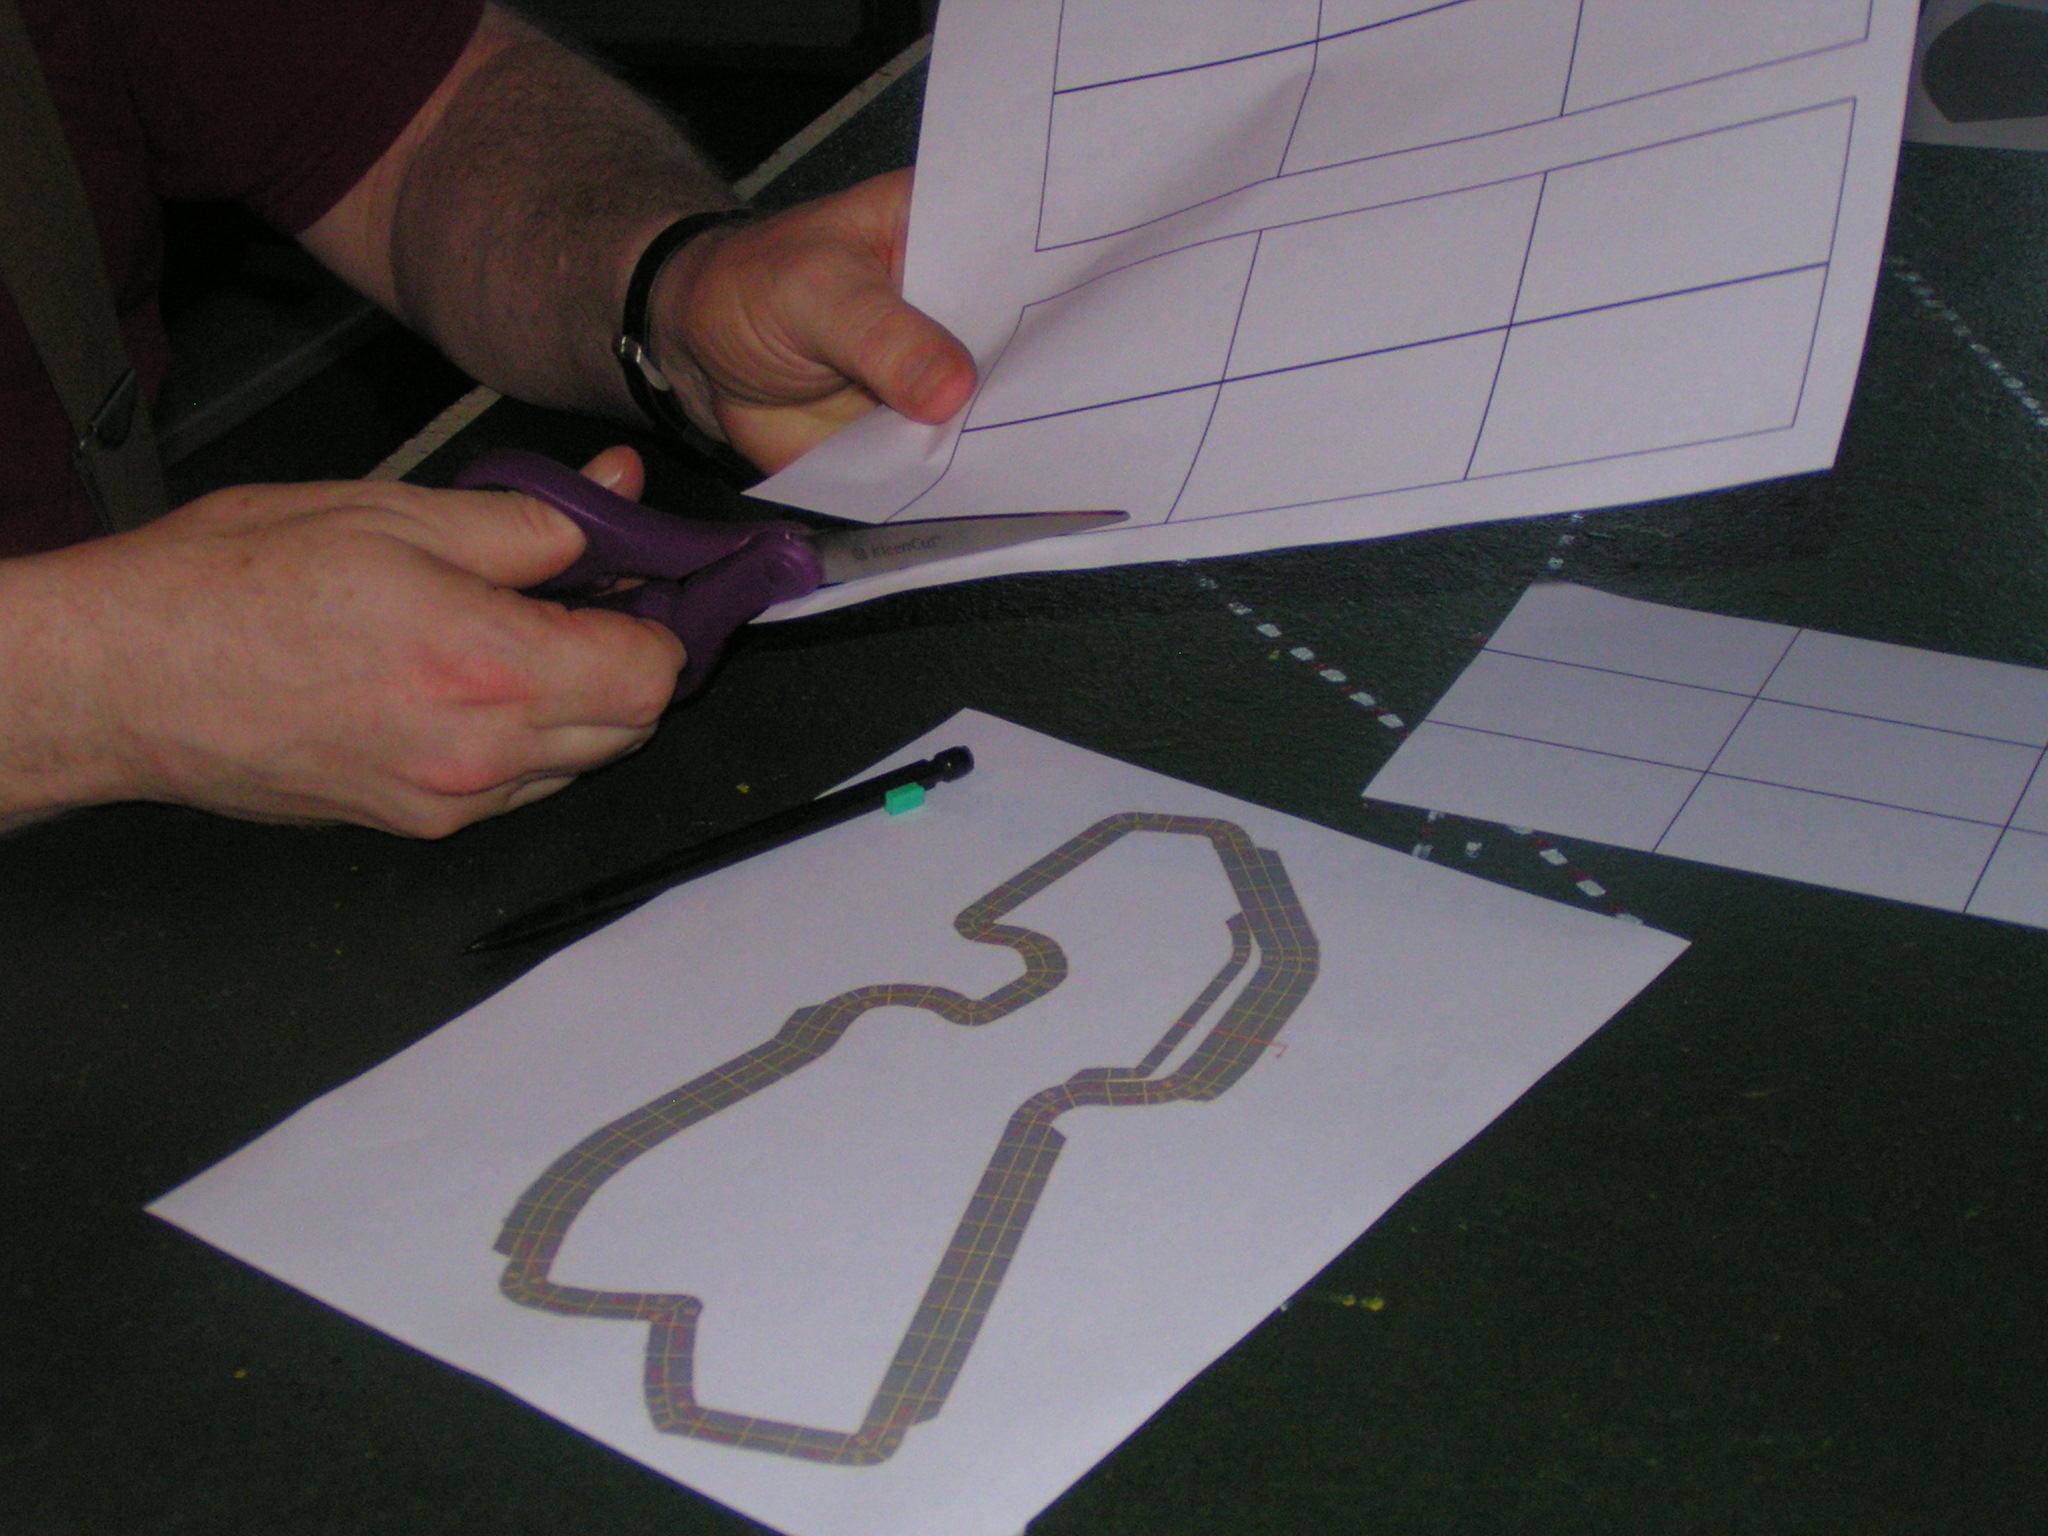
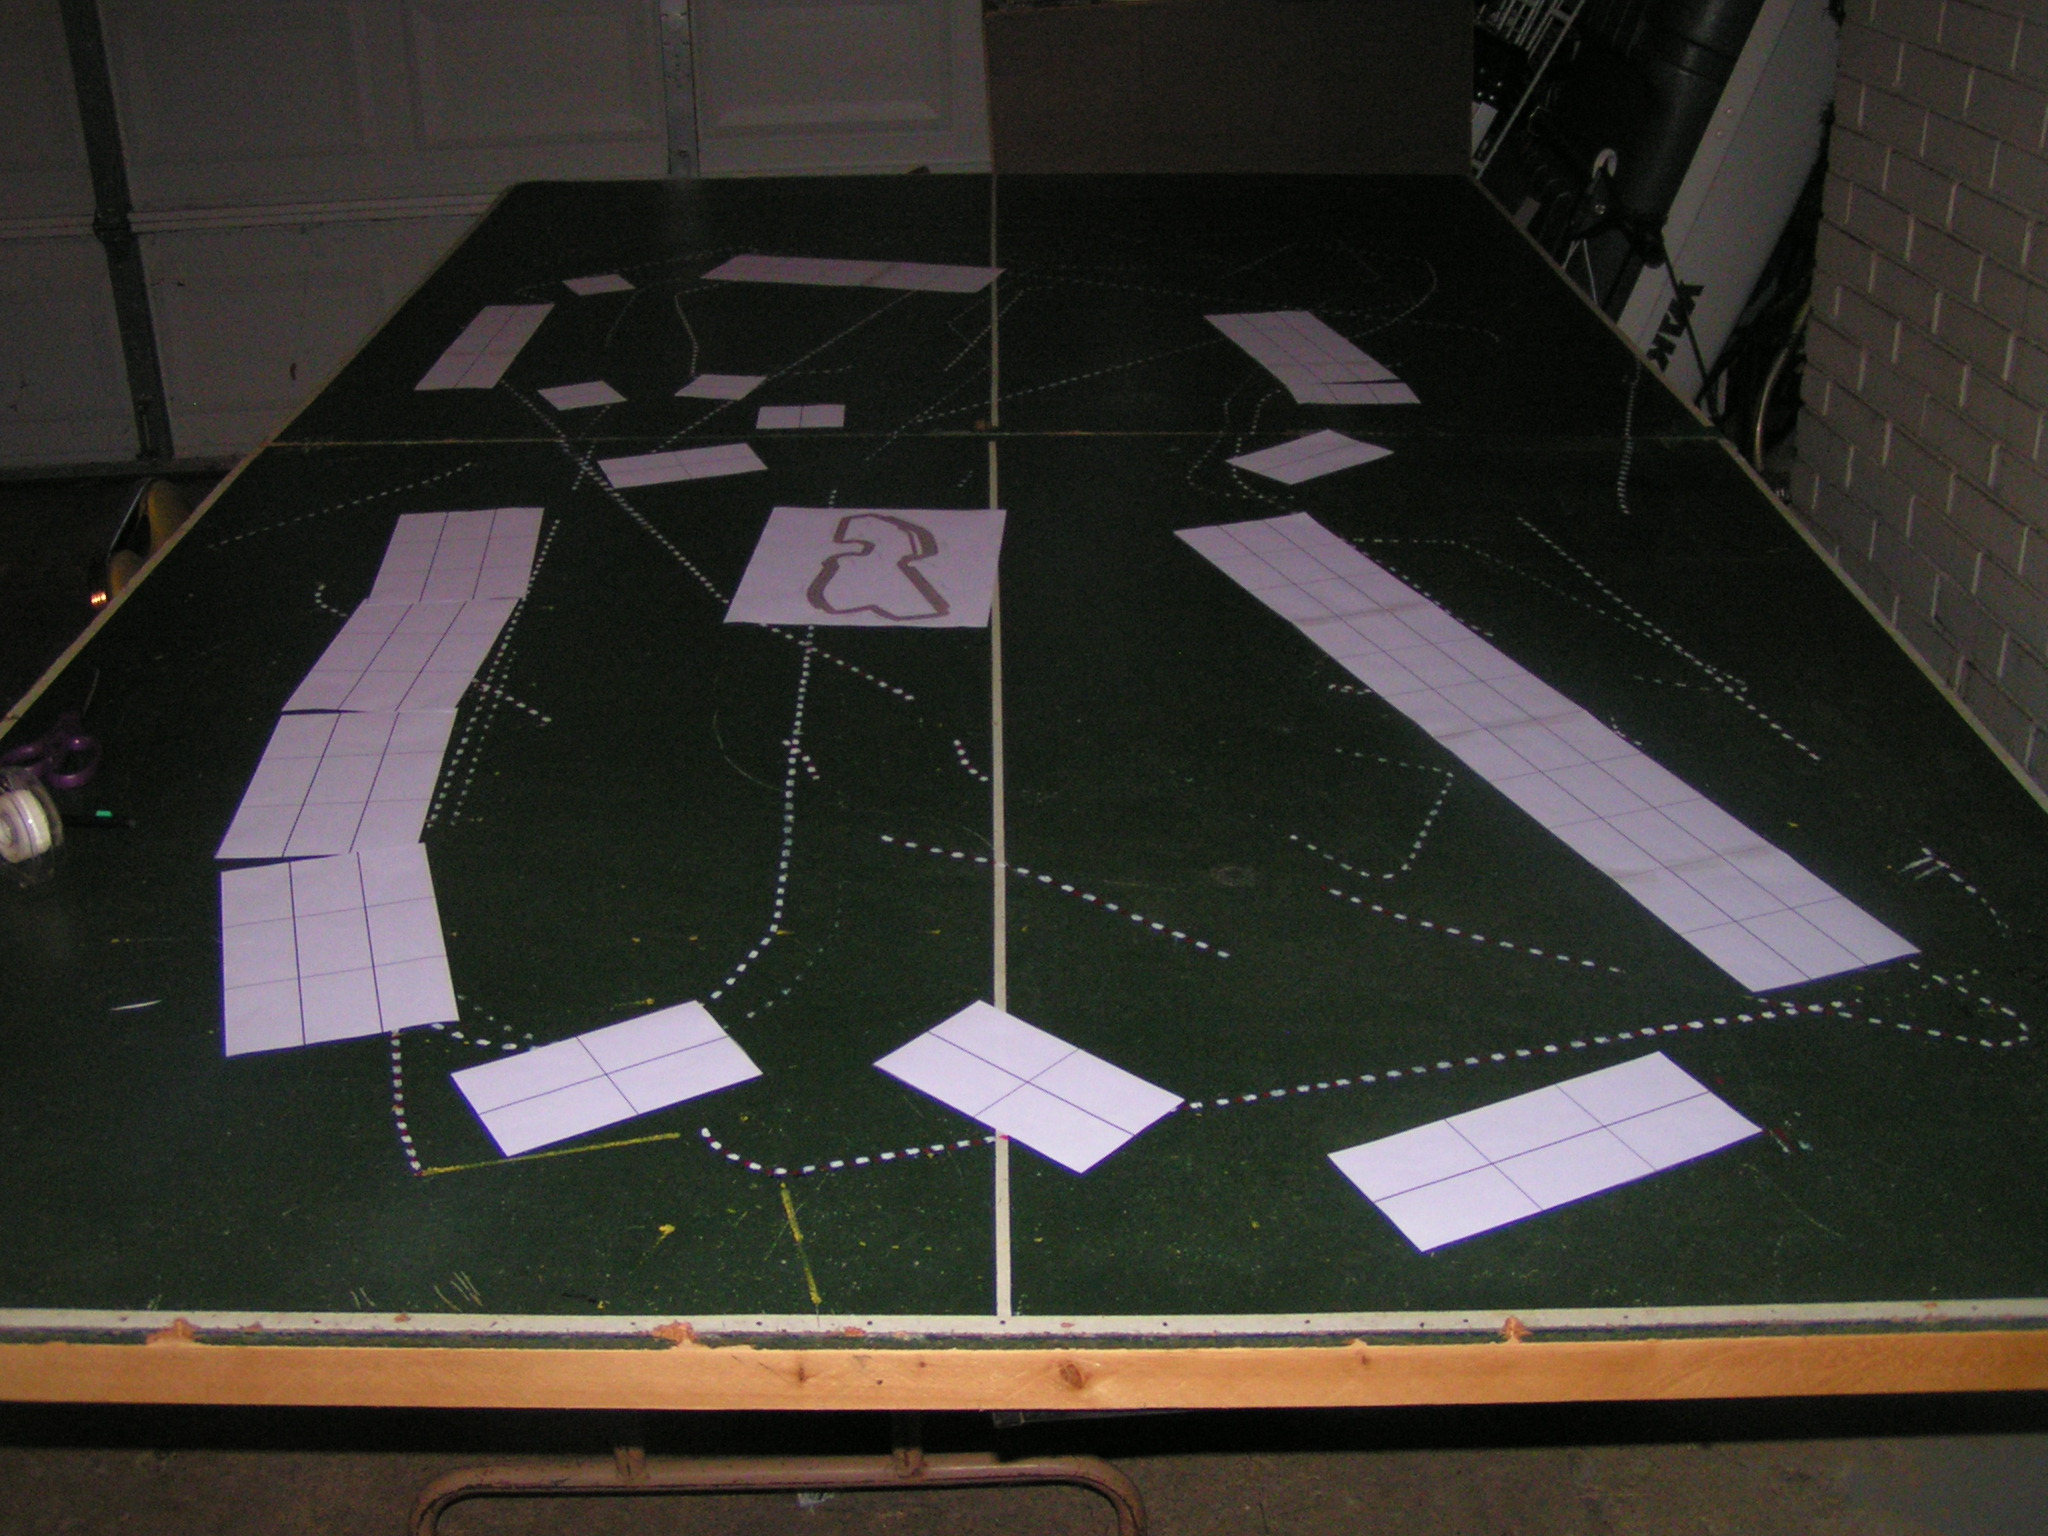
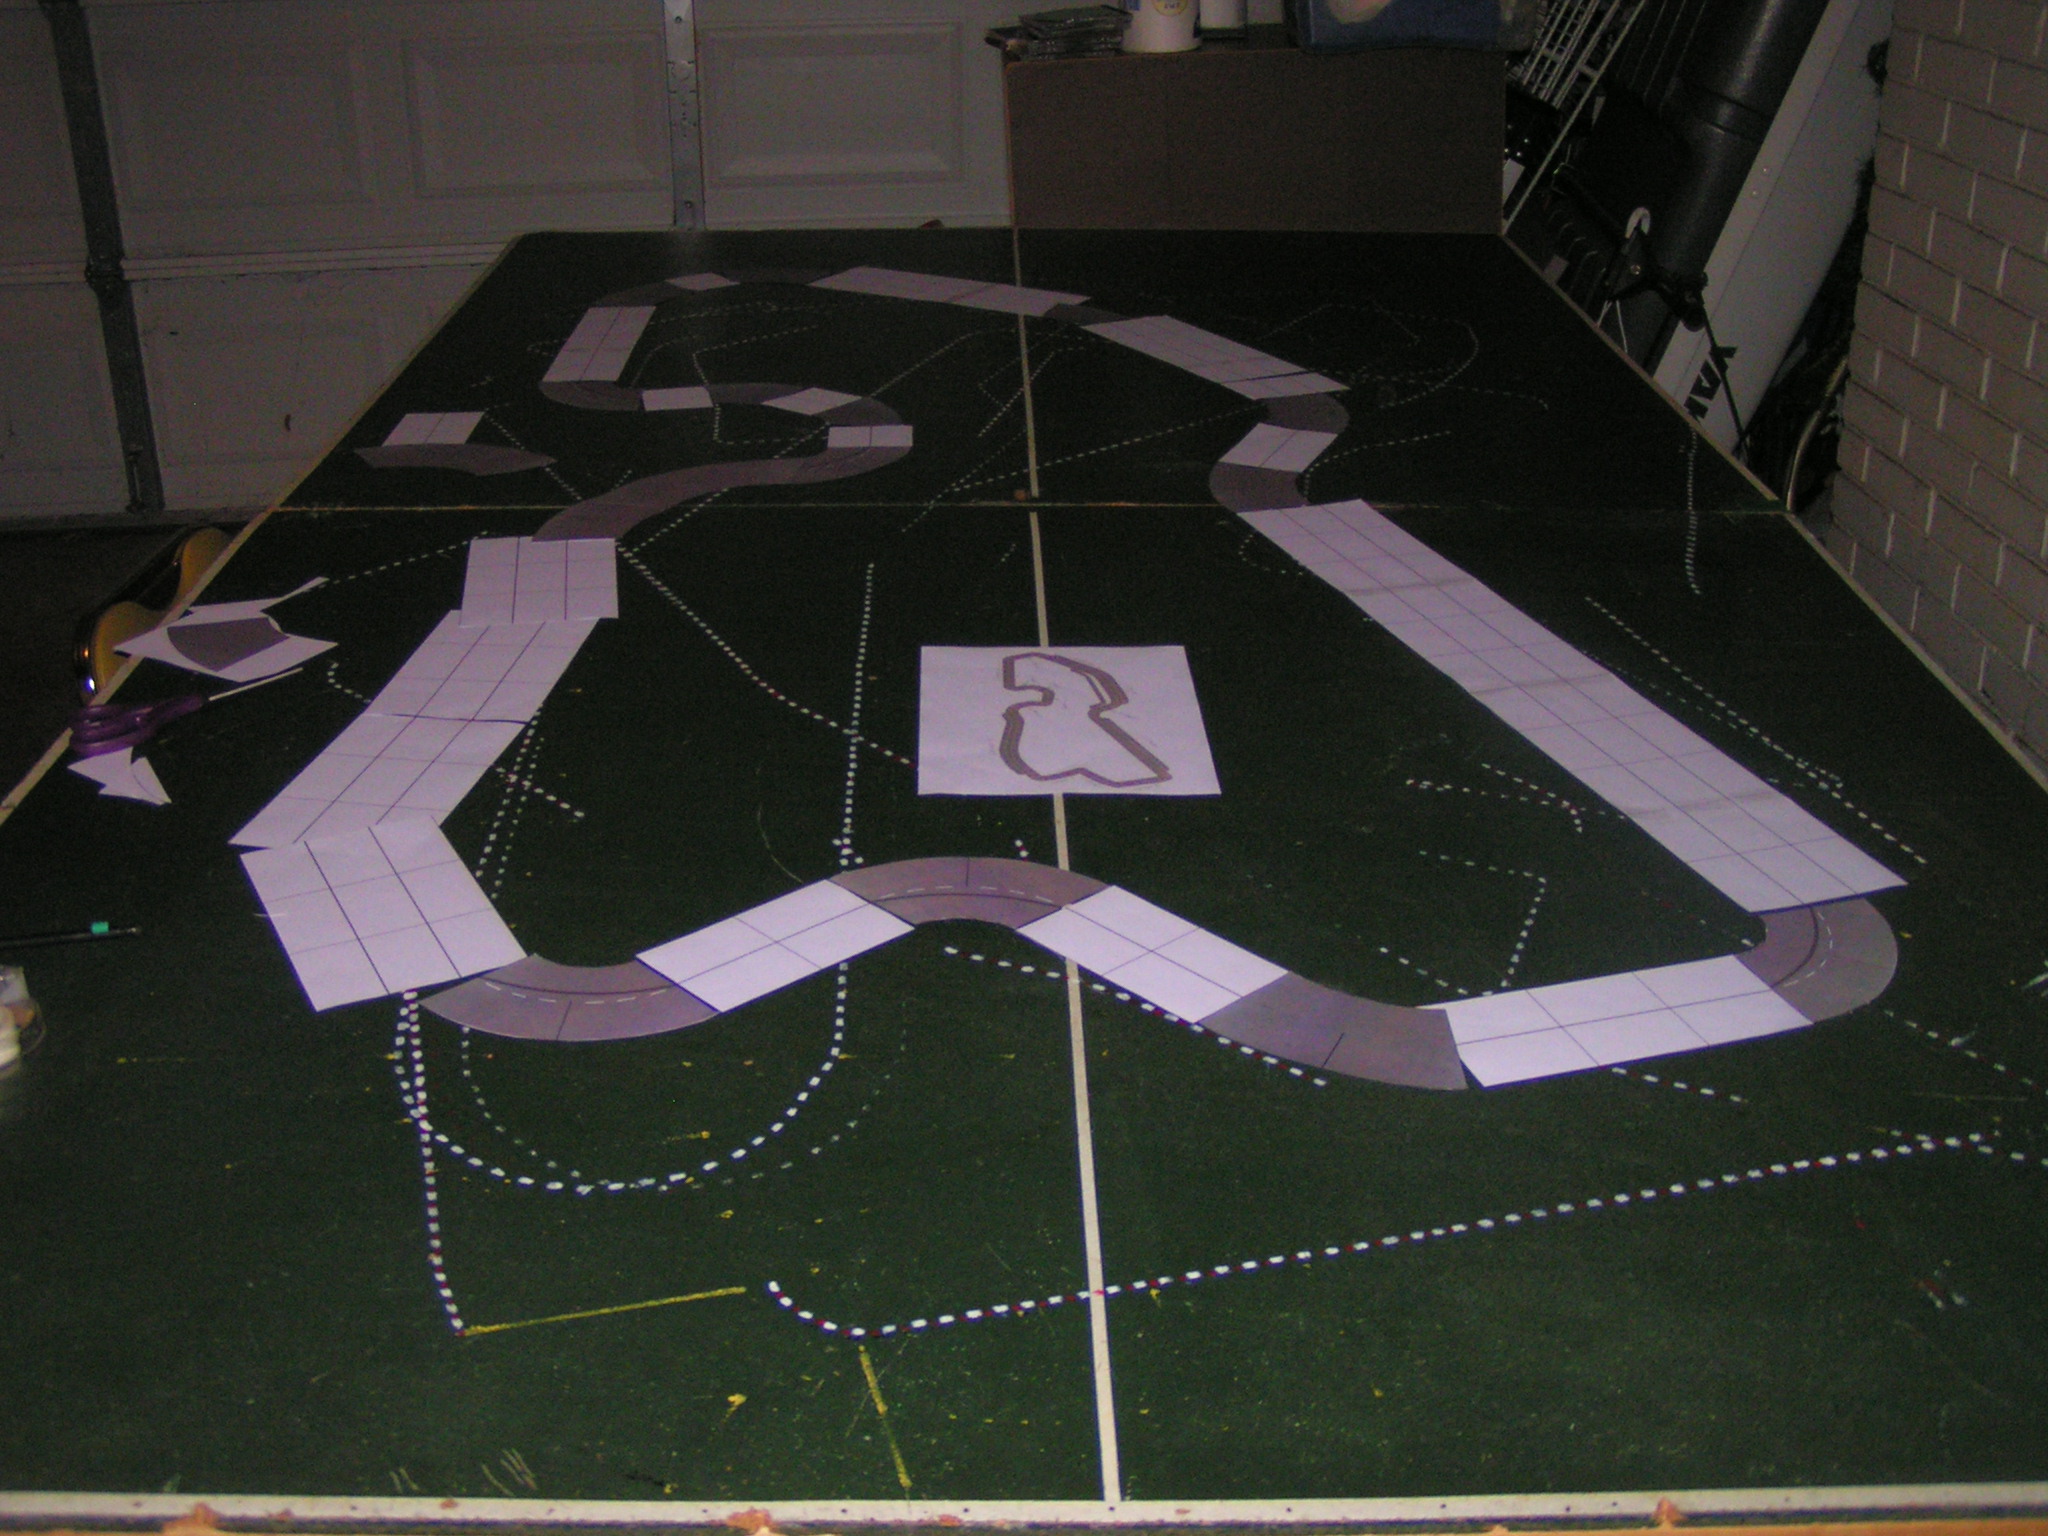
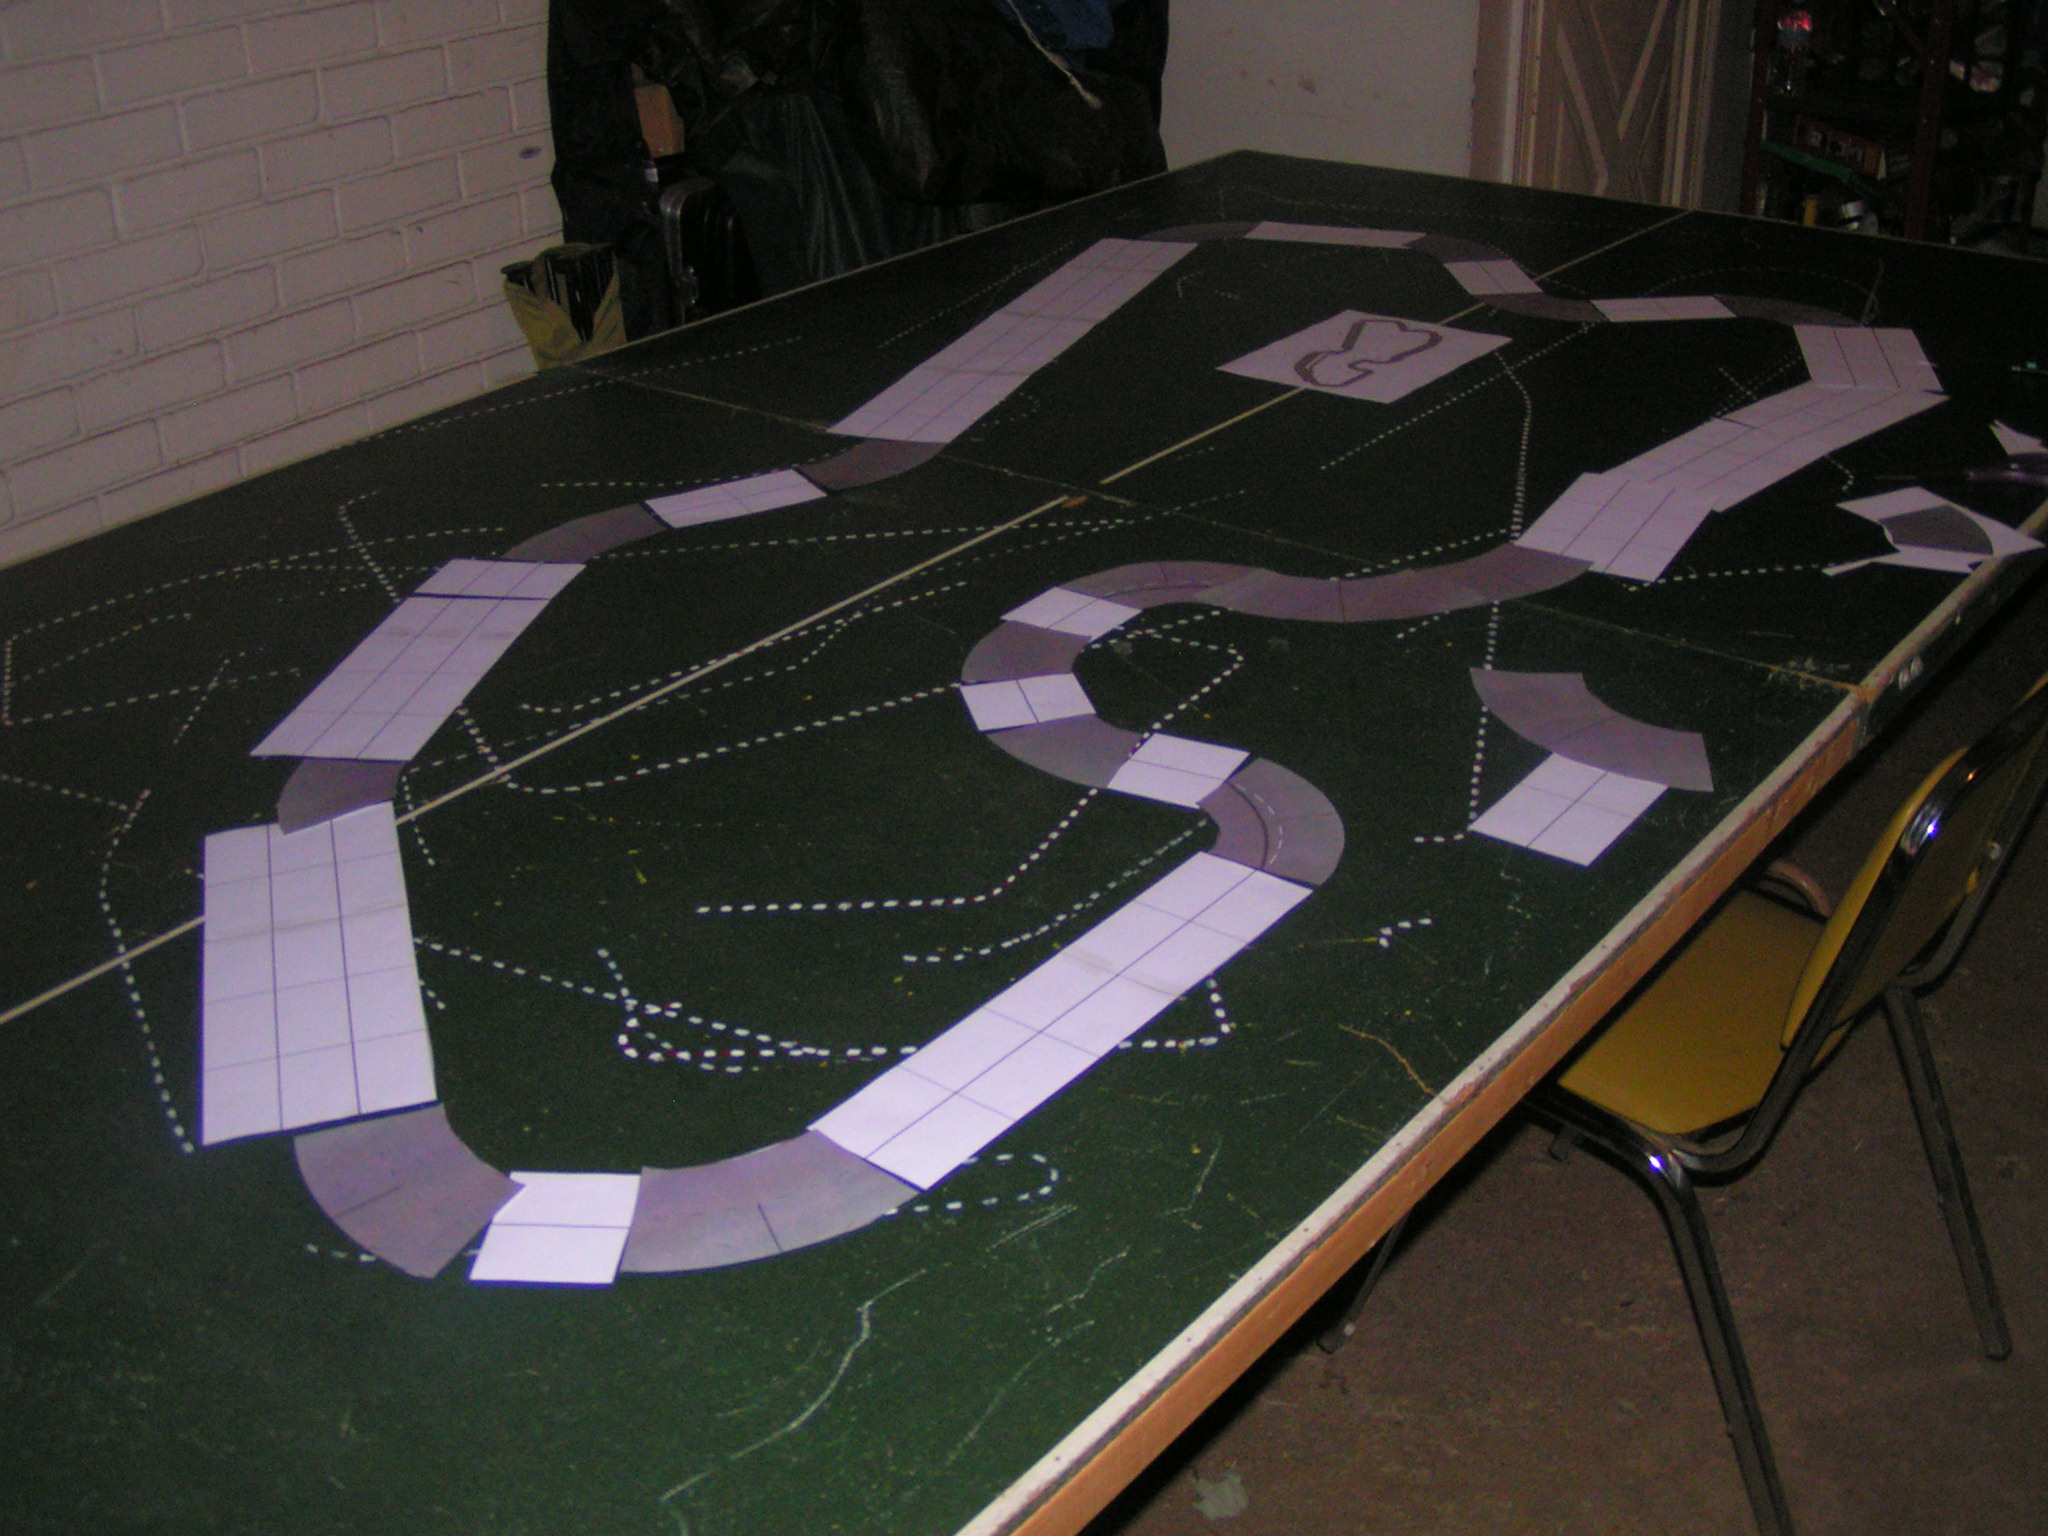
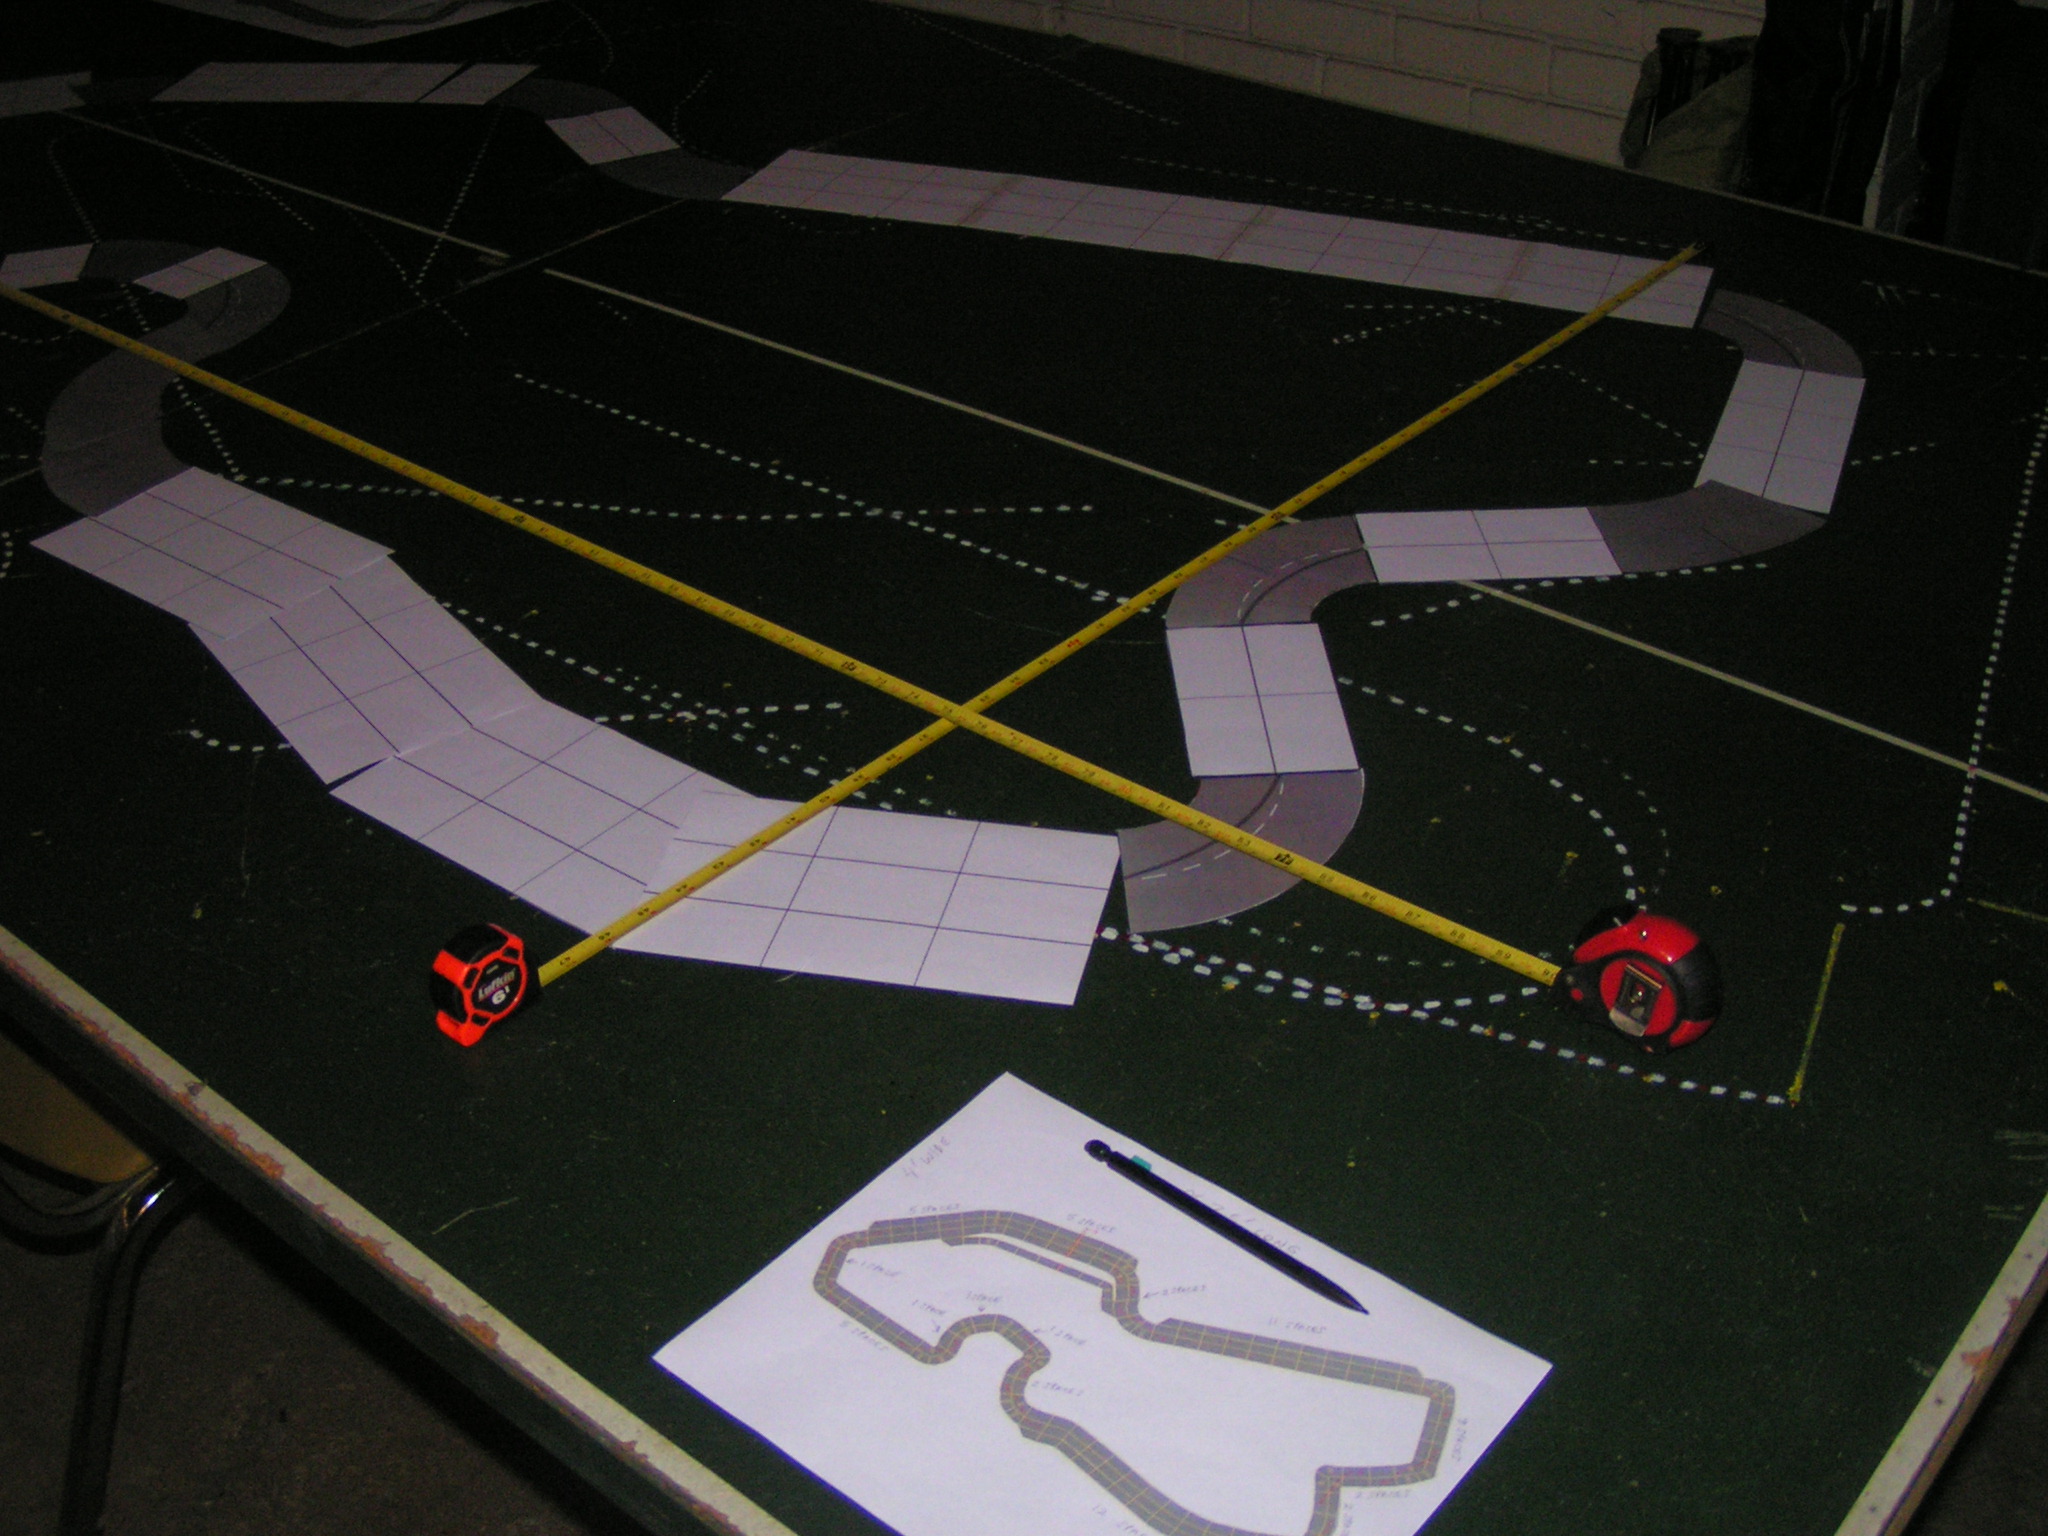
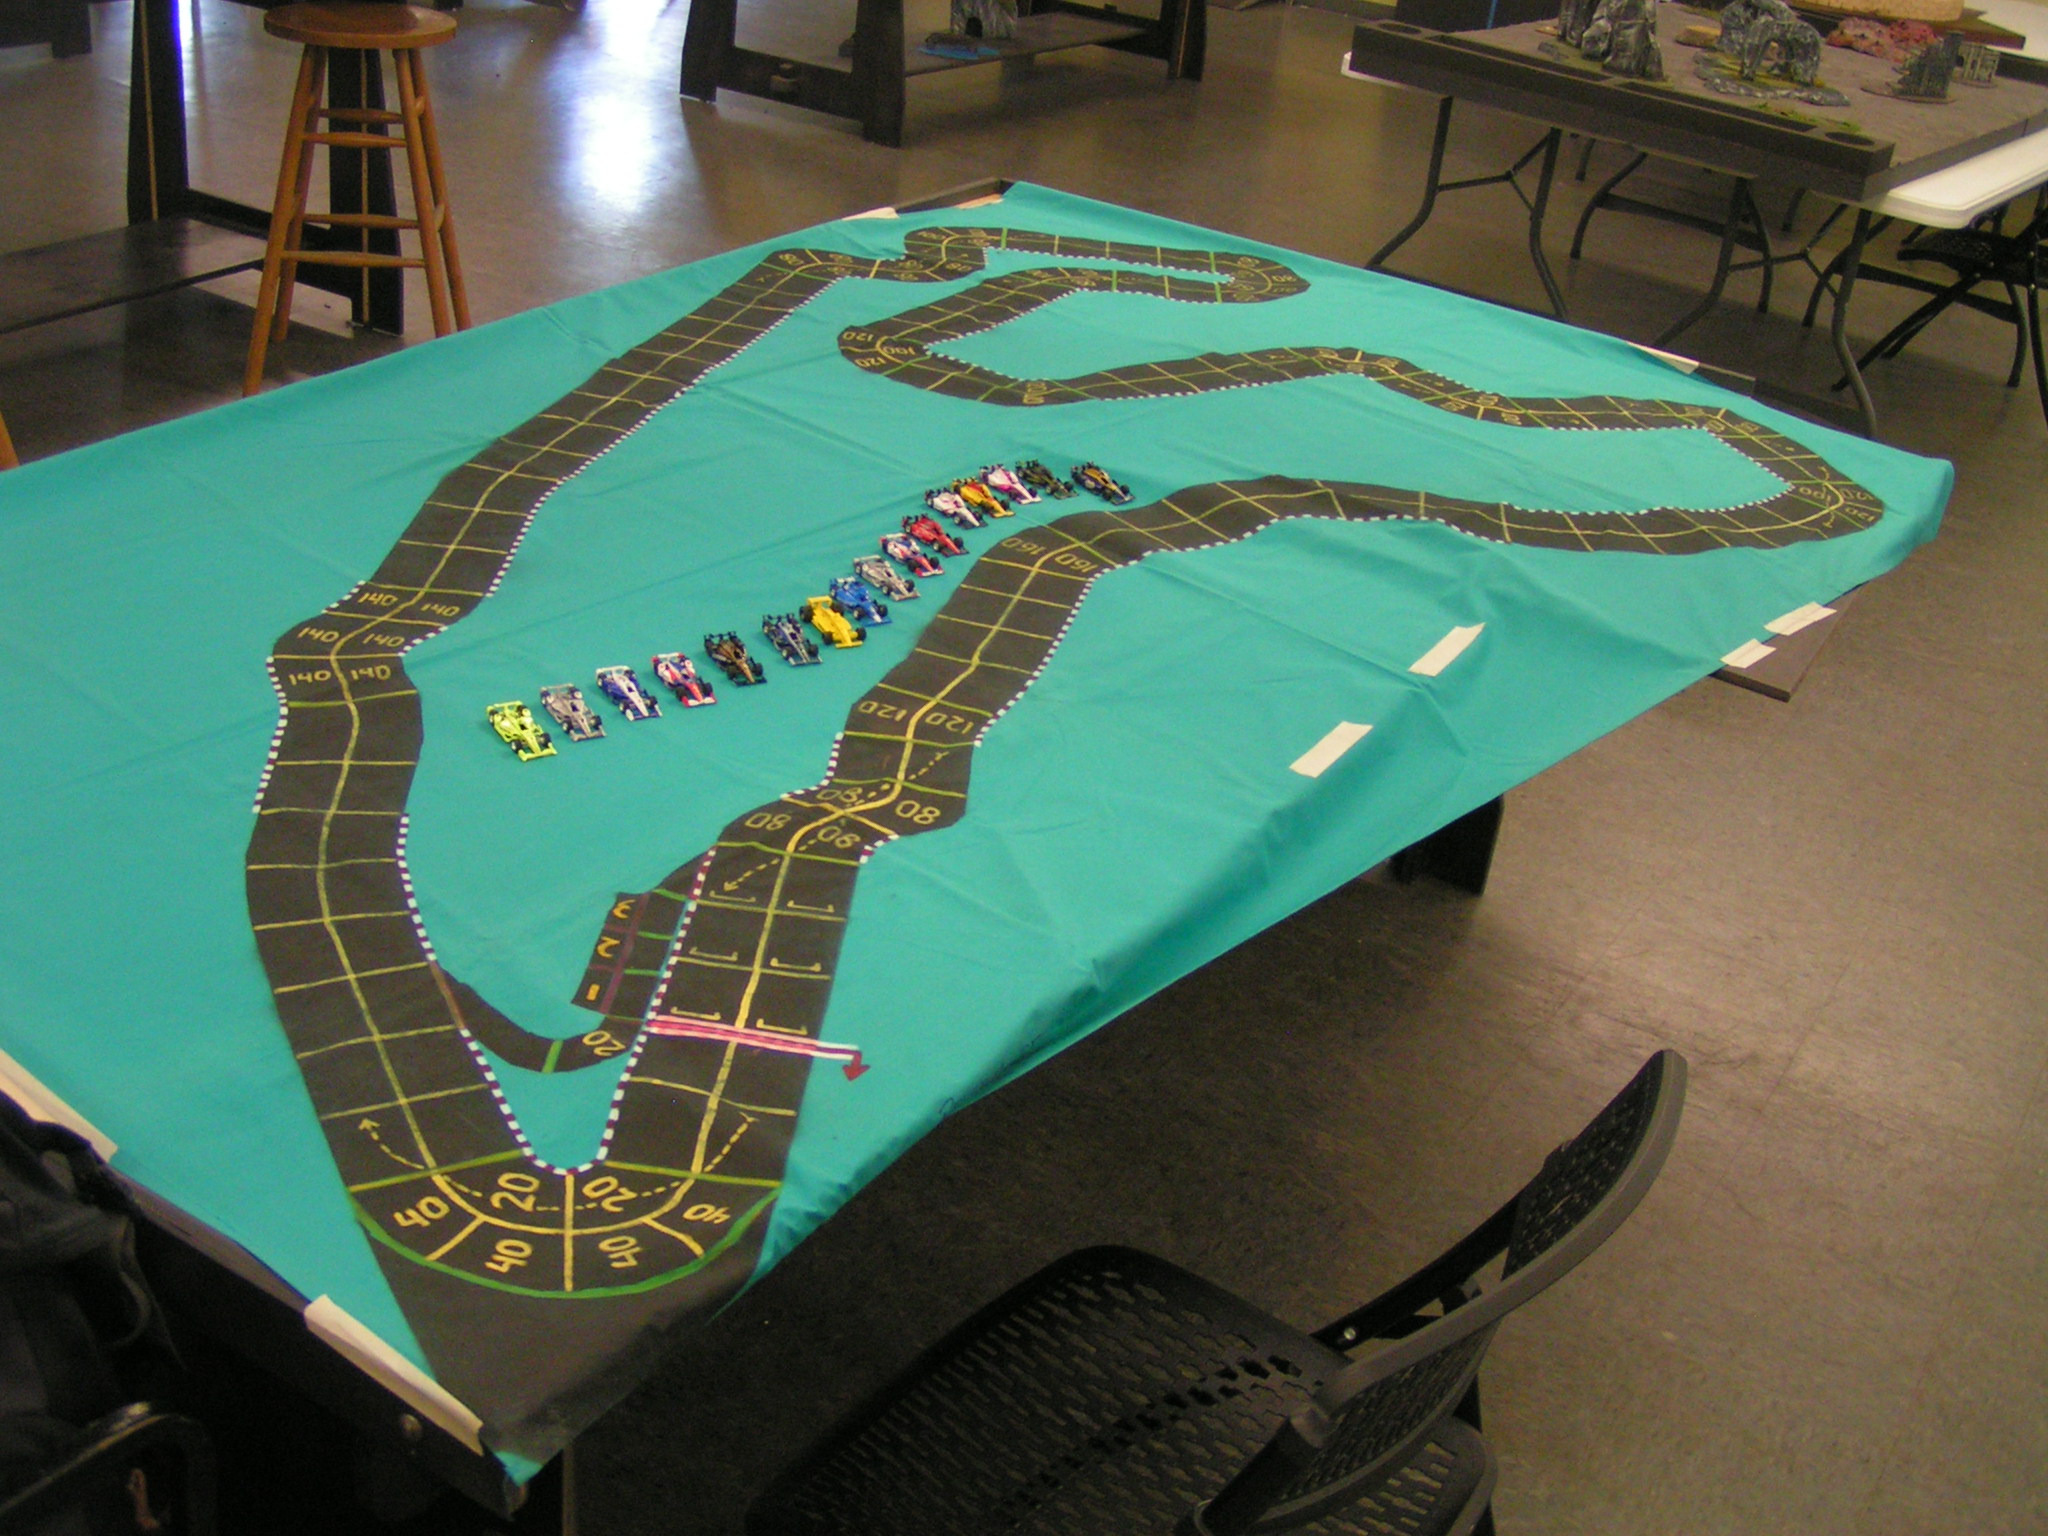
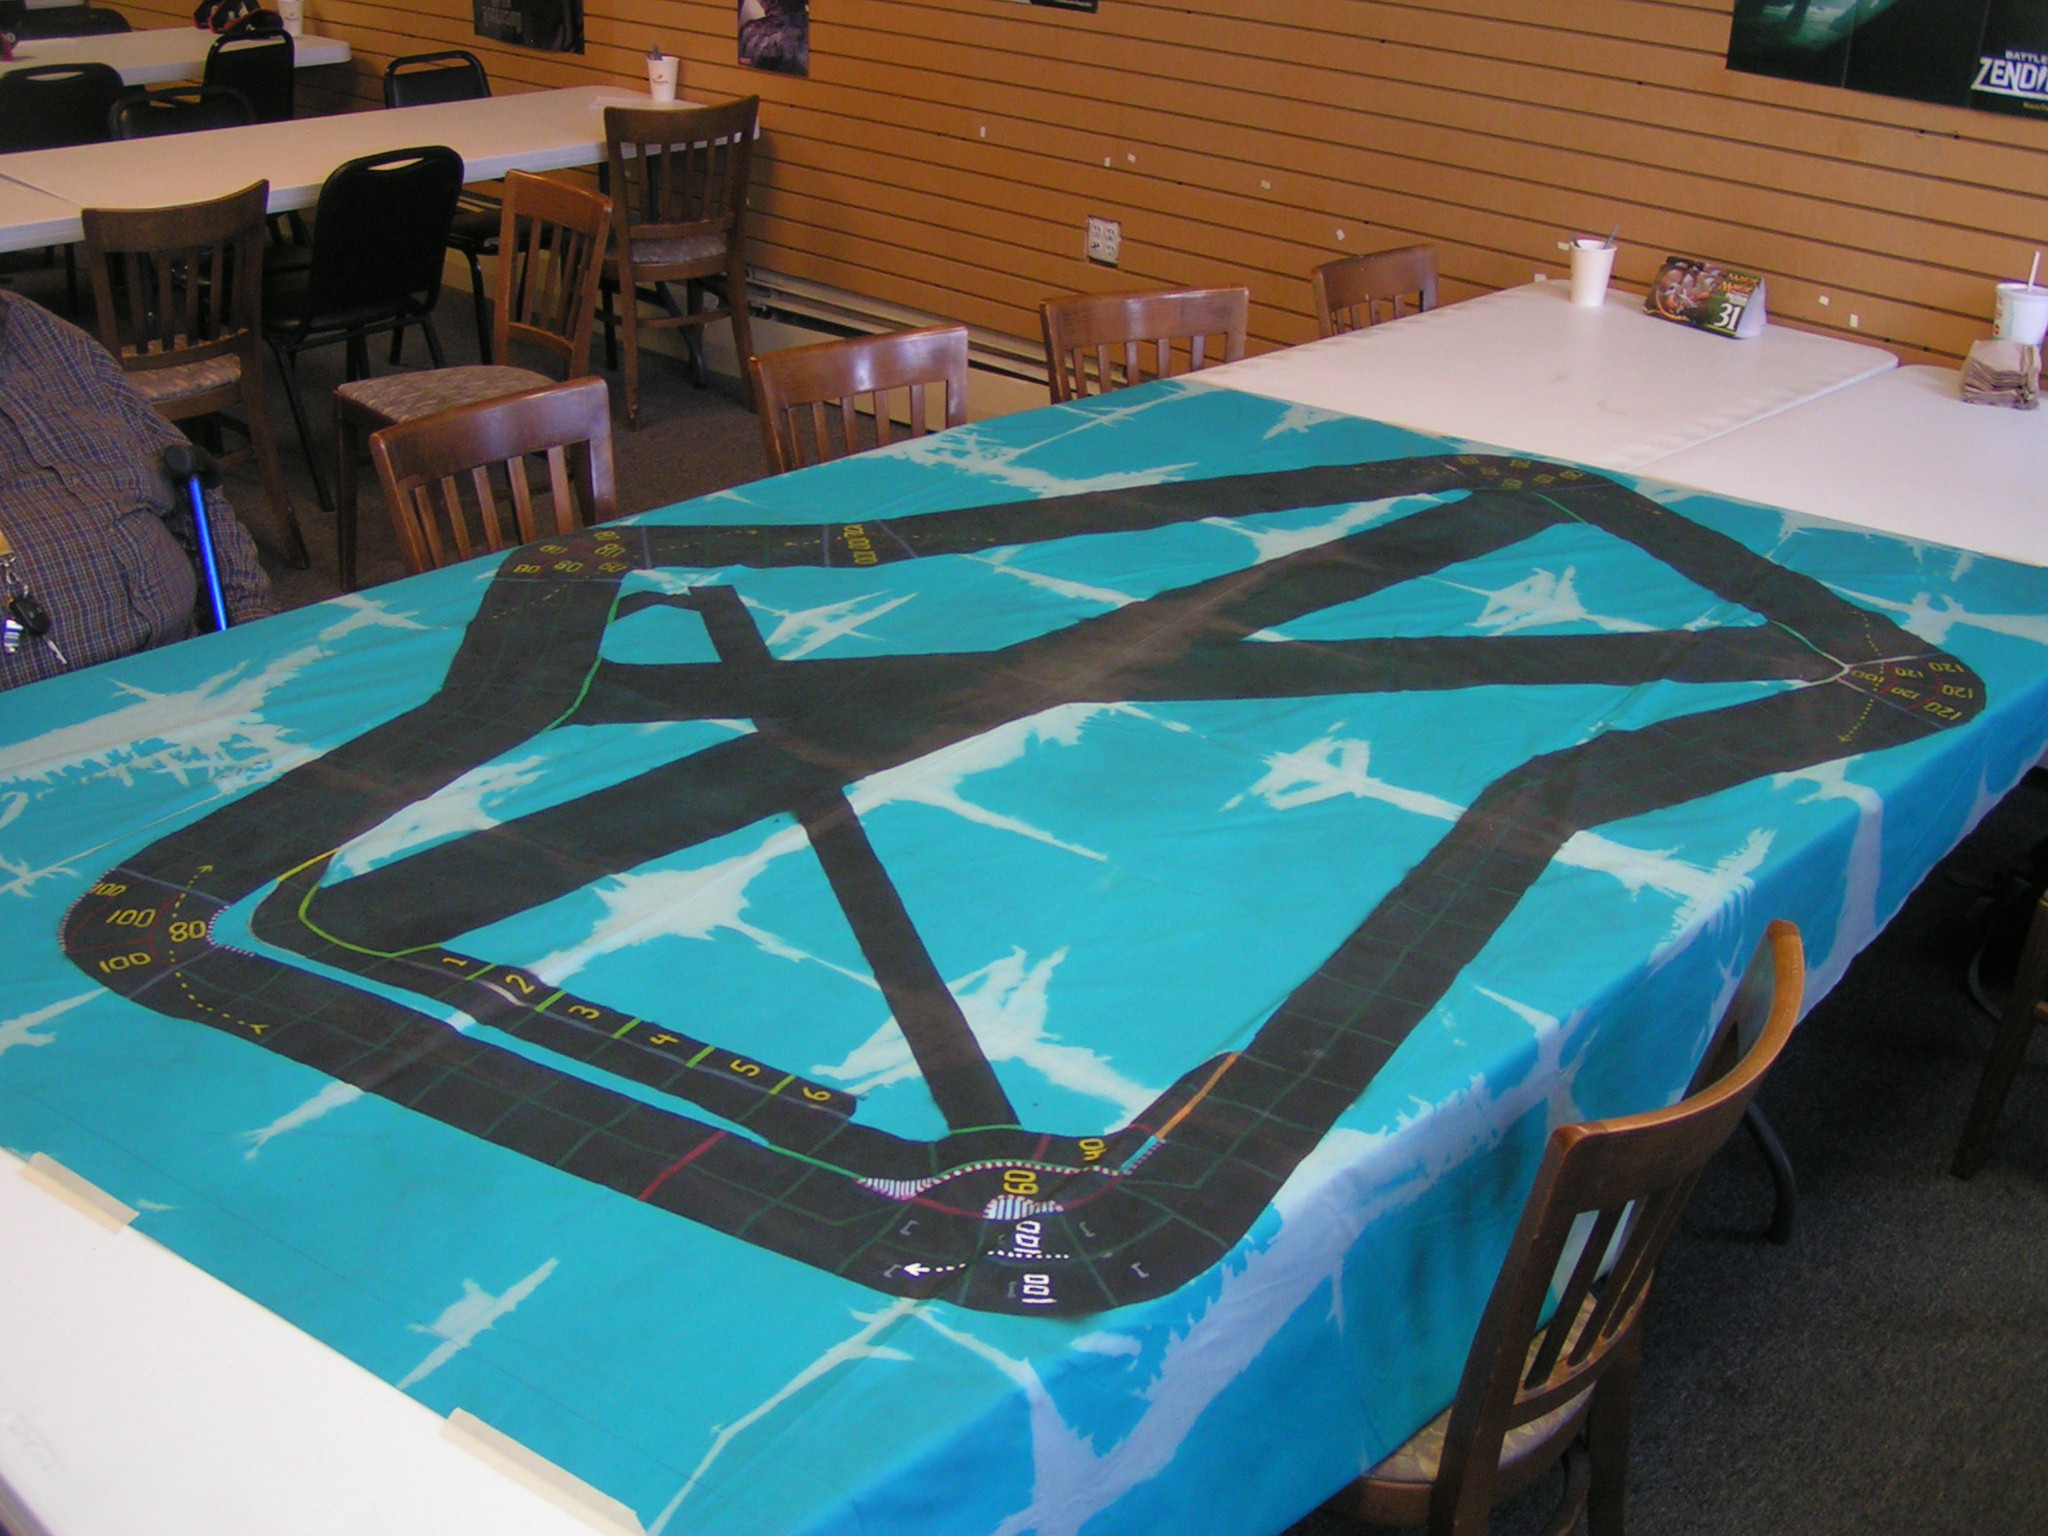
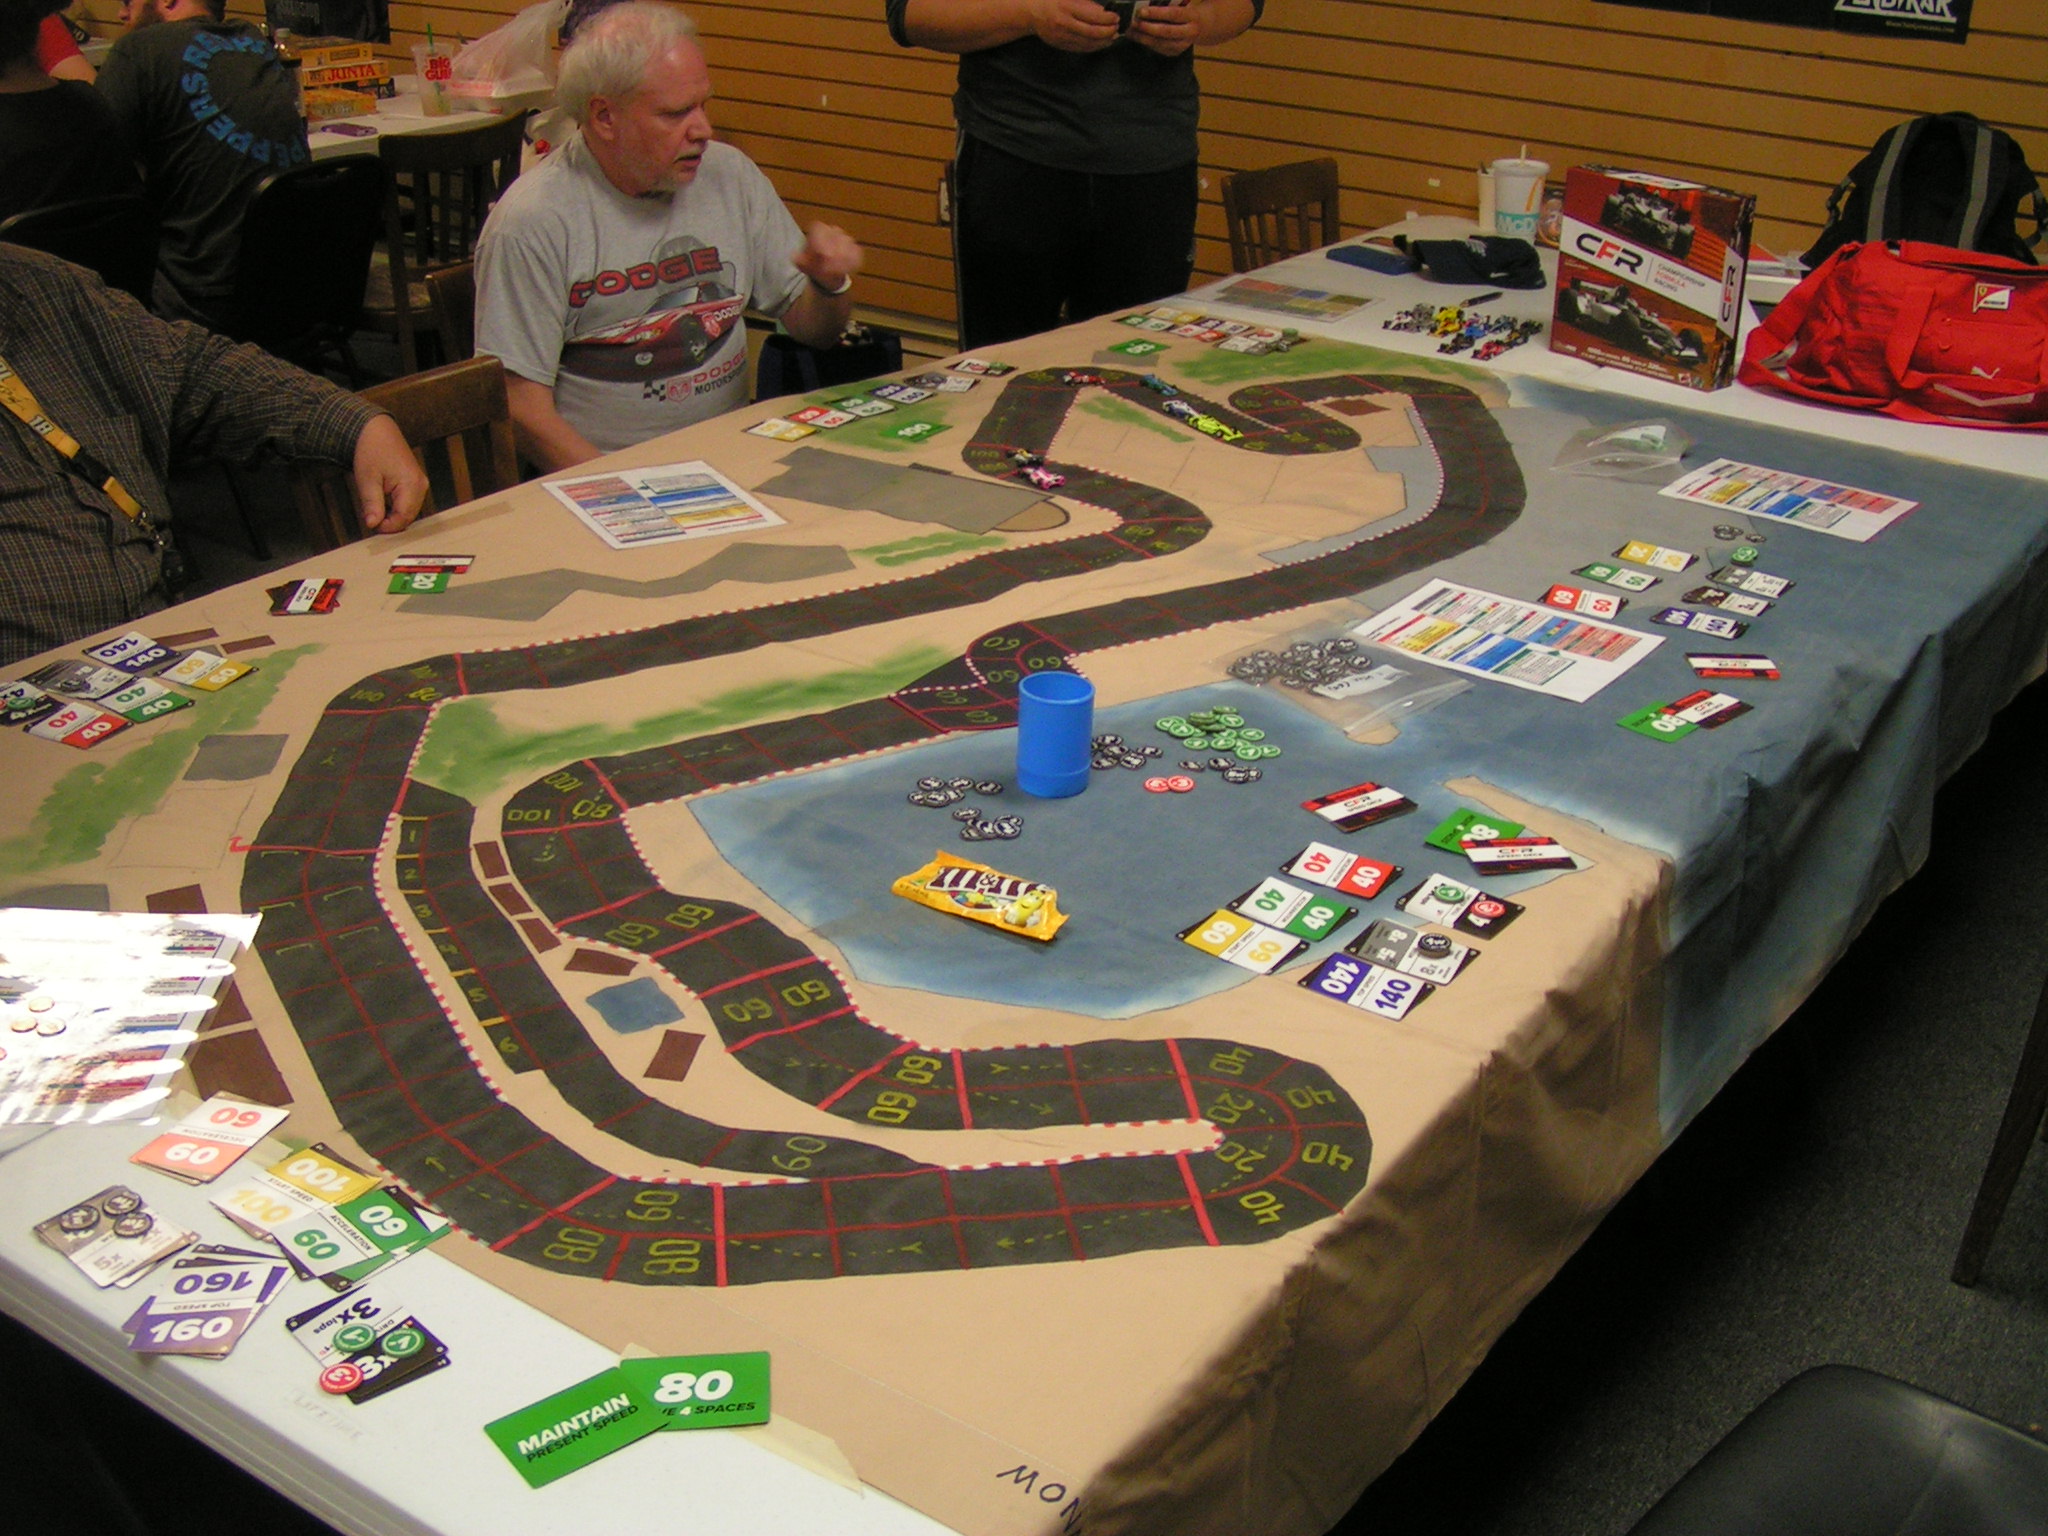
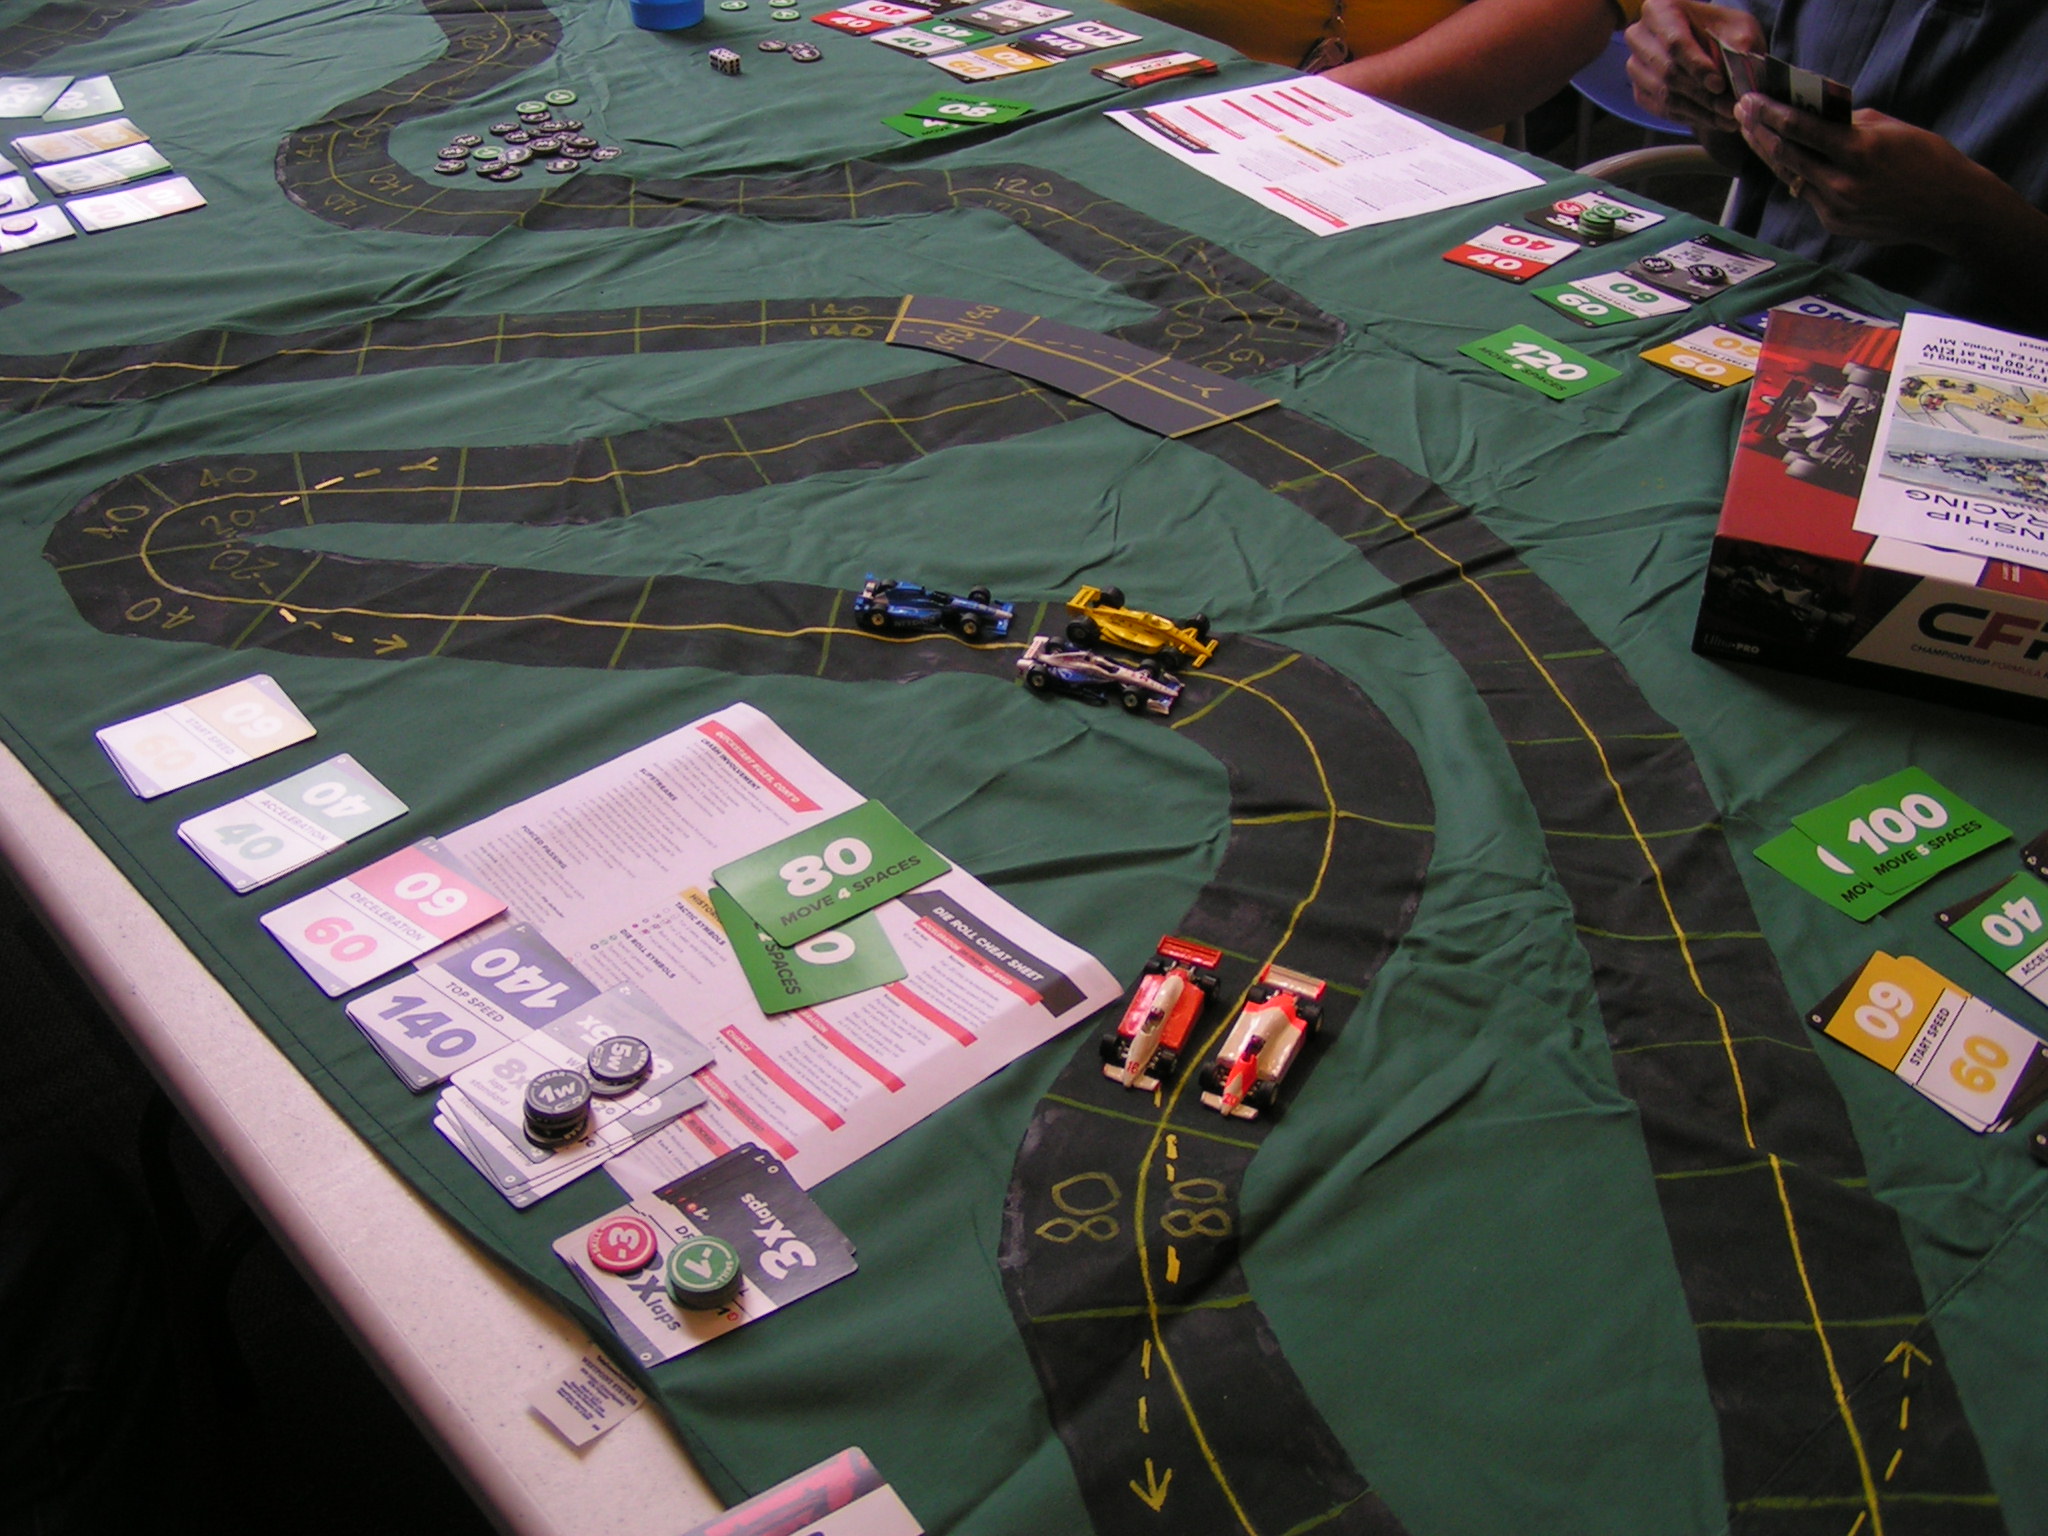
The modern Silverstone track as rendered in 1:64 scale for use with Championship Formula Racing.

Pole position was determined by drivers secretly bidding a number of their Wear and/or Skill markers. Jack Beckman won the pole position with a high bid of 7. Gary Sturgeon started on the outside of row 1 with his bid of 3. Sturgeon bid 6 Skill markers (each of which counts as 1/2 of a Wear for pole bid purposes), which used all of his Skill markers he had available for the race. The second row had Mike Cook and Jim Robinson. Although each of those drivers bid 2.5, Cook won the dice roll and so started on the inside. Brian Robinson, Garry Kaluzny, and Jim Landis all bid 2, with B. Robinson winning the dice roll to start 5th, then came Kaluzny in 6th and Landis in 7th. Greg Lim bid 0.5 (a single Skill marker) to start 8th, and Richard White started 9th as he did not bid anything.

The starting grid and car specs:

 # Driver (Car)                     Start/Accel/Decel/Top/Wear/Skill/Tires
 3 Jack Beckman (Ferrari)            100    40    40  160  5x    2x   hard
12 Gary Sturgeon (John Player Lotus)  20    60    60  180  4x    2x   hard
11 Mike Cook (Camel Lotus)            60    60    40  180  3x    3x   hard
 2 Jim Robinson (Williams)            60    40    40  160  5x    3x   soft
 5 Brian Robinson (Walker Racing)     20    60    60  180  3x    3x   soft
 9 Garry Kaluzny (McLaren)            20    60    40  180  5x    2x   soft
20 Jim Landis (Benetton)              60    40    40  180  5x    2x   soft
 7 Greg Lim (Motorola)                20    60    60  180  3x    3x   hard
 1 Richard White (Brabham)            60    40    40  180  4x    3x   soft

Start = Start Speed (in miles/hour); Accel = Acceleration (in mph); Decel = Deceleration (in mph); Top = Top Speed (in mph); Wear = # of Wear markers per lap raced; Skill = # of Skill markers per lap raced; Tires = hard or soft tires to begin the race. (Since the race was 3 laps, a car with 4x of Wear would receive 12 Wear markers to start the race (as an example).)

Once again, we were using the optional CFR rules for pit stops and tire compounds. Four drivers started on hard tires, and five started on soft tires. Soft tires give some driving advantages, such as being able to use a Wear to increase your start speed or your acceleration without having to roll dice, plus with soft tires you could use 3 Wear to go 60 mph over the speed limit in a corner without having to roll dice, instead of having to use only 2 Wear and roll on the Chance table if you were 60 mph in a corner while using hard tires. If a car was on hard tires, it could regain a few wear when passing the finish line each lap it did not pit for new tires. All drivers had to make at least one pit stop as they needed to use both hard and soft tires at some time during the race.

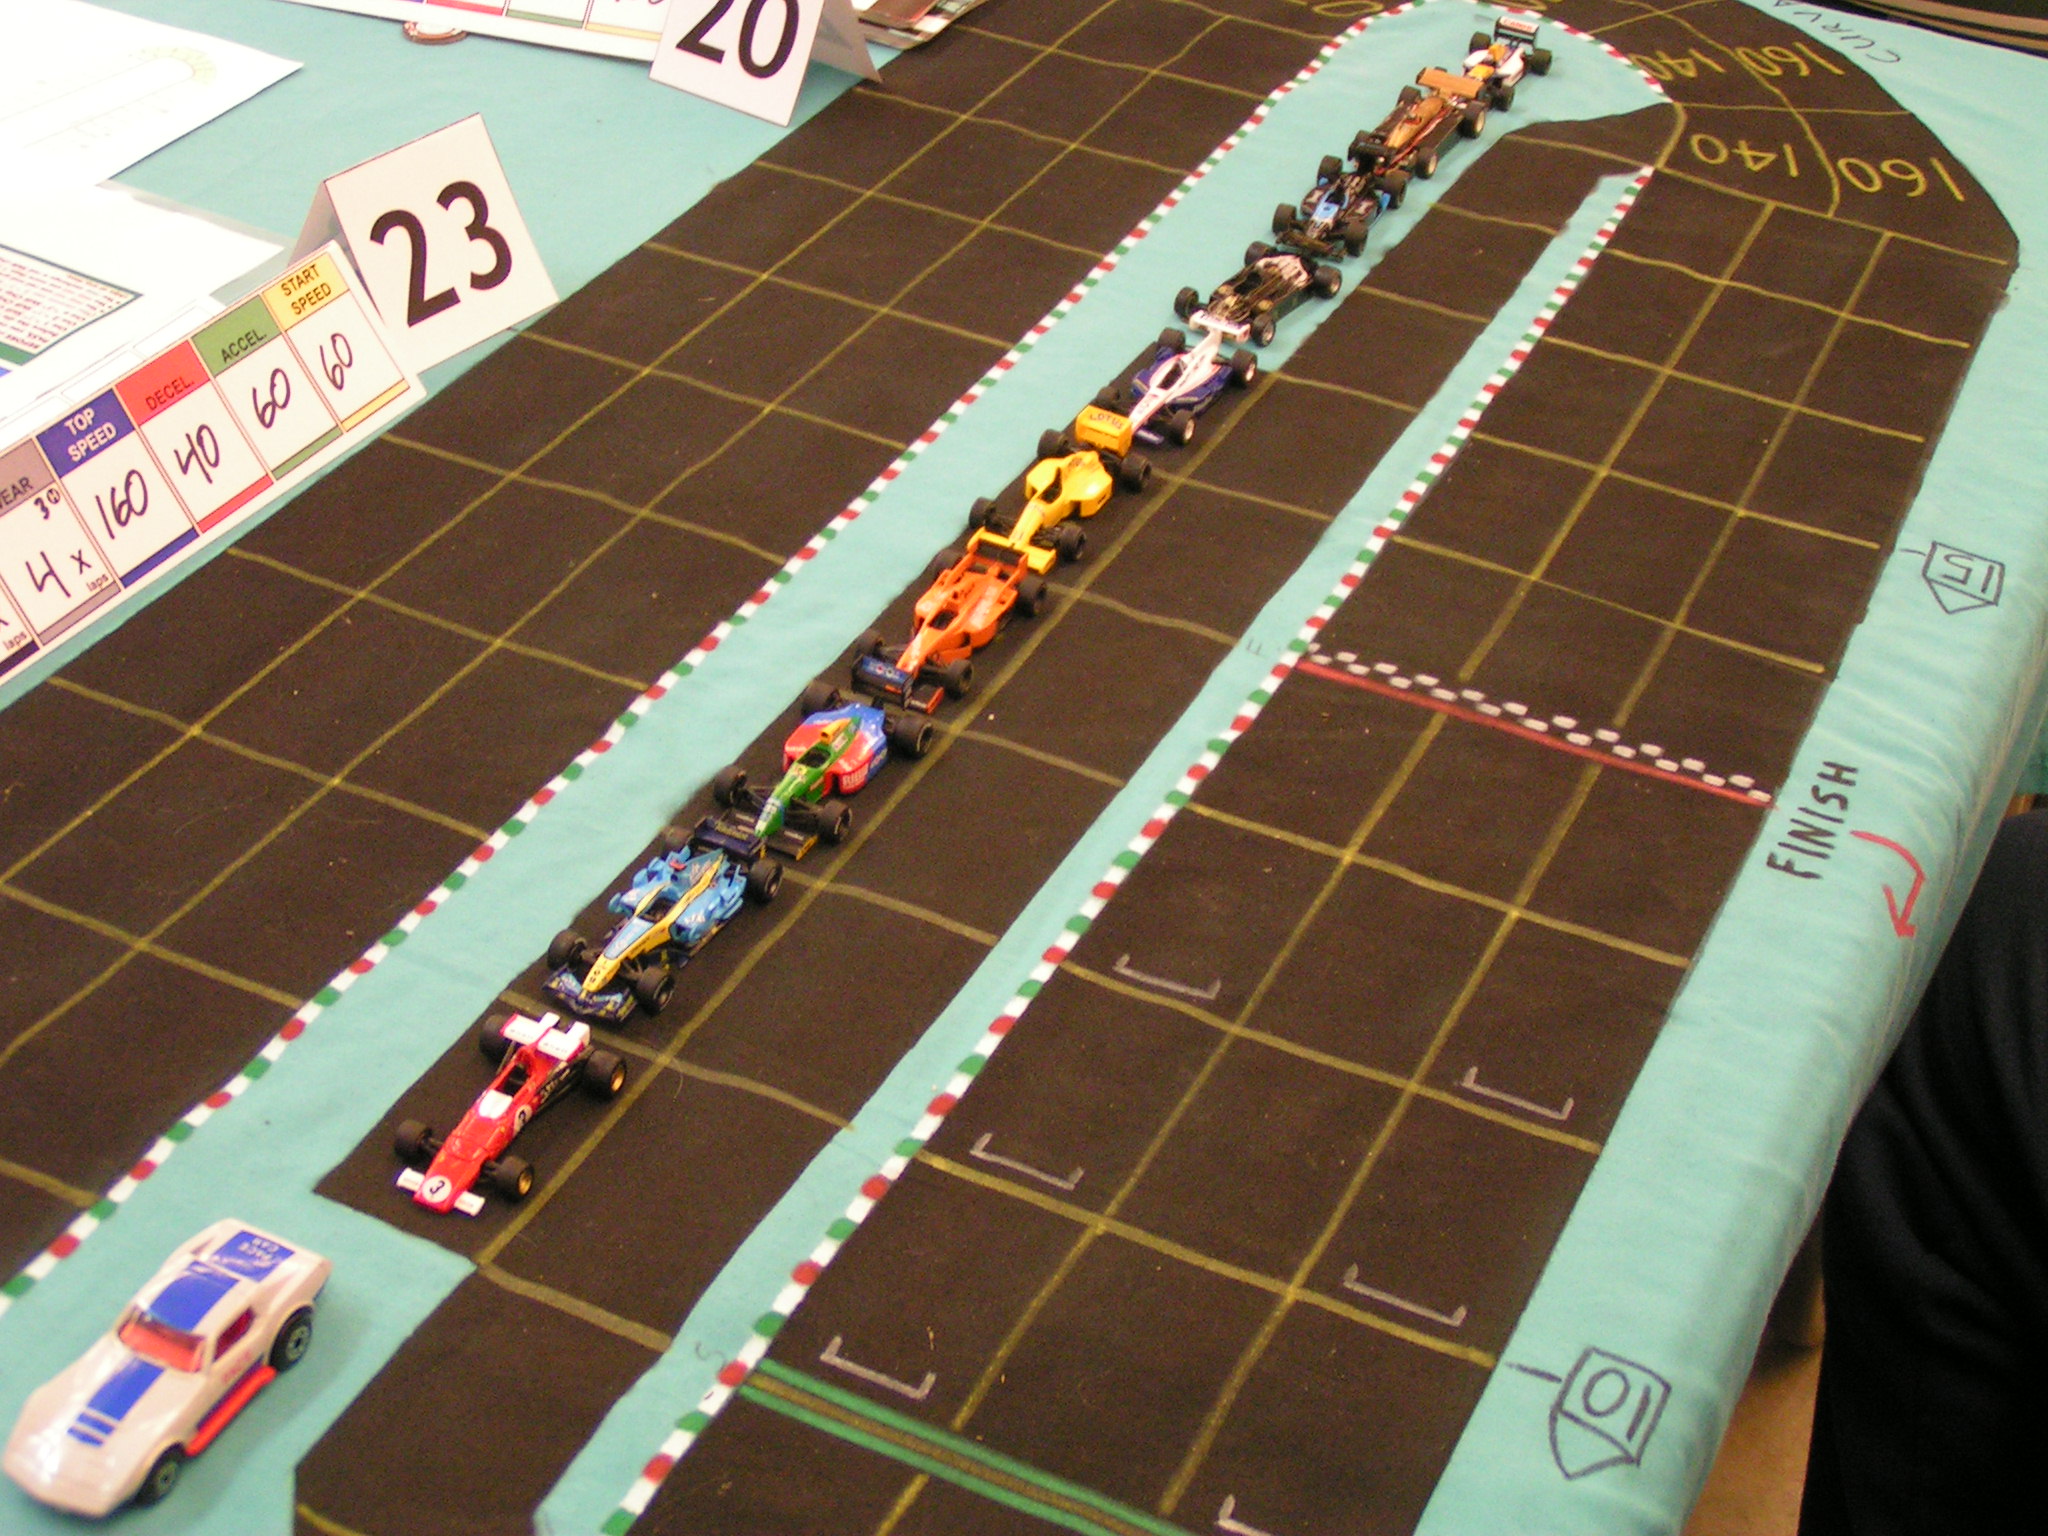
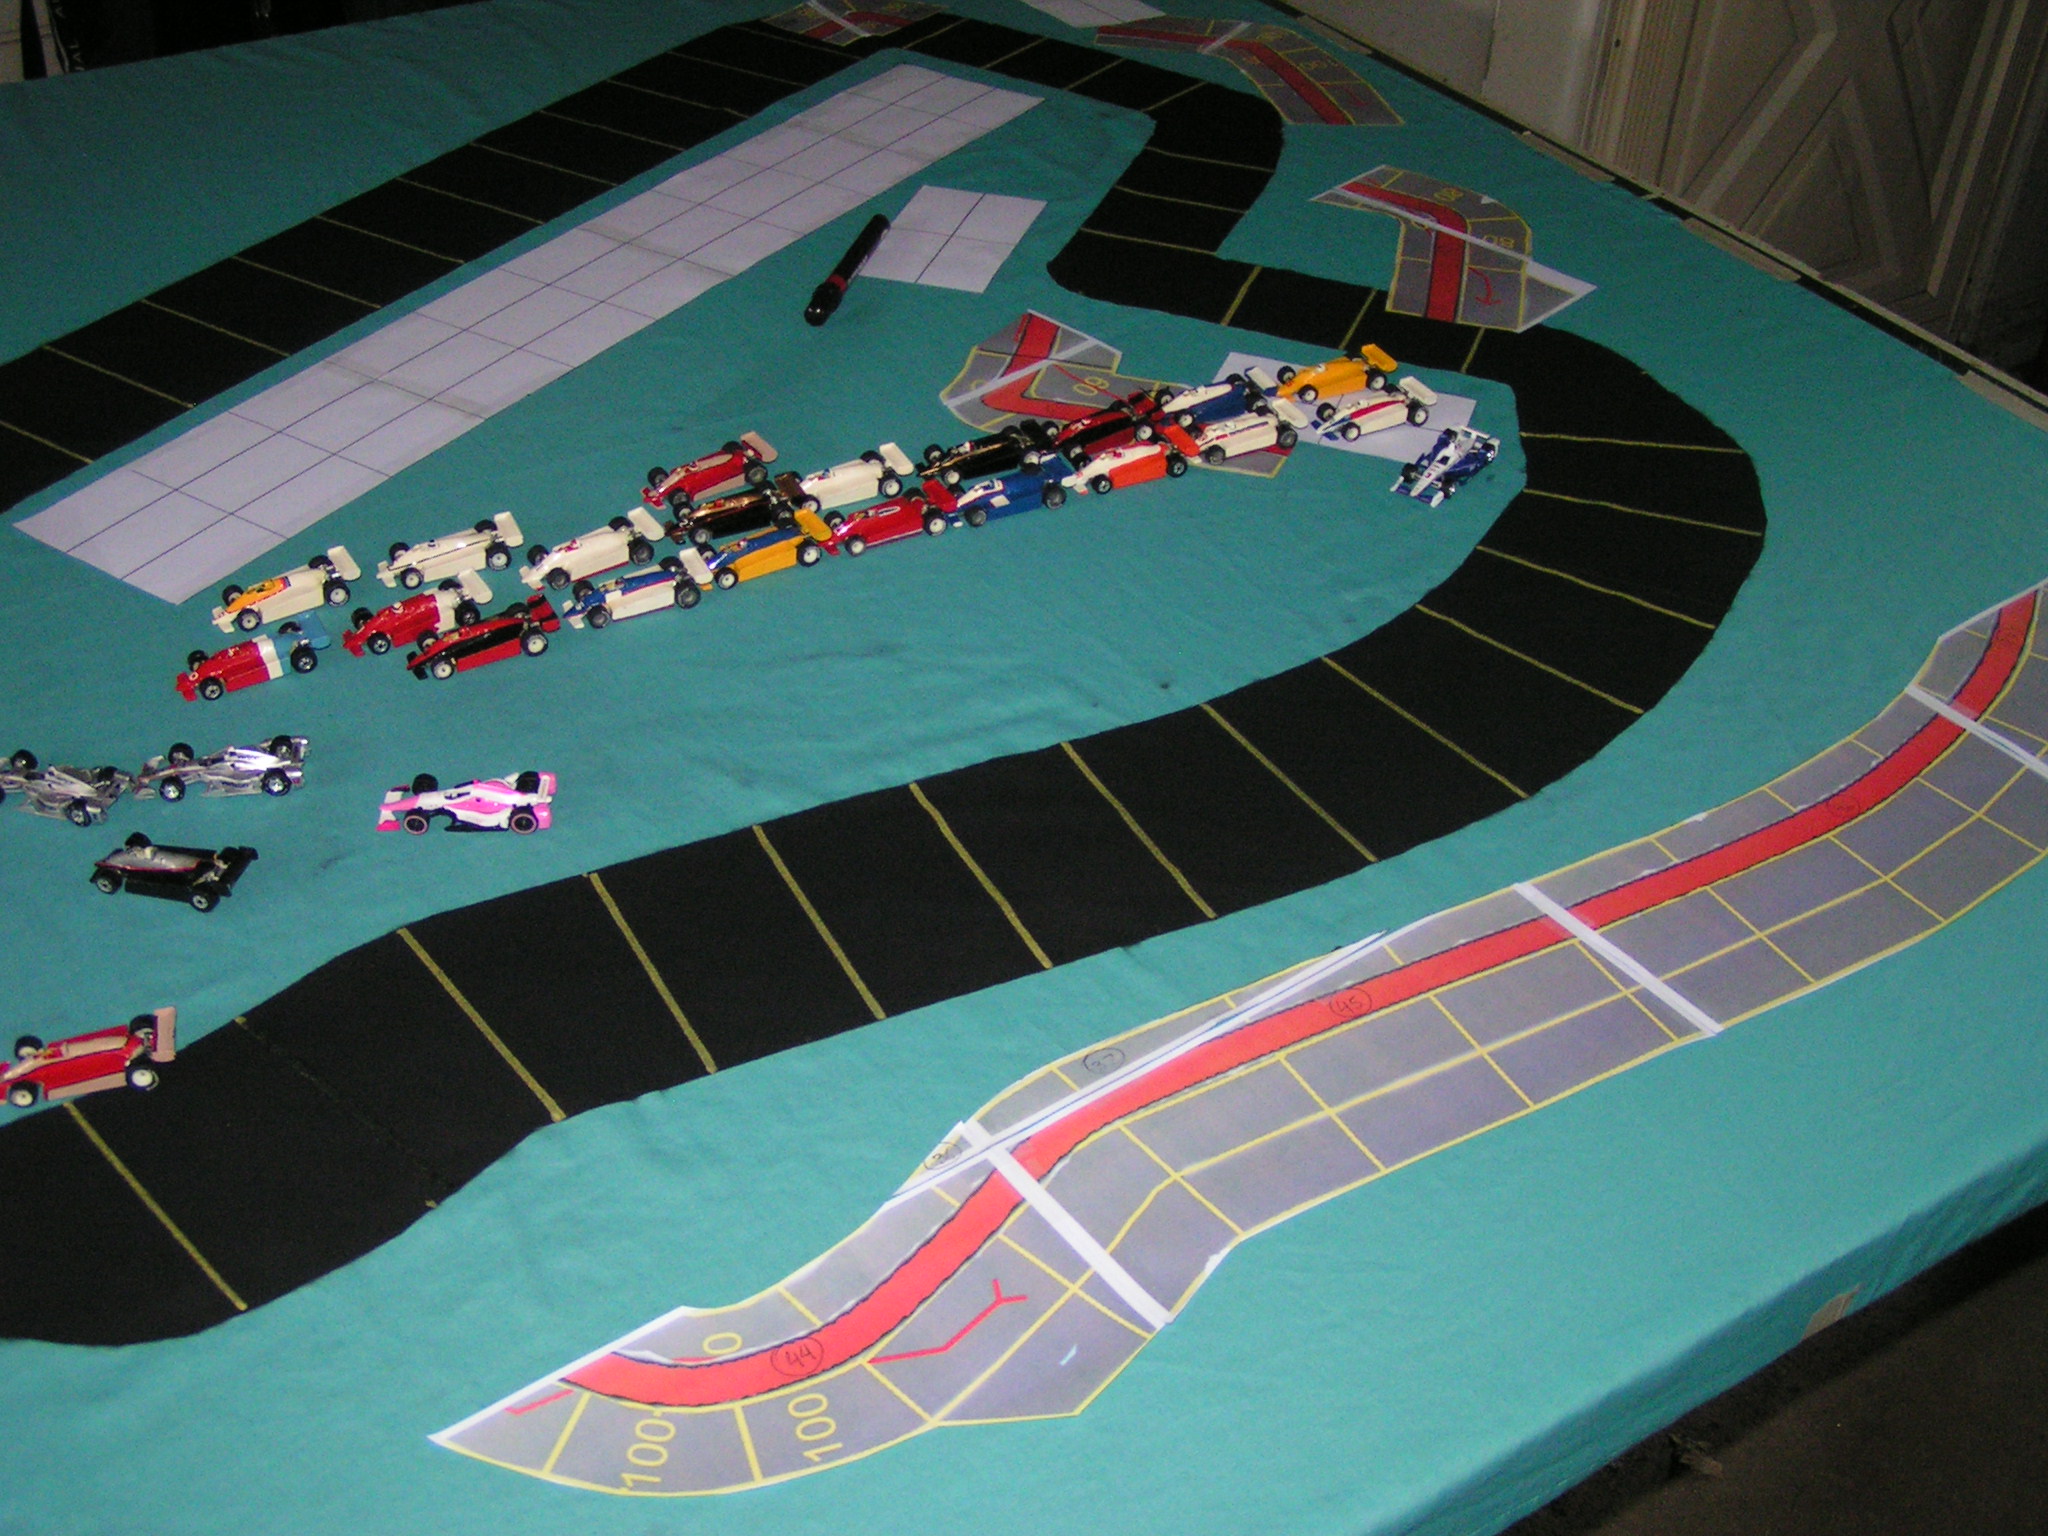
At the start, pole sitter Jack Beckman jumped into the lead with his 100 mph start speed. Jim Robinson moved up to 2nd from 4th. Mike Cook kept his 3rd position, while Gary Sturgeon dropped from 2nd to 4th. Then Brian Robinson, Garry Kaluzny, and Jim Landis were all side-by-side as they crossed the start line, followed by Richard White and Greg Lim.

The start at Silverstone.

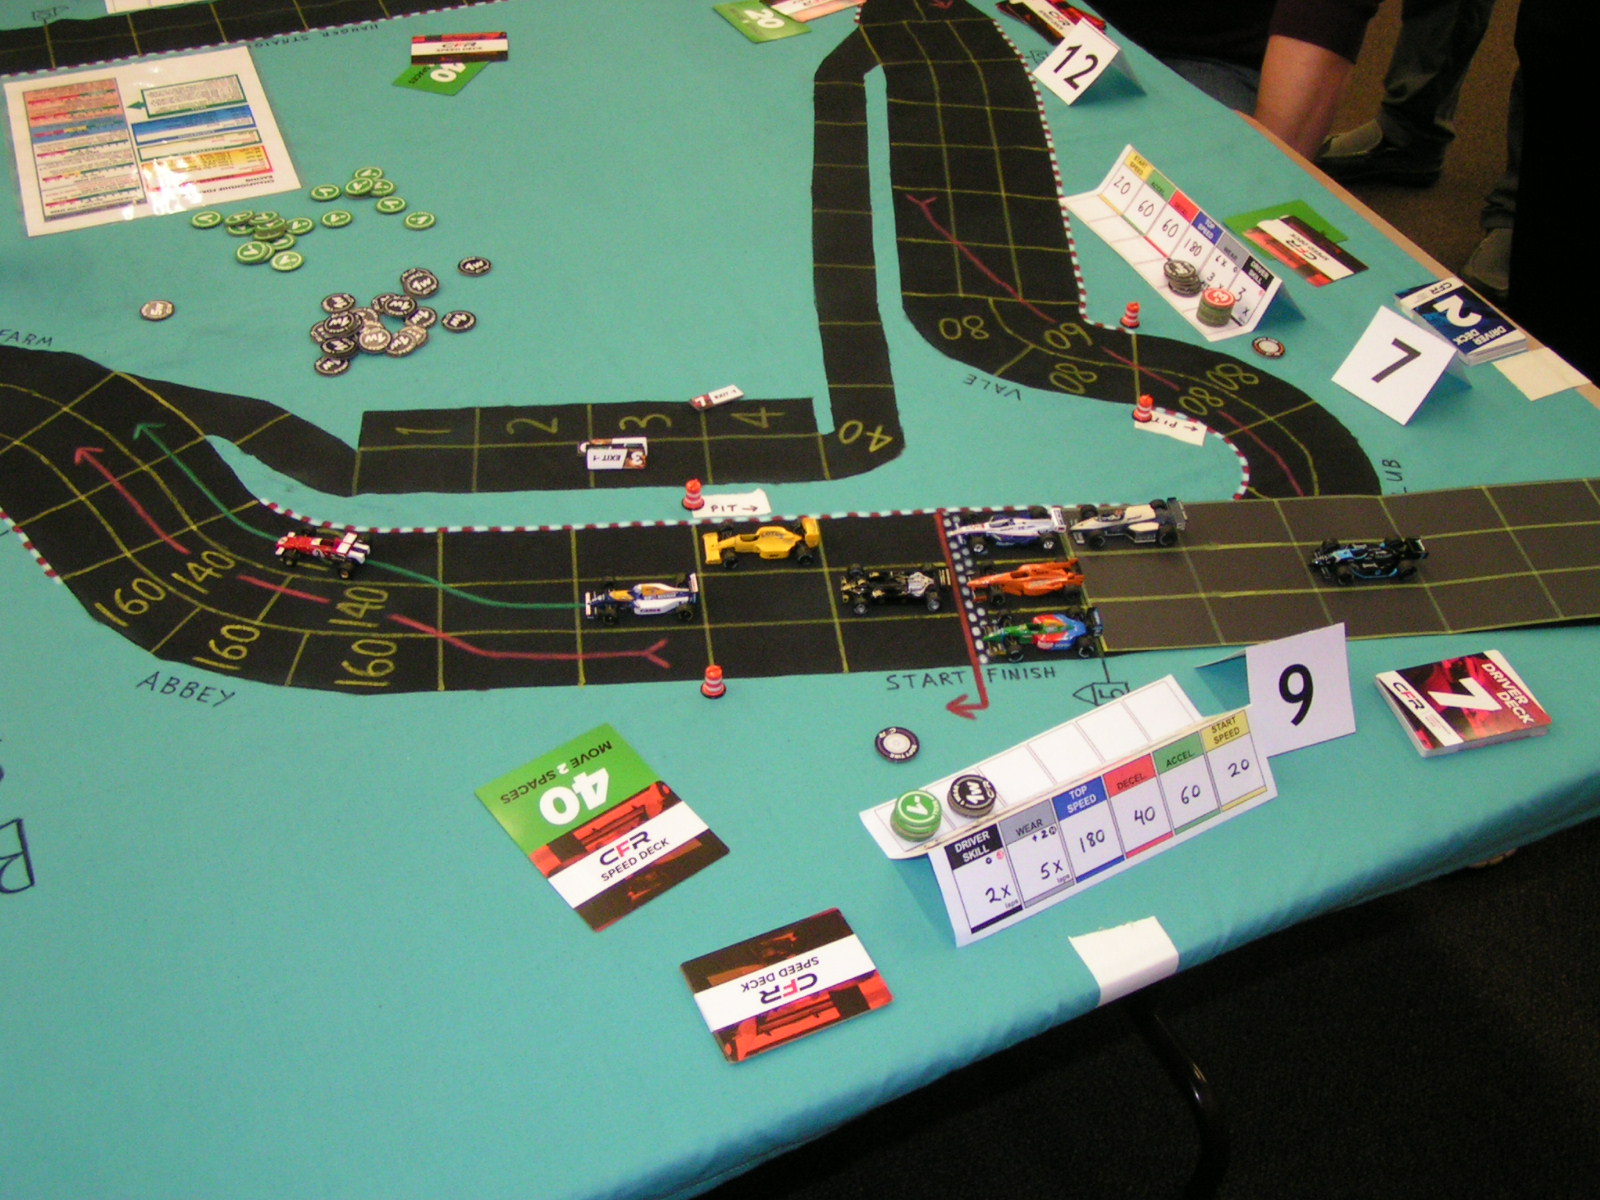
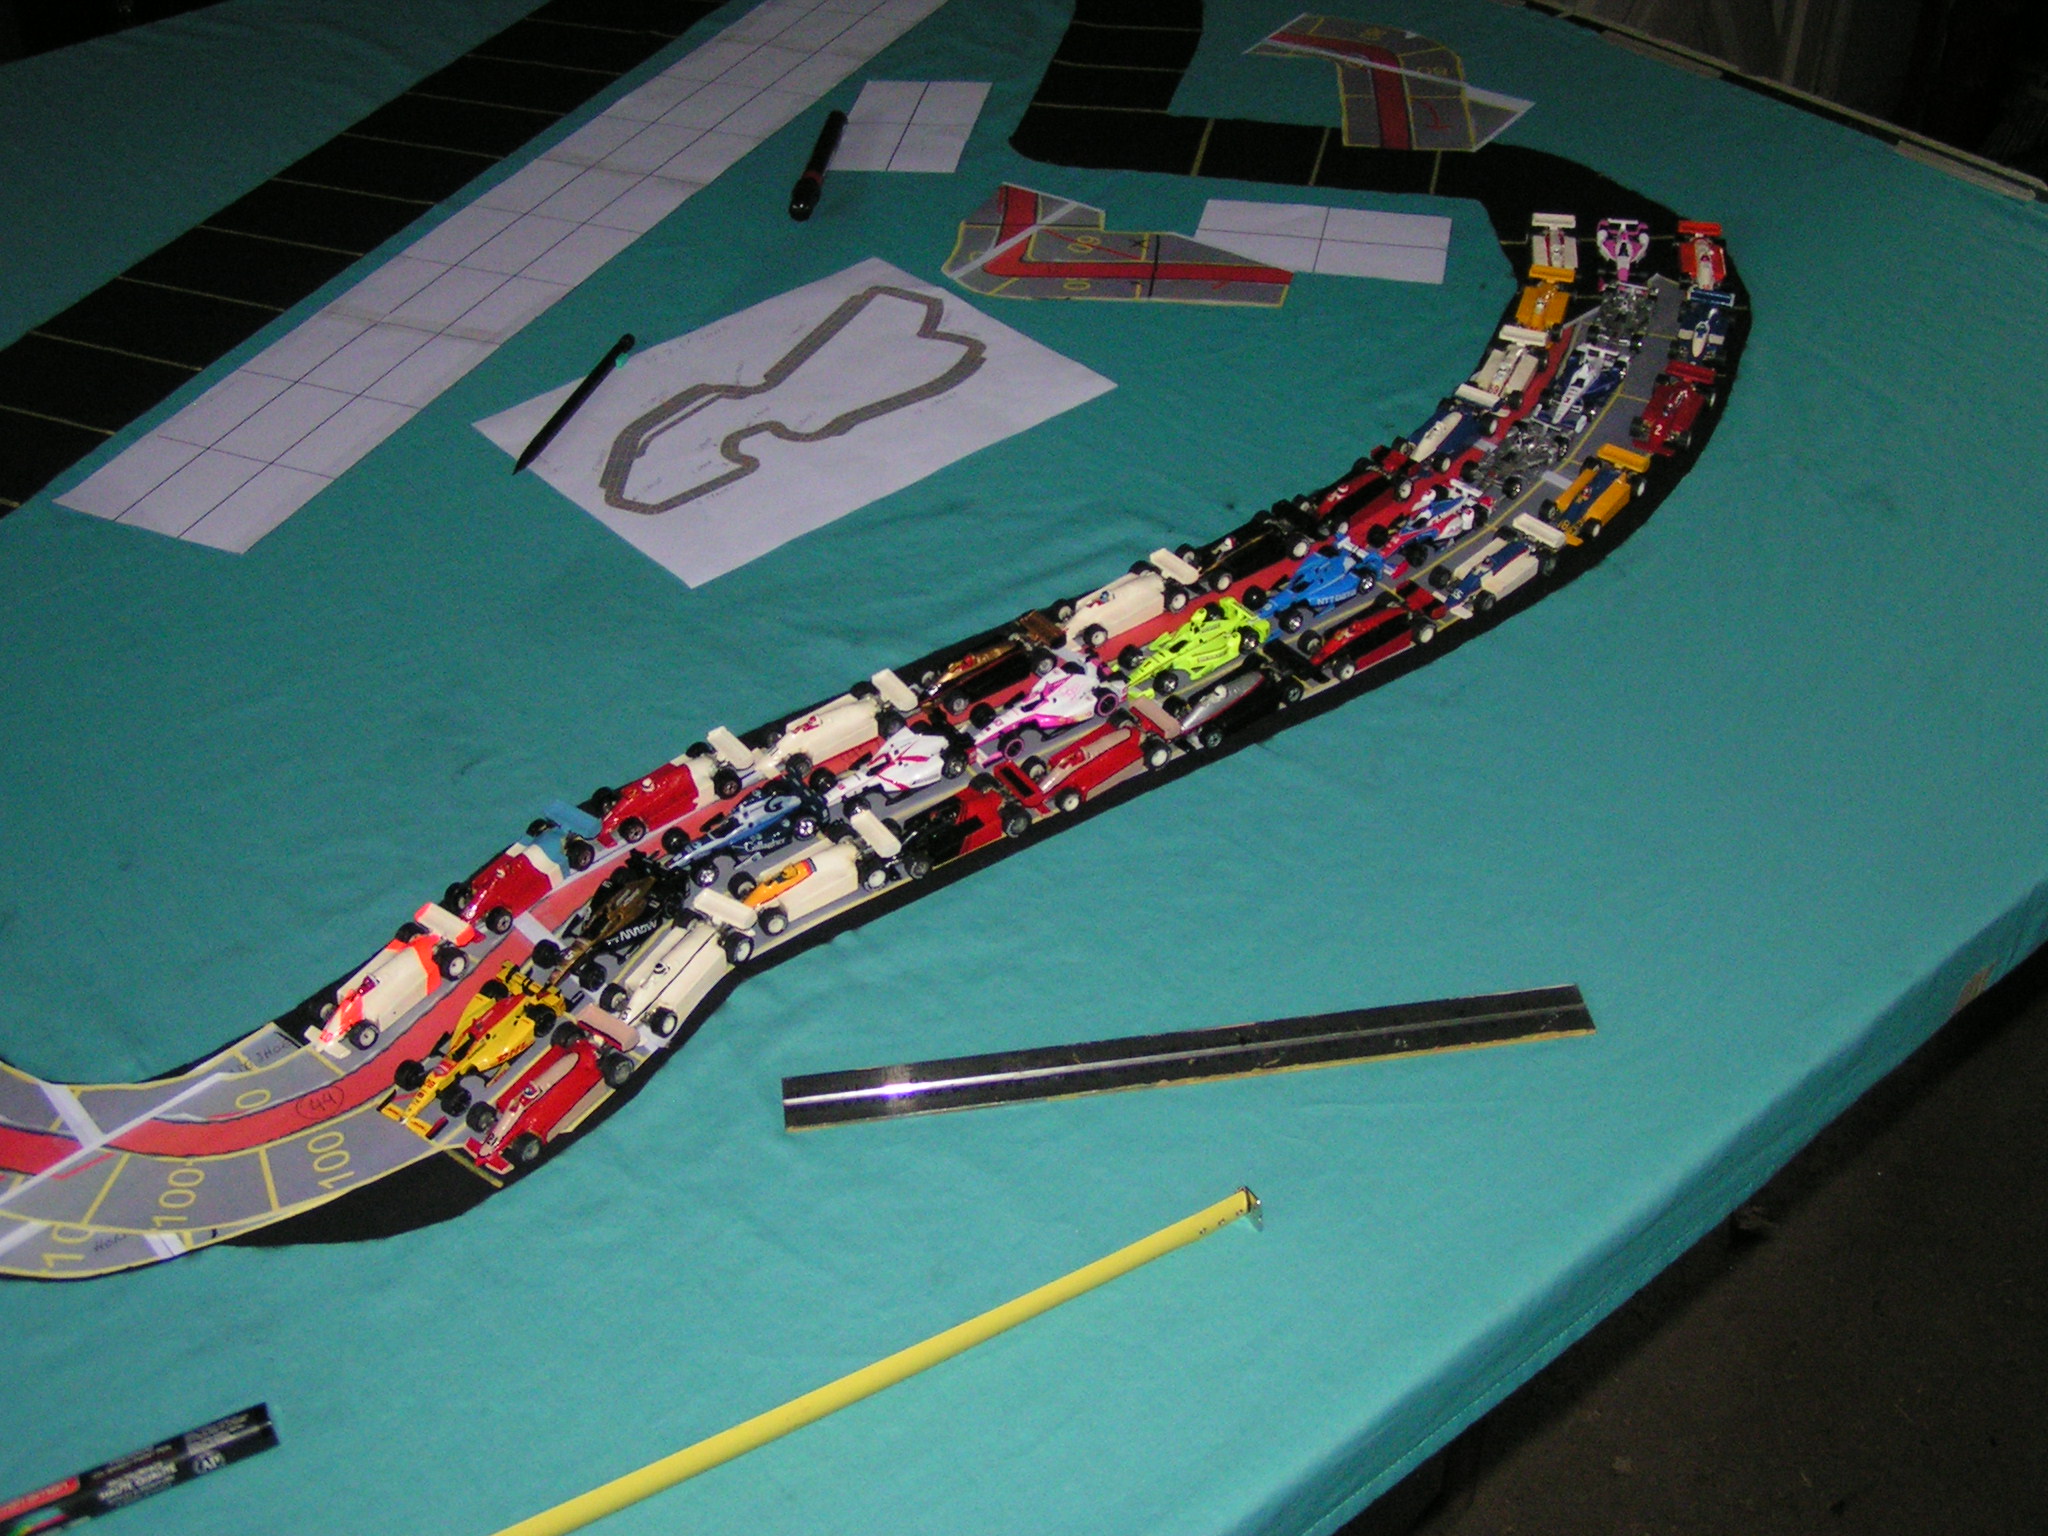
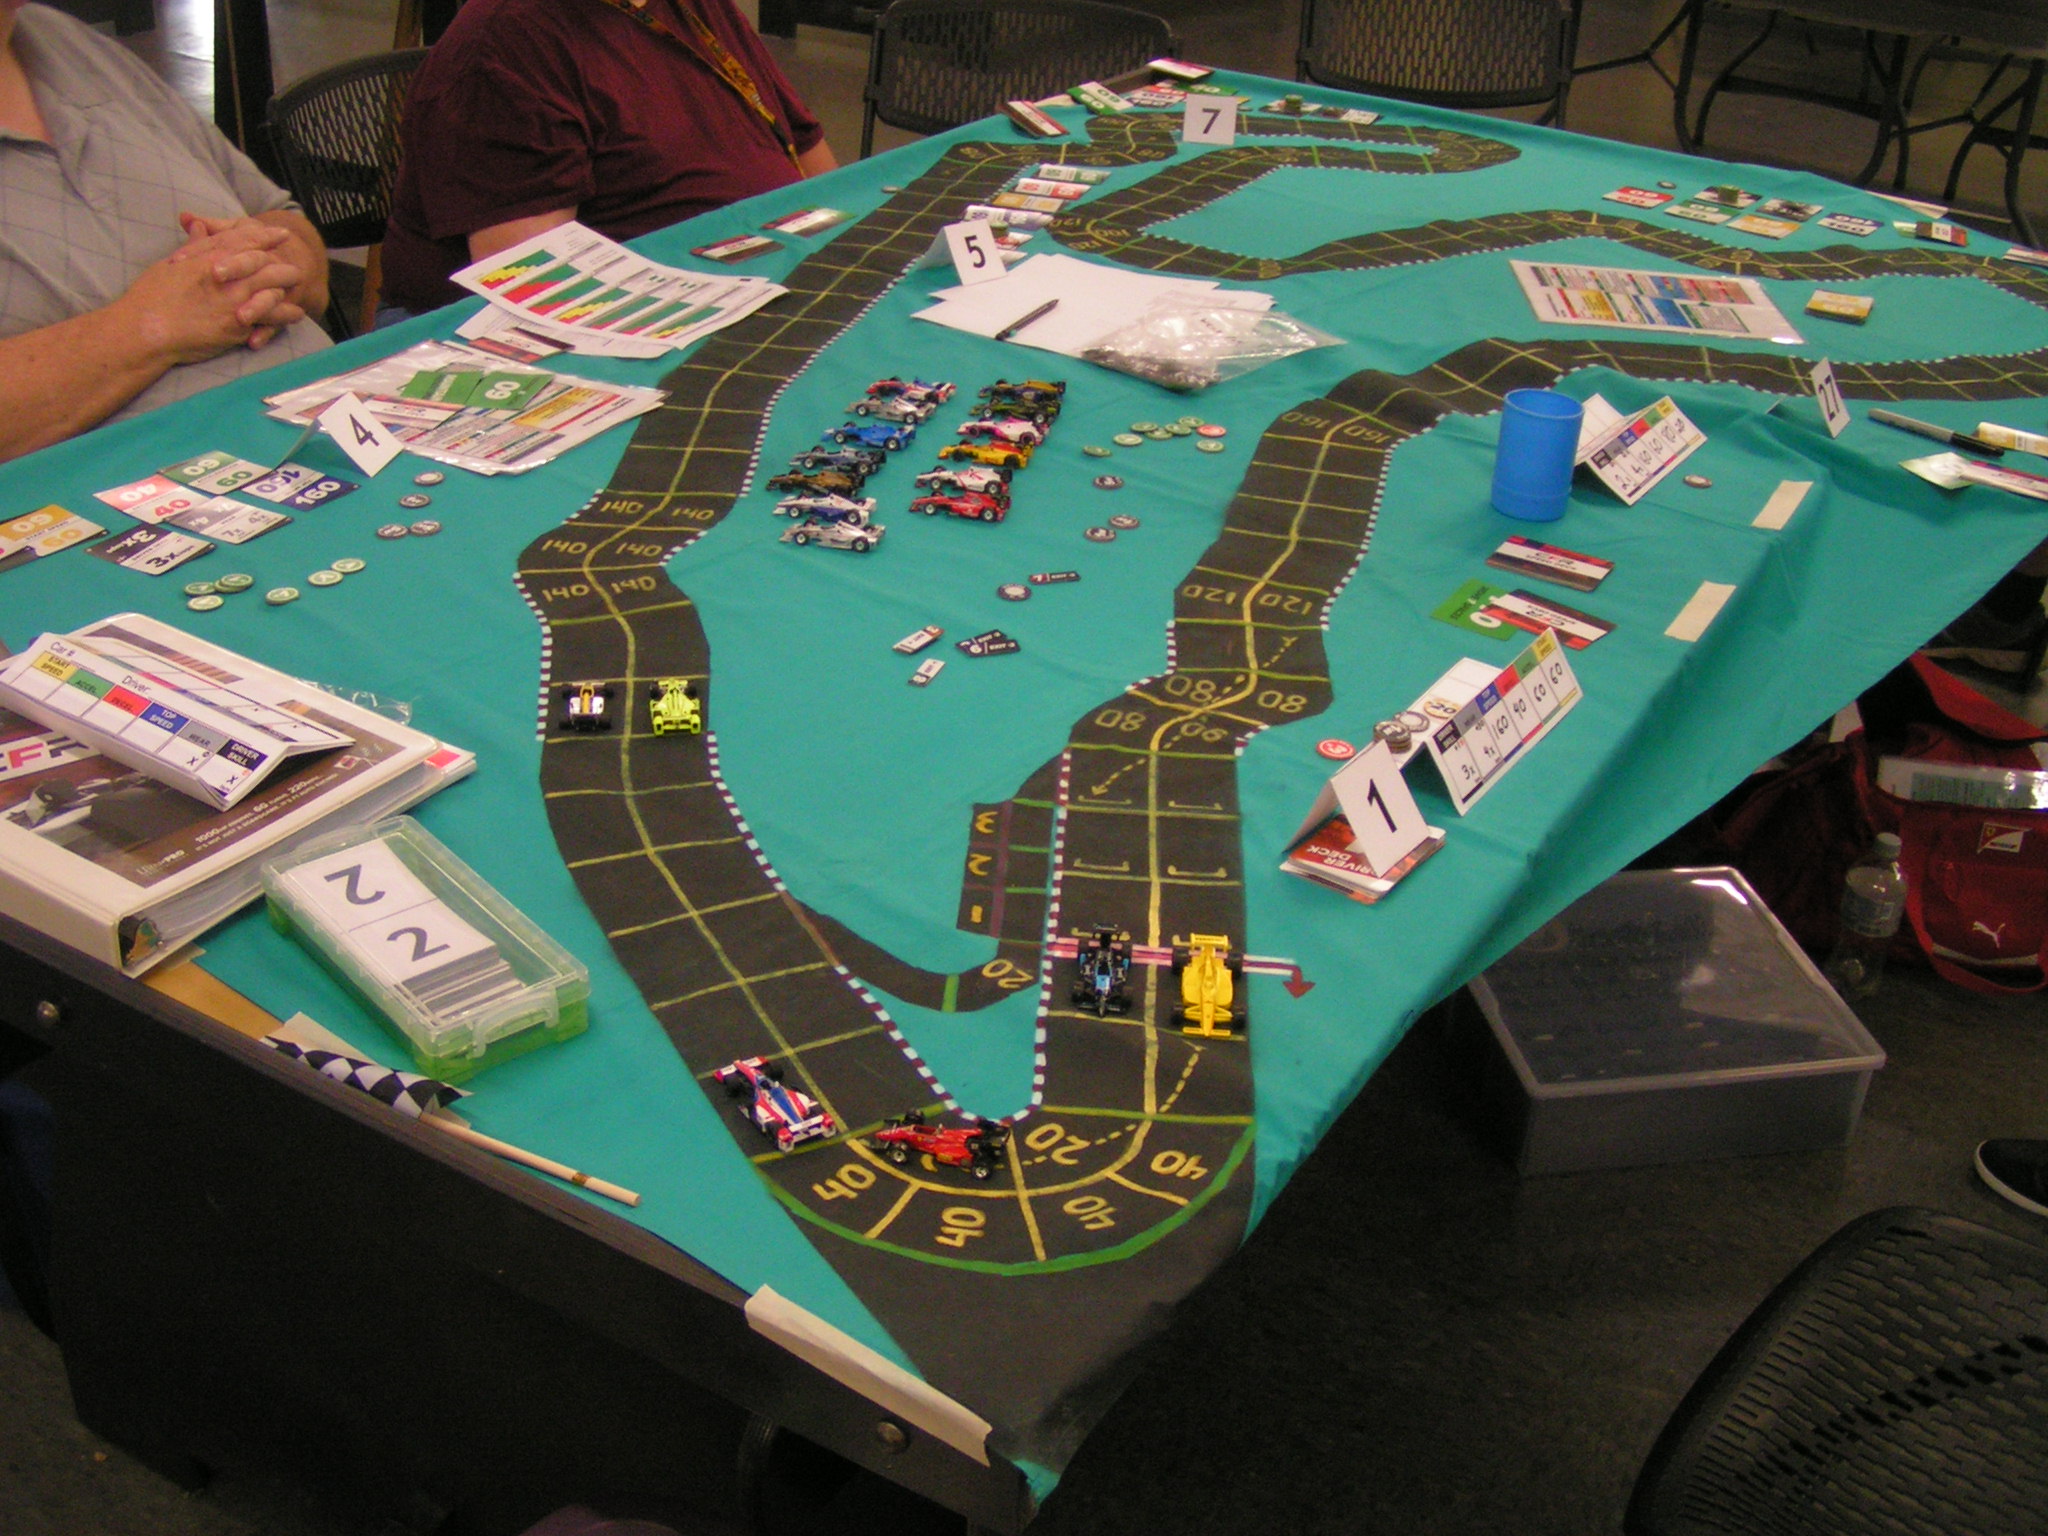
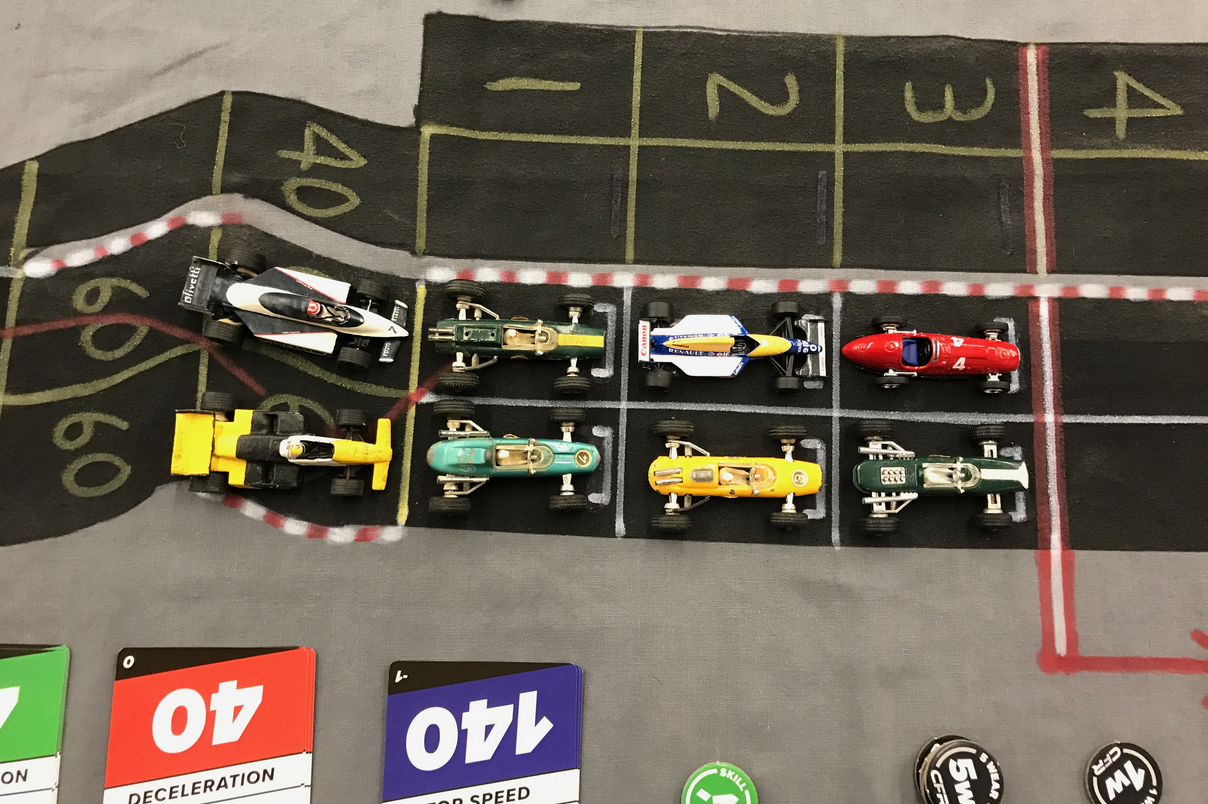
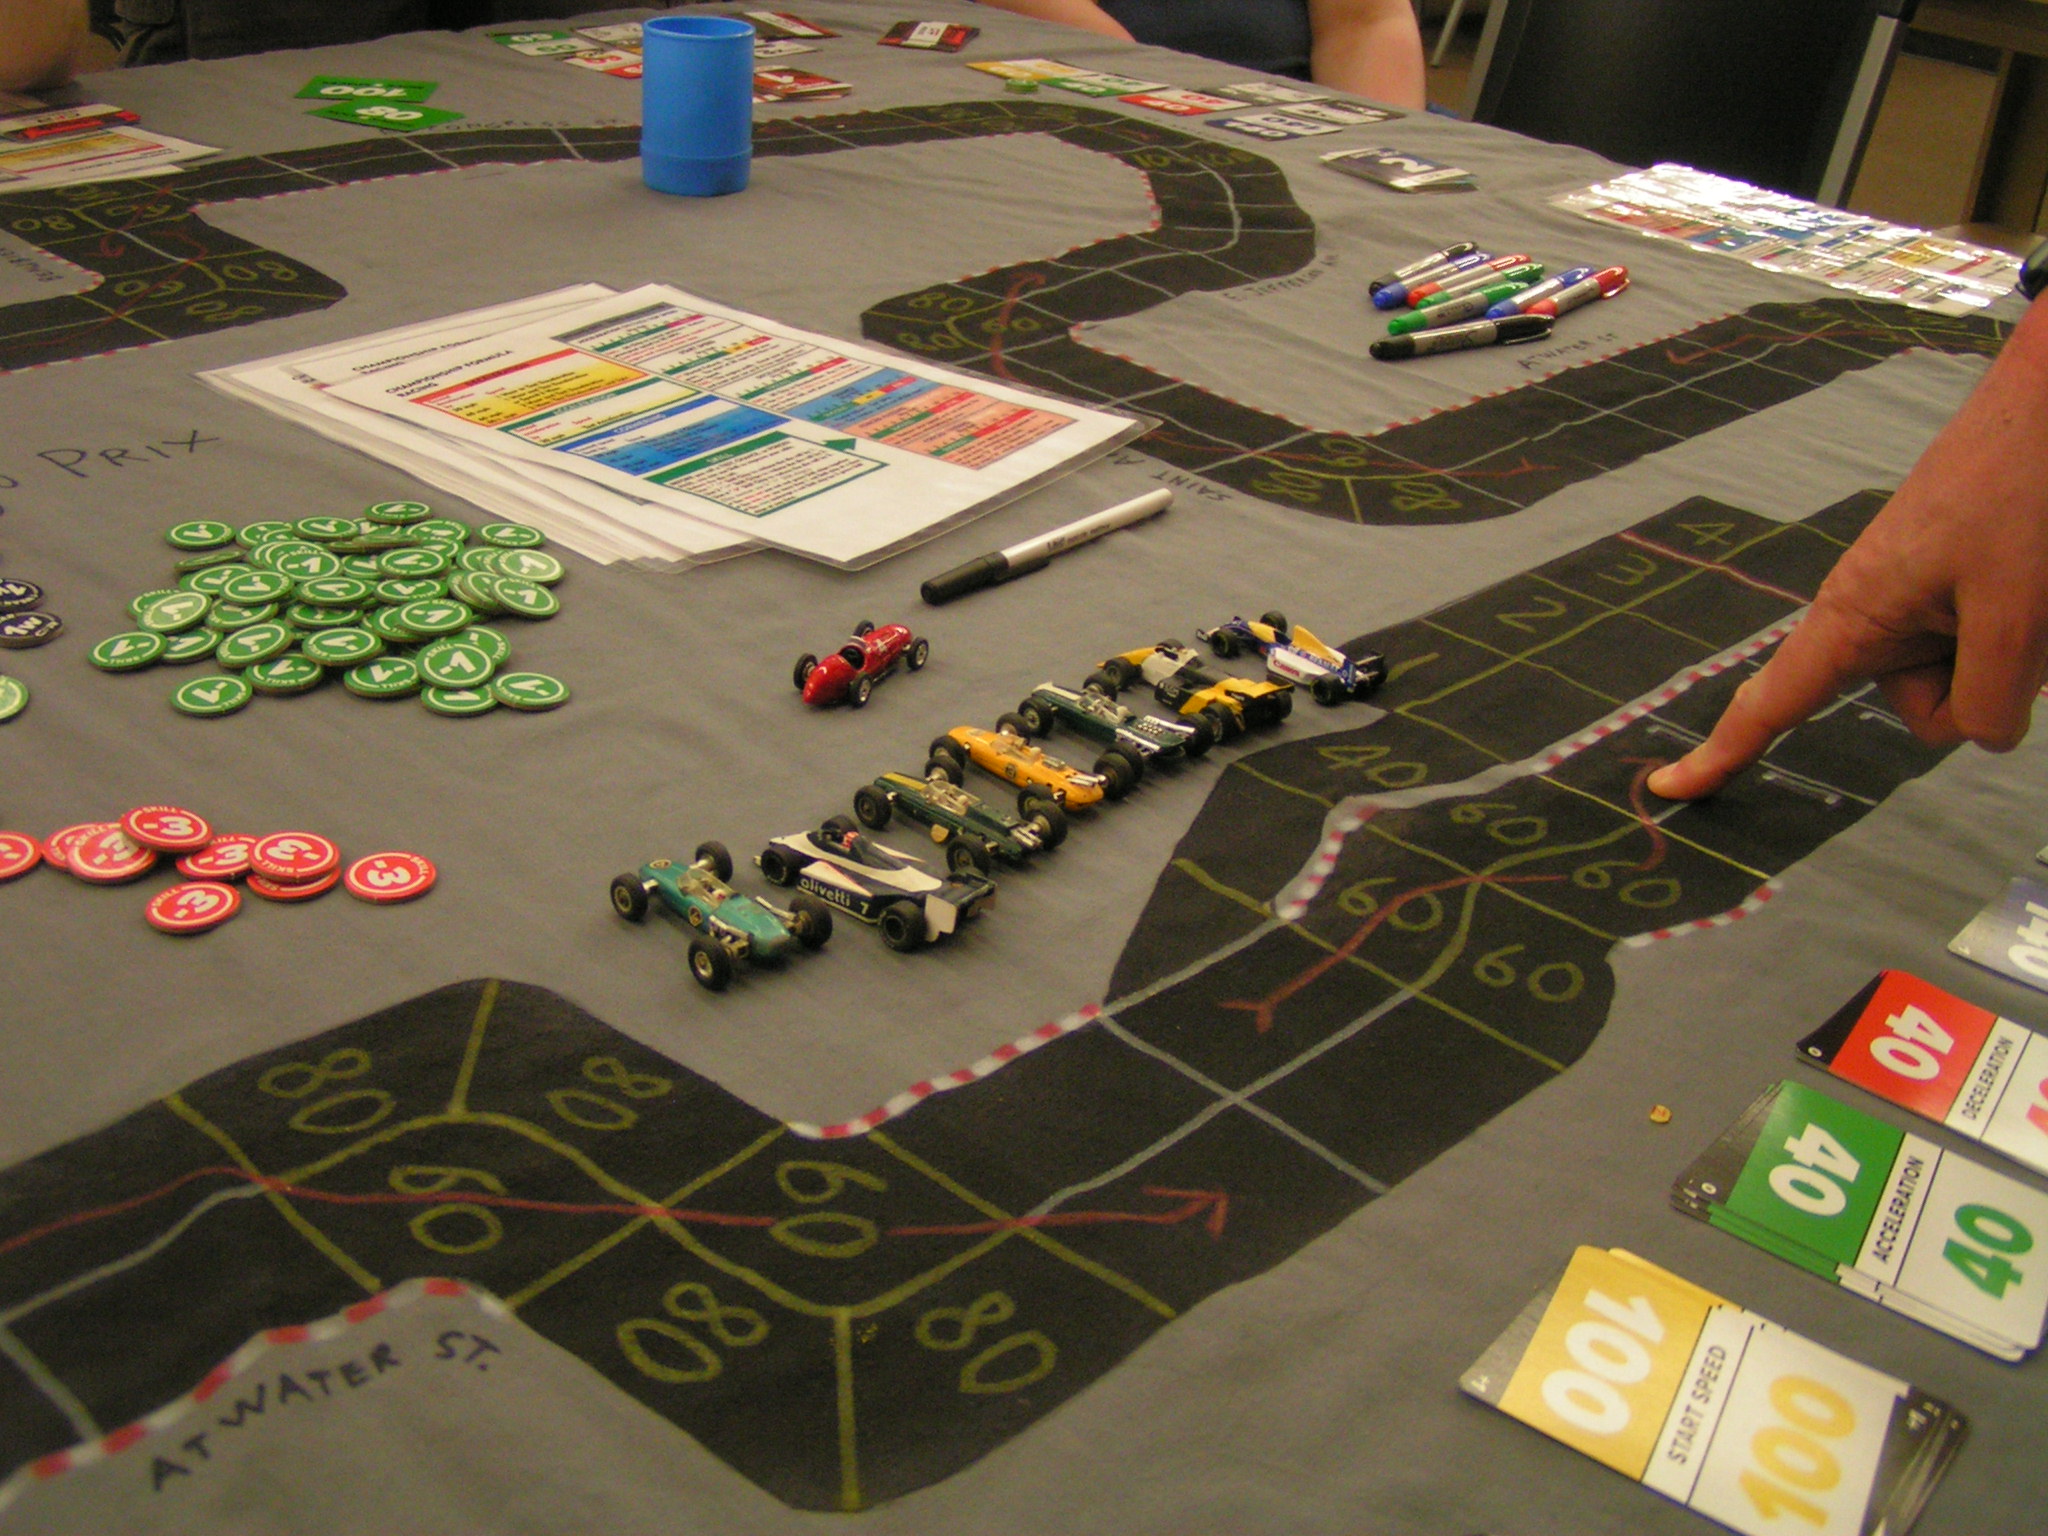
The start at Silverstone. Jack Beckman leads from Jim Robinson, then came Mike Cook, Gary Sturgeon, Brian Robinson, Garry Kaluzny, Jim Landis, Richard White, and Greg Lim. Note the temporary extension used to extend the starting grid, as the start/finish line is just past the Club corner in the 1:64 scale track.

As the pack roared through the Brooklands and Luffield corners, Beckman was still in the lead, followed by Cook and Kaluzny (who had made a daring pass of J. Robinson and Sturgeon at Brooklands to pull alongside Cook). Richard White spun his Brabham in Luffield, and Jim Robinson and Sturgeon went around on the outside of that corner. Then Landis, B. Robinson, and Lim brought up the rear of the pack.

Through the Luffield corner for the first time.

Through the Luffield corner for the first time.

Continuing around through the Maggots/Becketts/Chapel curves, Beckman continued leading Cook and Kaluzny by a slim margin, then a few spaces back in a bunch were J. Robinson, Sturgeon, Landis, and B. Robinson, and then Lim was a few spaces behind them.

Through Maggots/Becketts/Chapel curves for the first time.

Through Maggots/Becketts/Chapel curves for the first time.

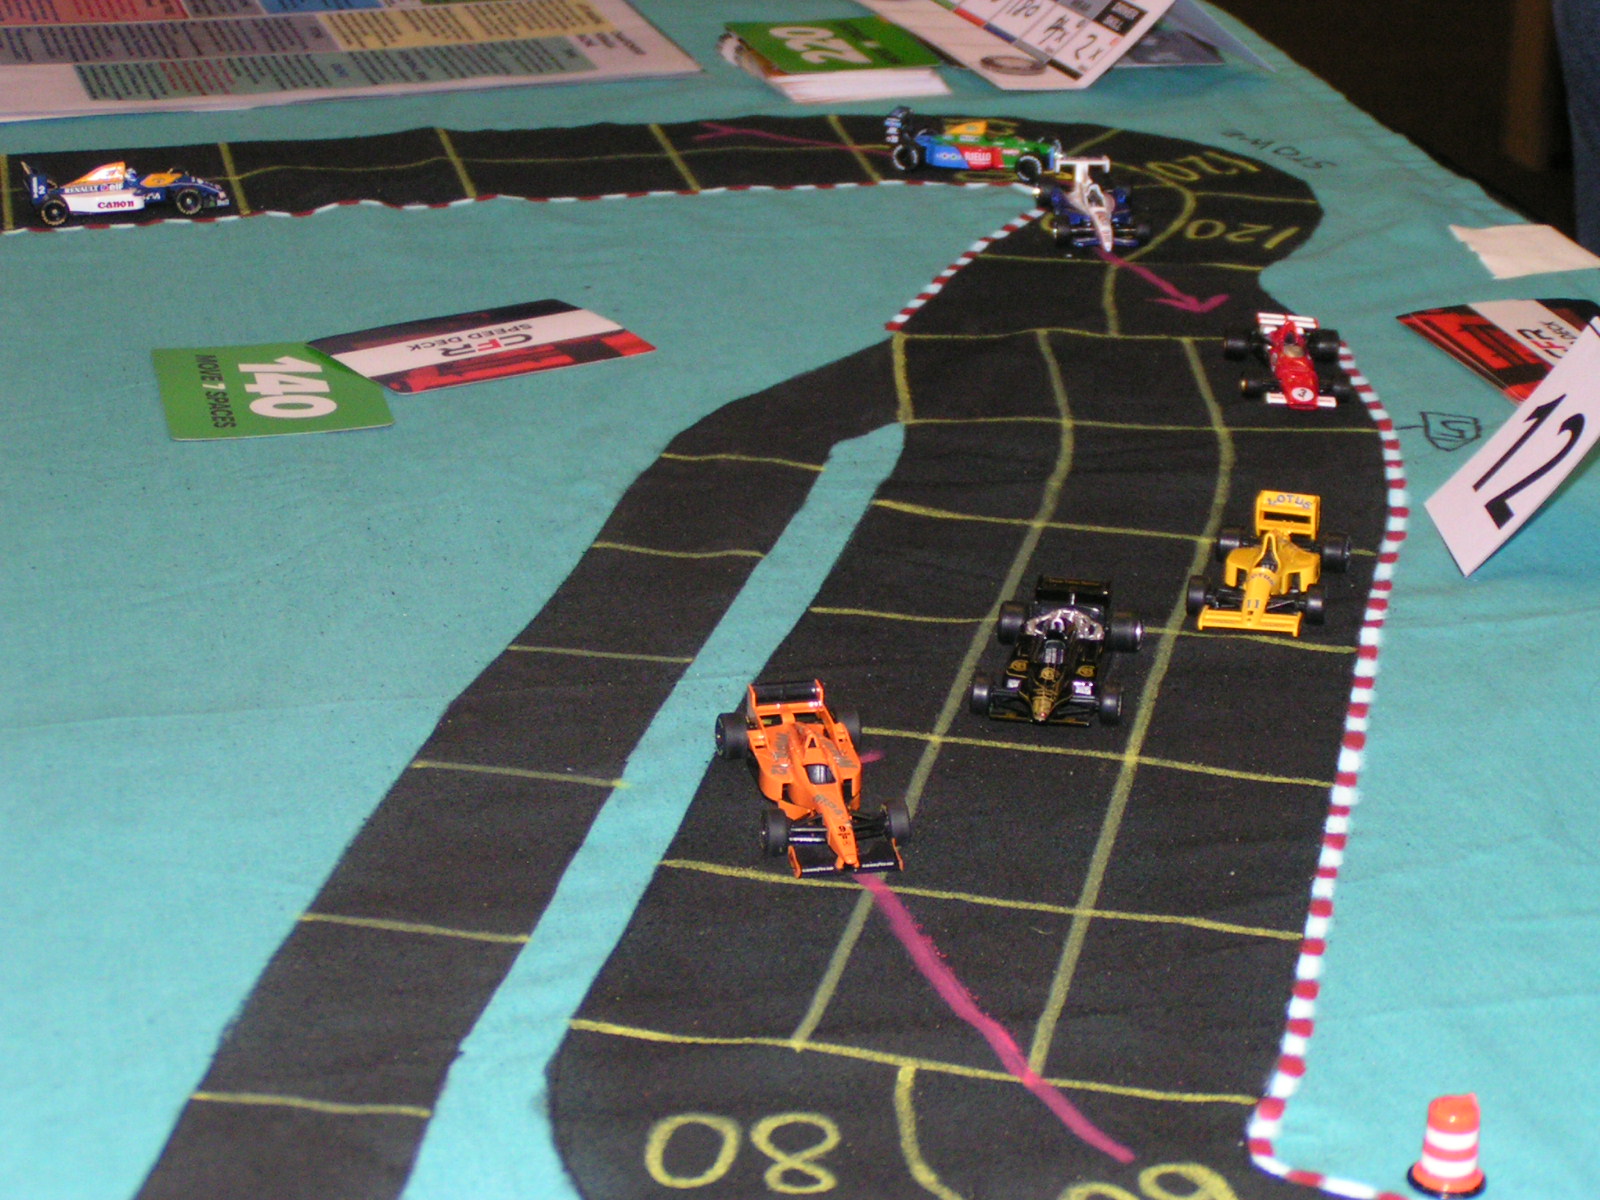
Heading through the Stowe corner, Cook’s Camel Lotus was breathing down Beckman’s Ferrari’s tailpipe. Sturgeon’s John Player Lotus passed Kaluzny at Stowe, then the others followed behind.

Through Stowe for the first time.

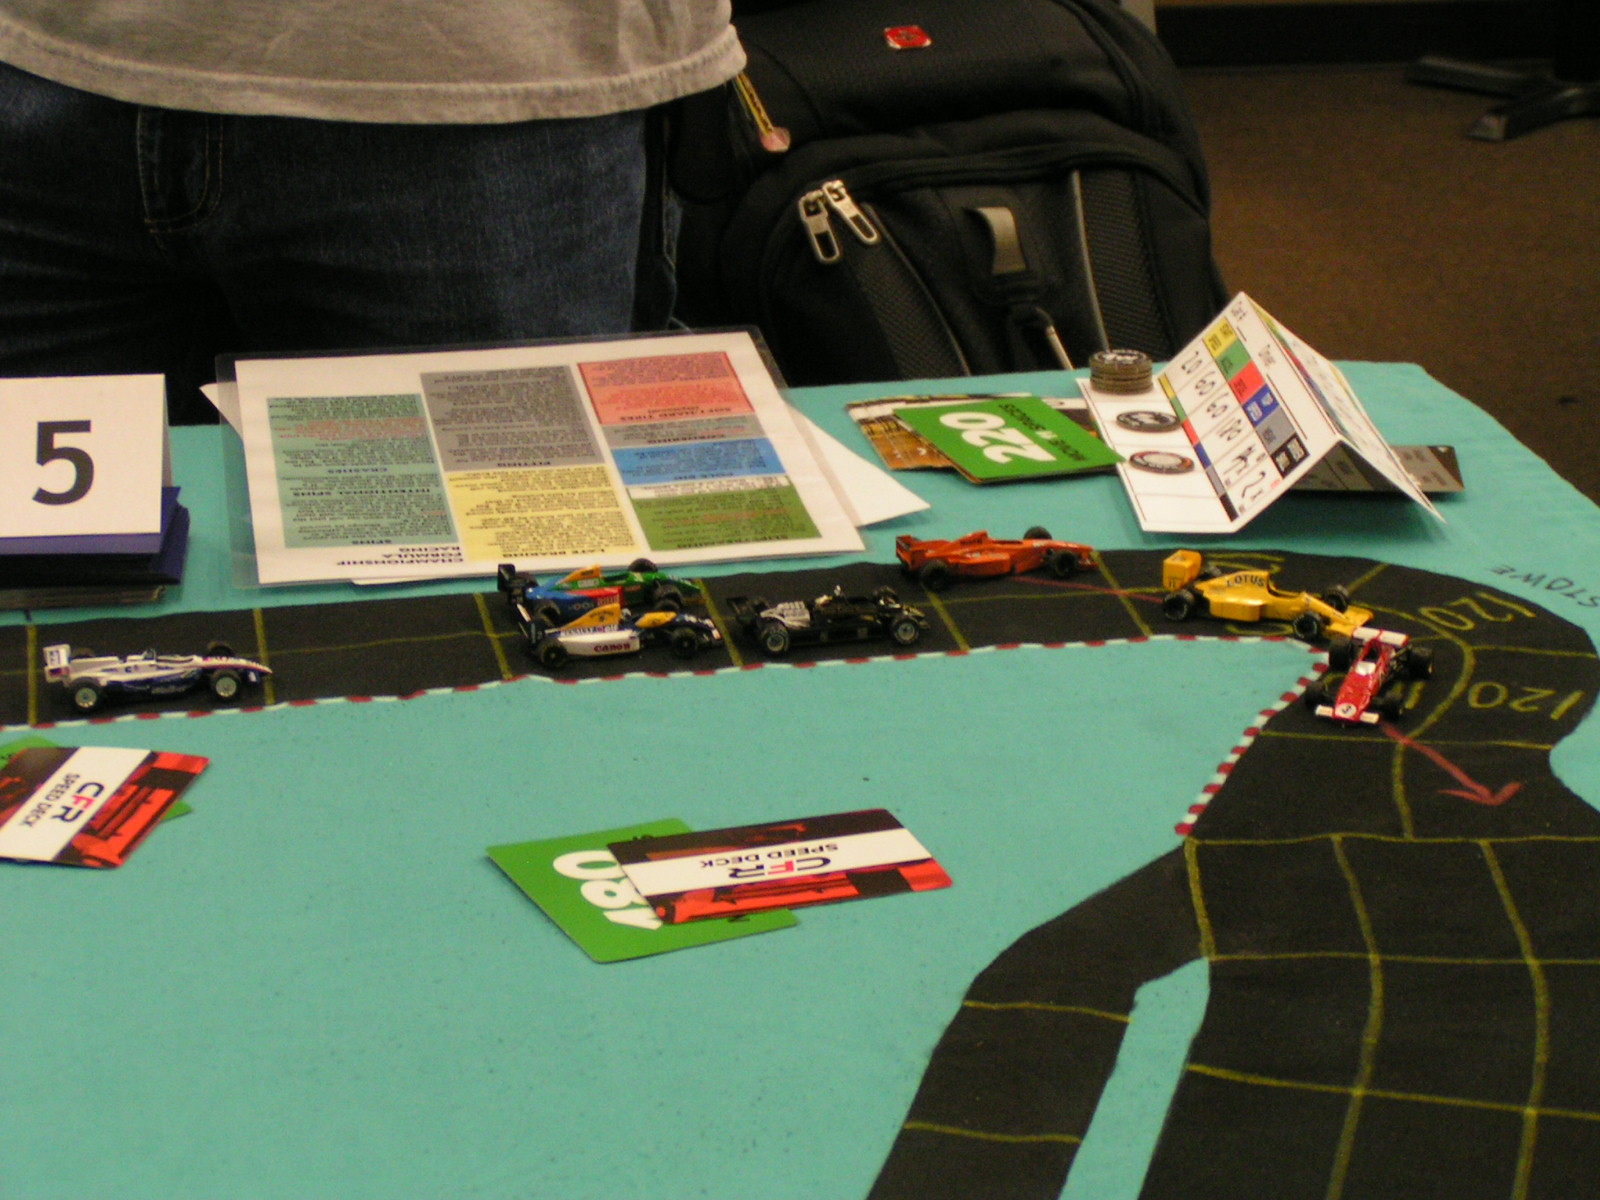
Through Stowe for the first time–Beckman, Cook, Kaluzny, Sturgeon, J. Robinson, Landis, and B. Robinson’s cars are pictured.

As the cars were coming around to complete the first lap, Beckman, Kaluzny, Landis, B. Robinson, White, and Lim all pitted. Beckman and Lim switched from hard to soft tires, while Kaluzny, Landis, B. Robinson, and White switched from soft to hard tires. Sturgeon, J. Robinson, and Cook all stayed out on the track and did not pit.

End of 1st lap, first pit stops.

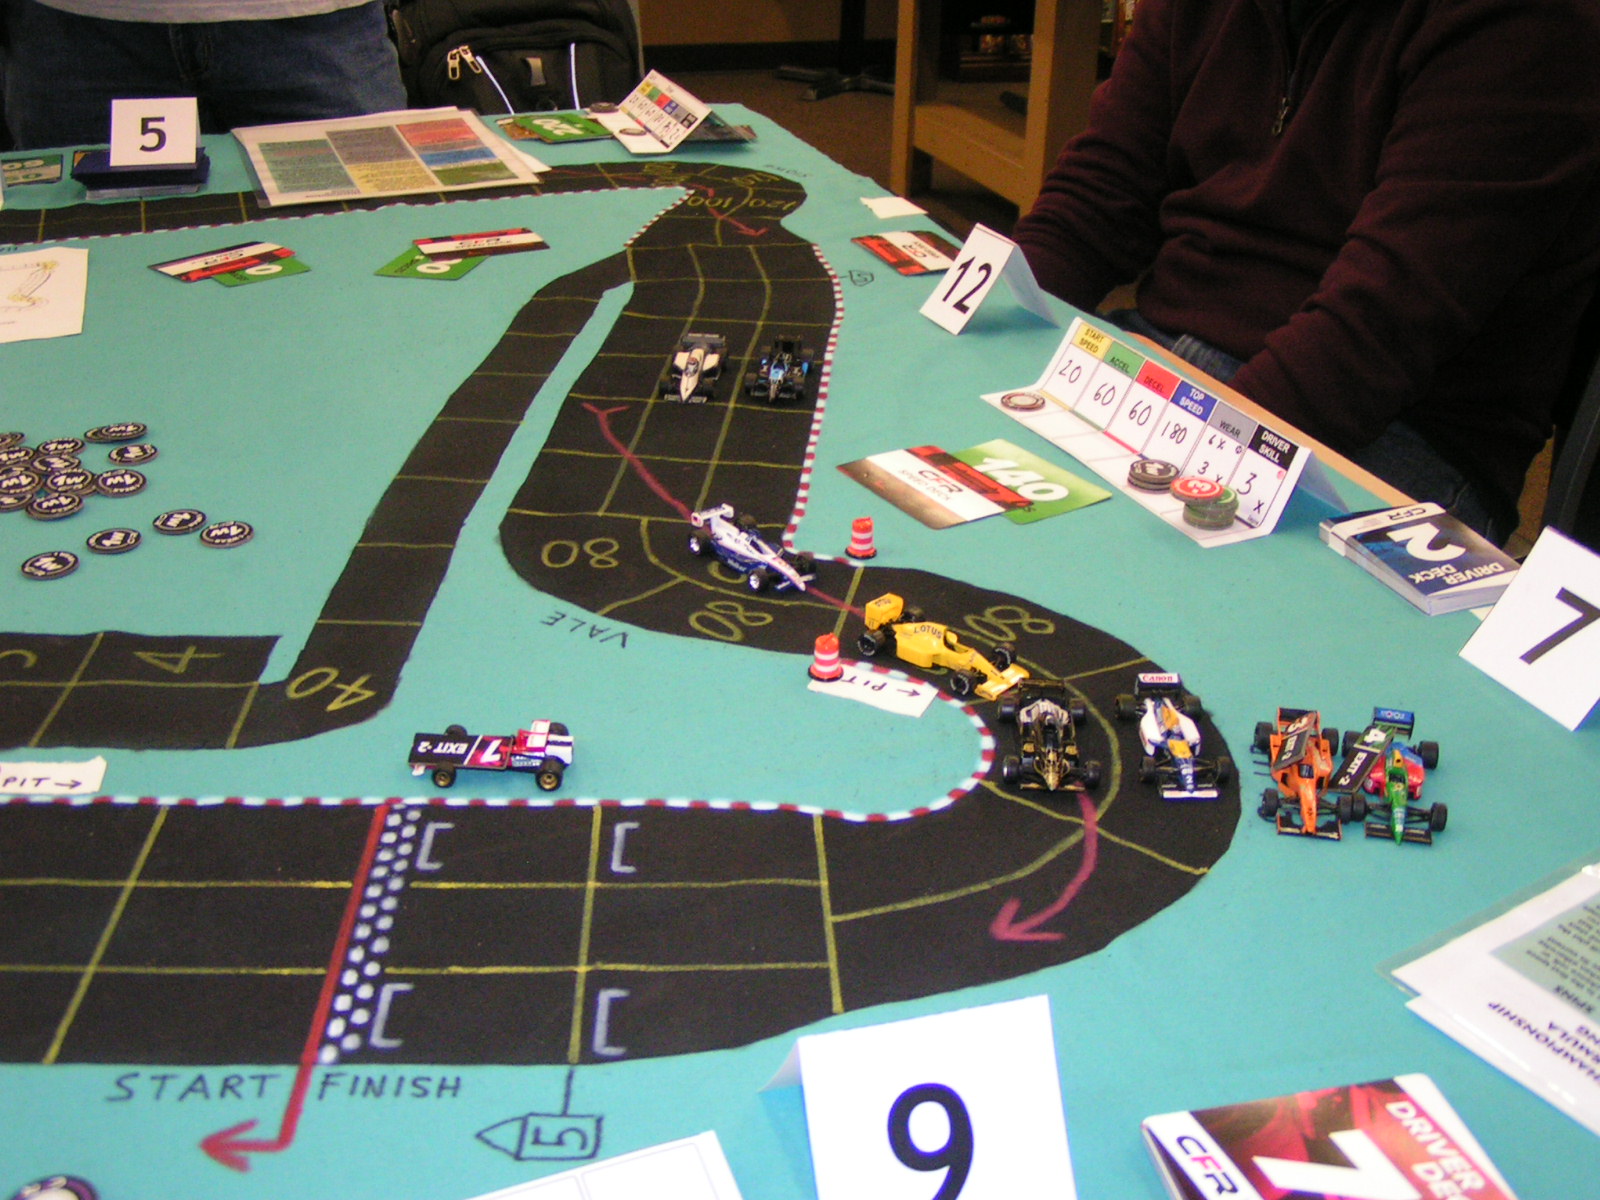
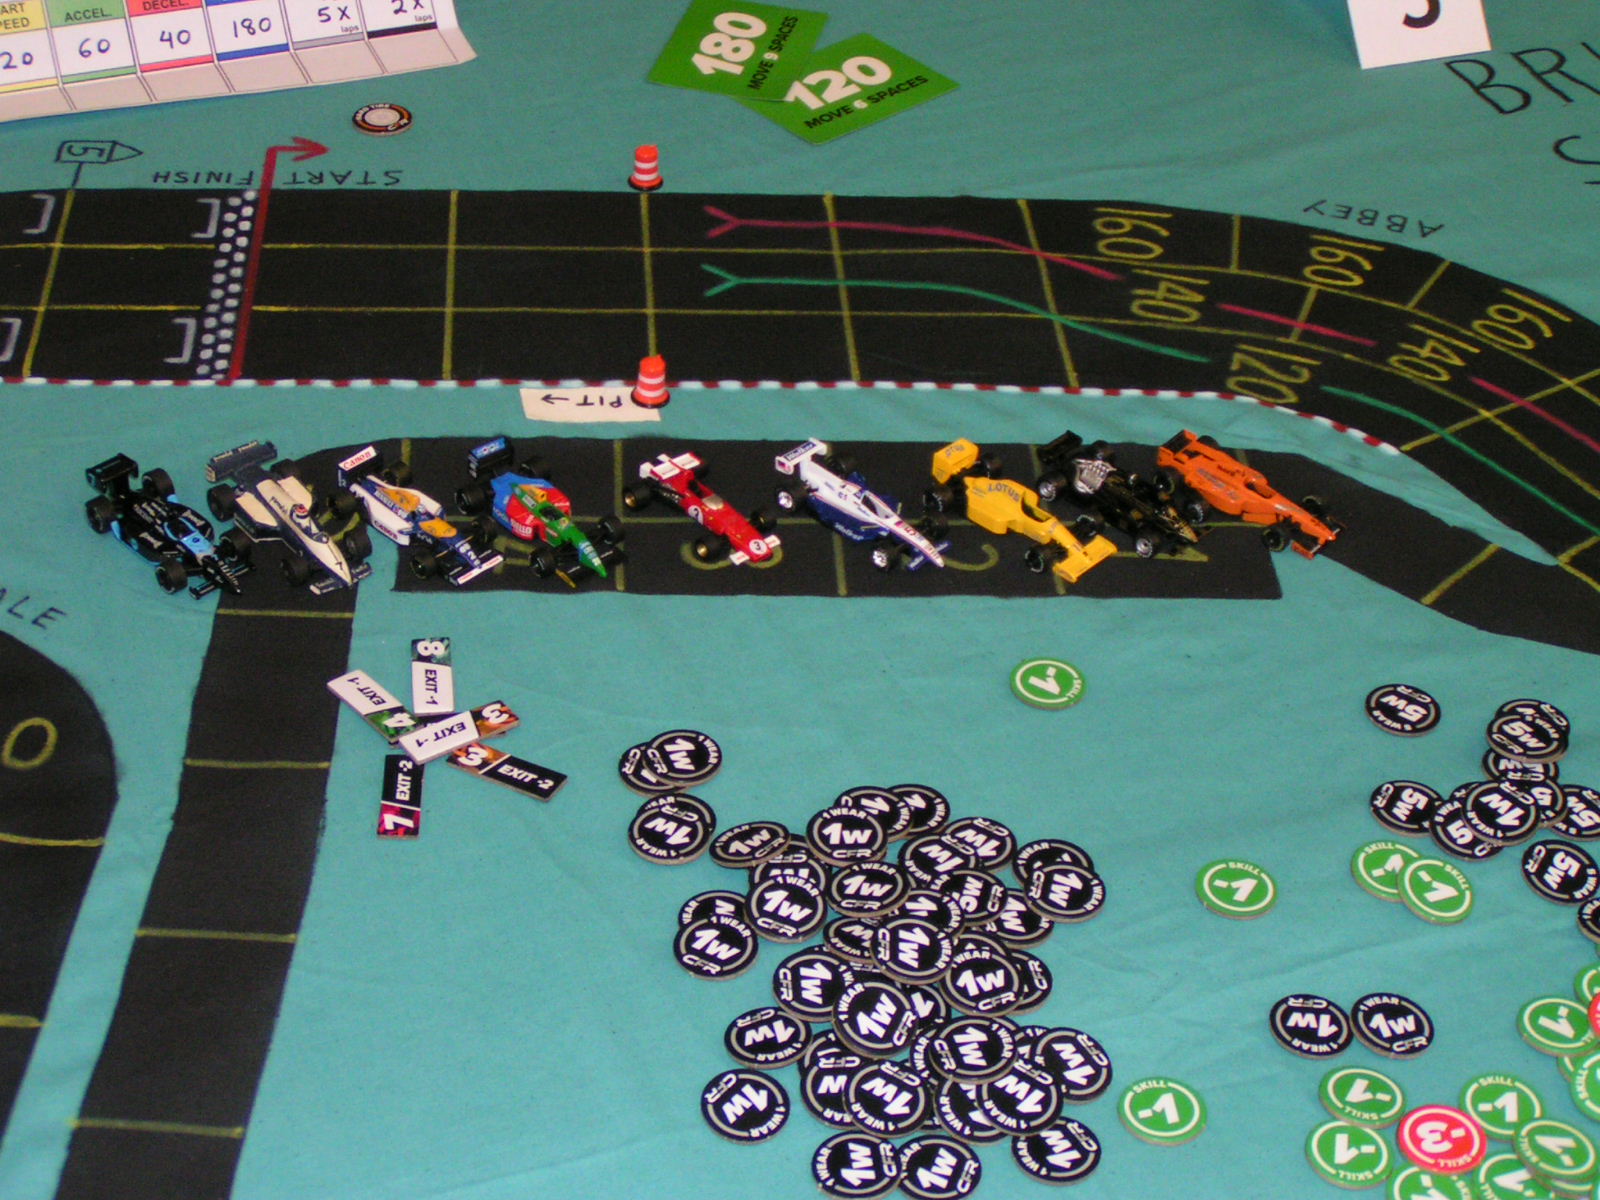
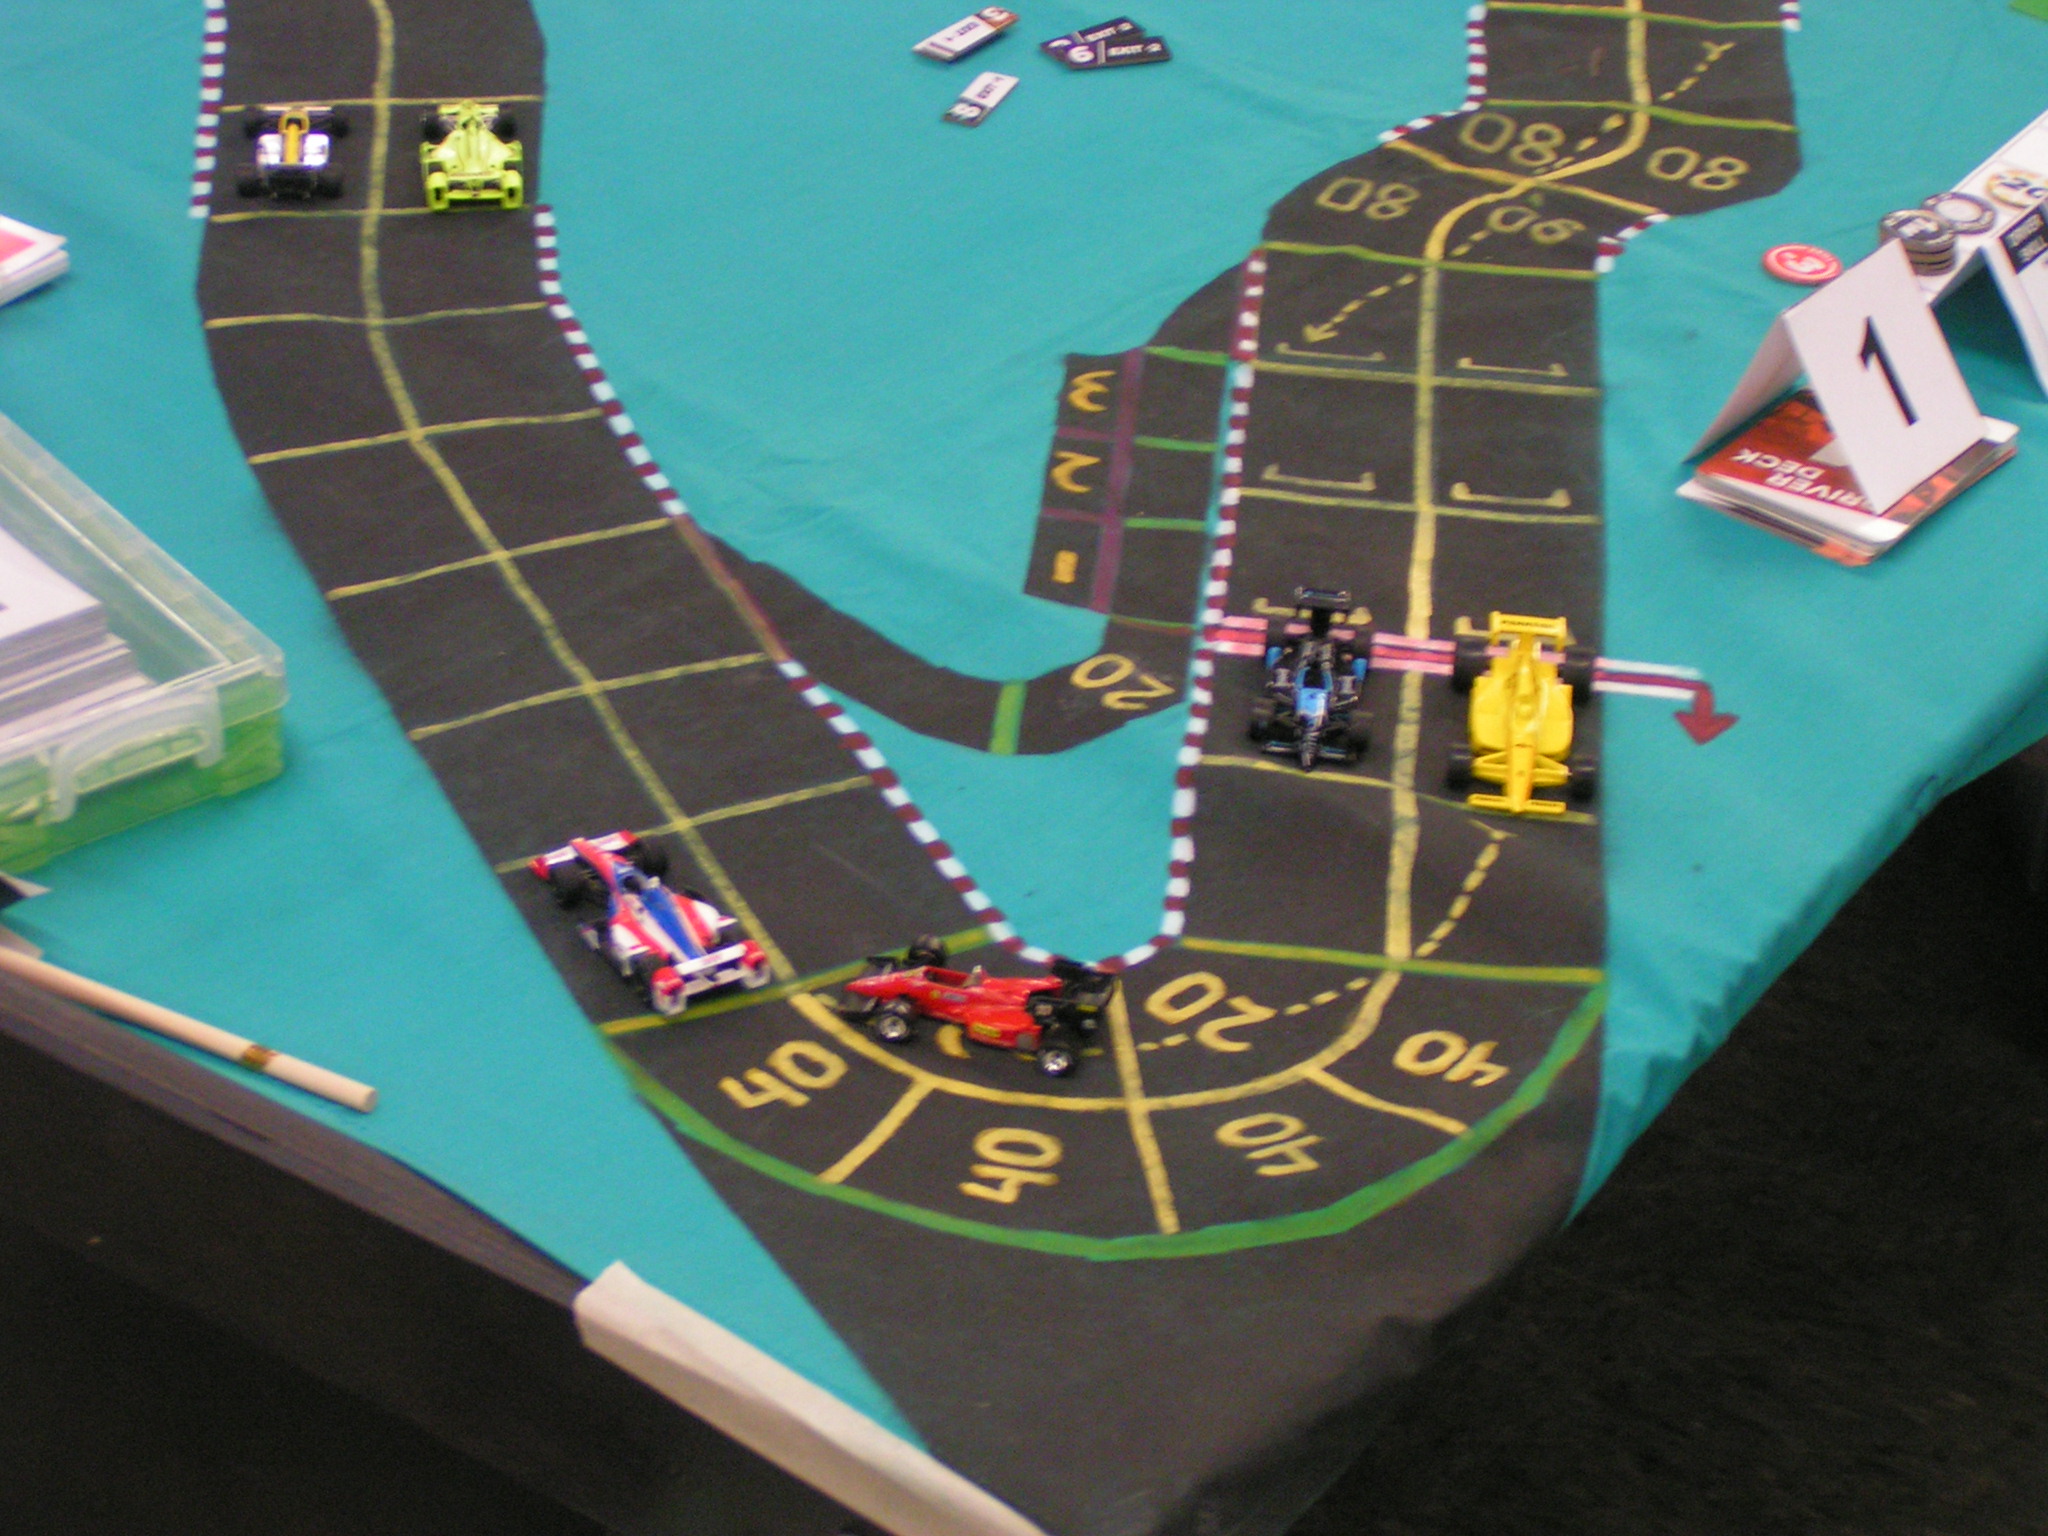
End of 1st lap, first pit stops. Beckman’s Ferrari (red car), Kaluzny’s McLaren (orange car) and Landis (green/red/blue car) are already in the pits.

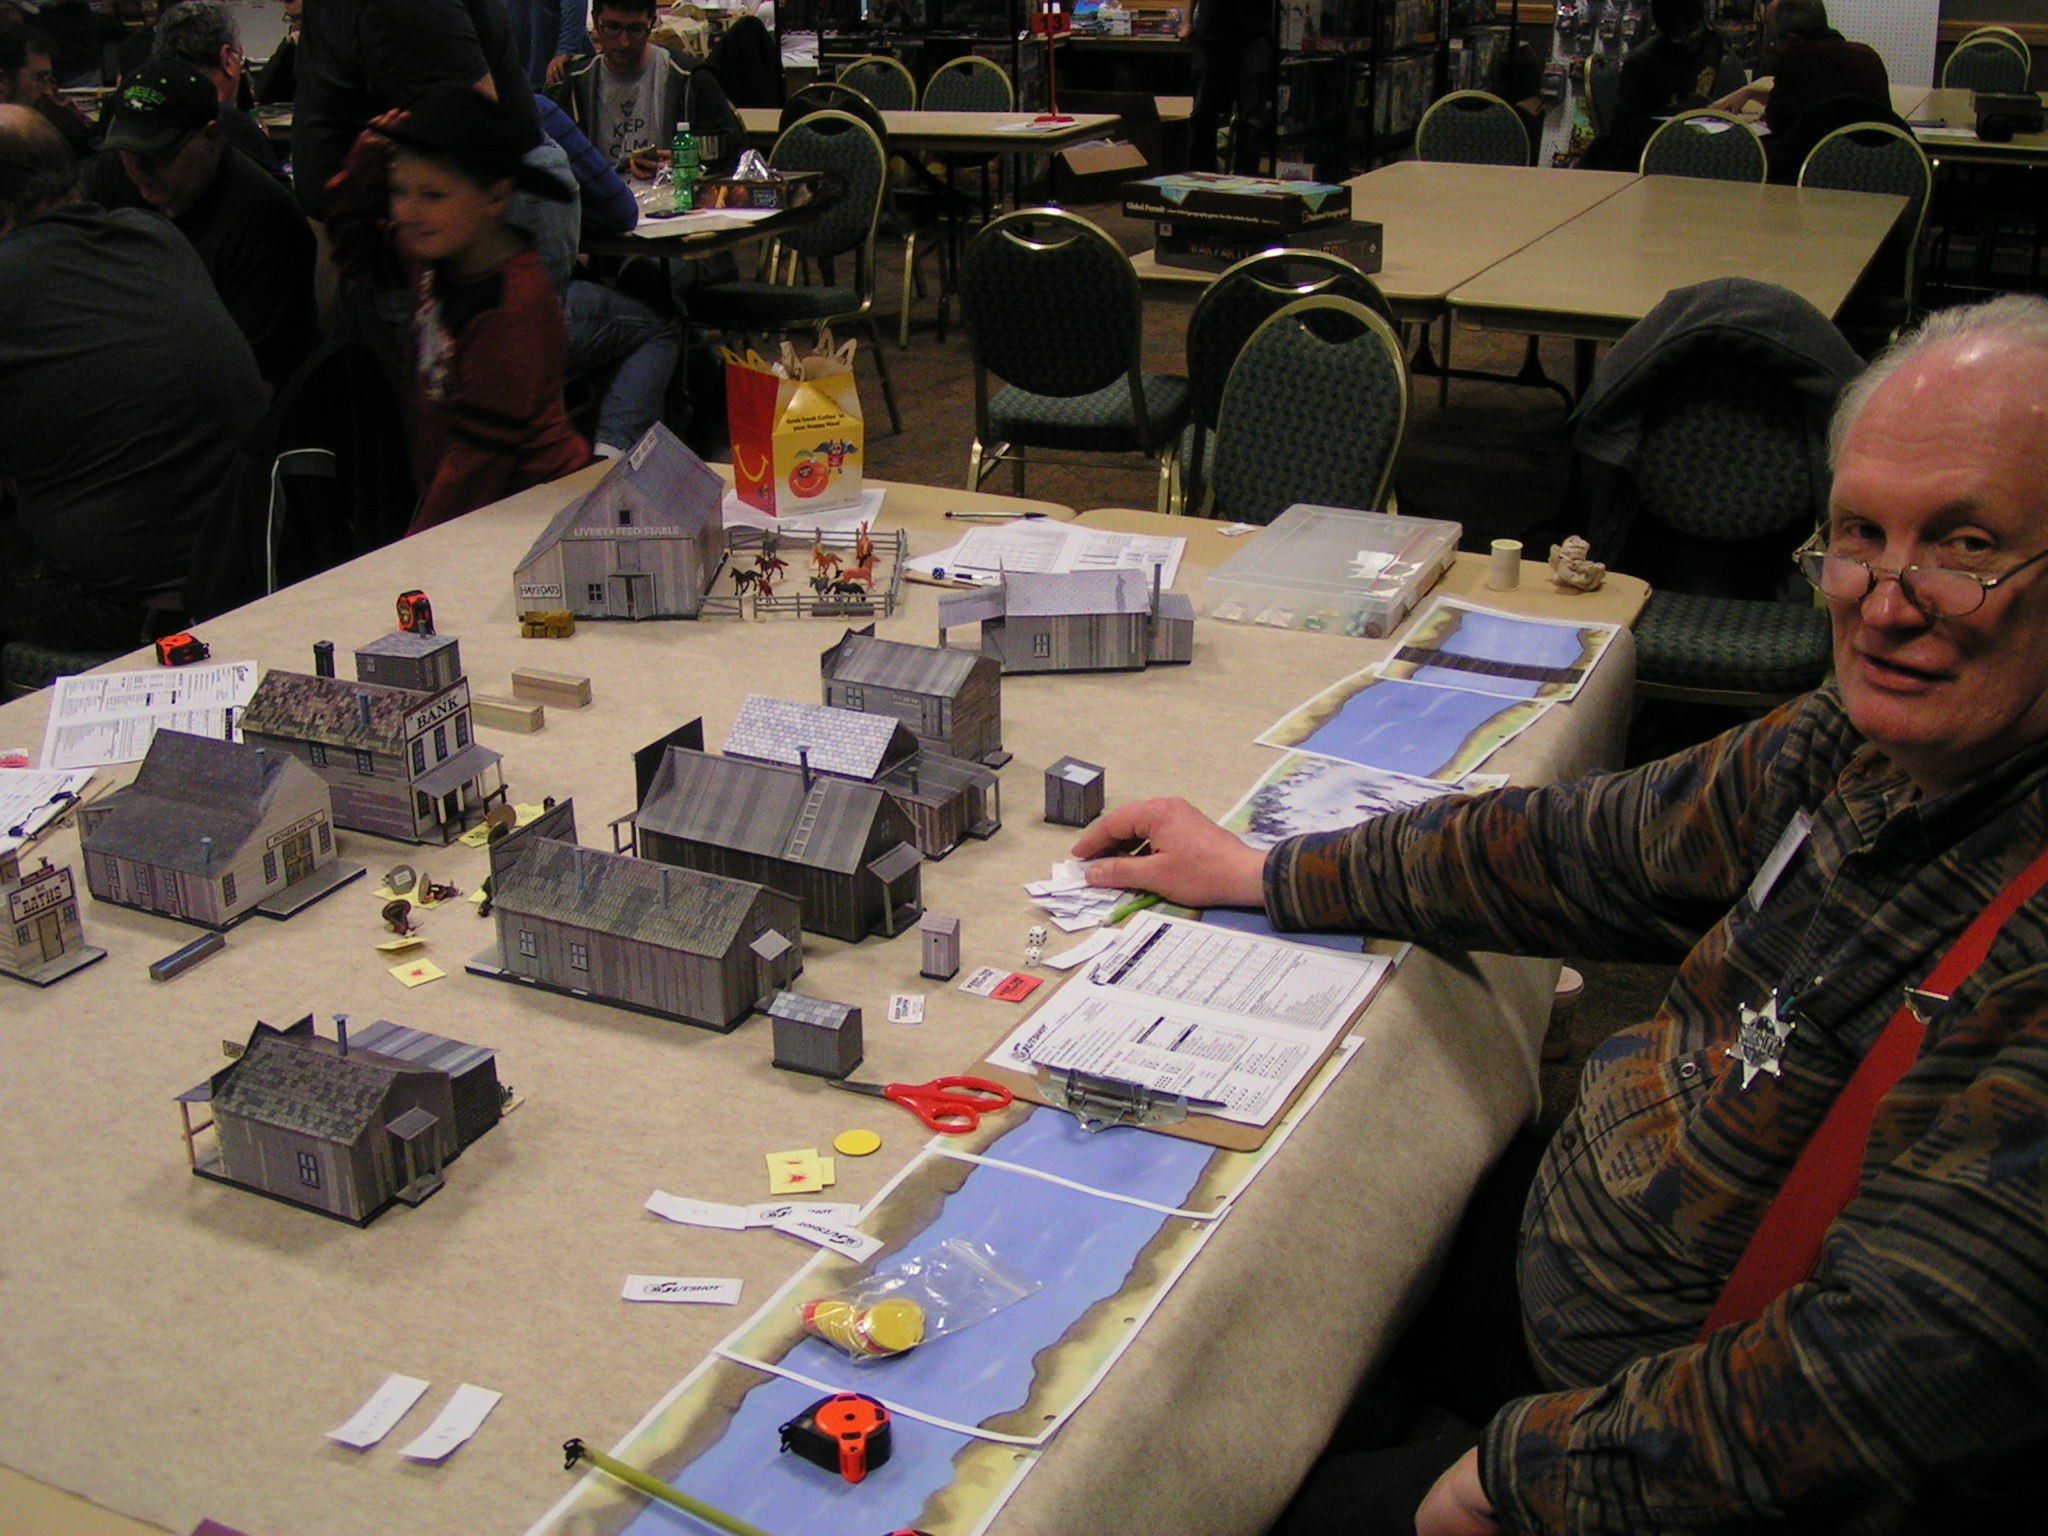
In CFR, pit stops are accomplished by simply moving your car off to the side of the track when you end a turn within the pit stop zone. In the above picture, you can see pieces of tape with “Pit” and an arrow on them to indicate the “pit stop zone” (also a pair of orange barrels mark the beginning of the pit stop zone). Then cars are marked with an “Exit -2” marker the turn they enter the pits. The following turn (while the car continues to sit in the pits), the Exit -2 marker is flipped to its “Exit -1” side, and then the next turn after that, the car can re-enter the track and resume its former speed.

The official order at the end of Lap 1, and before the pit stops were resolved, was Beckman, Sturgeon, J. Robinson, Cook, B. Robinson, Landis, Kaluzny, White, and Lim. However, after the stops were resolved, the actual running order on the track was Sturgeon, J. Robinson, Cook (none of whom had pitted), Beckman, Landis, Kaluzny, B. Robinson, White, and Lim.

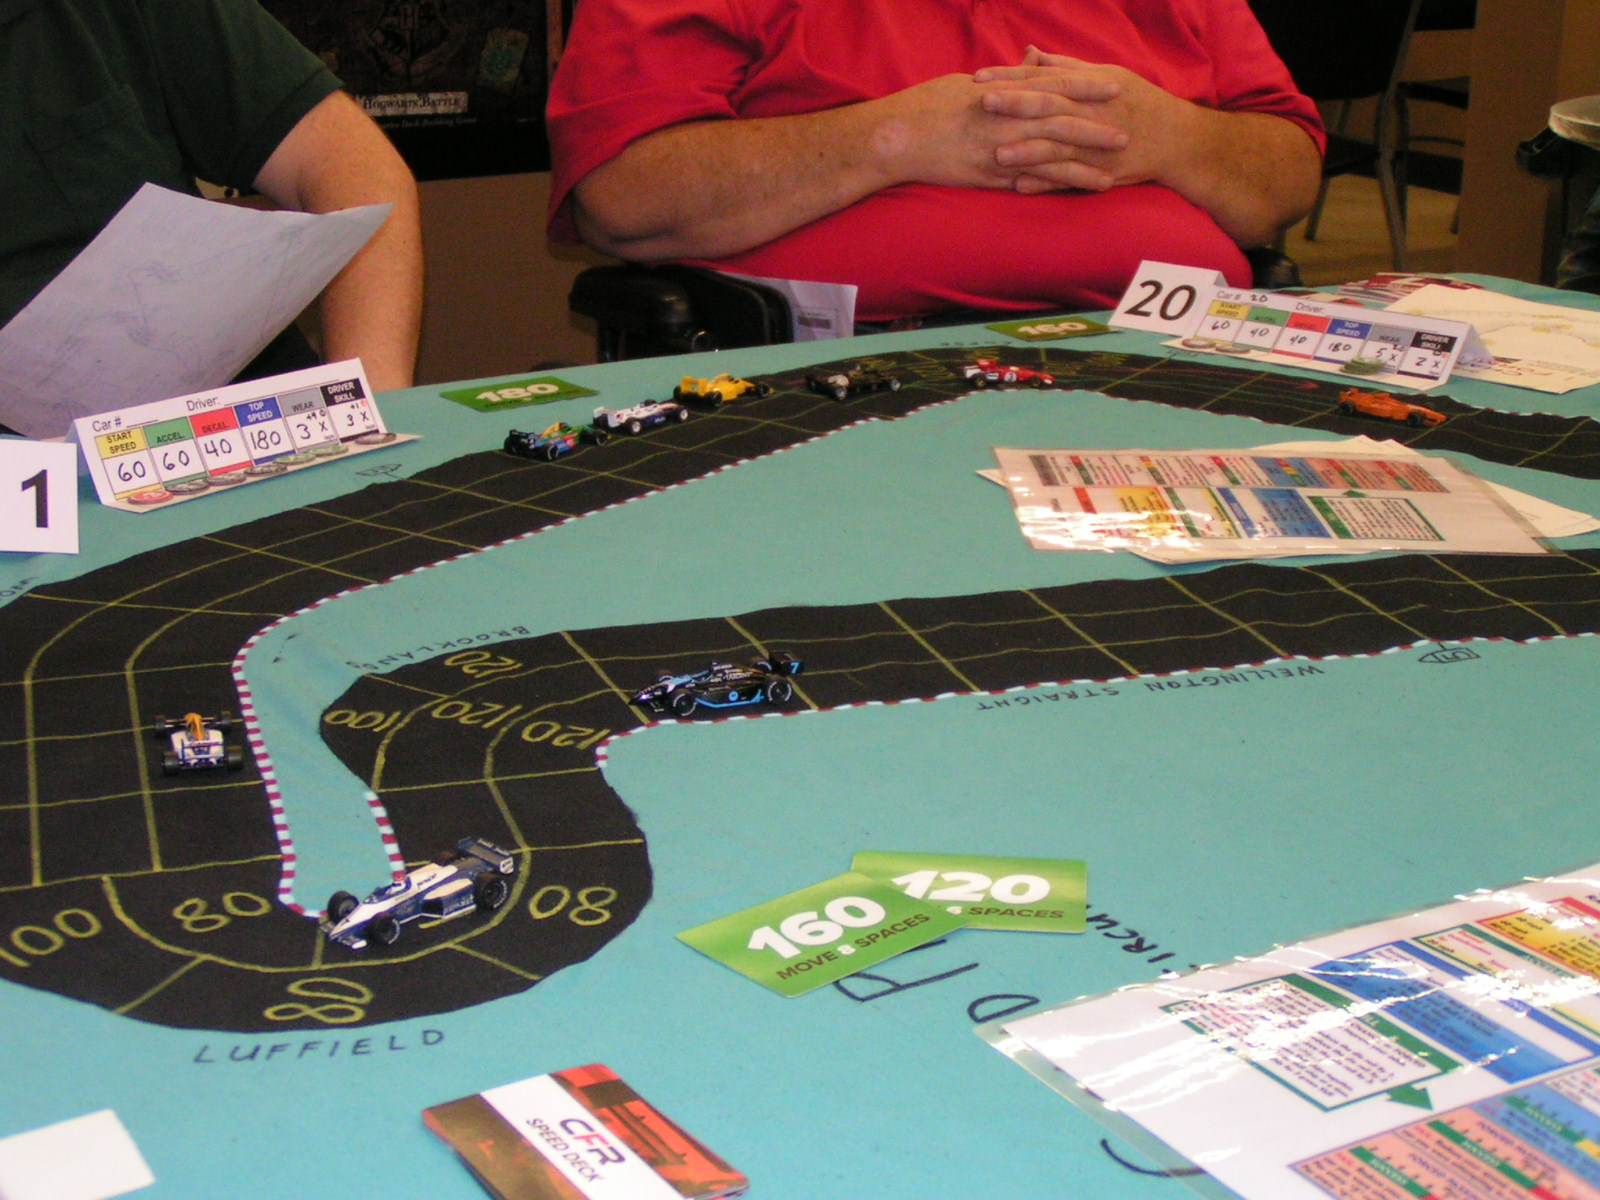
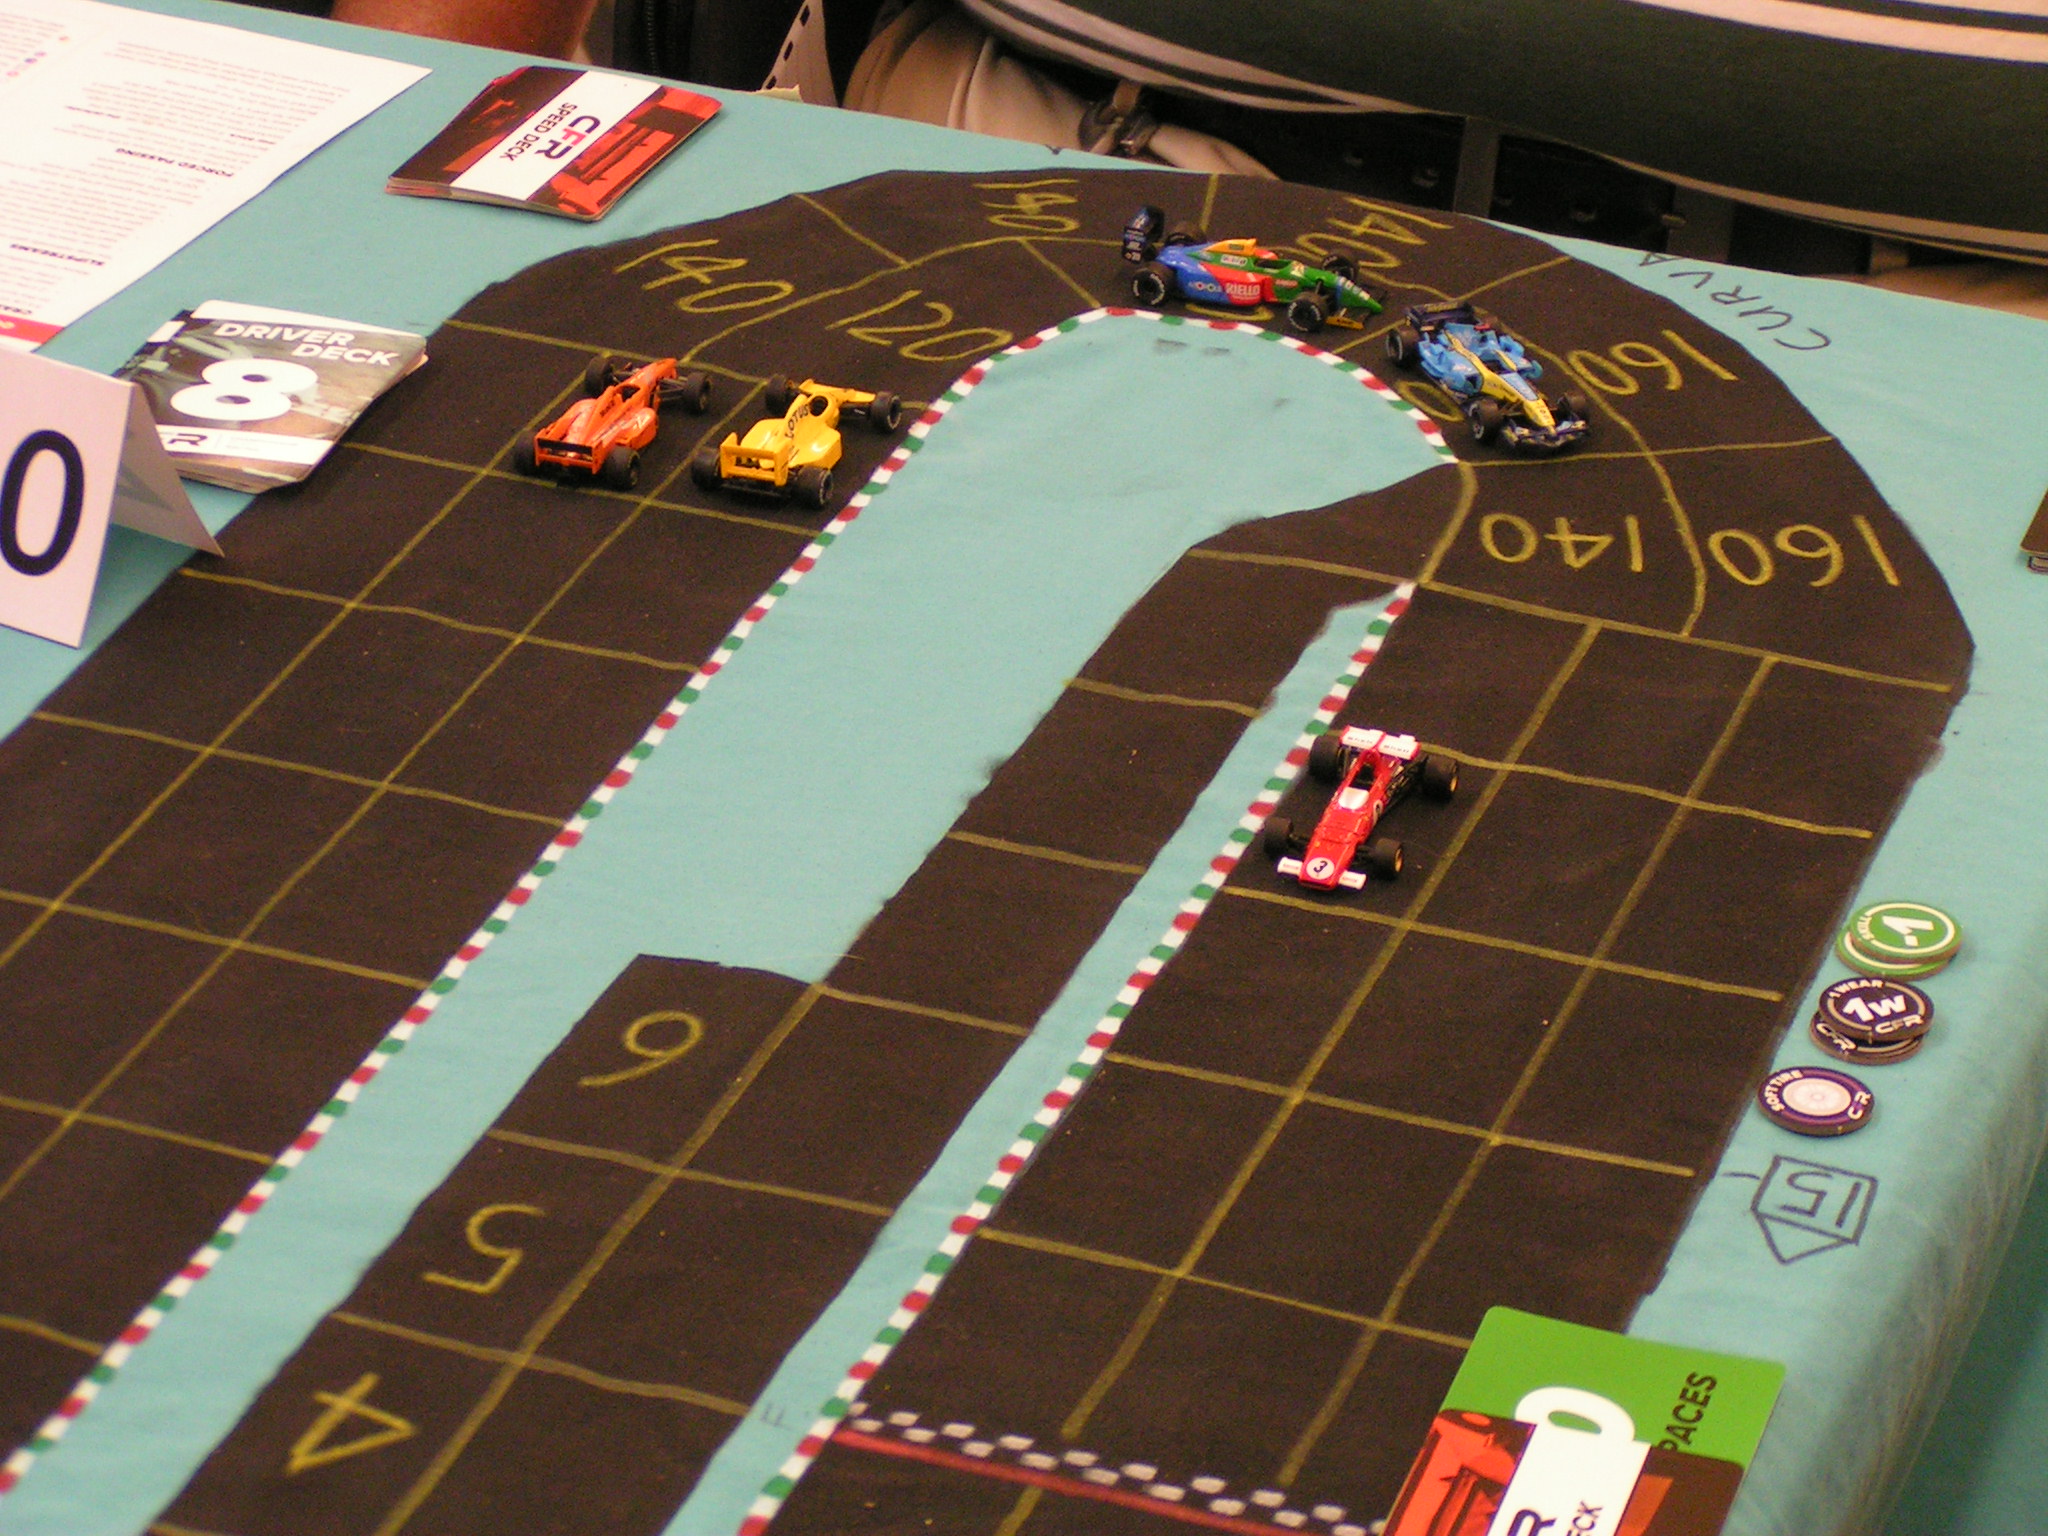
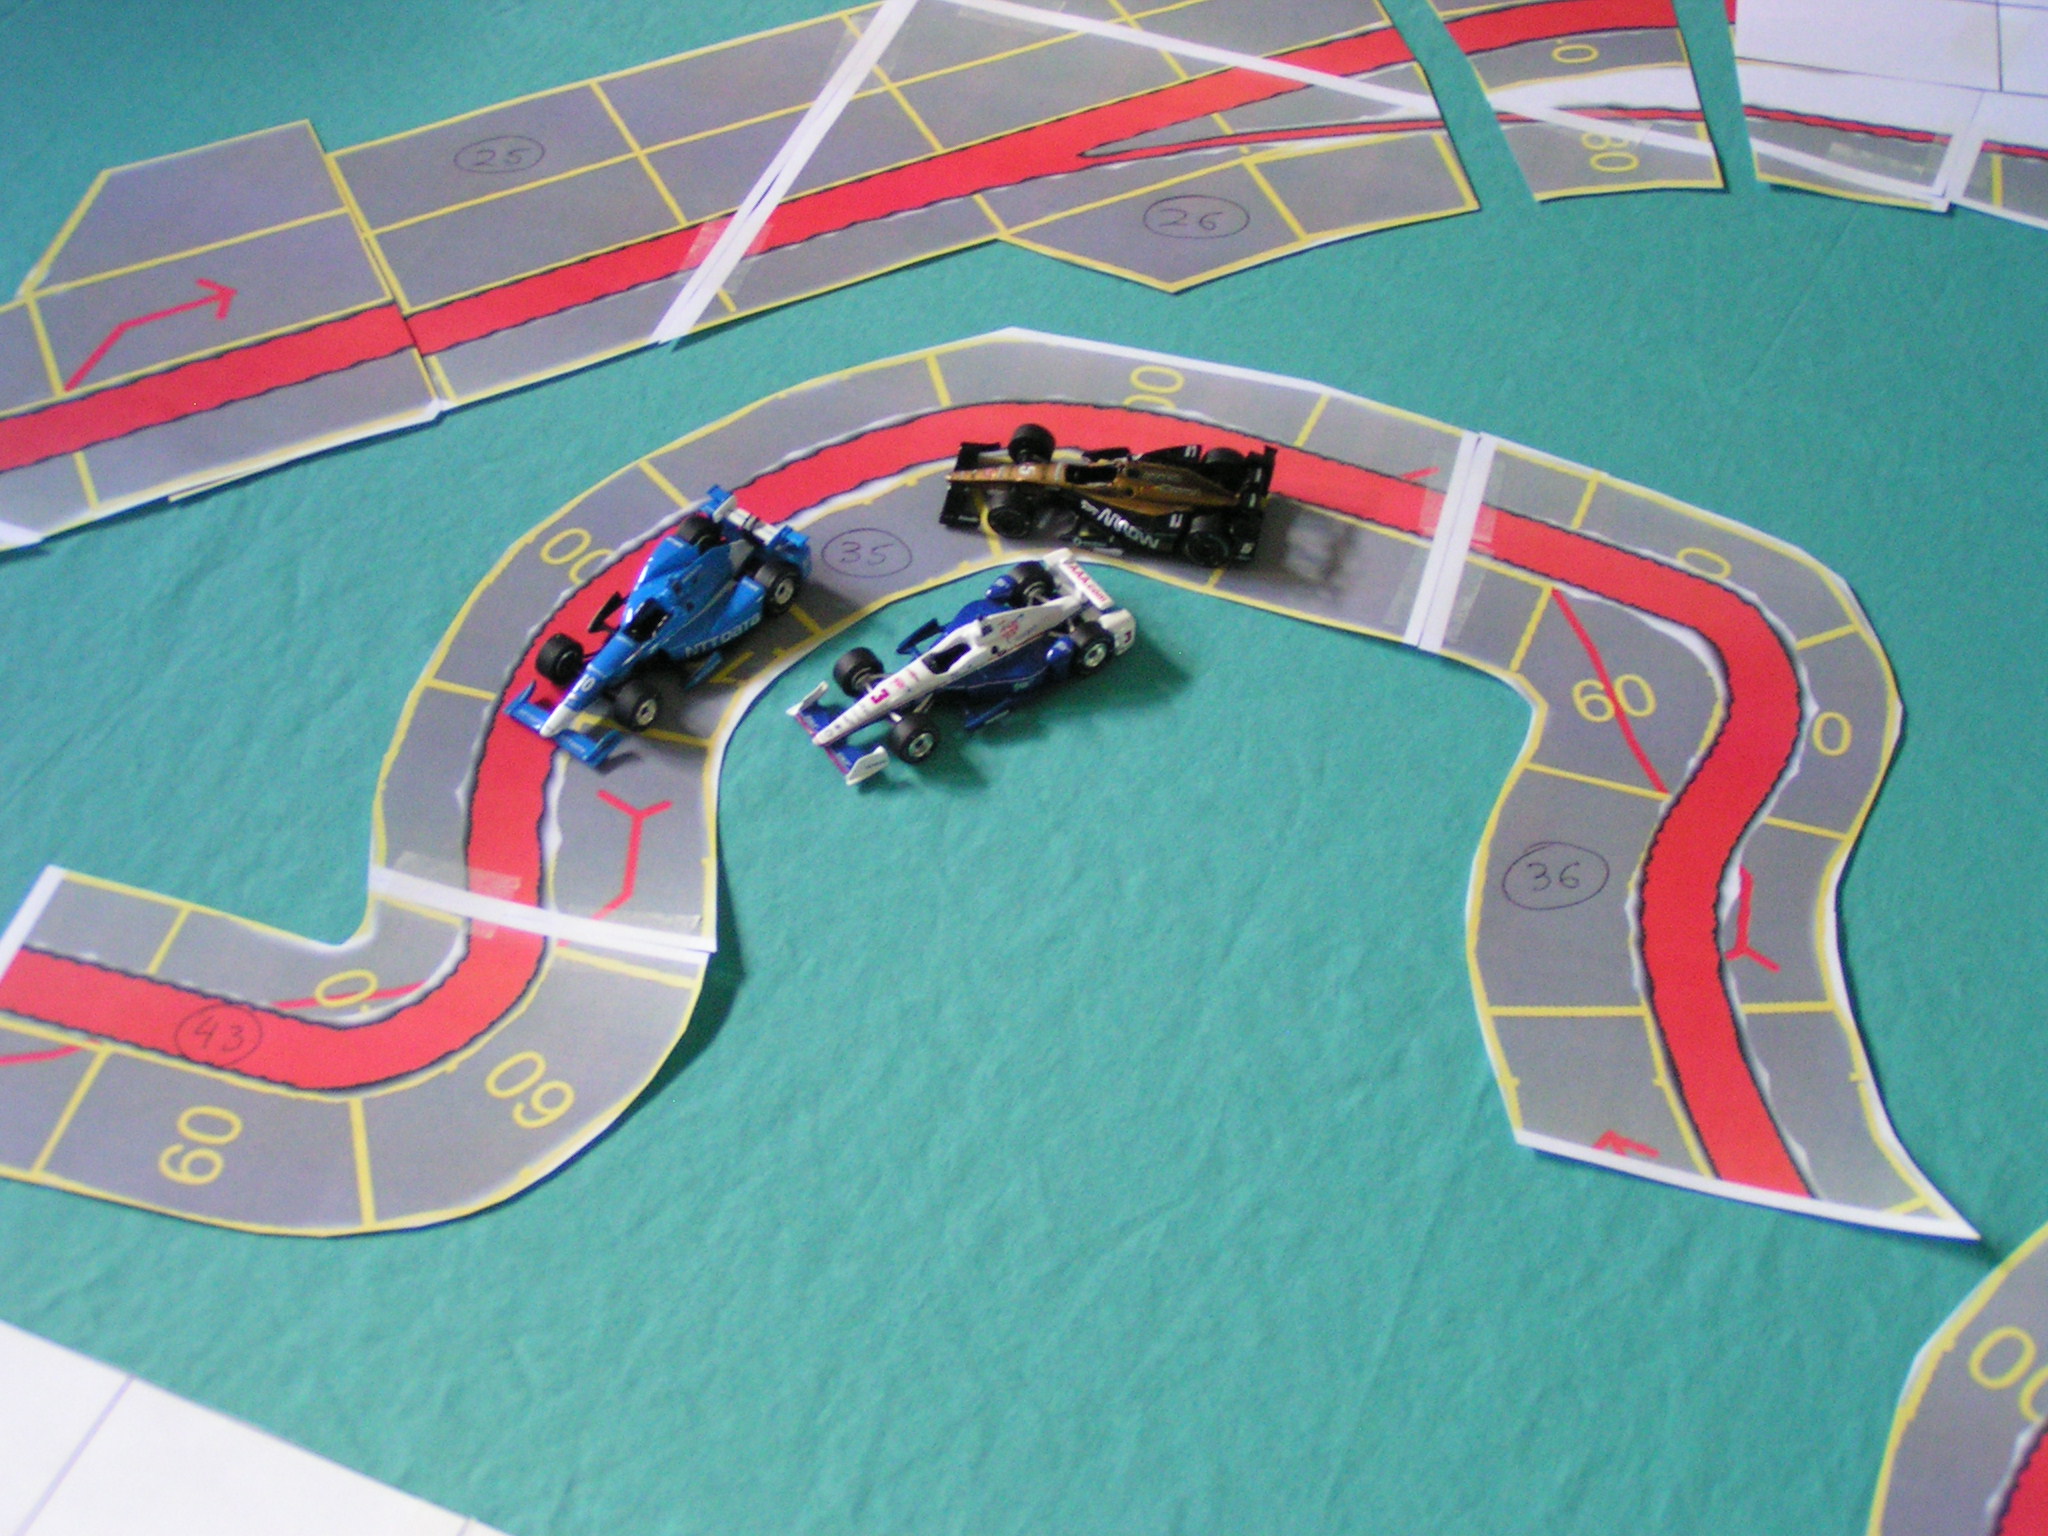
During the 2nd lap, the cars that did not pit enjoyed a bit of a lead over the rest of the pack, and the field became spread out somewhat. Through the Luffield corner the second time around, Sturgeon, Cook and J. Robinson led by 5 spaces over Beckman, then Kaluzny and B. Robinson were another 3 spaces behind Beckman. Landis was 2 spaces behind Kaluzny and B. Robinson, then Lim was 6 spaces behind Landis, and White had fallen farther behind, after spinning at Village corner (his 2nd spinout of the race).

Through Luffield corner on the 2nd lap

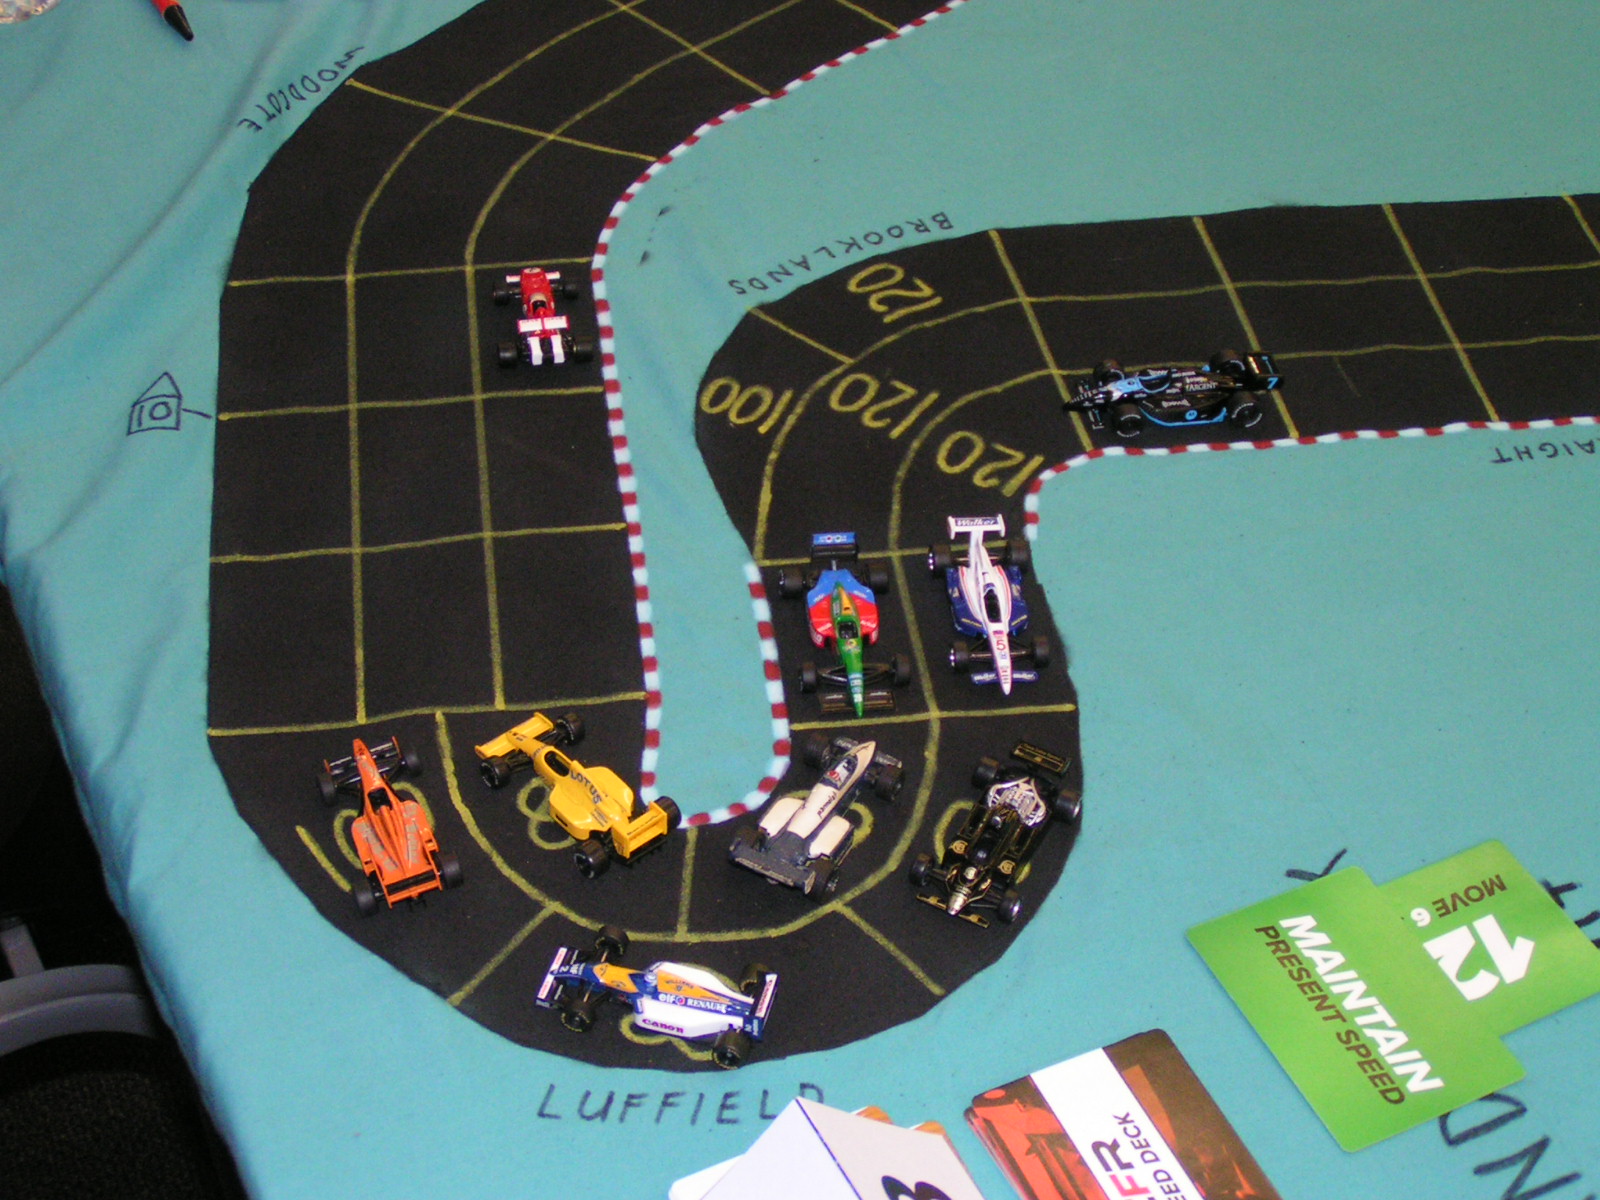
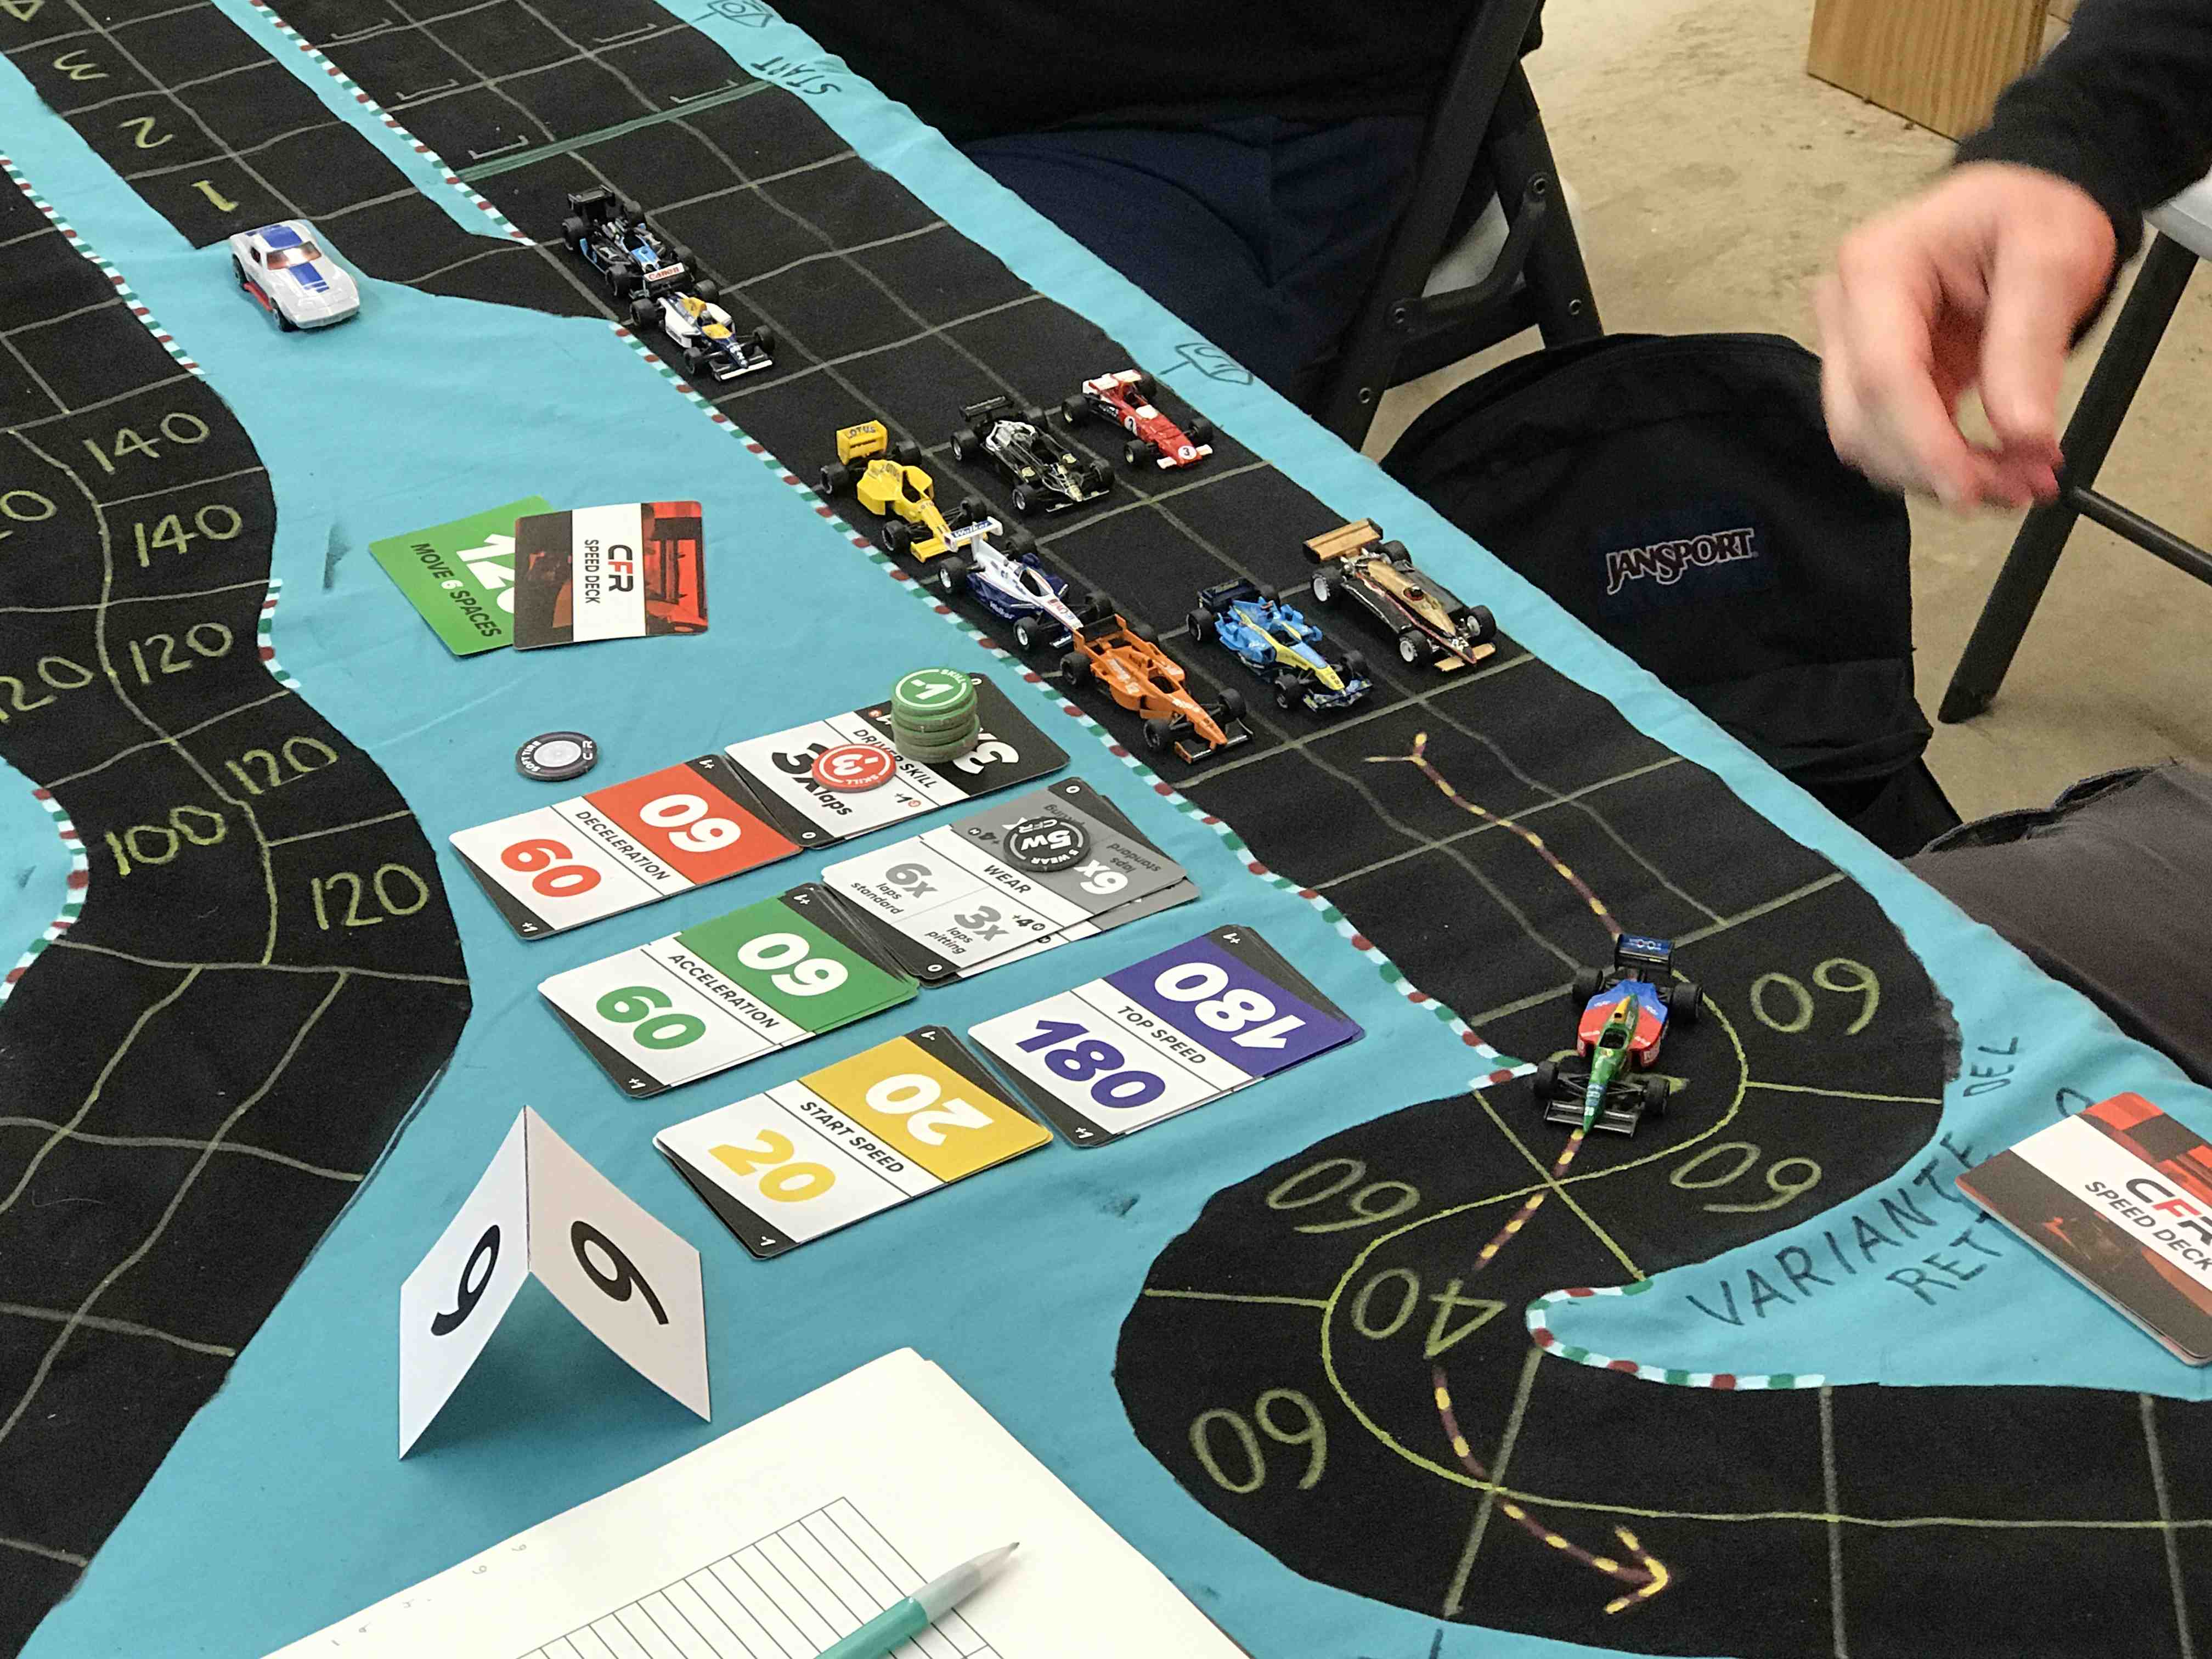
Through Luffield corner on the 2nd lap. Actual drivers pictured (left-to-right) are Mike Cook, Jim Landis, and Jim Robinson.

Going through the Maggots/Becketts/Chapel corners on the 2nd lap, the field was even more spread out. Sturgeon led from Cook, then came J. Robinson, Beckman, Kaluzny, B. Robinson, Landis, Lim, and White.

Through Maggots/Becketts/Chapel on the 2nd lap.

Through Maggots/Becketts/Chapel on the 2nd lap.

Sturgeon managed to hold his 3-space lead over Cook through the Stowe corner, and the rest of the field remained strung out in the same order behind him.

Through Stowe corner for the 2nd time.

Through Stowe corner for the 2nd time. Gary Sturgeon’s John Player Lotus (the black car near the large “12” marker) leads the pack. Drivers pictured (l-to-r): Mike Cook, Jim Landis, Jim Robinson, Richard White, and Brian Robinson.

As the leaders came up to the start/finish line to complete the 2nd lap, the three leaders, Sturgeon, Cook, and J. Robinson, all had to pit to change tires. Sturgeon and Cook changed from hard to soft tires, while J. Robinson changed from soft to hard tires. All of the other drivers stayed out on the track this time around except for Lim, who pitted to put a new set of soft tires on his car to replace the worn out soft tires.

Completing the 2nd lap.

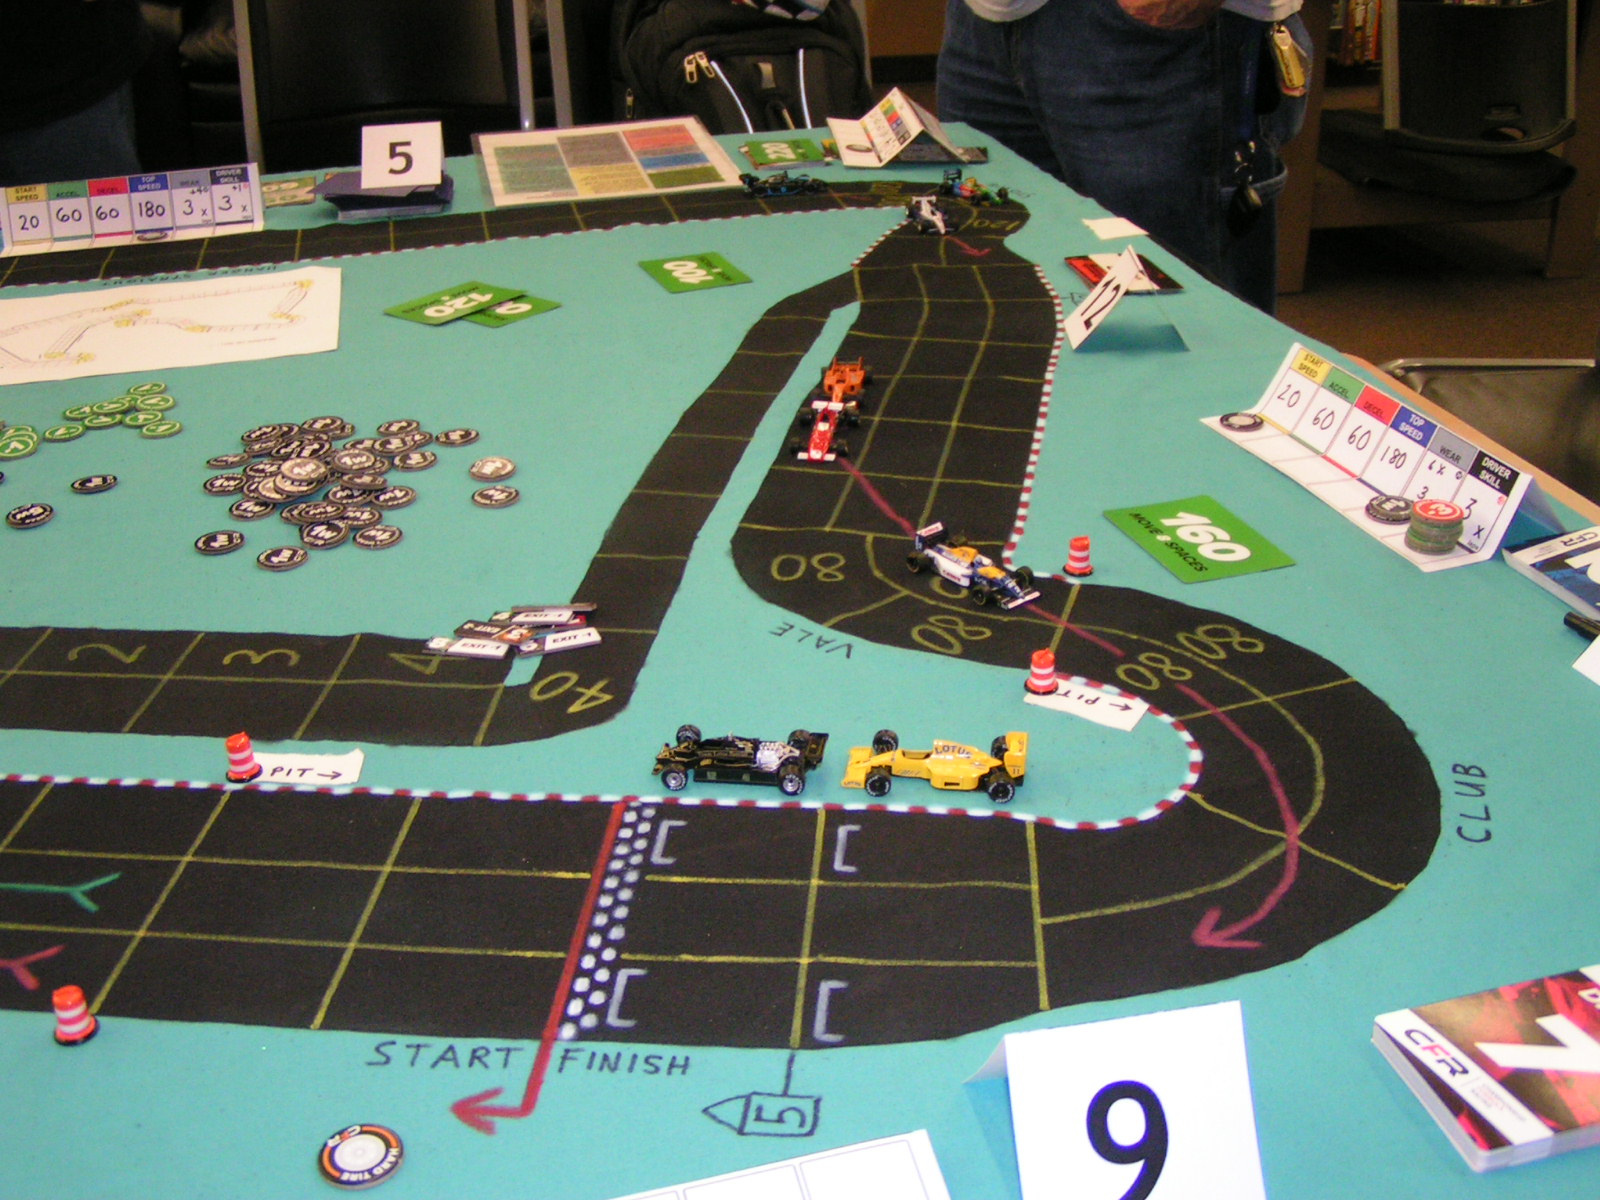
Completing the 2nd lap. Gary Sturgeon (black car) and Mike Cook (yellow car) have already pulled into the pits.

It should be noted in the above picture of cars in the pits, that there is a “pit road” (with the 40 mph speed limit) in the infield of the track. While we are not using that pit road with the CFR simplified pit stop rules, it was painted onto the track just in case we ever revert to our old “Advanced Speed Circuit” pit stop rules.

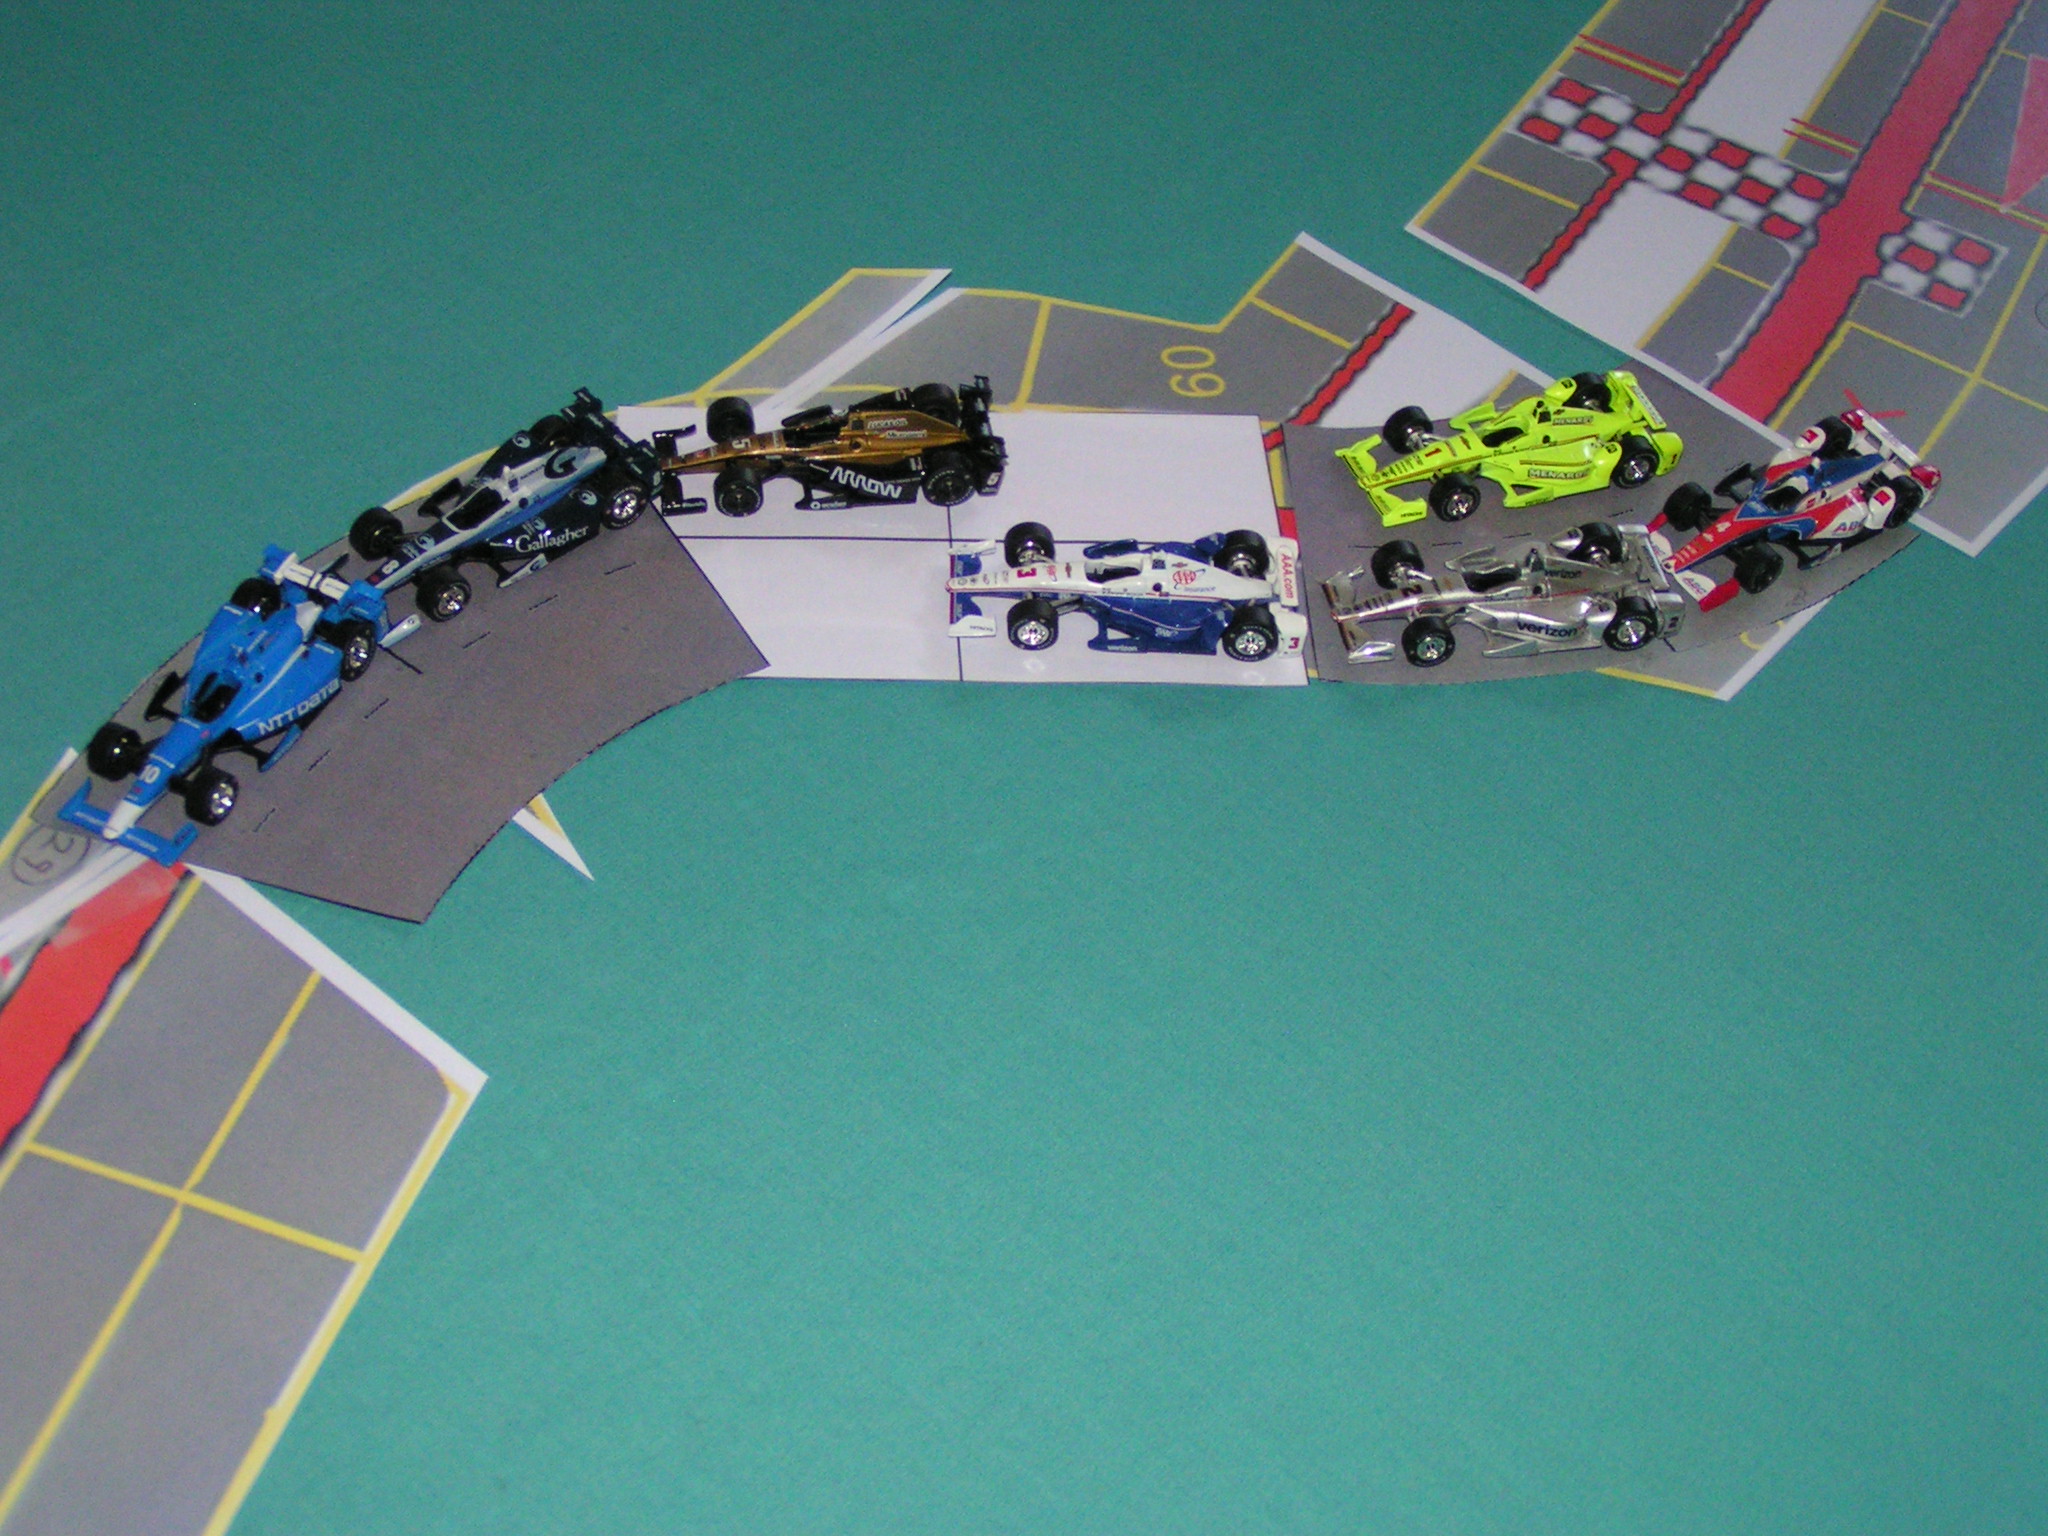
The official order after the 2nd lap was completed by all cars was: Gary Sturgeon; Jim Robinson; Garry Kaluzny; Jack Beckman; Brian Robinson; Mike Cook; Jim Landis; Richard White; and Greg Lim. By the time the lead cars were in the Luffield corner, the order was Kaluzny, Beckman, Sturgeon, Cook, B. Robinson, Landis, J. Robinson, White, and Lim. Lim was quite a ways behind White after making a 2nd pit stop.

Kaluzny takes the lead at Luffield on the last lap.

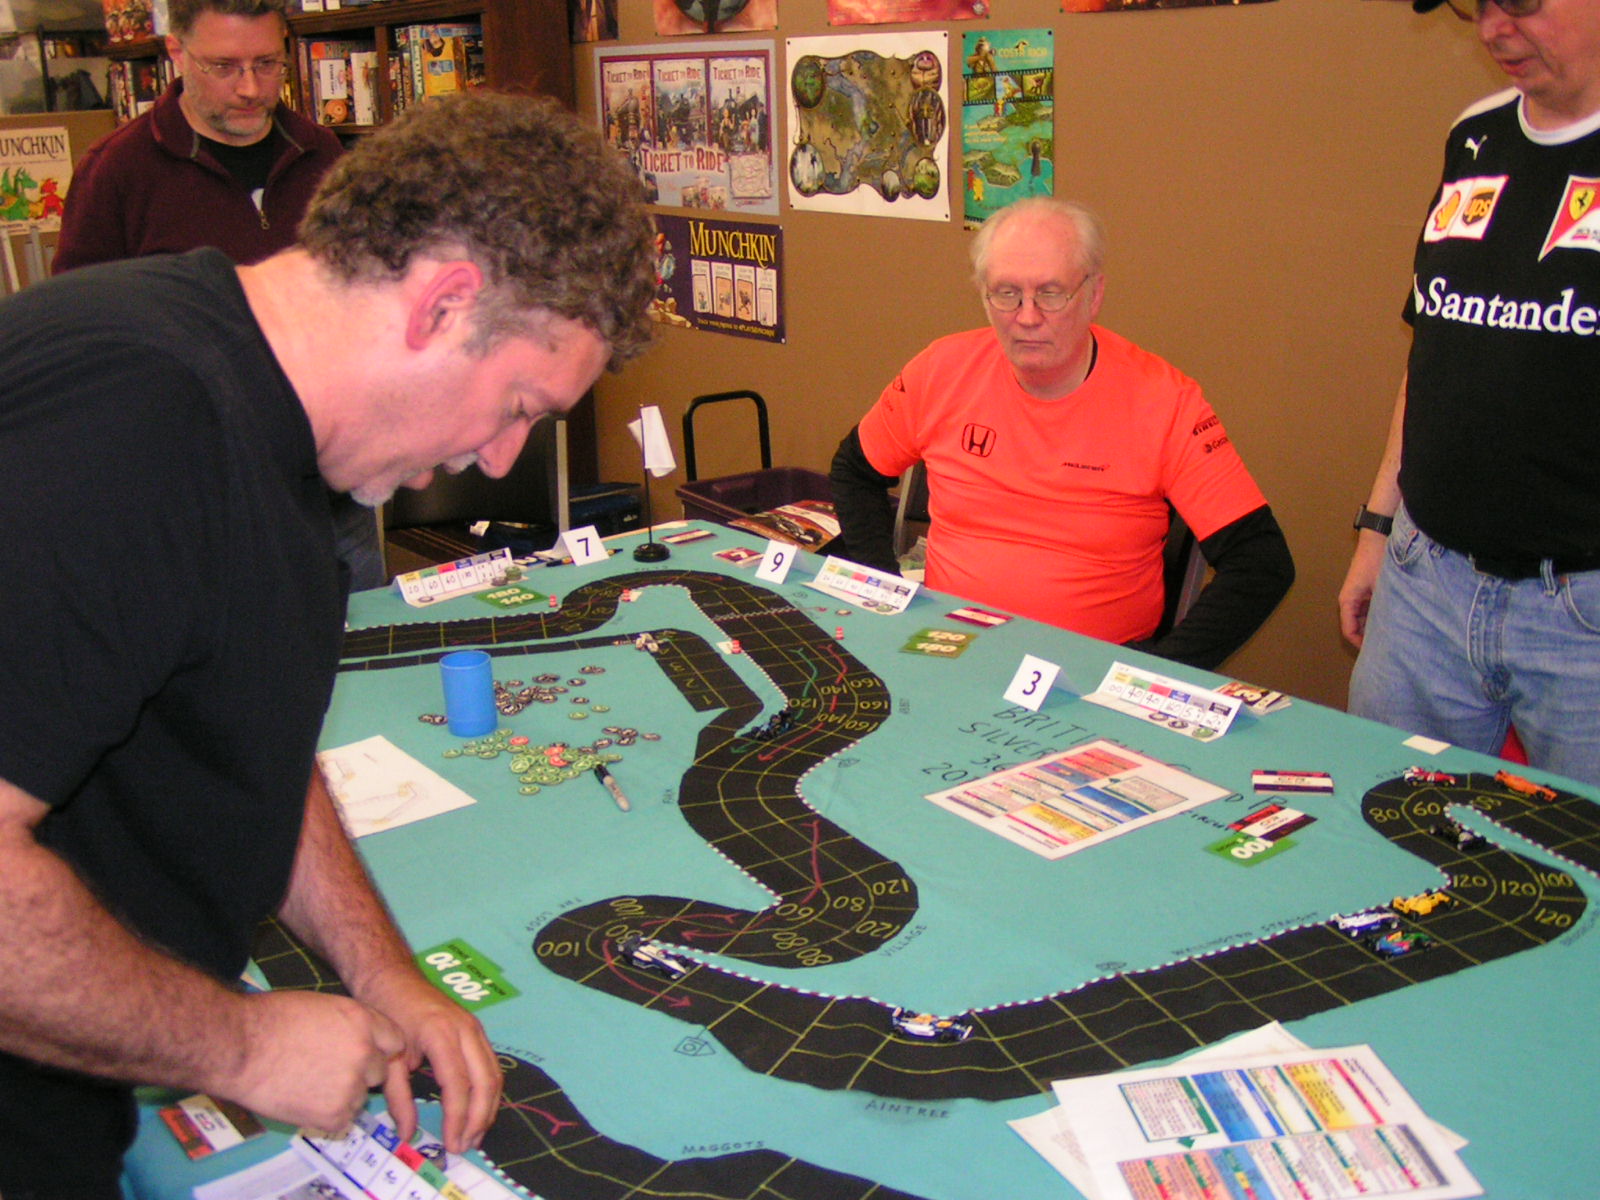
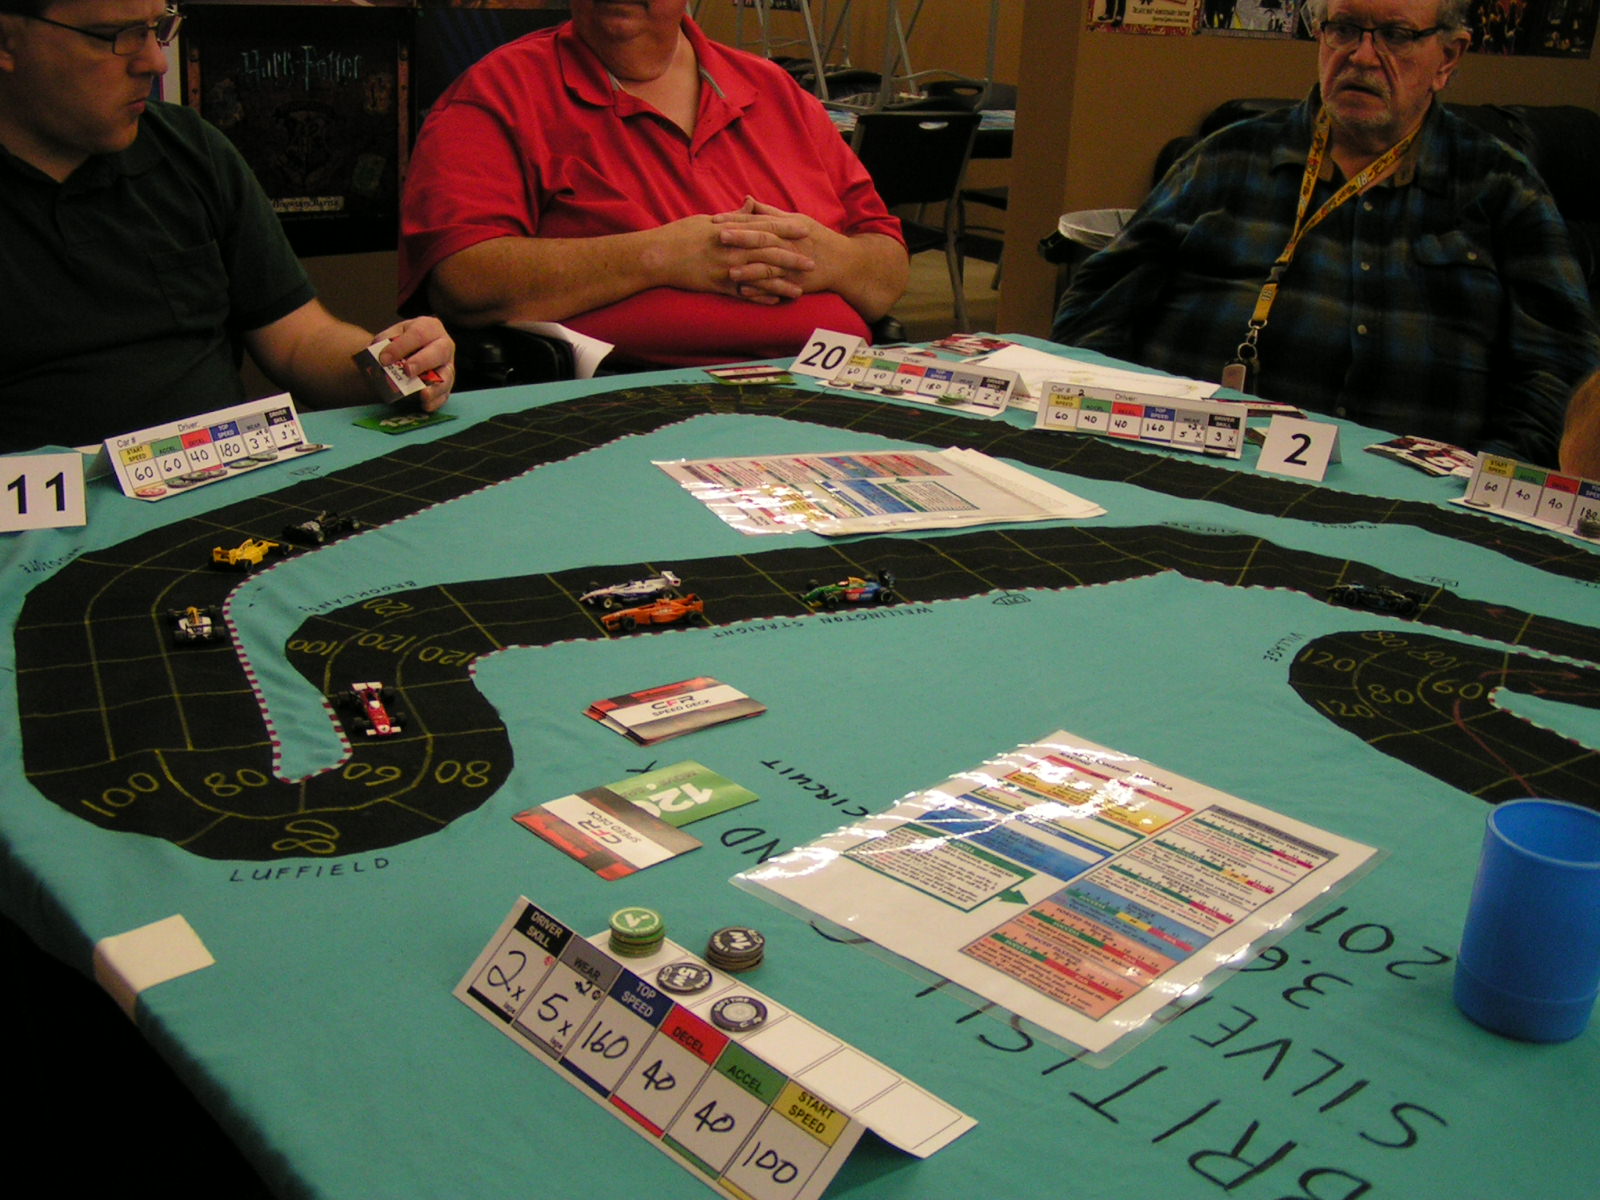
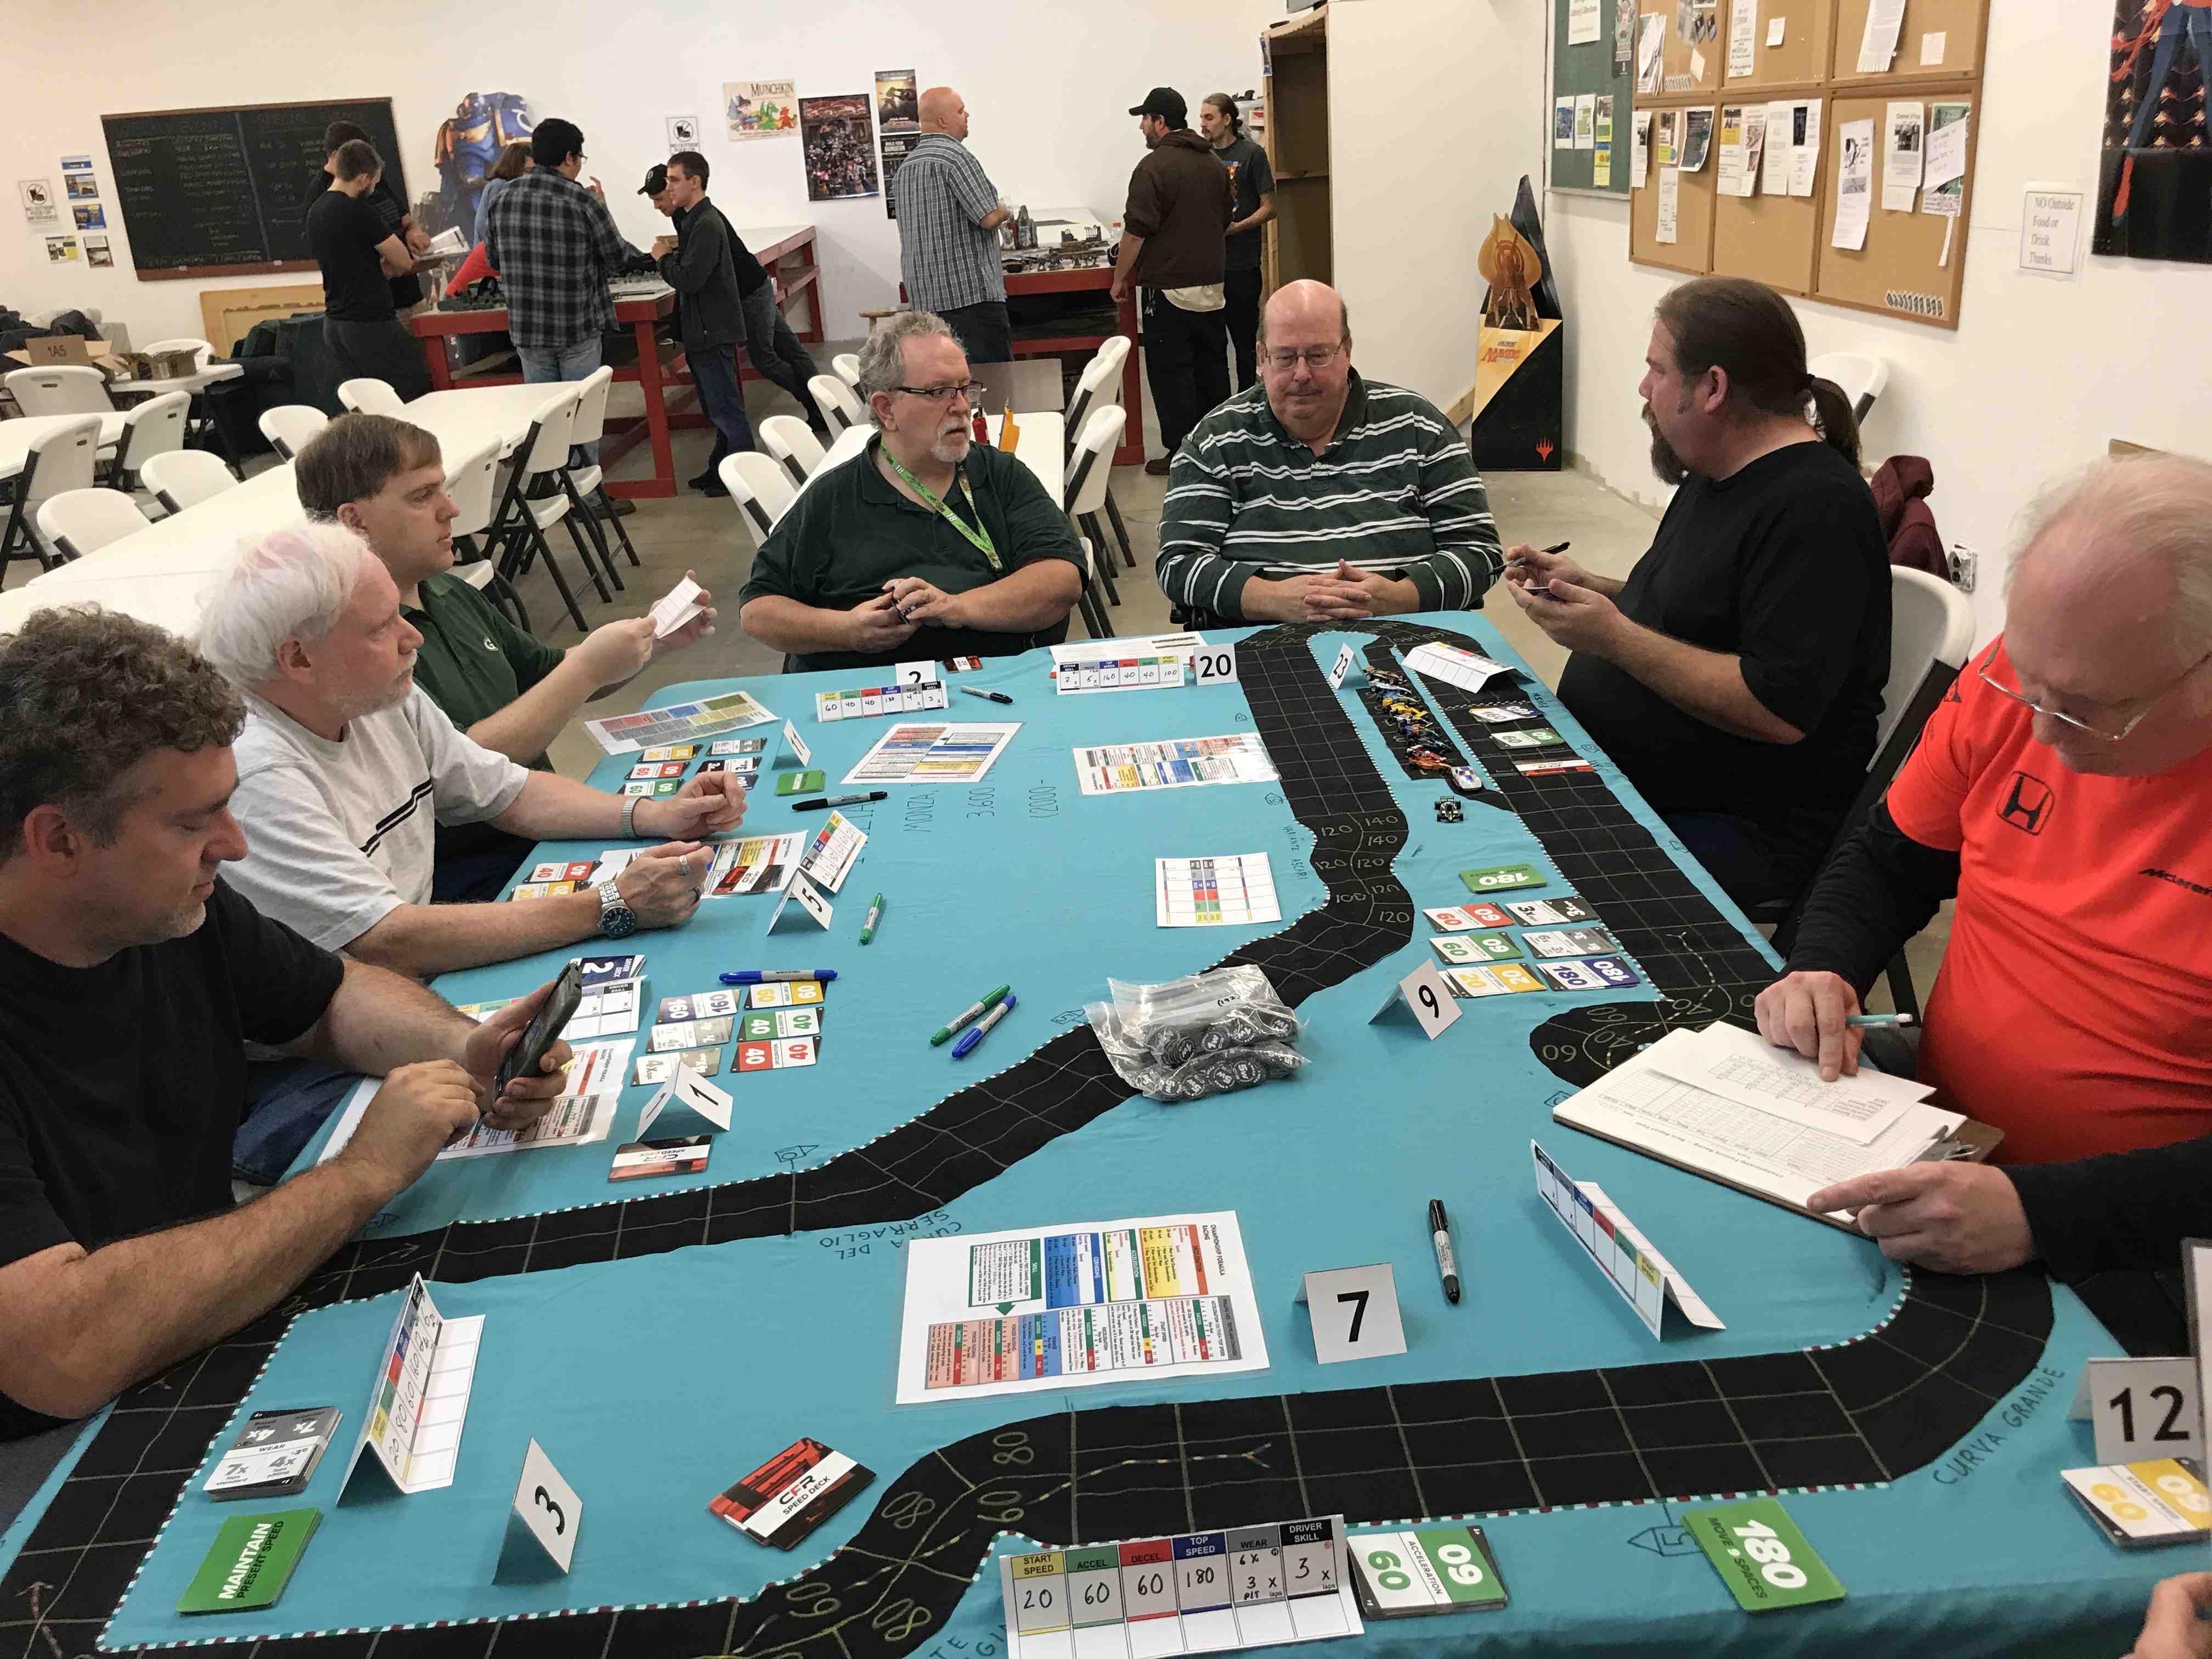
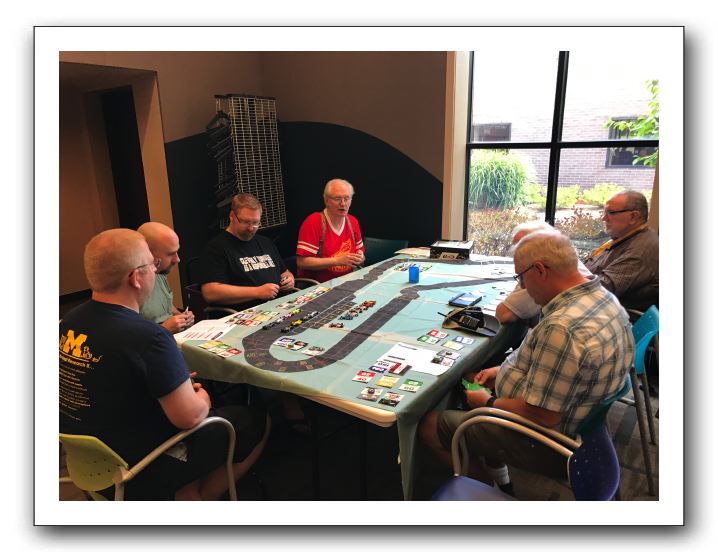
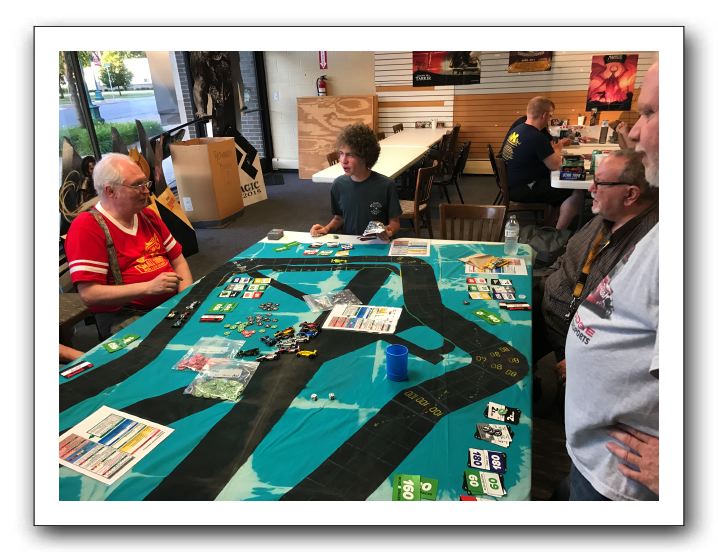
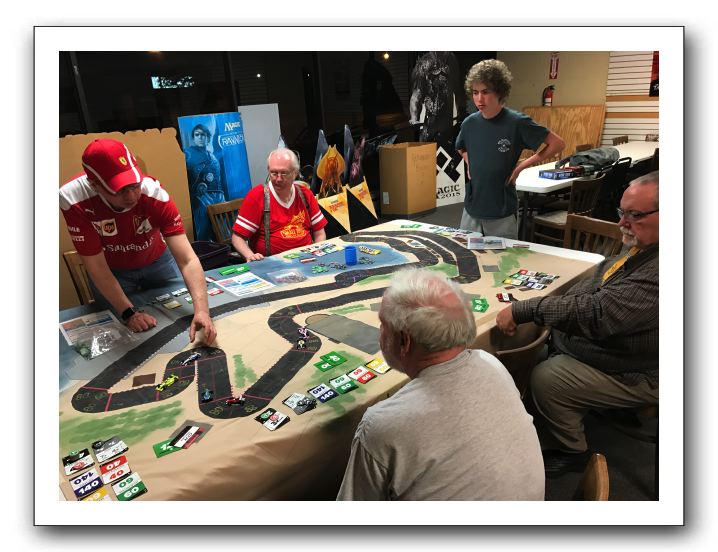
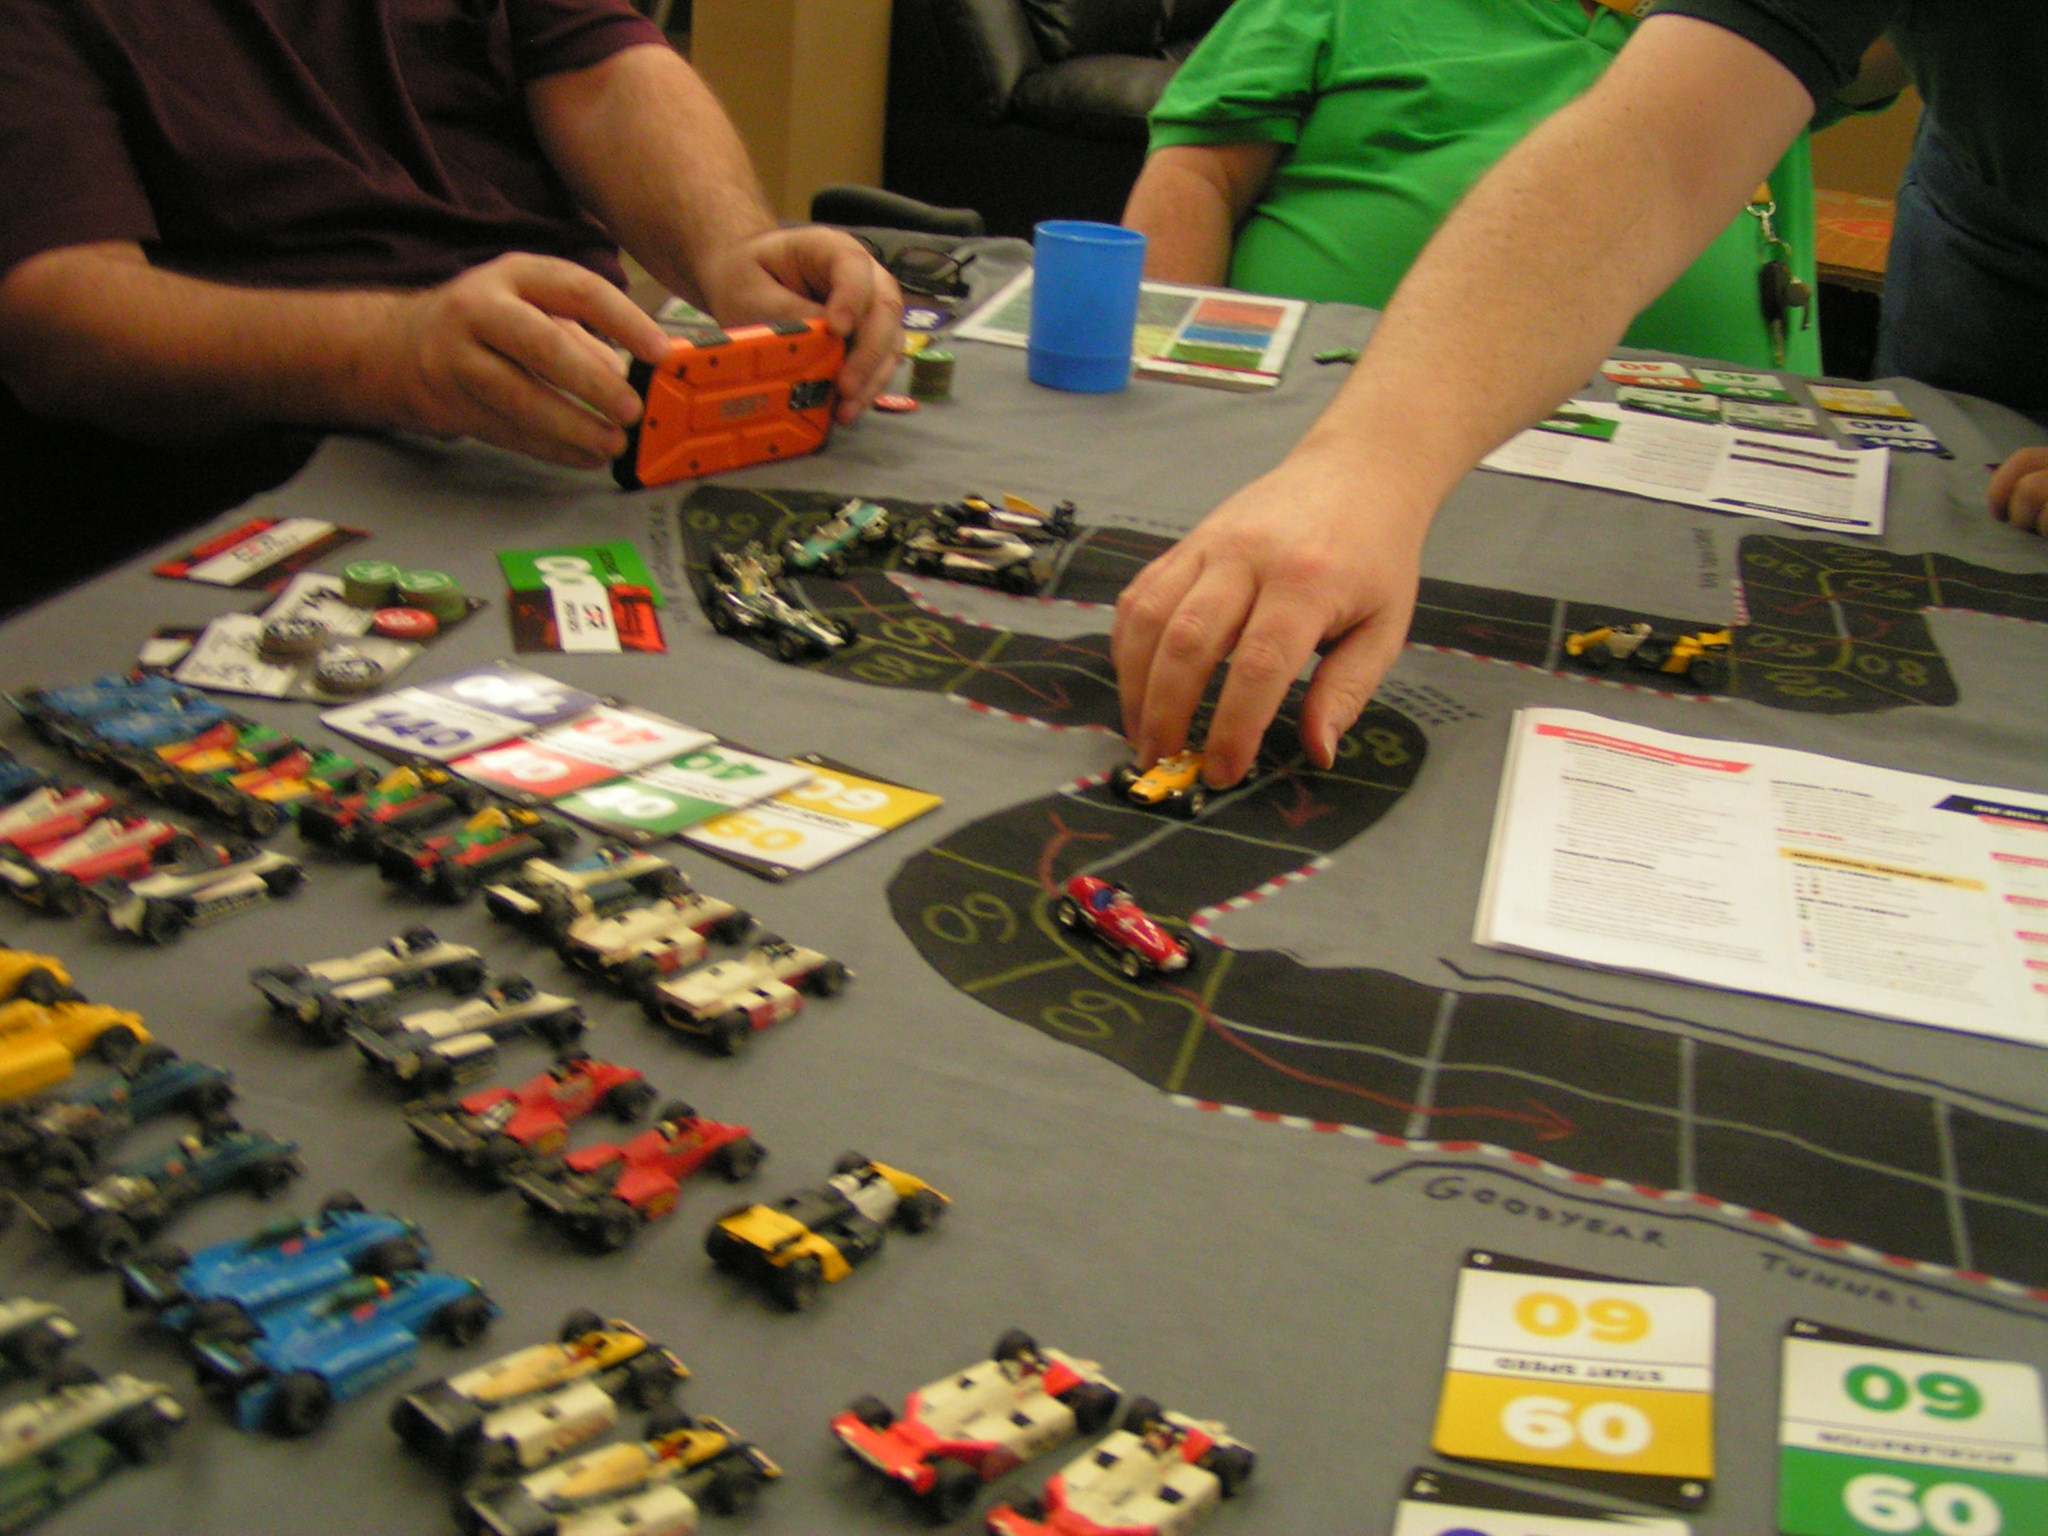
Kaluzny takes the lead at Luffield on the last lap. Pictured (l-to-r): Richard White (foreground); Gary Sturgeon (background); Garry Kaluzny (orange shirt); Jack Beckman (black shirt).

Kaluzny had taken the lead from Beckman going through the Brooklands/Luffield corners, as Beckman’s Ferrari was about out of Wear. Kaluzny stayed on the track after lap 2, and had 8 Wear remaining, then added another 2 Wear due to his being on hard tires, so he had 10 Wear left to use on the final lap. When Sturgeon and Cook came out of the pits after lap 2, they had 12 and 9 Wears, respectively, after replenishing their Wear. Going through Copse corner the last time, Kaluzny’s McLaren led from Beckman’s Ferrari by 3 spaces, and then Sturgeon, Cook, Brian Robinson, and Jim Landis were all nose-to-tail right behind Beckman.

Kaluzny leads through Copse corner on the last lap.

Kaluzny leads through Copse corner on the last lap.

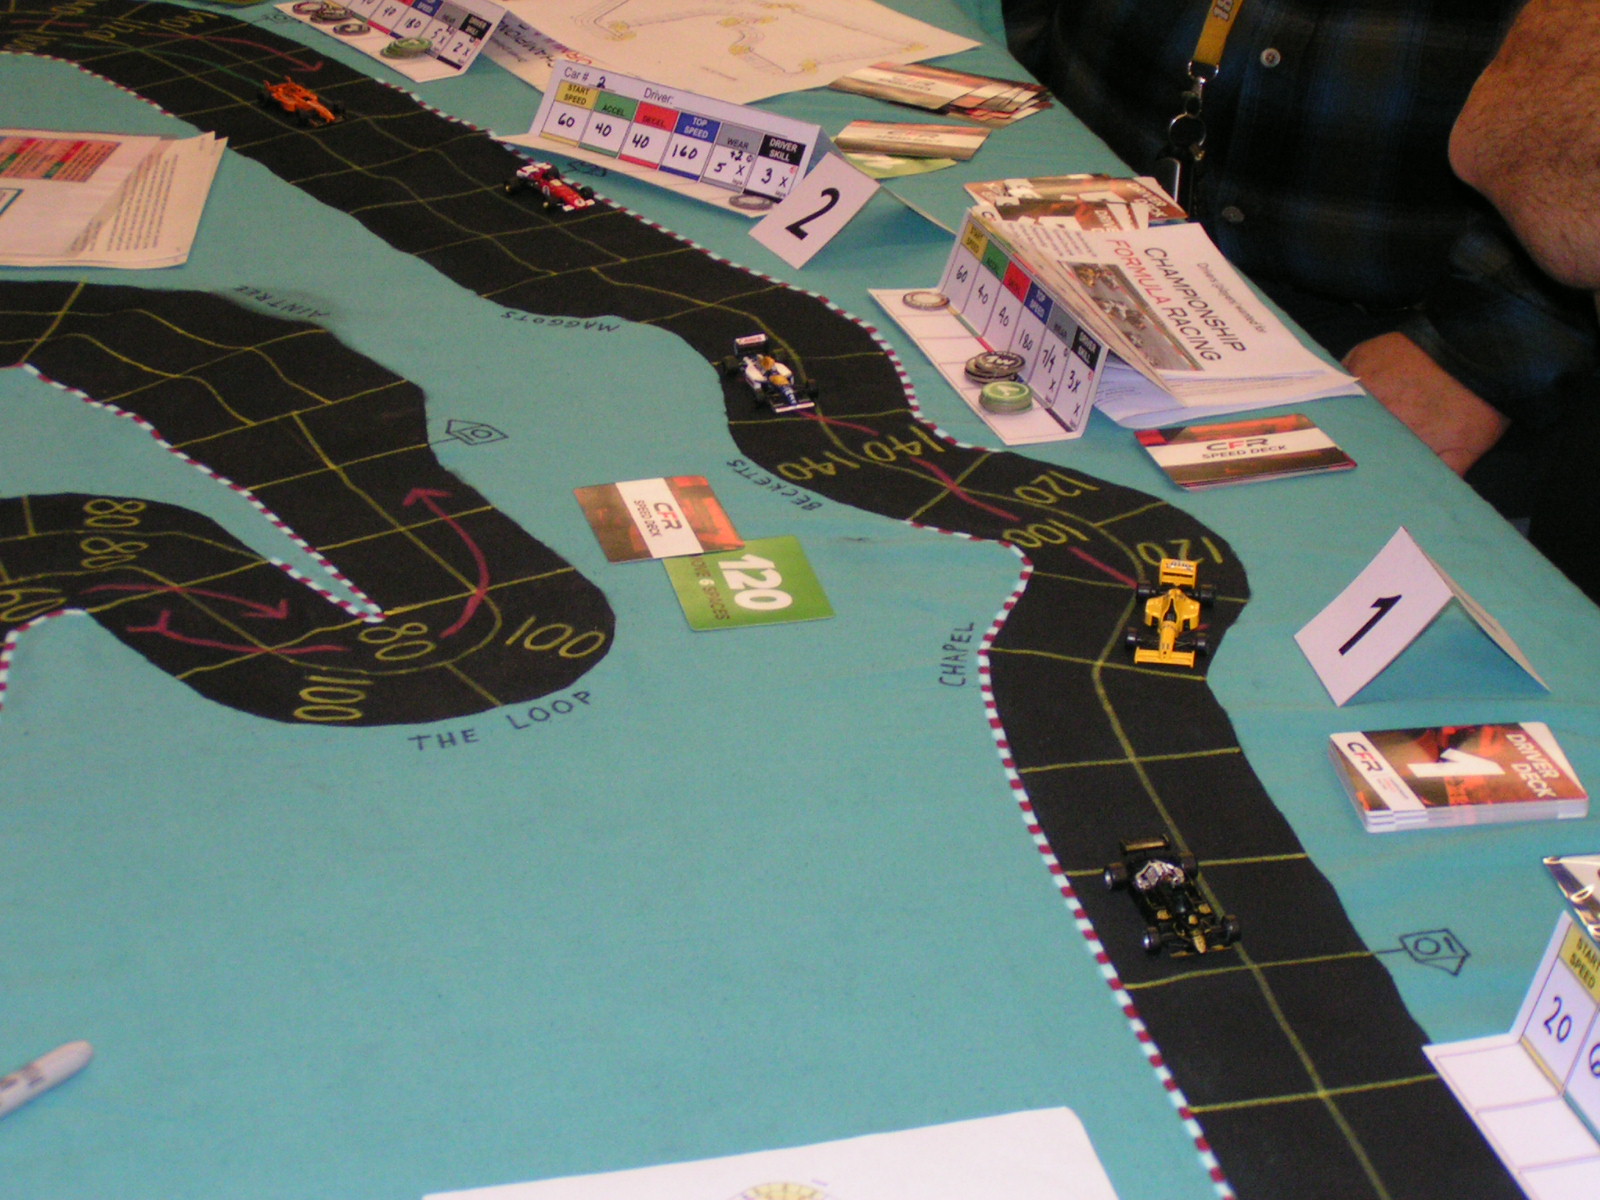
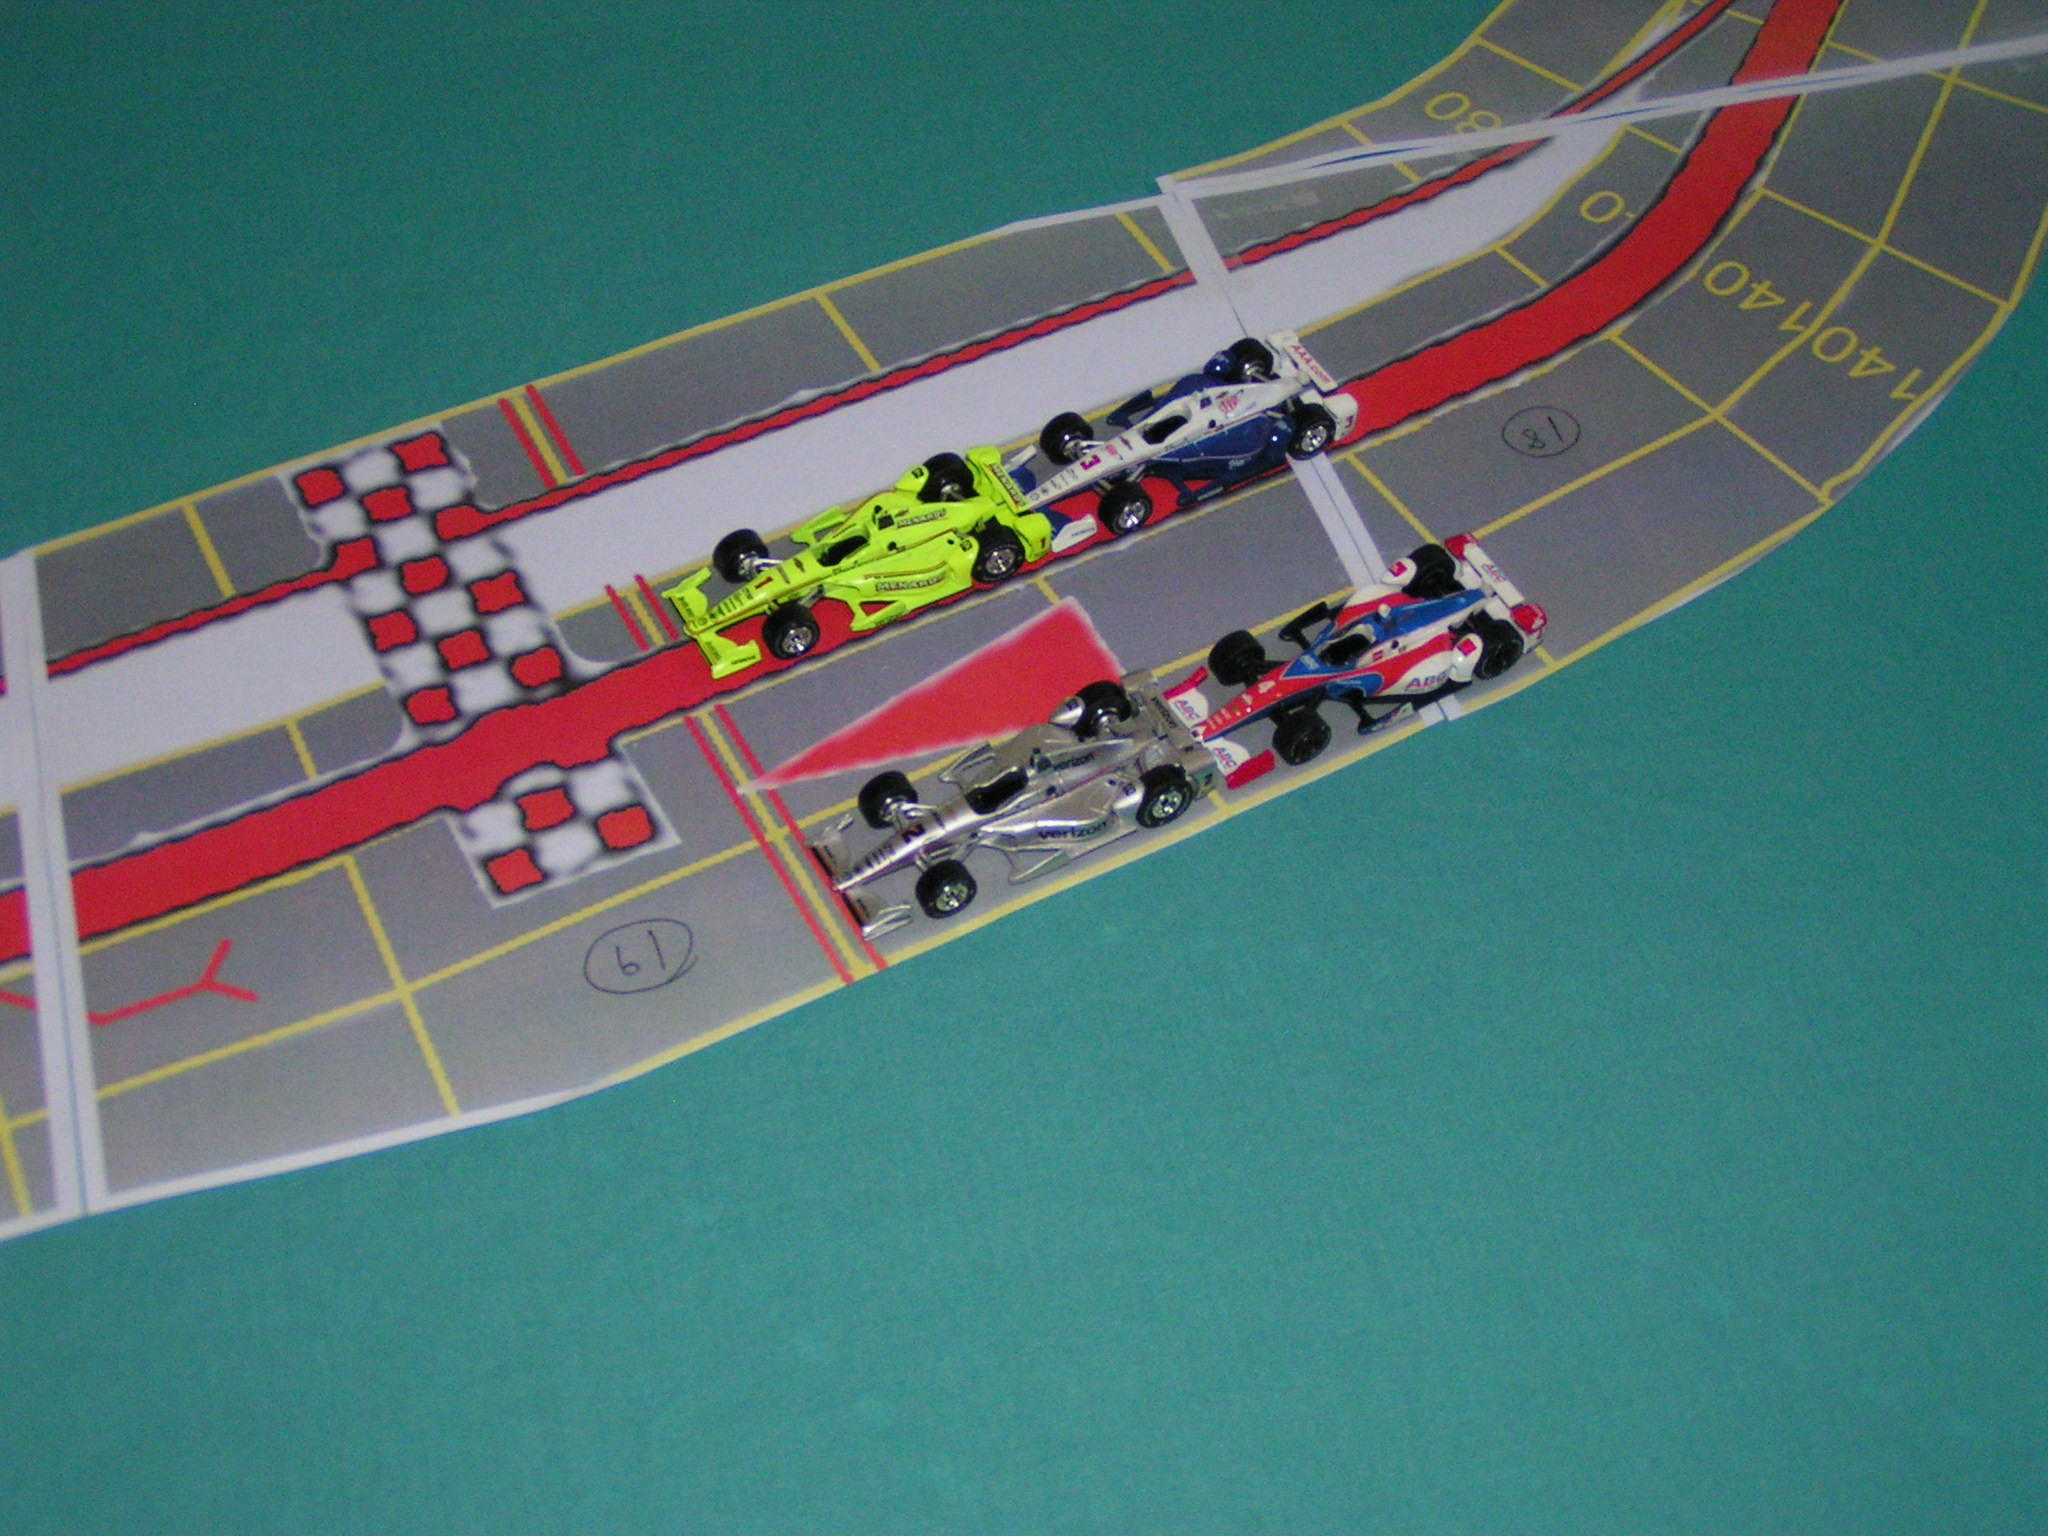
Kaluzny held his lead through the Maggots/Becketts/Chapel set of curves, but when he got to the Stowe corner, the rest of the pack had suddenly caught up to him. As they all approached the Vale and Club corners the last time, Kaluzny, Sturgeon, and Cook were running 1-2-3, all in follow-the-leader order.

Approaching the Vale corner for the last time.

Approaching the Vale corner for the last time.

As they went through Vale and Club corners, Kaluzny moved at 120 mph, burning 2 Wear, but Sturgeon, in 2nd place, went 140 mph while using 3 Wear due to being on soft tires, and that allowed Sturgeon to pull alongside Kaluzny as each driver was only one space from the finish line. But Kaluzny had 1 Wear and 2 Skill chips left, while Sturgeon had no Wear or Skill chips remaining, so on their next turn, Kaluzny plotted to move at 200 mph, and Sturgeon only plotted 160 mph. So Kaluzny’s car moved first, and he had to make both of acceleration and top speed dice rolls, using a -1 Skill marker for each roll. Then, after moving a space, Kaluzny made an unmodified deceleration dice roll to reduce his speed to 180 mph, and he was then able to go through the corner past the finish line at only 20 mph over the speed limit, for which he used his final Wear (that had been hoarded for such a use).

It should be noted that the CFR rules say that if a car crashes in the corner past the finish line, that it is considered to have NOT finished the race at all! Also, if a car spins in that corner after the finish line, the spun car is considered to have crossed the finish line behind all other cars that also crossed the finish line that turn.

So, after Kaluzny (+5) took the checkered flag, followed very closely by Sturgeon (0), the rest of the field finished in this order: Cook (0); B. Robinson (+1), Beckman (-4), Landis (+1), J. Robinson (-3), White (+1), and Lim (-1). The + or – numbers indicate how many positions that driver gained (+) or lost (-) from where their car qualified for the race.

Finishing order, right-to-left.

Finishing order, right-to-left.

The points awarded at this race: Kaluzny 10; Sturgeon 6; Cook 4; B. Robinson 3; Beckman 2; and Landis 1.

The updated points standings through two (of eight) races:

Place Driver (Car)                    Points
  1   Garry Kaluzny (McLaren)           13
  2   Jack Beckman (Ferrari)            12
  3T  Richard White (Brabham)            6
  3T  Mike Cook (Camel Lotus)            6
  3T  Gary Sturgeon (John Player Lotus)  6
  6   Jim Landis (Benetton)              5
  7   Brian Robinson (Walker Racing)     4
  8T  Russ Herschler (Minardi)           0
  8T  Greg Lim (Motorola)                0
  8T  Jim Robinson (Williams)            0
   

This was the 2nd race in a row where all of the starters also finished the race. Quelle surprise! This has set a new record for the most consecutive races in the Detroit area Speed Circuit/CFR races for all starters finishing the race.

The next race will be the Monaco Grand Prix. We will race that on Friday, November 10, 2017, at Imperium Games in Wixom, Michigan. Race time is 7:00 pm, although we would like drivers to try to get there (through bad rush hour traffic on I-96!) by 6:30 pm so they can get their car set up. Most drivers were early at the British Grand Prix race, and that allowed us to start just about on time.

Starting the Racing Season using the Championship Formula Racing Game

September 10th, 2017

After several months of running demo races in various locations to try to attract as many potential drivers as possible, the Championship Formula Racing-Detroit group started off their 2017-2018 series of races with the Italian Grand Prix on Friday, September 9, 2017. Ten drivers competed in the race, and when all was said and done, Jack Beckman won the race, followed by other podium finishers Richard White and Jim Landis. The race was at the Guild of Blades game store in Clawson, Michigan.

Drivers set up their cars preparatory to racing on the Monza, Italy track with 1:64 scale race cars.

Drivers set up their cars preparatory to racing on the Monza, Italy track with 1:64 scale race cars. Pictured are (left-to-right): Richard White; Brian Robinson; Mike Cook; Jim Robinson; Jim Landis; Russ Herschler; and Garry Kaluzny.

In our former racing game campaign using Advanced Speed Circuit rules, we used to actually run our cars on qualifying laps; however, in the new CFR rules, starting positions are determined by “bidding” some of your car’s Wear and/or Skill markers. Mike Cook took the pole position with a bid of 8 Skill, which is equal to 4 Wear (for a bid total of 4). Jim Landis started in the other front row position with a bid of 3. The 2nd row starters were Garry Kaluzny and Brian Robinson with bids of 2.5 and 2, respectively. Gary Sturgeon bid 1 to start 5th, and Jack Beckman bid 0.5 to start 6th. The final four starters each bid nothing, so they rolled dice for their starting positions, with the highest dice rolls starting in front of the lower dice rolls. Greg Lim started 7th; Russ Herschler started 8th; Richard White started 9th; and Jim Robinson started 10th.

The starting grid with their car specs:

 # Driver                        Start/Accel/Decel/Top/Wear/Skill/Tires
11 Mike Cook (Lotus)               20    60   60   180  3x   3x    hard
20 Jim Landis (Benetton)          100    40   40   160  5x   2x    soft
 9 Garry Kaluzny (McLaren)         20    60   60   180  3x   3x    soft
 5 Brian Robinson (Walker Racing)  20    60   60   180  3x   3x    soft
12 Gary Sturgeon (John Player)     60    60   60   160  4x   2x    hard
 3 Jack Beckman (Ferrari)          20    80   60   160  4x   2x    hard
 7 Greg Lim (Motorola)             20    80   60   160  4x   2x    hard
23 Russ Herschler (Minardi)        60    60   40   160  4x   3x    hard
 1 Richard White (Brabham)         60    40   40   160  4x   4x    hard
 2 Jim Robinson (Williams)         60    40   40   180  4x   3x    hard

Start = Start Speed (in miles/hour); Accel = Acceleration (in mph); Decel = Deceleration (in mph); Top = Top Speed (in mph); Wear = # of Wear markers; Skill = # of Skill markers.

We raced using the CFR rules for pit stops and different tire compounds. That meant that cars started with less Wear than if we were not using the pit stop rules. Since we raced three laps around the Monza track, cars with 3x Wear started with 3 x 3 = 9 Wear; cars with 4x Wear started with 4 x 3 = 12 Wear, and cars with 5x Wear started with 5 x 3 = 15 Wear. Cars would also have to make at least one pit stop during the race, as each car had to use both the hard and the soft tires. The CFR rules handle the different tires pretty eloquently; if your car is on hard tires, if you pass the finish line without stopping in the pits, you regain some Wear. This simulates that the hard tires don’t wear out as fast as the soft tires. A car on hard tires with 3x Wear would regain 4 Wear when crossing the finish line (except at the start or the finish of the race); a car with 4x Wear would regain 3 Wear when crossing the line, and a car with 5x Wear would regain 2 Wear when crossing the line.

Soft tires don’t allow cars to regain Wear, but they do allow drivers to spend Wear in extra ways. For example, drivers could spend 3 Wear if they were going 60 mph over the Speed Limit in a corner. Cars on hard tires (or using the basic rules without pit stops) would have to use 2 Wear and roll dice to take a chance of spinning out or crashing when 60 mph over the speed limit in a corner. Soft tires also allow drivers to increase their starting speed without chancing a stall, and they also allow using a Wear to increase Acceleration by 20 mph in a turn.

Diagram of the real Monza track.

Diagram of the real Monza track.

Drivers starting on soft tires were Jim Landis, Garry Kaluzny, and Brian Robinson. Everyone else started on hard tires. All of the soft tire cars increased their start speed by 20 mph, so that allowed Jim Landis to start at 120 mph, and he quickly jumped in front of the field at the start.

At the first turn of the first lap, Jim Landis leads the pack in the Benetton.

At the first turn of the first lap, Jim Landis leads the pack in the Benetton.

At the first turn (the Variante del Rettifilo), Jim Landis led, followed by Garry Kaluzny, Richard White (rocketing from 9th on the grid to 3rd on the start), Russ Herschler, Brian Robinson, Mike Cook (the pole-sitter), Gary Sturgeon, Jack Beckman, Jim Robinson, and Greg Lim. Going through the del Rettifilo turn, Brian Robinson managed to get by Russ Herschler. At the Variante Ascari (the series of corners leading onto the back straightaway), Jim Landis was leading Garry Kaluzny by 4 spaces on the track, followed by Jack Beckman and Brian Robinson (each 5 spaces behind Landis), then came White and Herschler (each 7 spaces behind Landis), then Cook (8 spaces back), Sturgeon (12 spaces back), Jim Robinson (16 spaces back), and Lim (22 spaces back). But then going through Ascari, both Herschler and Jim Robinson spun, so they dropped back in the field.

As the cars came around the final turn of the first lap, the Curva Parabolica, the three cars on soft tires, Landis, Kaluzny, and B. Robinson, all pitted as they had all burned through all of their starting wear. A bit of a surprise was when Sturgeon also pitted to switch from hard to soft tires. Herschler also pitted to switch from hard to soft tires.

The official order after the 1st lap was complete was: Beckman (+5); White (+7); Cook (-2); Sturgeon (+1, pitted); Landis (-3, pitted); Herschler (+2, pitted); Lim (0); Kaluzny (-5, pitted); B. Robinson (-5, pitted); and J. Robinson (0). The + or – symbols tell how many spaces the driver improved (+) their lap 1 position from their starting position, or how many spaces they lost (-) from their starting position.

On the 2nd lap, just past the del Rettifilo corner, Gary Sturgeon in the John Player car forced a pass on Garry Kaluzny’s McLaren in the Curva Grande, although Sturgeon had to burn a Wear when the cars bumped together. Jim Robinson spun a second time, this time at del Rettifilo, the sharp right-hand corner at the end of the main straightaway. He also had failed his deceleration dice roll just before spinning, so his brakes were just not up to snuff on this day. Russ Herschler, who had just come out of the pits, was able to pass J. Robinson before Robinson’s car got up to speed again.

As the cars passed through the Ascari corners on the 2nd lap, it was Beckman, White and Cook with quite a lead over the other drivers. Landis was in 4th place, 12 spaces behind the top three cars. Although, Landis had pitted on the 1st lap, and the three leaders had not yet ventured into the pits.

As the leaders passed through the final turn, the Curva Parabolica, on lap 2, the cars which had not stopped in the pits on after 1st lap did now pull into the pits. Cars that pitted on this lap were Beckman, White, Cook, Lim, and Jim Robinson, and they all switched from hard to soft tires. The other cars stayed out on the track.

The official order after lap 2 was: Landis (+4), Beckman (-1, pitted), White (-1, pitted), Lim (+3, pitted), Cook (-2, pitted), Kaluzny (+2), Sturgeon (-3), B. Robinson (+1), Herschler (-3), J. Robinson (0, pitted). The + or – symbols indicate how many positions the driver gained or lost from their position at the end of lap 1.

Early in the 3rd lap, three drivers, Beckman, Landis, and White, were side-by-side going into the Variante del Rettifilo. Landis and White blinked first, and Beckman’s Ferrari surged into the lead and got through that corner first. Beckman continued to lead through the first of the two Lesmo corners, building a 4-space lead.

Last lap through the Lesmo curves.

Beckman’s Ferrari leads the last lap through the Lesmo curves, followed by Landis, White, Cook, Kaluzny, and Sturgeon.

Richard White made a valiant effort to catch Beckman, but the engine in White’s Brabham started going sour as he approached the Ascari corners for the last time, and so could not catch up. Soon after that, Herschler’s Minardi spun in the 2nd Lesmo corner, although that didn’t affect his 9th place at the time.

Beckman's Ferrari about to cross the finish line. White and Landis trail, and Cook (yellow car) and Kaluzny (orange car) are side-by-side going into the Parabolica.

Beckman’s Ferrari about to cross the finish line. White and Landis trail, and Cook (yellow car) and Kaluzny (orange car) are side-by-side going into the Parabolica.

Going through the Curva Parabolica for the last time, Jack Beckman had no trouble motoring across the finish line first, thusly winning the inaugural race of the CFR-Detroit race series. Richard White was able to hold off Jim Landis for 2nd. The duel for 4th place was decided with Garry Kaluzny barely holding off Mike Cook. Exiting the Parabolica, Cook was right behind Kaluzny, ready to use two bonus spaces for drafting Kaluzny, which would have allowed Cook to pass Kaluzny for 4th. However, Kaluzny’s engine didn’t like being pushed to 200 mph, and spurted some oil onto the track. Cook had to swerve to avoid the oil, thus missing the slingshot move, and so finished 5th. Brian Robinson grabbed the last points-paying position in 6th place, and then 7th through 10th places went to Gary Sturgeon, Greg Lim, Russ Herschler, and Jim Robinson.

The finishing order at Monza.

The finishing order at Monza.

 Place Driver                                Points
    1  Jack Beckman (Ferrari) (+5)         - 10 points
    2  Richard White (Brabham) (+7)        -  6 points
    3  Jim Landis (Benetton) (-1)          -  4 points
    4  Garry Kaluzny (McLaren) (-1)        -  3 points
    5  Mike Cook (Lotus) (-4)              -  2 points
    6  Brian Robinson (Walker Racing) (-2) -  1 point
    7  Gary Sturgeon (John Player) (-2)
    8  Greg Lim (Motorola) (-1)
    9  Russ Herschler (Minardi) (-1)
   10  Jim Robinson (Williams) (0)

The + and – indicates how many places the driver gained or lost from their qualifying position. Jack Beckman gained 5 places from his starting position, although Richard White gained 7 places. Both drivers drove very fine races. They were the only two drivers who improved upon their starting position.

Very surprisingly, all 10 drivers who started the race also finished the race. This may be the only time this has occurred in the history of the Detroit area Speed Circuit/CFR races! Richard White stated that he thought that this was the only time when every starter also finished the race.

The next race will be on the 2010/2011 version of the Silverstone, England track. Race day is Friday, October 13, starting at 7:00 pm. The race venue has yet to be determined.

Making a 1:64 Scale Track — Part 3 — Painting the Track

July 25th, 2017

Welcome to the final installment of how to make a large scale race track on a bed sheet. Of course, by “large scale” I am not writing about a “real life” size race track, but a track that can be used to play auto racing board games on something larger than a small board game sized board. Previous blog posts in this series were:

Part 1 — Laying out the track

Part 2 — Marking the track on the sheet

At the end of part 2, we used masking tape to mask off the inside and outside edges of the track. We then mentioned masking off the parts of the sheet that you don’t want to paint, and then start spraying the track. After I finished masking the sheet with newspapers, I then sprayed the first coat of flat black paint on the sheet. It looked like this:

First coat of paint has been sprayed.

First coat of paint has been sprayed.

As you can see, although I tried to spray the paint fairly heavily, it soaked into the sheet and almost looks like it wasn’t sprayed very well. While I found that I usually only had to spray two coats of paint to fully cover a track in the past (allowing about 30 minutes between spraying each coat), this time I went cheap. Instead of buying a “name brand” of flat black spray paint, I opted for the “house brand” paint from a local hardware store. Big mistake. With the house brand paint, I had to apply about five coats of paint to get good coverage, and one can of spray paint wasn’t enough to do the entire job! I had to start using a second can of spray paint. When I previously used the higher quality paint on other tracks, it would usually only take 3/4 to an entire can of paint to cover the track satisfactorily.

The track after several coats of paint.

The track after several coats of paint.

Let the coats of paint dry enough to where you are satisfied with the results, then remove all of the masking. I suggest letting the paint dry at least a full day before applying any other markings to the track.

Masking has been removed.

Masking has been removed.

There was a little bit of spray paint that “bled” onto the sheet, but it’s not too bad. C’est la vie, as they would say in France.

Next, retrieve the track templates you saved, and place them on the track where they belong (i.e., put the turn 1 template where turn 1 should go, etc).

Track templates are back on the track.

Track templates are back on the track.

When you are satisfied with the track template placement, use your templates to mark where the horizontal lane lines will go to divide the track spaces. You should use a pencil to make “tick marks” on the sheet, just inside and outside the track. Then make tick marks with your yellow paint marker on the edges of the track. Note: You should only mark the spaces on straight sections at this time. Leave the corners and “curvy” straights for a little later.

Tick-marking for the horizontal lines.

Tick marking the horizontal lines.

Then remove the template and use a ruler/straight-edge to make straight horizontal lines across the track with your yellow paint marker.

Marking the horizontal lines.

Marking the horizontal lines.

There are usually a few special cases for marking the horizontal lines. On the Belle Isle track, the southeast “straightaway” actually has a gentle curve to its right when it starts outside of turn 6, and then it kinks a bit to its left just before turn 7. See the track diagram:

The Belle Isle track layout from Wikipedia.

The Belle Isle track layout from Wikipedia.

It was difficult to layout the horizontal spaces using a ruler or tape measure, so finally I just placed three rows of 1:64 scale cars on the track (with 12 cars in each row).

Using scale cars to determine track spaces on a curvy section of the track.

Using scale cars to determine track spaces on a curvy section of the track.

There needed to be 12 spaces in this curvy section, so lining up the cars on the track template helped with initial alignment, but then I moved the cars a little until the spacing looked right. I then made tick marks with the yellow paint marker on both sides of the track, then removed the cars and the track template, then used a straight-edge to paint the horizontal lines in this section of the track.

Horizontal lines are painted on the curvy section of the track.

Horizontal lines are painted on the curvy section of the track.

Note that a yellow line is missing in the left side of the above picture. I still wasn’t satisfied with where I had painted the yellow line, so then later I went over it with the black paint marker, effectively erasing that yellow line. Later, when the black paint dried, I re-painted the yellow line in a slightly different location.

Horizontal lines are painted on the track.

Horizontal lines are painted on the track.

Give the just painted yellow horizontal lines a little time to dry (so you don’t smear them by rubbing your hand across them in the next step), perhaps 15 to 30 minutes, then paint the lane divider lines. For straight sections, I usually use the straight section templates, and make tick marks where the lanes should be.

Placing tick marks where the lane lines will go.

Placing tick marks where the lane lines will go.

Move the template down the track, making more tick marks every two or three spaces along the track. When you have marked that entire straight section of track, then use a straight-edge and mark the yellow lane lines. When you have finished a straight section, it should look something like this:

Lane lines have been added to a straight section.

Lane lines have been added to a straight section.

After marking the lane lines on all of the straight sections of the track, we have to add lane lines to corners and other curvy parts of the track. I use the ruler to make tick marks along the curves, then draw the actual lane lines “freehand.” It’s not that difficult to draw an arc. Just place the side of your hand on the table, and slowly “connect the dots.” To make the tick marks on this “3-wide” section of track, I marked ticks at 1.75″ and at 3.5″ from one side of the track.

Drawing lane lines on curvy parts of the track.

Drawing lane lines on curvy parts of the track.

In the above picture you can see me drawing a slightly curved lane line. If you are not sure about this step, you could always practice on some scrap material before you draw on your track. But don’t worry about mistakes, because you can always use your black paint marker to “erase” mistakes you drew with the yellow marker!

Now, some of the corners have one space in their inside lane, and two spaces in the outside lane. This means we need to draw a horizontal line to divide the spaces, but only in that outside lane. Which is why we had to mark all of the lane divider lines before we could divide the outside corner lanes into spaces. For this step, I once again like to use the actual cars I will use for races. Place the cars on the corner, and you can the best place to make that horizontal line. Make tick marks at either side of that outside lane, then remove the cars, and use a straight-edge to draw the line.

When all of the spaces have been marked on the track, it should look something like this:

All track spaces have been marked.

All track spaces have been marked.

Start/Finish Line

Although I could have performed this next step earlier, I will now make a special start/finish line, to make it easily recognizable.

Most track spaces are marked with yellow lines, but to differentiate the start/finish line, I will use a white paint marker to create a sort of “checkered” line. Use a straight-edge, and draw “dots” across the width of the track where the start/finish line will go.

The start/finish line and starting spaces.

The start/finish line and starting spaces.

I also painted an arrow off the extended start/finish line as an aid as to which way the direction of travel goes on that track. Of course, there are also the other cornering arrows, and I also draw the corner speeds so they are readable in the direction you approach them from. Note I also marked six “starting” spaces, like a real F1 race track would have (the real tracks will have more than 6 spaces marked as above, but three rows are sufficient for our game needs).

———-

Once all of the spaces have been marked with the yellow paint marker, use that same yellow marker to apply the speeds in the corner spaces. Make sure you refer to your track diagram to get the speeds and arrows in the proper spaces.

Corner speeds and arrows have been added to the track.

Corner speeds and arrows have been added to the track.

I will make two passes for this step. First, I will go around the track and mark all of the cornering speeds, then I will make a second pass and add the arrows. I will let the paint dry in between each step, so I don’t smear any previously applied paint will adding more speeds or arrows. I also go backwards around the track, so I don’t smear any speeds that I just marked in a corner when I add speeds to other spaces in that same corner. And after the corner speeds and arrows have thoroughly dried, you probably should go over them again, to make them brighter and easier to read from the other end of the track.

When we originally made the tracks in the 1980s, we used red paint markers to mark off the track spaces, etc, but we found that the red lines are too hard to see from some angles. We now use either yellow or white for all of the lines and speeds and arrows. The higher contrast between the black track and the yellow or white lines makes it much easier to see the spaces, no matter where one sits around the track.

We next add the red-and-white stripes to denote the side of the track that is inside to the next corner. Although we never worried about this when we played Speed Circuit (we just designated the infield side of the track as the inside lane), with Championship Formula Racing (CFR) it is more important to know which side of the track is the inside lane to the next corner, so we need to add the red and white stripes. You could make a simpler marking, but the red and white stripe is easy to see at a glance. You will have to go over this striped line at least twice, as the first time you paint the unpainted sheet, the paint will soak in when it dries so that it will almost look like you didn’t paint it in those areas. The 2nd coat should look much better. Go around the entire track in this order: Mark the white dashes, then go around again and mark the red dashes in between the white dashes. Then make a second pass with white, and finally a second pass with red. After you add those stripes, it will look like this:

Red and white stripes have been added to the sides of the track.

Red and white stripes have been added to the sides of the track.

Either use a black permanent marker or a black paint marker to add the name of the track, its location, miles per lap, and years it was raced on. Add this somewhere in the infield of the track, if you can, although it could be anywhere.

Name of the track has been added.

Name of the track has been added.

Notice that I also added the actual name of the road, “The Strand” that the track is on at that part of the Belle Isle track. In other pictures you can also see a “5” or a “10” in a box outside the track. Those numbers are a play-aid so drivers can more easily count the number of straight spaces remaining until the next corner space.

Here’s a little trick to line up the letters nice and even. Mark some pencil lines along where the top and bottom of the letters will go.

Pencil lines were used to line up the lettering.

Pencil lines were used to line up the lettering.

Although the pencil lines may be hard to see in this picture, they are there. I used my tape measure to make tick marks at several places, measuring from one side of the table’s edge. I made the tick marks for the top row (the “Detroit Grand Prix” row) 2″ apart, then the other rows are each 1.5″ high. There is a 1″ space between each row. You can use whatever spacing looks good to you. If you haven’t done this kind of lettering before, mark all of the letters in pencil before using a permanent marker. If you absolutely can’t print neatly, and don’t have time to take drafting classes so you can print neatly, you could always use some lettering stencils or get a friend who can print well to mark the name on your track.

I also add the track name to a corner of the sheet, to make it easier to tell which track it is when it is all folded up for storage. Recently, I’ve also been adding its years of use if you might have different versions of a track.

Track name on the corner of the sheet.

Track name on the corner of the sheet.

I wrote the track name on both sides of one corner of the track, so it doesn’t matter which side is folded to the inside when the track is folded. It is probably better to fold the track with the painted side to the inside, just to better protect it. We used to just apply a piece of masking tape to the folded track with the track’s name, but tape will fall off after a number of years, so using a permanent marker is a much better way to go. And since some tracks have had revisions over the years, (see the many changes of the real life Silverstone, England, track as an example), the years for a particular track configuration have been added. I’ve also been adding what minimum table size is needed to use that track, so you’ll know what size or how many tables you’ll need to set it up. In the case of this Belle Isle track, the minimum table size is 3’9″ wide by 7’1″ long. In practical purposes, this will probably be used on a 4′ x 8′ table top.

The finished track.

The finished track.

At last, the track is finished. It’s time to race!

Making a 1:64 Scale Track — Part 2 — Marking the Track on the Sheet

July 20th, 2017

In this blog post, we’ll tape our sheet to the table, then lay out the track sections again. Read Part 1 of Making a 1:64 Scale Track to see how we arrived here. Note that you can make a similar track for other scales of cars. If you use something like 1:43 scale, you would have to adjust the size of the spaces (and a full track probably wouldn’t fit on a sheet). You could of course make large tracks on foam-core board, or other material. Part of the reason we went with 1:64 scale cars originally is that in the 1980s, when we starting making the large tracks, Hot Wheels cars were the easiest cars to find. We also found that most of Avalon Hill’s Accessory Pack tracks would fit on a sheet at 1:64 scale.

So, I finished washing and drying my twin bed flat sheet, then stretched it out on my ping-pong table, and then taped it so it would stay fairly tight so it would avoid wrinkling while I marked it up. I laid out the former track sections on the sheet, but the outline just didn’t look quite right to me.  In particular, some of the corners on the real track were sharp, 90-degree turns, while the templates I used for 90-degree turns were more gradual and rounded. So, I then printed out the actual track file using the Acorn program (from Flying Meat Software), then taped some sections together, then laid them on the table on top of the former outline. That original track plan is with the red stripe down its middle.

The new track outline is on top of the old track outline.

The new track outline is on top of the old track outline.

It was very apparent that the new outline seemed much smaller than the former outline.

The new track outline is smaller than the old track outline.

The new track outline is smaller than the old track outline.

The former outline that I used was based on templates, where all of the straight pieces had spaces that were 3″ long by 1.75″ wide, and the template corner spaces had been printed so my 1:64 cars would fit on them without encroaching on the spaces of other cars. When I printed the actual track outline (with the red stripe), I printed it at 775% of my original file’s size. That made most of the straight spaces 3″ long, but it also meant that the corner spaces were too small. If you had more than one car in a corner area, the cars would interfere with each other. Since you can only paint the track once, it is better to resolve any issues in this, the planning stage! Naturally, I had to cut out these new track sections and tape some of them together with clear cellophane tape. Note that I cut close to the track outline as eventually I will trace around the track outline with a pencil. If I just placed the printed pages on the sheet, I would have to cut them later before I could trace the edges, and that would then put pieces out of alignment.

Now, of course, the table top was too cluttered, so I picked up all of the template sections and left just the new track outline pieces on the table.

Track outline sections.

Track outline sections.

I then measured from the different edges of the track, and tried to center the sections as much as possible. This is not only for aesthetics, but for practicality, as when playing Championship Formula Racing, each driver needs to lay out their cards without laying them on the track. While you should try to leave an open “border” around all edges of the track, that won’t be possible with some tracks.

Measuring from the edges to center the track on the sheet.

Measuring from the edges to center the track on the sheet.

I then centered the pieces, and placed them together to see how it looked.

The centered track.

The centered track.

Now comes the task of checking how the 1:64 scale cars fit. Get out your scale cars and see how they fit on actual parts of the track outline.

Cars fit on the straight sections.

Cars fit on the straight sections.

It looks like the straight sections are long enough for my Greenlight IndyCars to fit. I also tested the sections with my old Hot Wheels open-wheel race cars that are the same length as the newer Greenlight cars. Note that the printed track is narrower than I will paint the finished track. The proportion of the rectangles for a poster-board size track is different than I want for my large track. When I design a poster-board size track, I make the straight spaces 1″ long by 0.5″ wide. That usually works well with small race cars. However, for the large track, I make spaces that are 3″ long by 1.75″ wide. That means that when I trace around the edge of the finished track layout, I will have to do a little more marking.

Now, to check the fit in a corner. Oh-oh! The corner spaces are too small!

Cars don't fit in the corners.

Cars don’t fit in the corners.

While the #3 car in the picture above fits on the inside space, the two cars on the outside of the corner (which is two spaces long) don’t fit into their spaces. This means I will have to allow for more space. In years past, I would just move the straight track sections a little and “fudge” or estimate the new corner area. I would put a clean piece of paper under the corner area, and pencil in where the lines should go. But this time, I decided to go back and reprint the corner sections. I printed the corners at 900% (instead of 775%) of original this time, and they printed just about right.

But before I reprinted the corners, I substituted the template pieces.

Cars on template sections.

Cars on template sections.

Using the template sections, I can see that the cars will fit. Of course, by allowing for a longer corner section in this area of the track (this is turns 1 and 2, just past the start-finish line), it will affect the alignment of other parts of the track.

Another part of the track where the cars don't fit.

Another part of the track where the cars don’t fit.

I also found a part of the track that was in a “U” shape also didn’t fit the cars well, not for the curvy-“straight” sections nor in the actual numbered corner spaces. So I had to re-print that entire section. And even after I printed that section at 900%, some of the spaces were still too short. So, I spliced in a couple of pieces of paper to “expand” that section slightly, and also used a permanent marker to mark new lines between the spaces.

Splices added and spaces re-marked in the "U" section.

Splices added and spaces re-marked in the “U” section.

After checking all of the sections so that the cars would fit the spaces (particularly in the corners), and rechecking the track alignment (also  re-centering the track sections on the sheet), it is time to tape down the track sections so they don’t move when you mark off the outline of the track. I just use small pieces of masking tape to tack down the track sections. I’ll usually just use four small pieces of tape per track section to ensure that section doesn’t move when I mark its outline on the sheet.

Taping the sections of the track.

Taping the sections of the track.

Note that the above track sections were printed at two different scales, which is why they don’t line up along their outside edge. Since I am using the inside border of the track as a reference, that is not critical.

Now is the time to mark the outline of the track. Use a pencil for the “first pass” as if you make any mistakes, you can easily correct them! At first, I only marked off the inside edge of the track sections, as that was my “reference” point. Some of the printed track sections that I used for laying out the track were not wide enough, so I had to make sure that I marked the track as wide as it needs to be for each section. Remember that I am making each space 1.75″ wide, so if the track is “2-wide” (meaning the track is two spaces wide) in an area, then the total track width is 3.5″. (Sorry, I didn’t warn you there would be math involved in painting a large-scale track!) If a track section is “3-wide” (three lanes side by side), then the total track width is 5.25″ in that area. I use the straight edge to check the width of a section before marking the outside lines of the track.

Using a ruler to check the track width.

Using a ruler to check the track width.

In the above picture, I am making pencil “tick” marks where the 5.25″ outer edge of the track will be for this 3-wide section. I had to do this because of the varying scale of my template pieces. Even if you have perfectly sized templates, you should check the width of your track before masking and painting it. After making tick marks in an area, I used a pencil to “connect the dots (ticks).” When I was satisfied with the pencil inside and outside borders, then I went over the pencil marks with a permanent marker.

Outlining the track with a permanent marker.

Outlining the track with a permanent marker.

When the outlining was completed, I removed the paper templates. I removed the small pieces of tape from the templates, then stacked them carefully out of the way, in order, as I will need them again to aid in actually painting the lines for the spaces on the track (see Part 3 of this series).

The completed permanent marker outline of the track.

The completed permanent marker outline of the track.

Note that there is a pit lane to the left. Although Championship Formula Racing doesn’t use a formal “pit lane,” we are thinking of using our older Speed Circuit era pit stop rules, and we would need to drive down pit lane. I felt it would be easier to add the pit lane at this time, rather than to try to add it at a later time, when I would have to re-mask the track and paint part of it again. Towards the right side of the picture I also made an adjustment so a 3-wide straightaway section could blend into a 2-wide corner.

The track outline has been masked with tape.

The track outline has been masked with tape.

Next, we will need to cover all parts of the sheet with newspapers (or whatever you have on hand) and then tape it down to the inside and outside track outline, and then we’ll start painting. That process will be continued in Part 3 – Painting the track.

Making a 1:64 Scale track — Part 1 — Laying out the track

July 14th, 2017

I have posted recently about playing Speed Circuit (past) and Championship Formula Racing (present) on large-scale tracks that were painted on bed sheets. Some folks on the CFR forums at BoardGameGeek  (BGG) have asked me to show the process, so here goes. Disclaimer: Since I am in the United States of America, I use inches, feet, etc, and also relate car speeds as miles per hour. If you are in a metric system country, you will of course want to adjust the measurements for your system.

Select a Track Diagram

First, you will need a diagram of the track you want to make. I recently designed the Belle Isle (Detroit) track that is used by IndyCars. I did find that track had already been designed by someone else (I downloaded it from the Files section at BGG), but I didn’t like the design. Some of the straightaway sections were too long in that other design, so cars could use a high top speed in the game to go 200 mph or so. Watching the video of actual IndyCars racing on the Belle Isle track, I never saw any car get much above 160 mph at any time. That other track design also ignored some of the corners in the corners 7 through 11 sequence, and also treated corner 14 as just another straightaway space.

I first obtained the real Belle Isle track outline diagram from online. I used Wikipedia as a source, but there are alternate sources for tracks that you could use if you were designing your own track.

The Belle Isle track layout from Wikipedia.

The Belle Isle track layout from Wikipedia. Unfortunately, the diagram incorrectly calls one of the streets “Lotter Way” when it should properly be “Loiter Way.”

I then imported that track diagram into image editing software (I use Acorn from Flying Meat Software). I then erased everything except the actual track outline, scaled it to fit a poster board size space of 22″ x 28″ (in case I want to print out a board-game size map of that track). Then I changed the track color to red so it wouldn’t interfere with other colored spaces I would create. I created spaces that were 1″ long for a board-game size track, then placed them around the track for the straight parts of the track. I then “fudged” in the corner spaces. I then assigned corner speeds based on watching race video, and added cornering arrows. Here is the track with the original red outline, and gray spaces added:

Belle Isle original track in red, with gray spaces for the board game track.

Belle Isle original track in red, with gray spaces for the board game track.

Acorn is a layer-based program like Photoshop, so you can make layers visible or invisible, change which layer is on top, etc, so that made the above process relatively easy.

Next was to print the track the size of a poster board, and then I ran some solo races on it using the CFR rules and cars of different configuration. I did make a few changes to the initial playtest track, so the “playtest 2” track above is how I finalized the spaces and corners. Except, I’m not sure about the speed of the final slight right-hand bend at the upper left of the track, just after the entrance to the pits. I have 140 mph marked on it for now, but may change it to 160 mph after I get some other folks to playtest it.

Poster board size Belle Isle track.

Poster board size Belle Isle track.

You may already have a track diagram, so you won’t need to perform the above steps. In that case, you will start here:

Gather Items Needed to Build Your Track

Gather items you will need to build a large track.

Track building items laid out on the table.

Track building items laid out on the table.

  • A large table ( I use a ping-pong table that is 5′ x 9′ in size — you will probably need something larger than a 4′ x 8′ piece of plywood, as some tracks are larger than 4′ x 8′). You could also use a large area of the floor, if you are younger than me, and have good knees!
  • Track template pieces. I used to use poster board to create various sizes of straightaways (either two-lane or three-lane wide), but now I find it’s easier and cheaper to just print paper on my laser printer. I create spaces for straights that are 3″ long by 1.75″ wide, as that size space fits my 1:64 scale race cars well. If you make the spaces much smaller than that, cars will be too tightly spaced together if they are crowded into the same area of the track. If the spaces are too large, you might not be able to fit the finished track onto a reasonable table size. I also used to just “fudge” in the corners after laying out the straight pieces, but now I also print out some generic corner pieces. I found some generic track sections online, and printed them at different scales until I got the right size. I also tested the printed corner pieces to ensure my 1:64 scale cars would fit in the spaces on those corner pieces.
Older green poster-board track template pieces in the foreground.

Older green poster-board track template pieces in the foreground.

  • A pair of scissors for cutting the track templates.
  • Carpenter’s style tape measure.
  • A straight edge of some sort to help with marking straight lines. I use an old steel ruler from an old combination square.
  • A pencil to mark the basic outline of the track once you have completed the layout.
  • A black marker (like a Sharpie), used to go over the penciled outline of the track.
  • Clear cellophane tape. Use the tape to tack small track sections together to build assemblies, so there are not as many loose pieces to move around when you make track adjustments.
  • Masking tape. Used to mask the track so you only paint the track.
  • Miscellaneous newspapers, pieces of cardboard, etc. Use these to actually mask areas of the sheet that you don’t want to paint.
  • A can of flat black spray paint. You could also brush flat black paint onto the sheet, but I find spraying is easier, and doesn’t bleed-through the sheet as much as brush painting.
  • Different colored paint markers. I use black (preferably flat black), red, white, and yellow paint markers. Get oil based paint markers, as they won’t wash out if you ever have to wash your track. These markers are used to paint the lines for the spaces on the track, cornering speeds & arrows, and the red-and-white lines along the edge of the track to denote which side of the track is the inside to the next corner.
  • A flat bed sheet. Wait to buy the sheet until after you determine how big the track will be.

Laying Out the Track

Cut out the various straight and curved template pieces.

Cutting out paper straight-section templates.

Cutting out paper straight-section templates.

Then, tape together straight sections to make longer pieces. Do this so you won’t have as many pieces of paper to move around. For the Belle Isle track, I needed straight sections of various spaces long, such as 12 spaces long, 5 spaces long, etc.

Taping straight templates to make longer straightaways.

Taping straight templates to make longer straightaways.

After you have cut out and taped your various templates, place the various lengths of straight sections about where they should go. Use the track diagram as a guide. I also wrote the number of straight spaces in each area directly on that track diagram, so I wasn’t always re-counting the straightaways.

Placing the straight sections of the track.

The straight sections of track have been placed in their approximate positions.

In the above picture, the straight pieces are roughly where they should go. Don’t worry about exactness, as you will have to make adjustments. Then add the corner pieces, and try to “close the loop” of the track by making adjustments as needed.

Curves have been added to the track.

Curves have been added to the track.

In my example above, you can see that the track will actually fit on the table. Yay!

A view of the other side of the track.

A view of the other side of the track.

The next step is to measure the longest distance of the track’s length and width, and write down the numbers.

Measuring the track dimensions.

Measuring the track dimensions.

For my Belle Isle track, I found the rough layout was about 4′ wide and 7’6″ long, so the finished track should be able to be played on a 4′ x 8′ table size. This is now the time to purchase the flat bed sheet. I was able to purchase a flat sheet that is 66″ x 96″, or 5’6″ x 8’0″, for about $5 (US). For you metric folk, that sheet is 168cm x 244cm. Of course, before you can use the sheet, you will need to wash it, as the sheets are usually packed very densely, and the wrinkles will make it difficult to paint the track later. Also throw the sheet in the dryer (if you have one) after washing to “pre-shrink” it.

Continued in Part 2 – Marking the track on the sheet.

Also see Part 3 – Painting the track.

Championship Formula Racing at Imperium Games, July 7, 2017

July 9th, 2017

We had our most recent demo race of Championship Formula Racing at Imperium Games in Wixom, Michigan, on Friday, July 7.  (Imperium Games was up until recently known as Flat Land Games. It had a recent change of ownership.) We once again used one of the magnificent large-scale tracks made by Richard White many years ago.

Spa-Francorchamps track (1981-2003 configuration)

Spa-Francorchamps track (1981-2003 configuration)

I lined up my available 1:64 scale IndyCars for drivers to use as Jack Beckman had not yet shown up with his many Formula One cars. Traffic was exceptionally bad on I-96 west of I-275. I tried to get to Imperium Games by 5:00 pm, but I didn’t arrive until around 5:45 pm. The Imperium Games staff were very helpful in converting one of the lower miniatures tables by removing the edge rail from one side of the table, and providing a plywood extension under the part of the track in the upper right of the above picture. In other words, the Spa track is wider than a 4 foot x 8 foot table — it needs about a 5 foot by 8 foot table.

Not too long after I set up the track, Jim Landis arrived, followed by Jim Robinson and Greg Lim. Jack Beckman got to the track around 6:45 pm. We got rolling a little past 7:00 pm.

Starting positions in Championship Formula Racing are handled on a “bid” basis. Each driver bids some of his starting Wear or Skill chits, with each Wear counting as one and each Skill counts as 1/2. Jim Robinson and I each bid 1.5 (1 Wear and 1 Skill each), Jack Beckman bid only 0.5 (a single Skill chit), and Jim Landis and Greg Lim each bid nothing. So then Jim Robinson and me had to roll dice for starting position, with Jim getting the pole, and I started on the front row next to him. Jack was 3rd, and Jim Landis and Greg diced for starting 4th and 5th.

The Spa race is on. Cars are just past the first turn.

The Spa race is on. Cars are just past the first turn. L-to-R: Jack Beckman, Garry Kaluzny, Jim Landis, Jim Robinson (Greg Lim Photo).

We got about a half-lap into our 3 lap race, when a sixth driver, Chris Mogle,  showed up. We paused the race so he could build his car’s specifications, then we placed him on the track just behind the 5th place car. We also deducted 3 Wear from Chris, as that is how much Wear the 5th place car had used up to that point in the race.

I had finally convinced the other drivers to use the Tire and Pit Stop rules for CFR. We also specified that each car would have to use both hard and soft tires at some point during the race. I started on hard tires, but switched to soft tires at the end of the first lap when I pulled into the pits. To my surprise, all five other cars also pulled into the pits.

Basically, if you use the pit stop rules in CFR, your car starts with less wear than it would have available if you weren’t using the pit rules. For example, I put +1 build point into my Wear when I set up my car. Without using the pit stop rules, I would have received 7 Wear per lap. Since we were racing 3 laps, that means I would have started with 21 Wear for the race, and once it was used up it could not be replenished. However, with the pit rules, I only received 4 Wear per lap, meaning I only started with 12 Wear. However, when you pit, you come out of the pits with your full complement of Wear. I was planning on pitting twice in the 3 laps, so I would theoretically have 12 + 12 + 12 = 36 Wear to use, instead of just the 21 Wear I would have had if we had not used the pit rules. Now, to balance all that, when you pit your car is stationary for two turns, so you would lose track position to other cars that stayed out on the track.

So, after burning through 10 Wear on my first lap (also having used one Wear in bidding for starting position), I pitted, but so did everyone else. Some drivers had not burned all of their starting Wear, so when they “topped off” their Wear, they effectively lost a couple/few Wear.

After pit stops, the cars are back on the track, starting their 2nd lap (of 3) on the Spa track.

After pit stops, the cars are back on the track, starting their 2nd lap (of 3) on the Spa track.

So, shortly after starting the 2nd lap, I failed a Deceleration dice roll, which reduced my car’s Deceleration from 40 mph to 20 mph. This wasn’t a huge handicap on the Spa track, as there are only a couple of places where you really need to decelerate by more than 20 mph, and when I needed to decelerate by 40 mph I could spend a Wear to slow down.

A close up of cars at the La Source hairpin turn at Spa-Francorchamps.

A close up of cars at the La Source hairpin turn at Spa-Francorchamps.

At the end of the 2nd lap, five of the six cars pitted again, and surprisingly, I was still in the lead. I held the lead all the way until the end. Then, on the next to last turn, I finished my move one space short of the finish line, but moving at 120 mph. For my next turn, I need to reduce my speed to 60 mph to avoid entering the slow hairpin turn which was only three spaces past the finish line. However, since I was out of Wear, I couldn’t use any Wear to slow down more than my damaged 20 mph Deceleration. I could only add a single dice roll to try to decelerate by a total of 40 mph. That would have left my car traveling at 80 mph, which would put me into the corner after the finish line. Since I didn’t have any Wear, I could only have entered that corner at 60 mph without crashing, and I would have had to take a Chance dice roll if I entered the corner at 60 mph. So, my car crashed, and according to the rules, if your car crashes after crossing the finish line, it is considered to have NOT finished the race!

That meant that Jack Beckman took the win, as he had been in 2nd place, very close behind my car. I believe Jim Robinson was 2nd, and Jim Landis was 3rd (or was it the other way around?), and Chris Mogle was 4th, and Greg Lim was 5th. I (Garry Kaluzny) was 6th, although I would not have received any points if we had been racing for points.

However, after we had all packed up the game components, and I was headed home, I realized that I totally forgot about “late braking”! I could have used a Deceleration dice roll to get down to 80 mph (from 120 mph), and then after I moved at least one space on the track, I could have used late braking to scrub off another 20 mph by taking another Deceleration roll. I also had a -1 and a -3 Skill markers, which I could have exchanged the -3 Skill marker for three -1 Skill markers, meaning I could have made both Deceleration rolls with -2 Skill applied, meaning I would have only failed either roll if I rolled a 12 on 2d6. Of course, if I had failed either of those Deceleration rolls, my car would also have been out of the race, but each roll had a 35 in 36 chance of succeeding.

It just goes to show that even us “experienced” Speed Circuit/CFR drivers can fail an internal “brain” roll and forget about applying a rule when it is vitally needed!

Jack and I were hoping to run a demo race of CFR at the Metro Detroit Gamers’ MichiCon at Oakland University in August, but that game con, tentatively scheduled for August 4-5, is not happening for certain. So, if MichiCon does not take place on August 4-5, I will probably have more CFR demo races in Canton and Wayne on August 5. And then we will probably have our final demo race at Guild of Blades on Friday, August 11. We then hope to start racing for points on Friday, September 8.

Check out our CFR-Detroit web page.

Posted by Garry Kaluzny

Championship Formula Racing demo races, July 1, 2017

July 2nd, 2017

On Saturday, July 1, 2017, I ran four more demo races of Championship Formula Racing, trying to attract more regular racers for our upcoming season of races (that should begin in September). I ran two races at the monthly first Saturday boardgame Meetup group at the Canton Public Library in Canton, Michigan, then later in the day I ran two more races at the Warriors 3 game store in Wayne, Michigan.

I got to the Canton library just before they opened the meeting room for us boardgamers at noon. Meeting me there were Greg Lim and Jim Robinson. We quickly set up four folding tables together so we could place one of our large scale race tracks on that group of tables. I had just borrowed four more large tracks from Richard White on Thursday, two nights previous.

For our first race, we had eight racers, and we raced on the Monza, Italy track. This large track is based on the mid-1980s Monza track from Avalon Hill’s Accessory Pack tracks from that era. It has not been modified for the newer Monza changes. But we all race on the same track, n’est-ce pas?

Racing on the Monza, Italy track at the Canton Public Library.

Racing on the Monza, Italy track at the Canton Public Library. (Greg Lim photo)

After we completed the first race at Monza, I asked folks if they wanted to race the 2nd race on a different track, but they wanted to race the Monza track again. One of the drivers from the first race dropped out, as he wanted to play some other board games at the library, but we added two other drivers, so the 2nd race had nine drivers. That was the most drivers we have had (so far) for our demo races.

The last lap of the 2nd Monza race at the Canton library.

The last lap of the 2nd Monza race at the Canton library. Brian Robinson (center, in the gray t-shirt) comtemplates how he can win the race from his then 2nd place on the track.

Brian Robinson won that 2nd Monza race. Brian is relatively new to the Speed Circuit/Championship Formula Racing type games, but he is driving like an old pro. I told him at the end of the evening after the last race at Warriors 3 that I no longer considered him a rookie, but an “old pro” driver.

After that 2nd race at the Canton library, Greg and Jim and I went to a local fast food place for some dinner. (If you’re going to drive “fast” in racing games, you should eat “fast” food, eh?) Then we got to the Warriors 3 game store in Wayne, Michigan, in plenty of time to arrange four folding tables together to make room to set up another large track. I set up the Silverstone, England track.

The Silverstone, England track.

The Silverstone, England track.

While we were setting up the 1:64 scale race cars on the track while we were waiting for some other racers to arrive, a three-year old boy, Thomas, came over to our table. He was determined to play with our 1:64 scale cars! We first moved the cars from one side of the table to the other, but then Thomas tried to climb on top of the table to get to the cars. I was afraid of Thomas falling off the table and injuring himself. Finally, though, Thomas’ father called him away from us. The father was playing in a different game in a different area of the same large gaming room. Anyway, we were relieved, as our 1:64 scale cars are definitely not toys, and would not survive without damage from being handled by a three-year-old!

Racing on the Silverstone track.

Racing on the Silverstone track. Garry Kaluzny in the red shirt at left. (Greg Lim photo)

It should be noted that our race on the Silverstone track was also based on the mid-1980s configuration of that real-life track. In CFR game terms, I built my car to have 60 mph Acceleration and Deceleration, and a 180 mph Top Speed. You can pretty much drive either 120 mph or 180 mph every turn on this track configuration. Centered in the picture above is Ian, a young guy visiting the Detroit area from his home in Kentucky. Although he had never played CFR (nor Speed Circuit), he pretty quickly grasped the strategy to use. His downfall was taking too many early chances on cornering, and a spinout dropped him back in the race. If he wouldn’t have spun, though, he would have been a tough competitor.

After the Silverstone race was complete, we had time to race once more. We switched to the Monaco track for that last race of the evening. We had the same six drivers from the Silverstone race competing.

Half a lap left to race on the Monte Carlo track at Monaco.

Half a lap left to race on the Monte Carlo track at Monaco.

Ian took the early lead from the pole position, although I was hot on his heels from my front row position. The first time at the Casino/Station/Loews hairpin turn, I got the inside position from Ian, meaning I got to move first the next turn, so I took over the lead.

Jack stands to move the cars, while Garry tries to stay ahead of Brian's car on the last lap at Monaco.

Jack stands to move the cars, while Garry tries to stay ahead of Brian’s car on the last lap at Monaco. (Greg Lim photo)

On the last lap, I had to hold back Brian’s car. With about a half-lap left to race, I had only 3 Wear remaining, while Brian had 7 Wear. At the finish line, Brian pulled alongside my car, but I nipped him by a nose at the end. Whew! I had to make two cornering Chance dice rolls late in the race, using my two -3 Skill chits.

Although the day was long, I believe everyone had fun racing in the different races. We added another six names to our CFR email list. We now have about 30 names on the list, but not all of them will race in our upcoming season. Some folks, such as Brian, have been using the frequent demo races to gain a lot of experience in racing CFR. When the season starts in September, I expect some close competition!

We will have another demo race on July 7, 2017, at Imperium Games in Wixom. Imperium Games used to be Flat Land Games, but they had a recent change of ownership. That demo race will start at 7:00 pm, and will be a 3-lap race. All of the demo races on July 1 were only 2-lap races, as they were intended to be used for teaching the game mechanics. Shorter races mean you can run more races in a day, plus if someone were to crash out of a race, they wouldn’t have to wait as long to get back into the next race. Surprisingly, though, every racer (including me!) finished every race, in spite of multiple chances being taken by rolling dice!

Check our CFR-Detroit web page for more info about upcoming Championship Formula Racing races in the Detroit, Michigan, metro area.

Posted by Garry

Detroit Grand Prix at RIW Hobbies, June 9, 2017

June 10th, 2017

On June 9, eight aficionados of the new Championship Formula Racing game gathered at RIW Hobbies & Games in Livonia, Michigan, to race the downtown Detroit Grand Prix. I just finished painting the track a couple of days before the race. We (actually, Richard White) used to have a large scale downtown Detroit track, but it was stolen from him at a game con a number of years ago.

Detroit Grand Prix track

Detroit (downtown) Grand Prix track, painted on a flat bedsheet.

Actually, there were seven of us ready to race, we had bid for starting positions and had lined up on the grid, and then Russ Herschler finally showed up at the last minute, so he got to start in the 8th (last) starting position on the grid. Jack Beckman and I had given some new folks to the game some instruction, and helped them configure their car specifications before we bid for starting position.

Detroit Grand Prix

The racers are ready to start the Detroit Grand Prix.

Detroit GP starting grid

An overhead view of the starting grid.

Jack Beckman had bid an enormous amount of Wear and Skill markers (mostly Skill), and so he had the pole position. Jack also brought his various 1:64 scale Formula One car collection, and most of us chose “vintage” 1960s-era F1 cars to race with. I used a green and yellow mid-1960s Lotus-Ford, while Jack went with a front-engined Ferrari roadster. Here’s a picture of Jack’s red Ferrari leading the race:

Detroit Grand Prix

Jack’s red Ferrari leads into the turn onto Atwater St, just before entering the Goodyear Tunnel. Richard’s car collection are all parked to the left of the track.

Unfortunately for Jack, his car was the first to run out of Wear, and he eventually crashed out of the race. Surprisingly, he was the only car to not finish the race. When the race was over, Jim Robinson took the checkered flag, Richard White was 2nd, and Garry Kaluzny was 3rd. It was a good race to help teach the rules, and even Richard White, who had a lot of previous experience playing Advanced Speed Circuit, learned the differences in rules between Advanced Speed Circuit and Championship Formula Racing.

Detroit GP finishing order

The finishing order of the Detroit Grand Prix. Jim Robinson’s car is at the left.

It was also cool to see Richard White’s Formula One car collection again.

Richard White's 1:64 scale F1 cars.

Richard White’s 1:64 scale F1 cars.

Richard’s collection is all the more remarkable because his cars were all hand-modified and hand-painted from stock Hot Wheels cars, back in the 1980s when you couldn’t buy “collectible” cars anywhere, much less over the Internet (as there was no Internet then).

We will have more Championship Formula Racing demo races on Saturday, July 1 at the Canton Public Library and at Warriors 3 in Wayne, Michigan, and on Friday, July 7 at Imperium Games (formerly Flat Land Games) in Wixom, Michigan. Come on out and join us!

Championship Formula Racing/Speed Circuit

June 9th, 2017

I was first exposed to the Avalon Hill version of Speed Circuit in the late 1970s, at a Metro Detroit Gamers MichiCon game convention. Someone (I can’t remember who) had made a very large scale track and used 1:64 scale cars. There were a number of us playing that game that day, but I don’t remember anything else about that race.

Speed Circuit large-scale track

Speed Circuit played on a hand-made large-scale track at MichiCon, circa 1978.

I then bought the Avalon Hill version of Speed Circuit, but couldn’t find any other folks to play it with. It seems none of my gaming friends were interested in auto racing games. About that same time, I played USAC Auto Racing at local MDG game cons. I believe it was Don Walker who made a large scale Indy 500 track and used painted Mattel Hot Wheels cars. Don stopped running those events, so then I built a large scale Indy 500 track and bought and painted some Hot Wheels cars, and ran USAC Auto Racing at cons a couple of more times.

Then in early 1984, I took the regular sized board game of Speed Circuit to the Michigan Gaming Center in Ferndale, Michigan (it was on Woodward, just north of Nine Mile Rd.), one day. Interestingly, several other folks wanted to play it. After we got done racing, somebody suggested that we should make it a regular game. Then we proposed a series of races, like the real-life Formula One race series. We posted a flyer at the Michigan Gaming Center that looked sort of like this:

Speed Circuit flyer from 1985.

Speed Circuit flyer from 1985.

A number of other guys then contacted me, and after having another demo race, we started our 15-race season on March 16, 1984, racing the Brazilian Grand Prix around the Jacarepagua track. Tom Kane took the first pole position, and was leading the entire race, only to have Tony Ploucha pass him at the last corner, and then Tony won the race! I managed to finish 3rd after qualifying 11th (out of 13 racers), mostly due to retirements of other drivers.

That first Speed Circuit season in 1984 was won by Ray Eifler with 67 points (we used the 9-6-4-3-2-1 scoring system at that time). Richard White was 2nd with 62 points for the season, and Steve Zack was 3rd with 35 points. Race winners were Ray Eifler (5 victories), Richard White (2 victories), Andy Balent, Mark Hesskamp, Tom Kane, Tony Ploucha, Jim Robinson, Jeff Schwartz, Don Woodward, and Steve Zack. I managed to finish in 9th place with 19 points. We had a total of 26 different drivers during that season, and we averaged 12.8 drivers per race. The most drivers at a race was 17, at both Italy and Brands Hatch, and the fewest was 8, at Detroit.

At that time, we were using the various Avalon Hill Accessory Pack tracks, in standard board-game size. We were also using the plastic cars from USAC Auto Racing that I had painted like the real Formula One cars of the mid-1980s.

Avalon Hill's Silverstone track.

Avalon Hill’s Silverstone, England, track from Accessory Pack I.

Starting in 1985, I had to make some tracks that were not available from Avalon Hill. In particular, I made the downtown Detroit, Michigan track:

Detroit Grand Prix track.

Playing Speed Circuit on the 1983-1988 version of the downtown Detroit Grand Prix track.

Avalon Hill had a Detroit Grand Prix track you could buy, but it was of the 1982 course that had the hairpin turn at East Jefferson going into Chrysler Drive. The west end of the track wasn’t totally accurate, either, for either 1982 or for years 1983-1988. I got data for tracks from Road & Track magazine, but then I started buying the Autocourse books, which had much more detail about the races.

Autocourse 1983.

Autocourse 1983.

It was also evident that playing on small tracks made it hard for everyone to sit around the table and be able to see which of the miniscule cars was theirs. So, we started making large-scale tracks on bedsheets, using 1:64 scale Hot Wheels cars. Richard White made most of the large tracks, and also made most of the cars. I helped cut off a few sidepods and wings, but Richard did a magnificent job of molding new sidepods, engine cowlings, and made new wings. He then painted the cars to look like the real Formula One Ferraris, McLarens, etc. Richard even painted the driver’s helmets to look like the helmets of the real-life drivers. This was back in the era when you couldn’t buy “collectible” cars that were molded and painted like the real cars.

So then we eventually started playing on the large-scale tracks, with the larger cars, and it was much easier to have a large number of folks sit around the table and see the track and where their car was on the track.

Suzuka, Japan, track.

Large scale Suzuka, Japan, track.

Alas, I can’t find any pictures of our old Speed Circuit races using the large tracks, so the above picture is of one of the large-scale tracks that was made in our Speed Circuit days. We are using that track with Championship Formula Racing, though. You can see some of the CFR driver and speed cards on the table.

Championship Formula Racing

I ran the Speed Circuit campaign from 1984 until 1991. The Detroit-area campaign continued on without me for a few more years, then sort of faded away. Then, when I was GMing the Gutshot game at MDG’s WinterCon 2017, I met Jack Beckman. He was playing a Formula One style game with someone else, and as I am interested in auto racing board games, I started talking with Jack. He told me that a new game had just been published, Championship Formula Racing (henceforth known as CFR) from Jolly Roger Games, and that I should check it out as it was just like Speed Circuit (SC). Of course, when we played SC, we extended the rules and called our version of the game Advanced Speed Circuit (ASC). I downloaded the CFR rules, and while reading them, I thought, “these are almost exactly our old ASC rules!”

Championship Formula Racing.

Championship Formula Racing.

I exchanged some emails with the creator of CFR, Douglas Schulz, and he said he was given a copy of some “advanced” Speed Circuit rules from someone in the Baltimore area in the late 1980s. I believe they were a copy of our Detroit area ASC rules, as I had given copies to some folks in the Baltimore area when I attended an Origins game con there in the late-1980s.

There are a few differences between ASC and CFR. For one thing, CFR uses a simplified qualifying procedure where you “bid” some of your Wear and Skill markers; the higher bidders starting in front of the lower bidders. Also, we had used an attribute called “-2 DRM” and CFR uses “Skill” markers, where you can pre-designate using Skill to modify dice rolls. In our ASC days, we had actual qualifying sessions that were somewhat time consuming, but ensured that the better (or luckier!) drivers would start in the front.

CFR also uses different (optional) rules for pit stops than we did. In CFR, you just move your car off the track and into the pits, whereas in ASC you had to drive down pit lane and into your numbered pit stall. Probably the most interesting rule in CFR are the hard tires/soft tires rule (which is used with the optional pit stops). If using the pit stop rules, your car will only start with about 40% to 60% of the Wear it would have received if you weren’t using the pit stop rules. If you are on hard tires, your car will regain a few Wear every time it completes a lap. But the coolest thing (for us maniac drivers) are the soft tires. Soft tires will enable you to use Wear for some things that you would have had to roll dice for. In particular, if you are on soft tires and are 60 mph over the speed limit in a corner, you can use 3 Wears instead of having to use 2 Wears and roll a Chance (to see if you might spin out or crash).

Doug has also designed a number of tracks, especially newer tracks that didn’t exist in Speed Circuit’s heyday, and they are available as 8.5″ x 11″ printouts (downloadable from the Lucid Phoenix web page). I believe that Doug has given too many tracks “three-wide” sections of track (and the Monte Carlo track that comes with the board game of CFR is way overly simplified), but all-in-all, Doug has produced a lot of good stuff for folks who want to race cars in a table-top board game! I believe Doug’s philosophy is to produce playable games, whereas our dedicated ASC group were more into an accurate simulation of tracks.

CFR Nurburgring track.

CFR Nurburgring track.

We have a web page for our new local races using the CFR rules. Anyone who wants to race with us in the Metro Detroit, Michigan area, is welcome to attend our races. We have a demo race on Friday, June 9th, 2017, at 7:00 pm, at RIW Hobbies & Games in Livonia, Michigan. We plan on having races in several different game stores in the metro Detroit area, to even out the traveling miles and times for folks. This is so west-siders won’t always have to drive to the east side of town, or vice versa.

–Posted by Garry

Playing Gutshot at MDG’s Wintercon – Part II (aka “Carnage Asada”)

February 15th, 2017

After I got done playing in the Siege of Budapest game near 7:00 pm on February 11, it was time to set up the wild west minis game I was running, “Gutshot.” I laid out a sand-colored piece of felt, then placed some cardstock buildings on the felt. BTW, the Gutshot rules are from Hawgleg Publishing, some folks from down Texas way. There are many wild west style “skirmish” rules out there for using with miniature figures, but Gutshot makes for a fast playing game at gamecons. There aren’t a lot of modifiers to figure out, so with a minimum of time spent teaching the basic game, players can be blazing away at each other right away!

Game Marshall Garry at Whitewash City

Game Marshall Garry at Whitewash City

I built the buildings out of cardstock, using the Whitewash City buildings that were designed by Eric Hotz. After downloading and assembling the free Imperial Saloon, I purchased the entire “Mother Lode” of buildings  which was a PDF file with more than 40 large buildings plus a number of smaller buildings and other accessories you could print. Although the buildings are supposed to be for 30mm scale minis, the stock buildings seemed small, so I enlarged them to 125% of their original size, then they seemed better proportioned to the western minis I used. So far I have built: Bank, Cafe, Imperial Saloon, J.H. McFarland Blacksmith, Livery & Feed Stable, McSweeny Dry Goods, Medical Building (doctor & dentist), Pioneer Hotel, Sheriff’s Office & Jail, Small Building Set 1 (bath house, small log cabin, two small sheds, and two privys). I also built a few watering troughs, some corral fencing, and couple of piles of lumber and a couple of wooden crates.

Whitewash City Sheriff's Office

Close up of the Whitewash City Sheriff’s Office

While the Whitewash City buildings are meant to be printed on cardstock, then cut out, folded, and glued together, I also added balsa/bassword/poplar wood as reinforcements for the corners and bottom edges. I also added some roof supports for large roofs, like with the Livery Stable building. While the Whitewash City buildings are not meant to have removable roofs, there are floor plans you can print of the interiors, and you can lift the entire building off its floor plan. I also glued the floor plans to foam-core board to keep them from warping, plus they won’t get bumped out of position as easily as if they were plain cardstock.

I also purchased a number of western miniature (mostly 25mm & 28mm) figures online from Noble Knight Games. Before Christmas 2016, Noble Knight had a sale on a whole passel of used, already painted, western minis, so I bought more than 50 minis. Being already painted saved me some time putting everything together. I also found some horses in about the right sizes from places such as Michaels crafts and Toys-R-Us, and they filled up the corral. I also made some hay bales from the “pluck foam” I plucked out of the foam carrying trays for the miniature figures.

OK, so I only had three players show up to play, P.J., Cory, and a youngster named Bryce. The premise of the game was that four Mexican banditos came to town to rob the bank. The Banditos were controlled by Cory, and the Banditos were named Juan, Squelch, Jueves, and Eral. P.J. represented the law in town, controlling sherriff Kathleen and her deputies Hoss and P.J. Bryce only wanted to play a single character, so he controlled the bounty hunter Bat, who sported twin six-shooters.

Shootout at Whitewash City

Shootout at Whitewash City

So, the Banditos strolled right down main street of Whitewash City, heading towards the bank. As they passed the Sheriff’s Office (the building at the far left of the above picture), deputy Hoss fell in behind the banditos. Bounty Hunter Bat, who had been talking with the proprietor of the Livery Stable at the other end of town (off the right side of the above picture), recognized one of the banditos as being wanted. Bat then ran to intercept the banditos before they reached the bank. At the same time, sheriff Kathleen and deputy P.J. came out of the sheriff’s office and also followed the bad-looking hombres in the street.

Bat came right up to the man he wanted to claim the bounty on, then Bat pulled out both his pistols and demanded the man (Juan) surrender). Juan put his hands in the air, but kept saying, “Why you want me? I am just going about my business, and not bothering anybody!” But then the other banditos pulled their pistols, as did the lawmen and lawwoman, and the shootout was on! When the hot lead stopped flying, all of the “White Hats” (Bat, Hoss, Kathleen, and P.J.) lay dead in the middle of the dusty street, as did three of the banditos (Juan, Jueves, and Eral). Only Squelch survived the shootout, but he was badly wounded. (The townsfolk had no trouble capturing Squelch, then hanged him with some vigilante justice.)

Dead minis in the streets of Whitewash City

Dead minis in the streets of Whitewash City

Just when the first character was wounded, I asked the players if they wanted to play the game “gory, or non-gory.” As I had expected, they all answered “gory!” so I started placing the “blood splatter” markers (the yellow markers in the street) at locations where characters were wounded.

I hope to run Gutshot again at the next MDG con in the summer of 2017. I hope to build more buildings, and hope to get more players for the game.

Main Street at Whitewash City

Main Street at Whitewash City – Yuh have to admit, cardstock buildings look pretty durn good, don’t they?

So, why did I decide to run a wild west shoot-’em-up game? About 10 years ago, probably the last time I attended a local gamecon, some other feller was running a similar game. He had a western looking town with 20 or 30 buildings in it (I believe they were actual wooden buildings, not cardstock), and the premise of his game was that 8 different gangs (each with four outlaws) all arrived in town at the same time with the idea of robbing the bank! Needless to say, there were multiple crossfires and dead bodies everywhere. I had a hoot of a time playing in that game, and always wanted to duplicate the experience. Well, now I can run my own games.