I have posted recently about playing Speed Circuit (past) and Championship Formula Racing (present) on large-scale tracks that were painted on bed sheets. Some folks on the CFR forums at BoardGameGeek (BGG) have asked me to show the process, so here goes. Disclaimer: Since I am in the United States of America, I use inches, feet, etc, and also relate car speeds as miles per hour. If you are in a metric system country, you will of course want to adjust the measurements for your system.
Select a Track Diagram
First, you will need a diagram of the track you want to make. I recently designed the Belle Isle (Detroit) track that is used by IndyCars. I did find that track had already been designed by someone else (I downloaded it from the Files section at BGG), but I didn’t like the design. Some of the straightaway sections were too long in that other design, so cars could use a high top speed in the game to go 200 mph or so. Watching the video of actual IndyCars racing on the Belle Isle track, I never saw any car get much above 160 mph at any time. That other track design also ignored some of the corners in the corners 7 through 11 sequence, and also treated corner 14 as just another straightaway space.
I first obtained the real Belle Isle track outline diagram from online. I used Wikipedia as a source, but there are alternate sources for tracks that you could use if you were designing your own track.
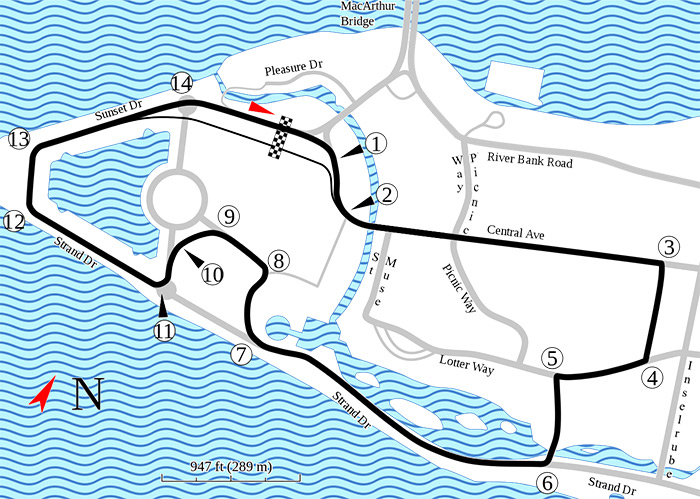
The Belle Isle track layout from Wikipedia. Unfortunately, the diagram incorrectly calls one of the streets “Lotter Way” when it should properly be “Loiter Way.”
I then imported that track diagram into image editing software (I use Acorn from Flying Meat Software). I then erased everything except the actual track outline, scaled it to fit a poster board size space of 22″ x 28″ (in case I want to print out a board-game size map of that track). Then I changed the track color to red so it wouldn’t interfere with other colored spaces I would create. I created spaces that were 1″ long for a board-game size track, then placed them around the track for the straight parts of the track. I then “fudged” in the corner spaces. I then assigned corner speeds based on watching race video, and added cornering arrows. Here is the track with the original red outline, and gray spaces added:
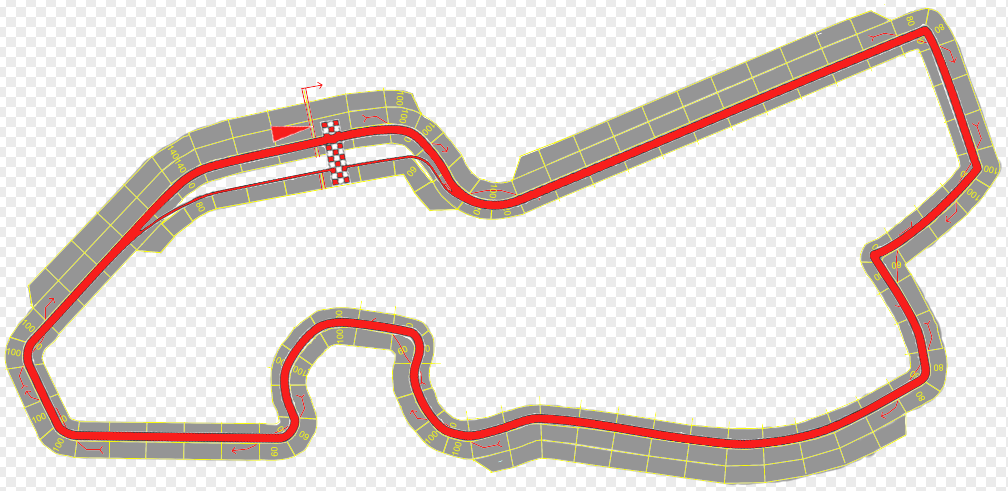
Belle Isle original track in red, with gray spaces for the board game track.
Acorn is a layer-based program like Photoshop, so you can make layers visible or invisible, change which layer is on top, etc, so that made the above process relatively easy.
Next was to print the track the size of a poster board, and then I ran some solo races on it using the CFR rules and cars of different configuration. I did make a few changes to the initial playtest track, so the “playtest 2” track above is how I finalized the spaces and corners. Except, I’m not sure about the speed of the final slight right-hand bend at the upper left of the track, just after the entrance to the pits. I have 140 mph marked on it for now, but may change it to 160 mph after I get some other folks to playtest it.
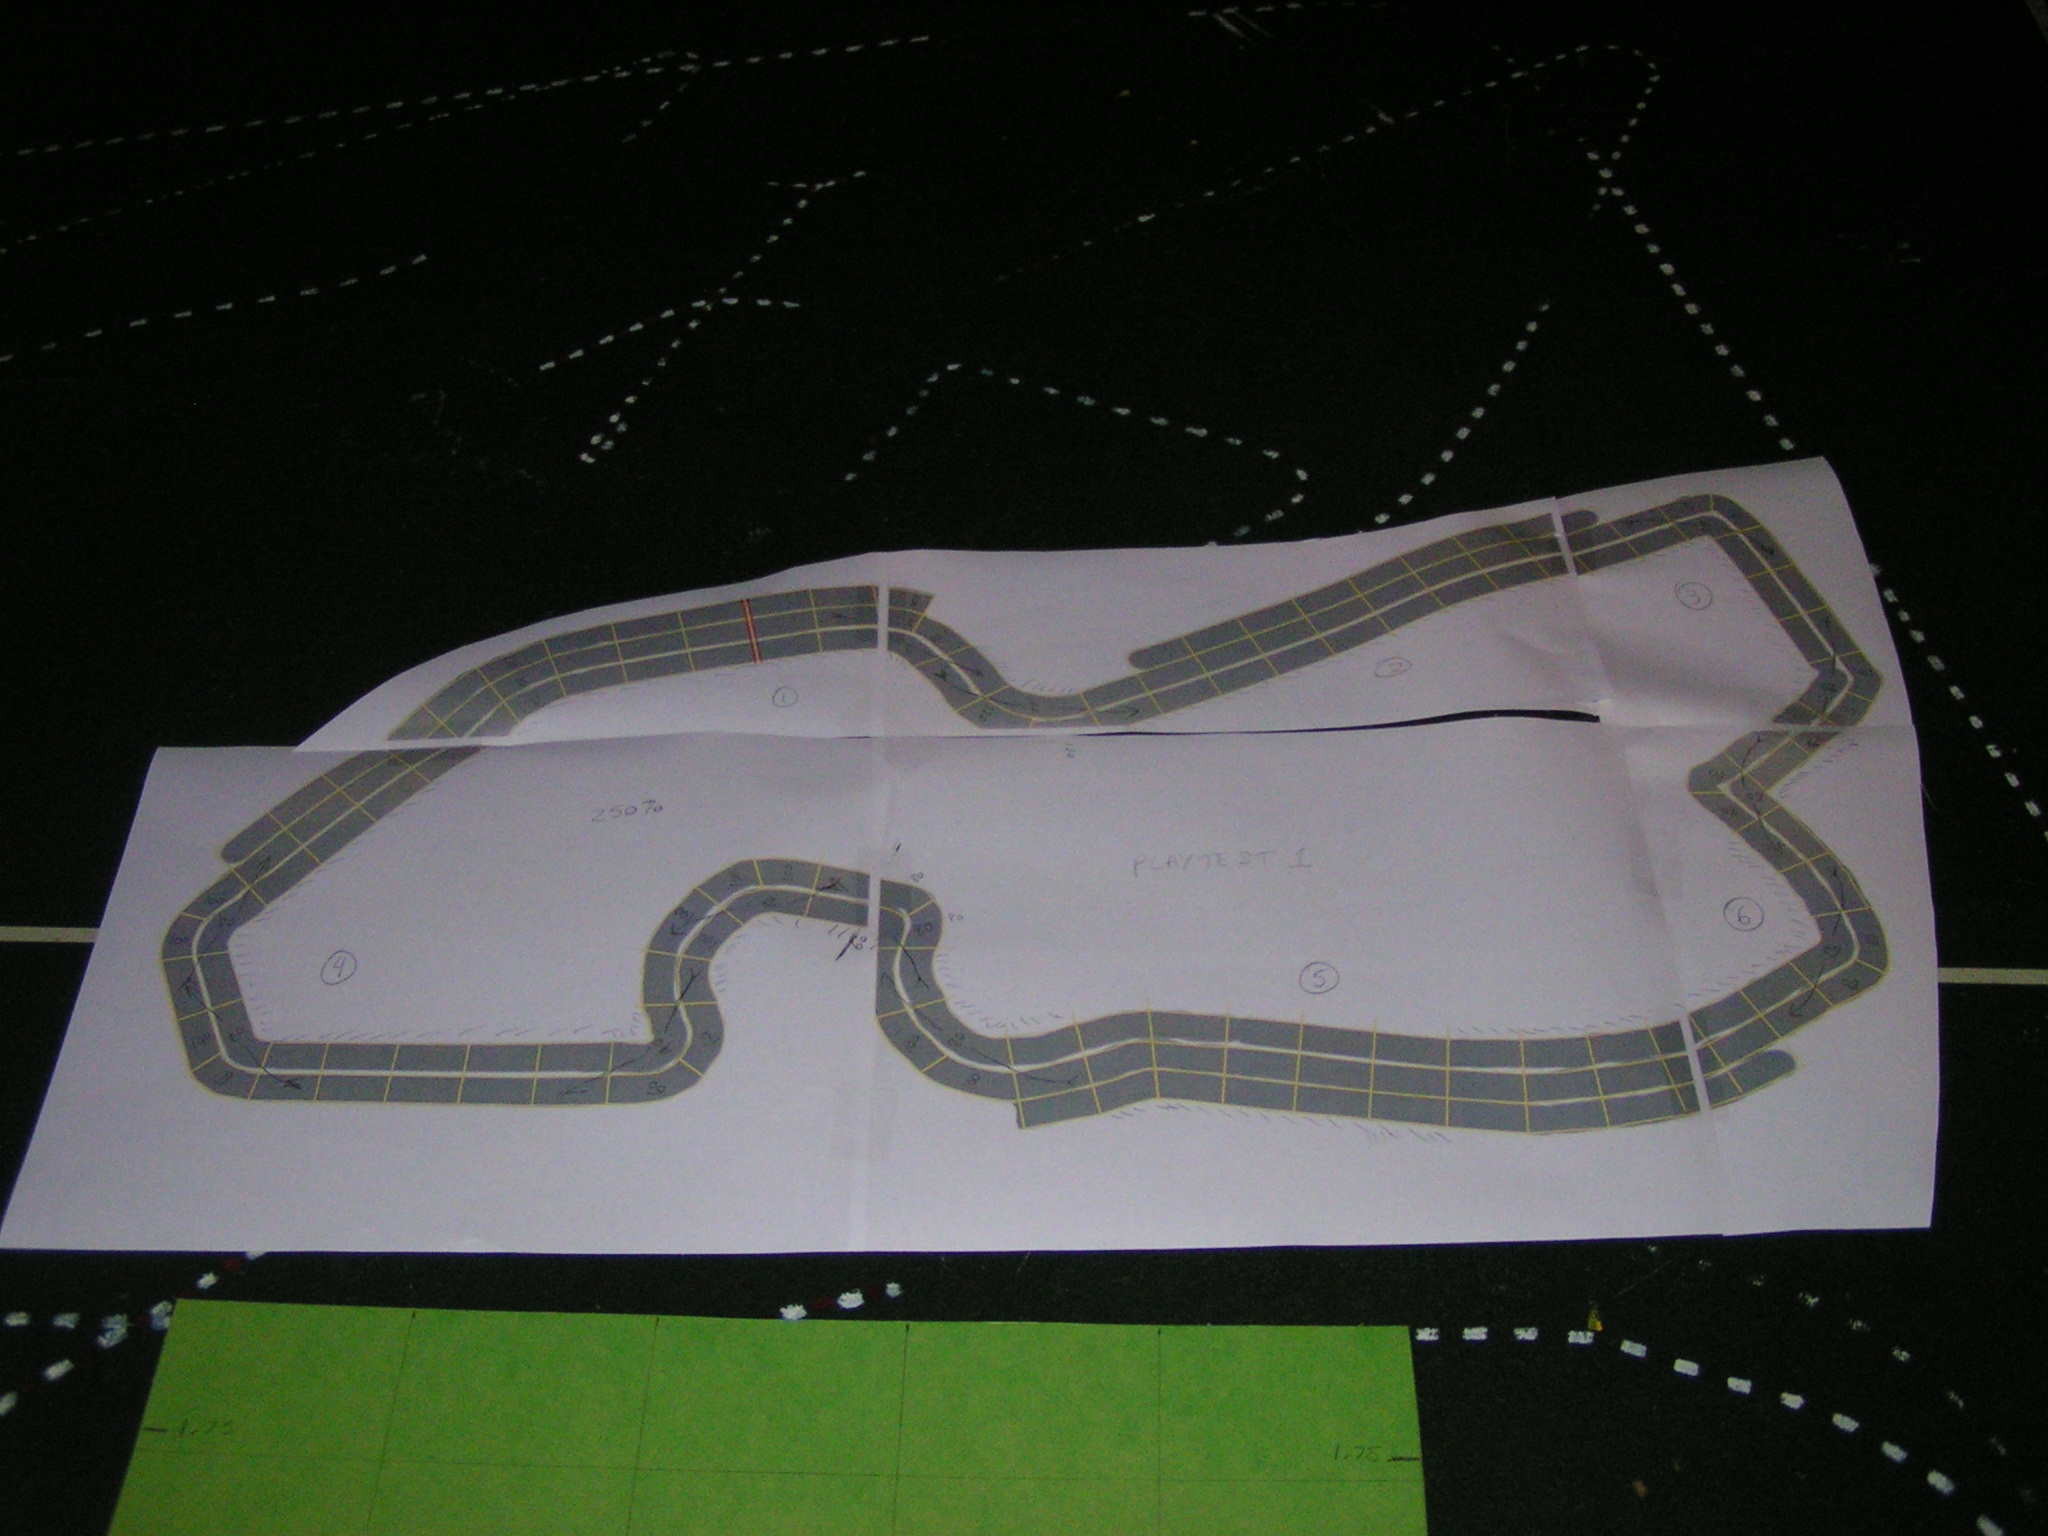
Poster board size Belle Isle track.
You may already have a track diagram, so you won’t need to perform the above steps. In that case, you will start here:
Gather Items Needed to Build Your Track
Gather items you will need to build a large track.
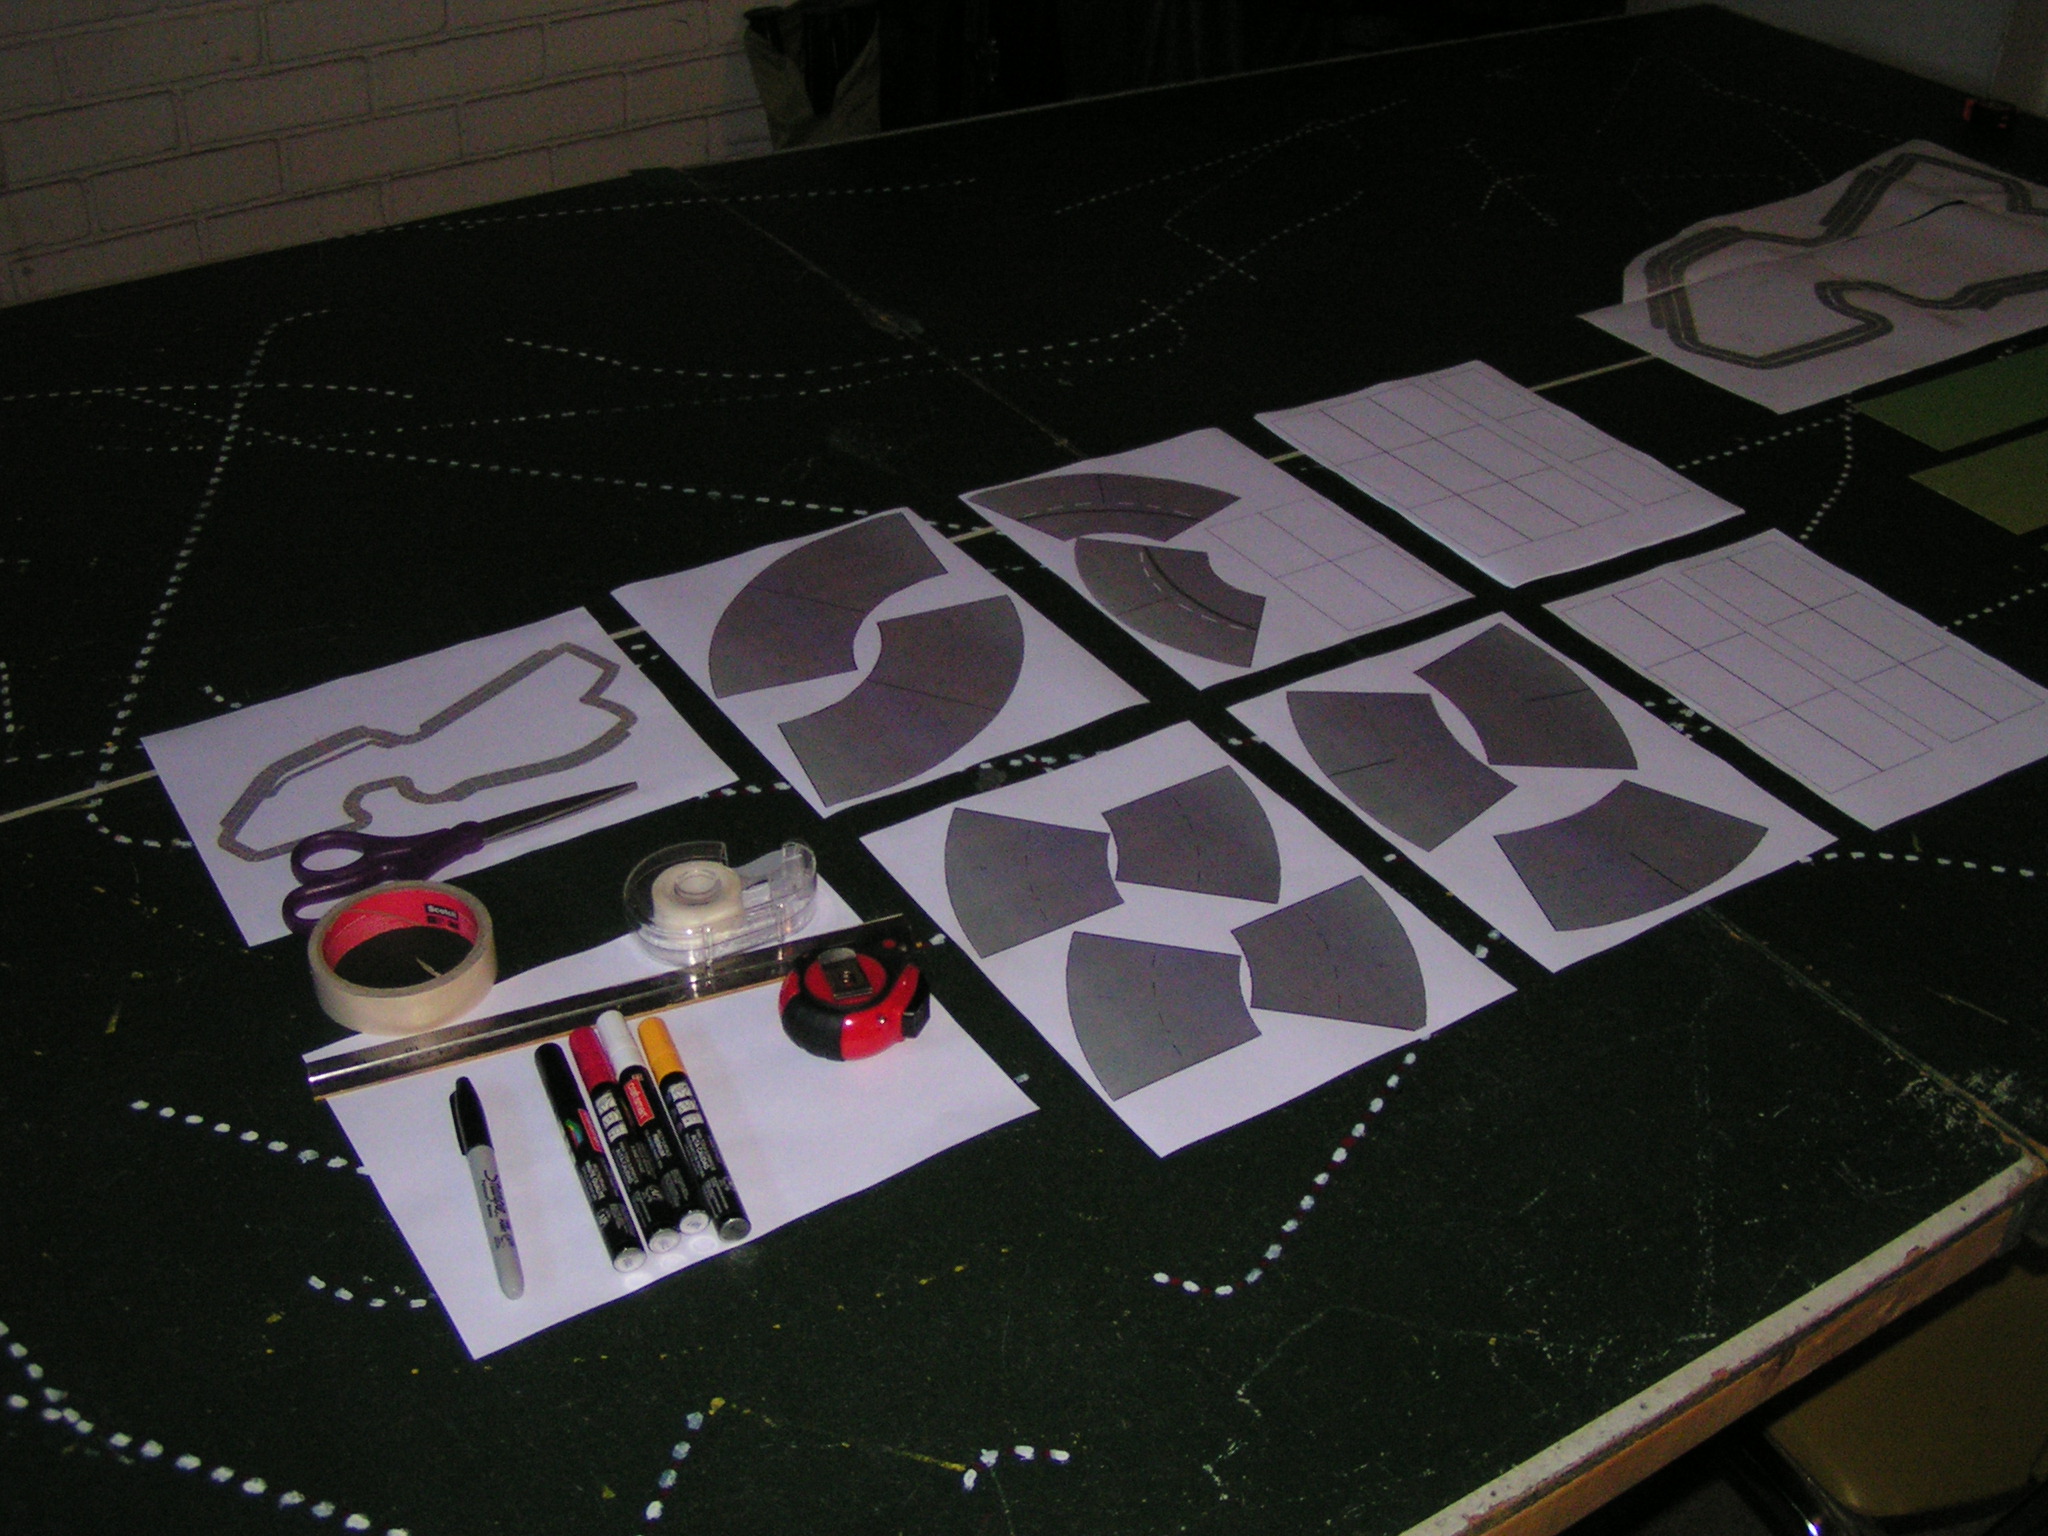
Track building items laid out on the table.
- A large table ( I use a ping-pong table that is 5′ x 9′ in size — you will probably need something larger than a 4′ x 8′ piece of plywood, as some tracks are larger than 4′ x 8′). You could also use a large area of the floor, if you are younger than me, and have good knees!
- Track template pieces. I used to use poster board to create various sizes of straightaways (either two-lane or three-lane wide), but now I find it’s easier and cheaper to just print paper on my laser printer. I create spaces for straights that are 3″ long by 1.75″ wide, as that size space fits my 1:64 scale race cars well. If you make the spaces much smaller than that, cars will be too tightly spaced together if they are crowded into the same area of the track. If the spaces are too large, you might not be able to fit the finished track onto a reasonable table size. I also used to just “fudge” in the corners after laying out the straight pieces, but now I also print out some generic corner pieces. I found some generic track sections online, and printed them at different scales until I got the right size. I also tested the printed corner pieces to ensure my 1:64 scale cars would fit in the spaces on those corner pieces.
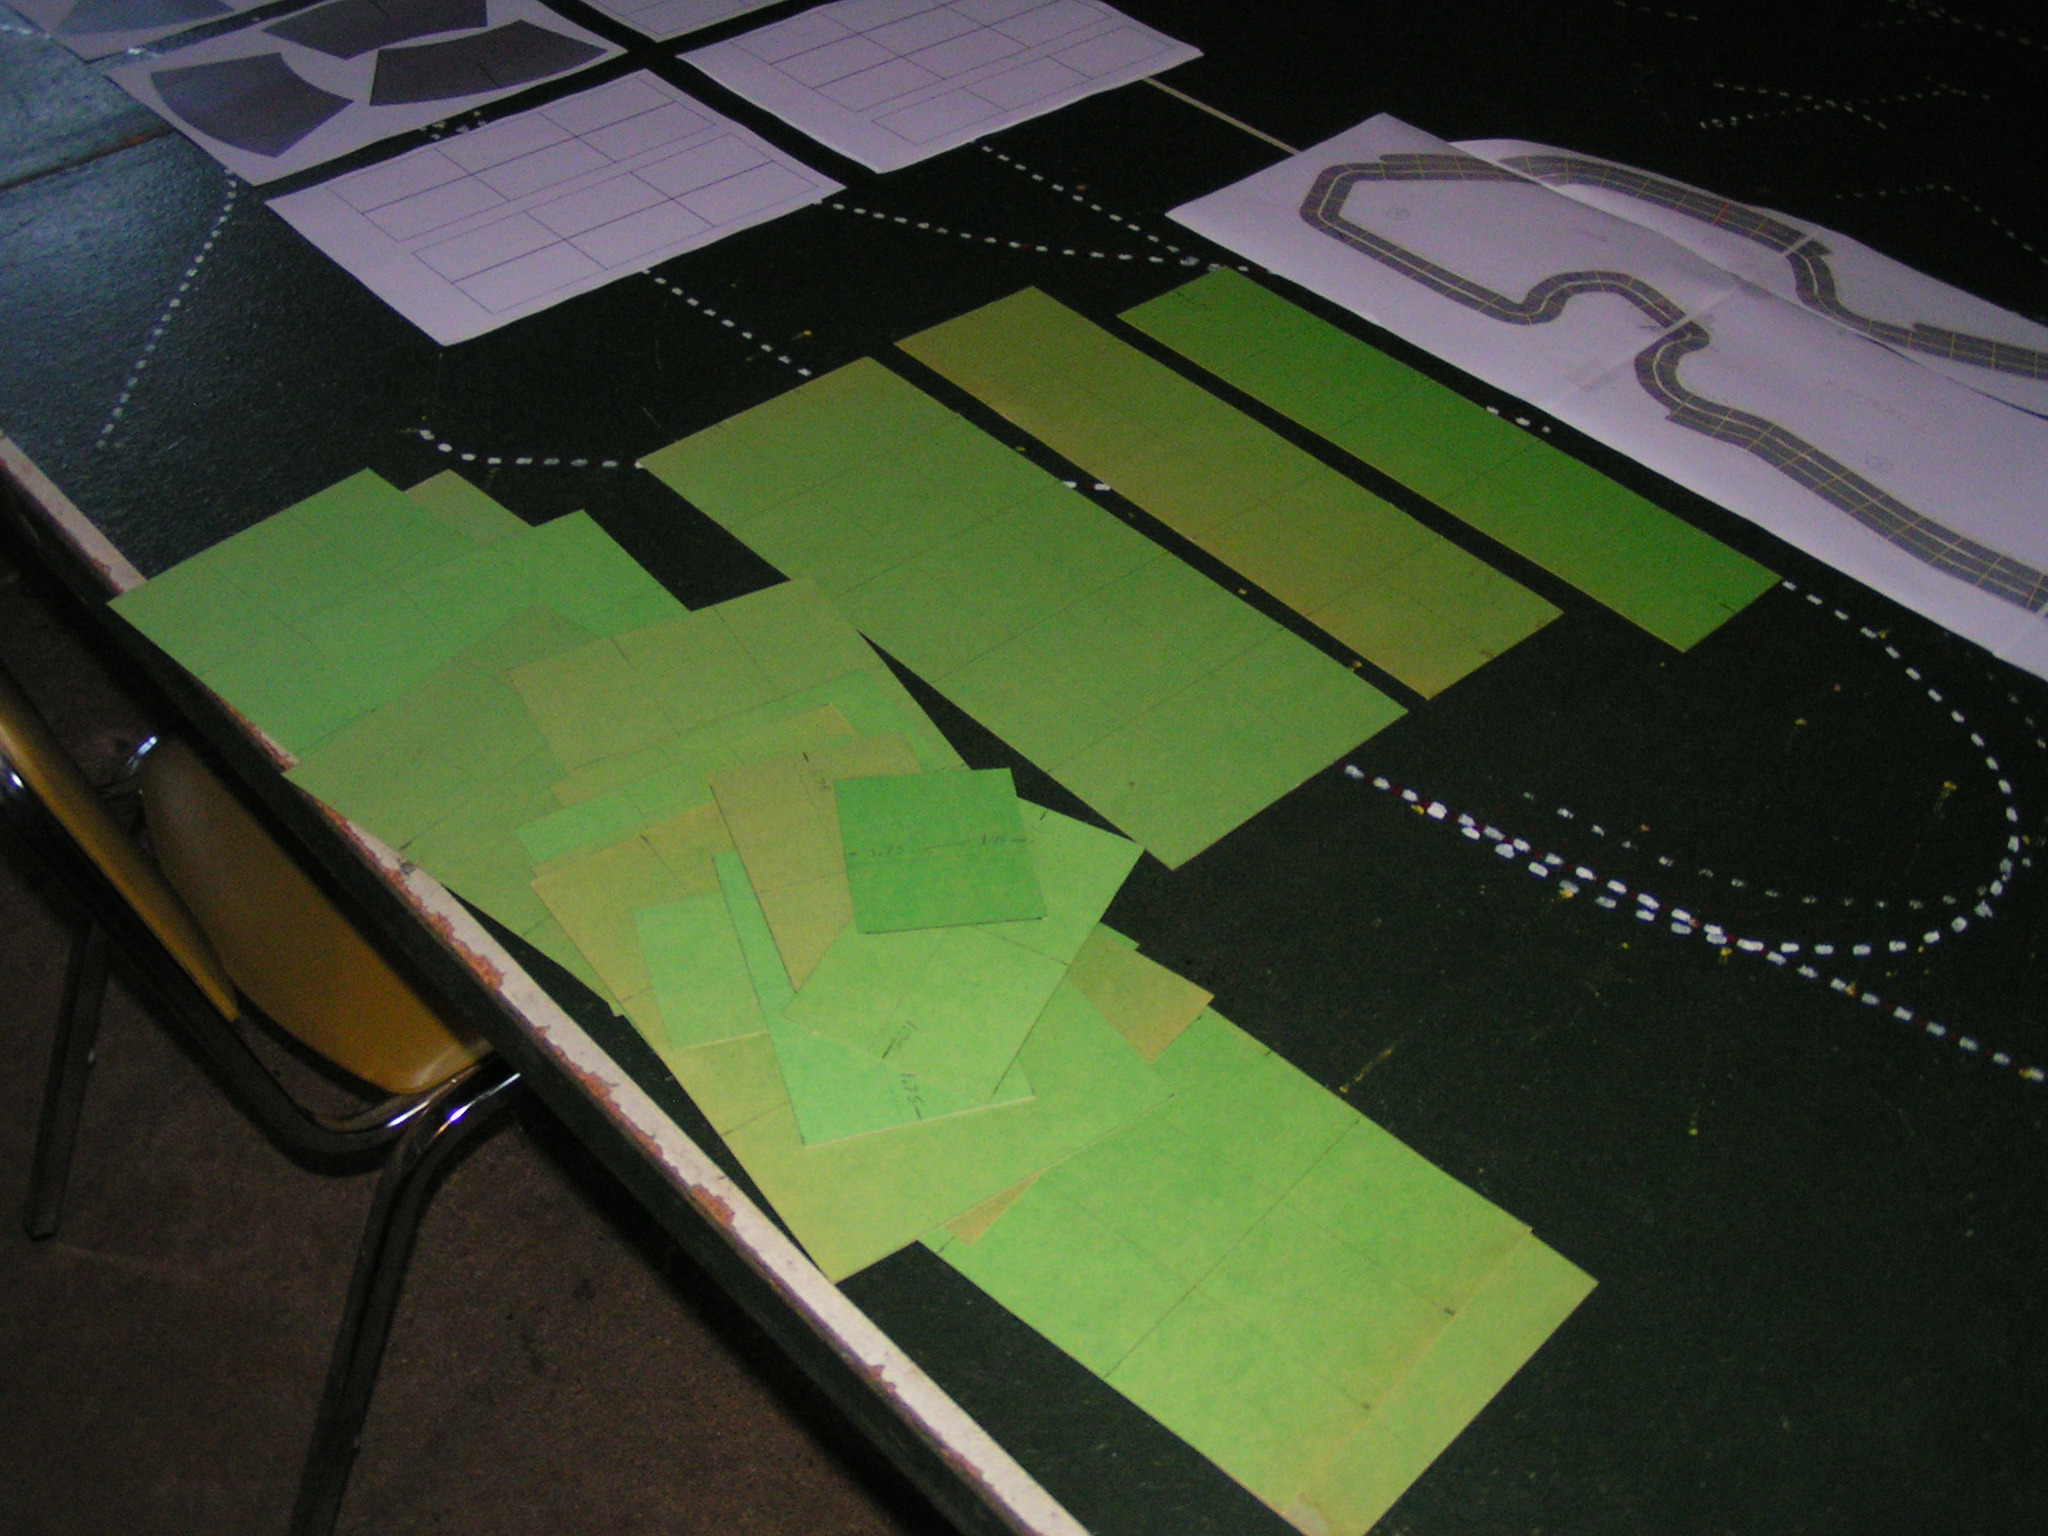
Older green poster-board track template pieces in the foreground.
- A pair of scissors for cutting the track templates.
- Carpenter’s style tape measure.
- A straight edge of some sort to help with marking straight lines. I use an old steel ruler from an old combination square.
- A pencil to mark the basic outline of the track once you have completed the layout.
- A black marker (like a Sharpie), used to go over the penciled outline of the track.
- Clear cellophane tape. Use the tape to tack small track sections together to build assemblies, so there are not as many loose pieces to move around when you make track adjustments.
- Masking tape. Used to mask the track so you only paint the track.
- Miscellaneous newspapers, pieces of cardboard, etc. Use these to actually mask areas of the sheet that you don’t want to paint.
- A can of flat black spray paint. You could also brush flat black paint onto the sheet, but I find spraying is easier, and doesn’t bleed-through the sheet as much as brush painting.
- Different colored paint markers. I use black (preferably flat black), red, white, and yellow paint markers. Get oil based paint markers, as they won’t wash out if you ever have to wash your track. These markers are used to paint the lines for the spaces on the track, cornering speeds & arrows, and the red-and-white lines along the edge of the track to denote which side of the track is the inside to the next corner.
- A flat bed sheet. Wait to buy the sheet until after you determine how big the track will be.
Laying Out the Track
Cut out the various straight and curved template pieces.
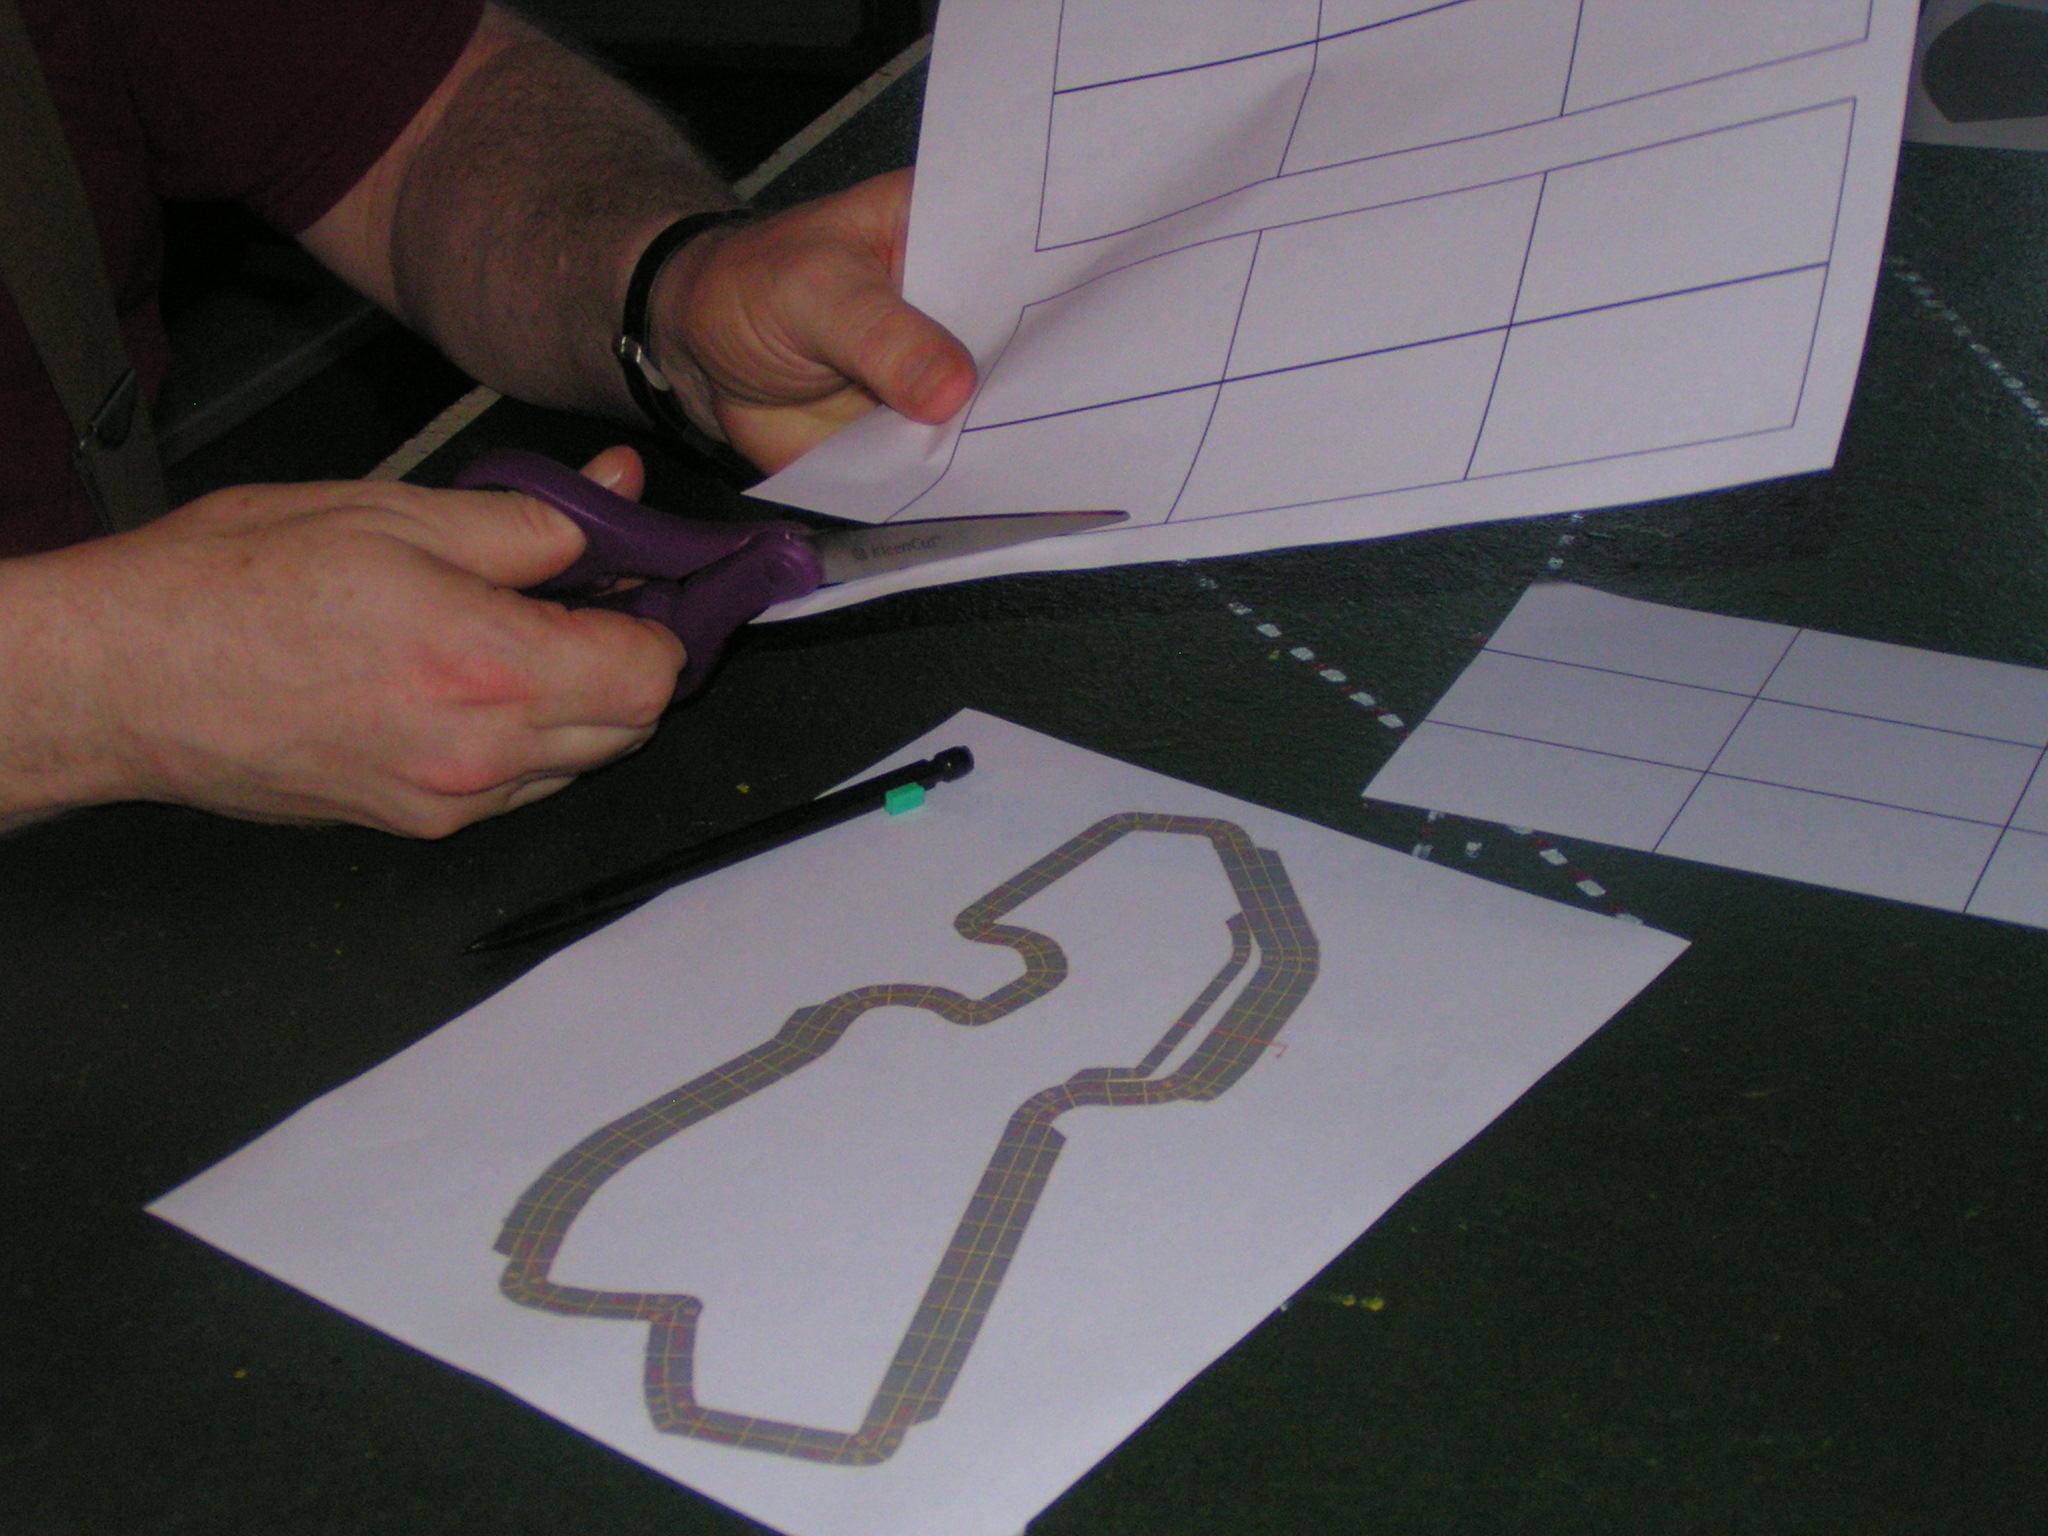
Cutting out paper straight-section templates.
Then, tape together straight sections to make longer pieces. Do this so you won’t have as many pieces of paper to move around. For the Belle Isle track, I needed straight sections of various spaces long, such as 12 spaces long, 5 spaces long, etc.

Taping straight templates to make longer straightaways.
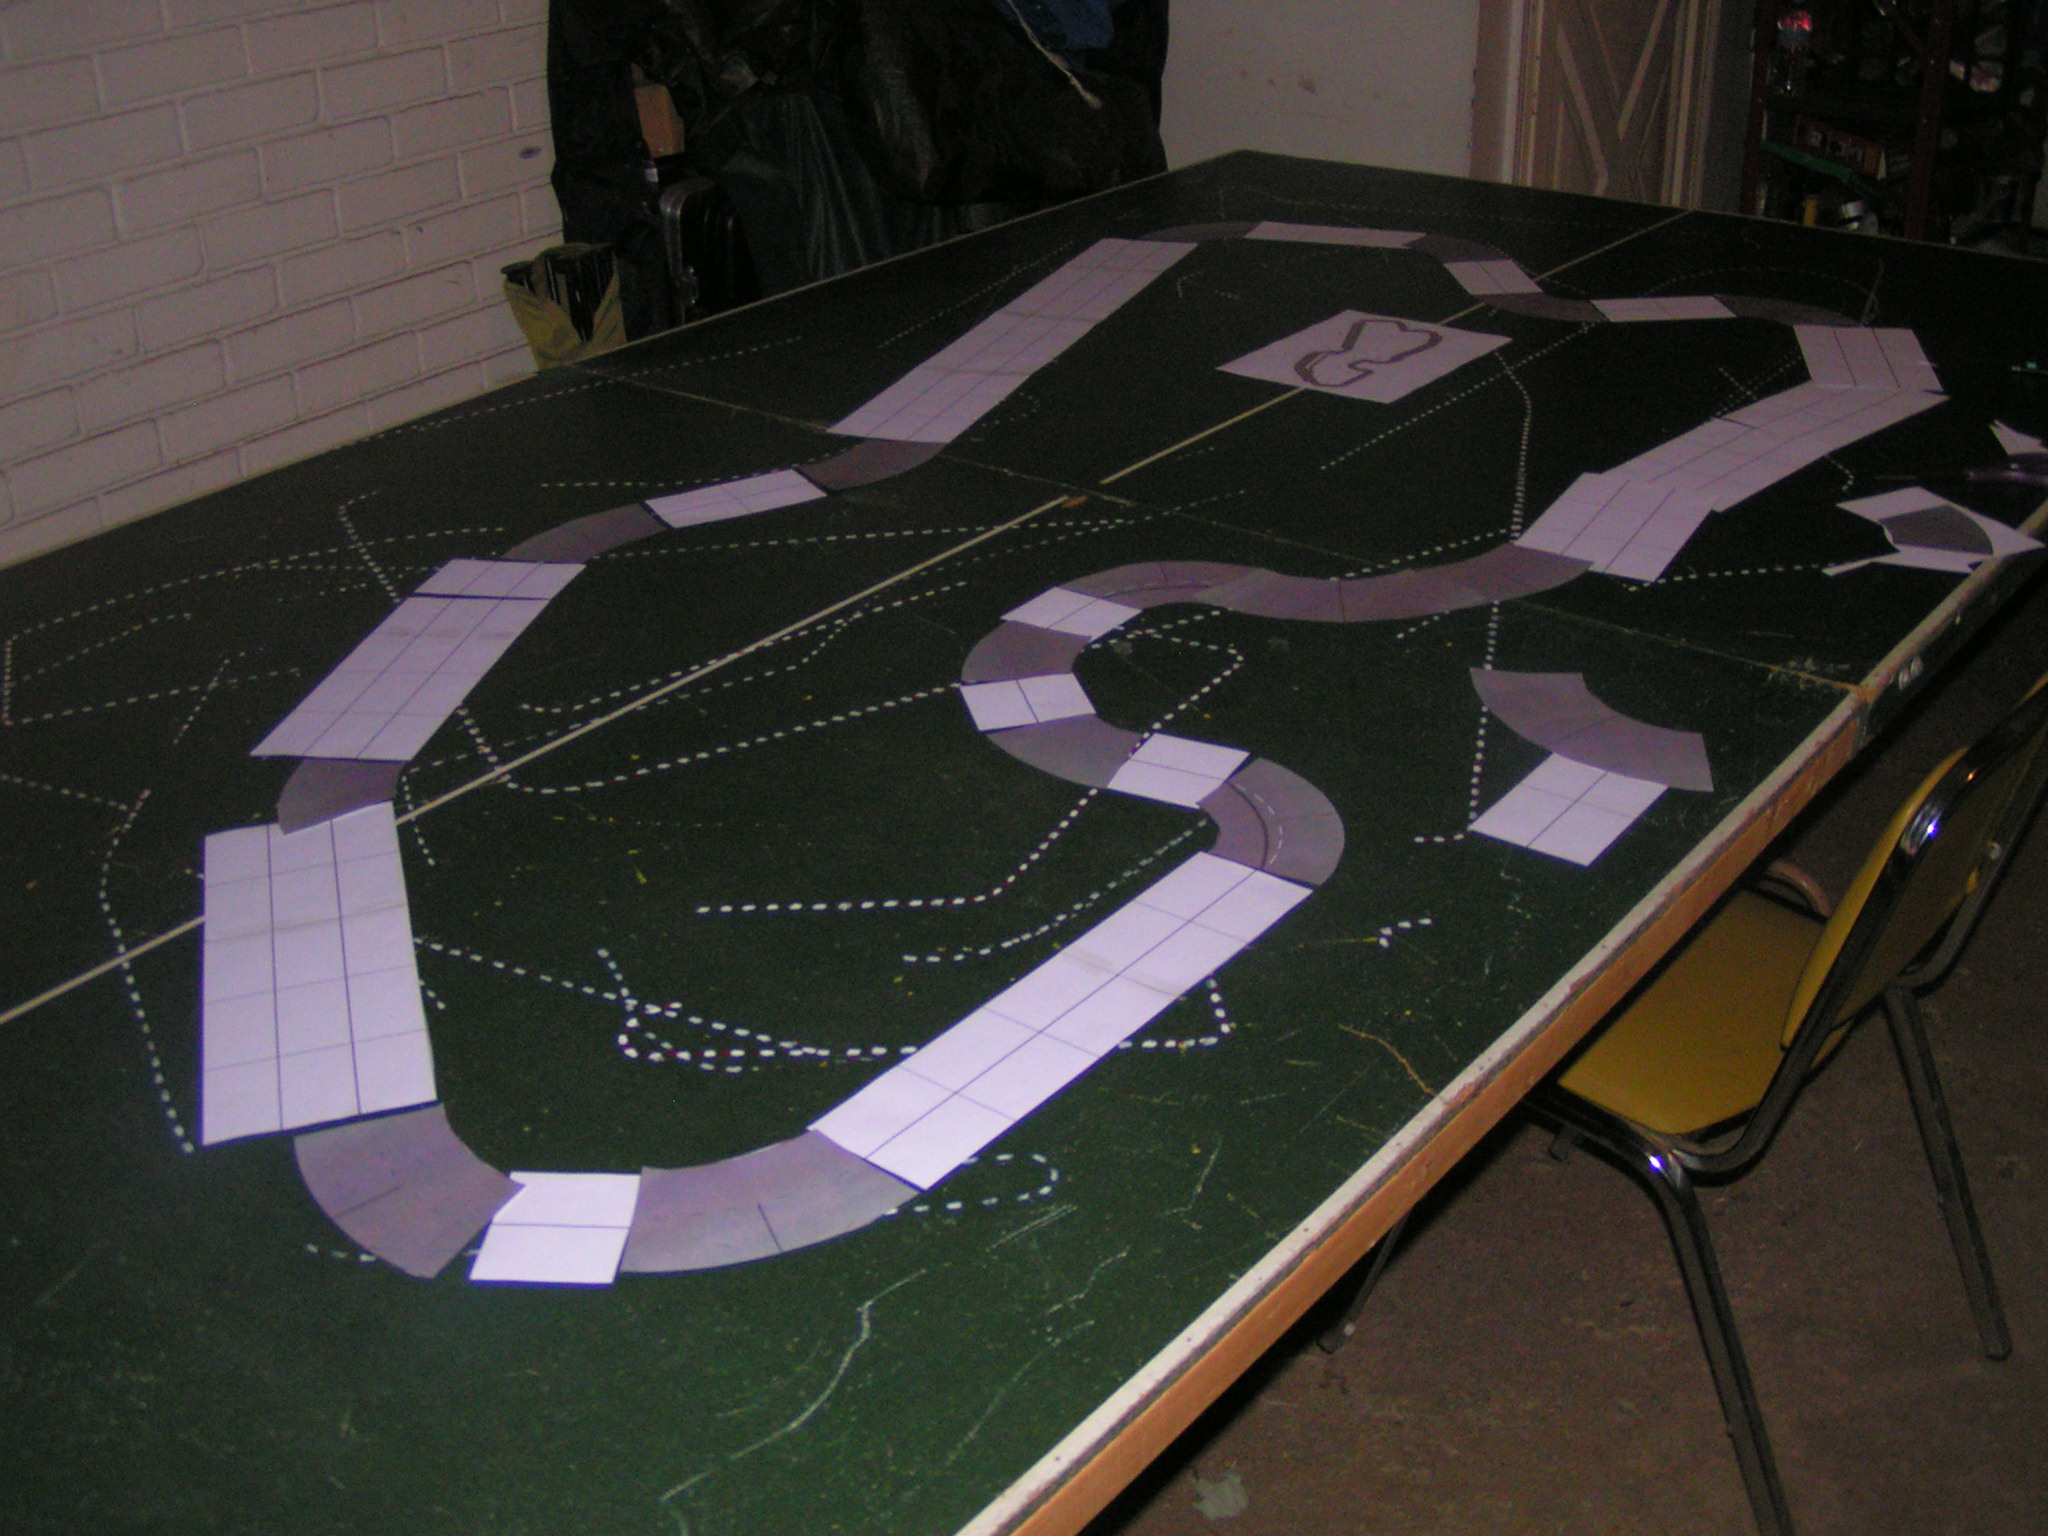
After you have cut out and taped your various templates, place the various lengths of straight sections about where they should go. Use the track diagram as a guide. I also wrote the number of straight spaces in each area directly on that track diagram, so I wasn’t always re-counting the straightaways.
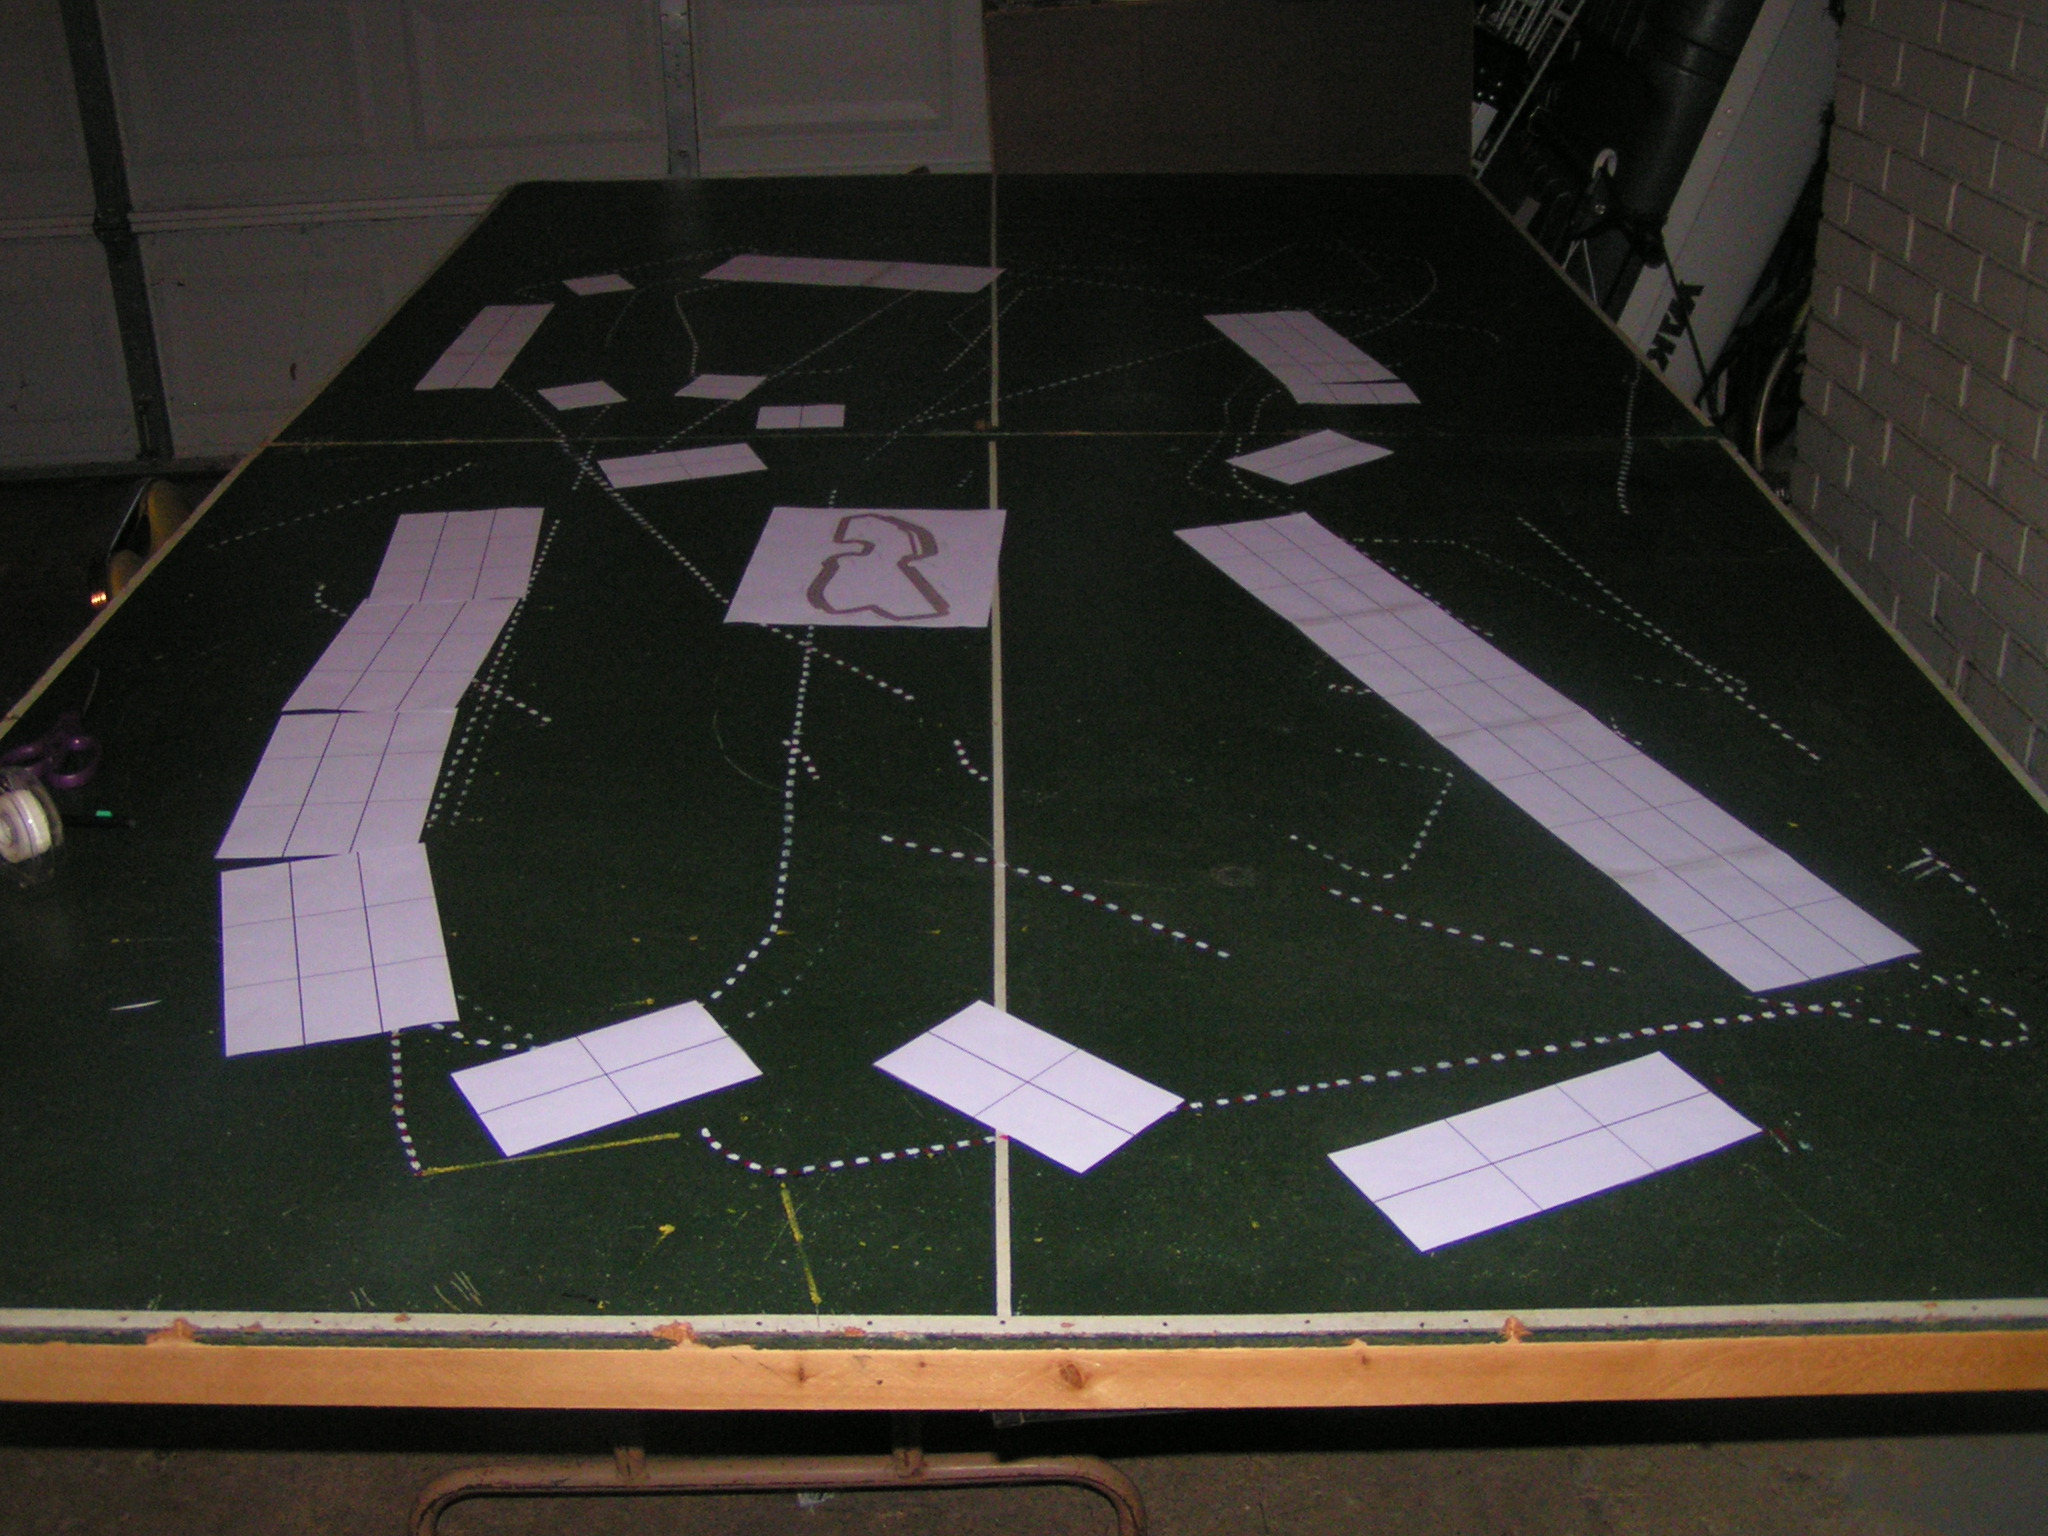
The straight sections of track have been placed in their approximate positions.
In the above picture, the straight pieces are roughly where they should go. Don’t worry about exactness, as you will have to make adjustments. Then add the corner pieces, and try to “close the loop” of the track by making adjustments as needed.
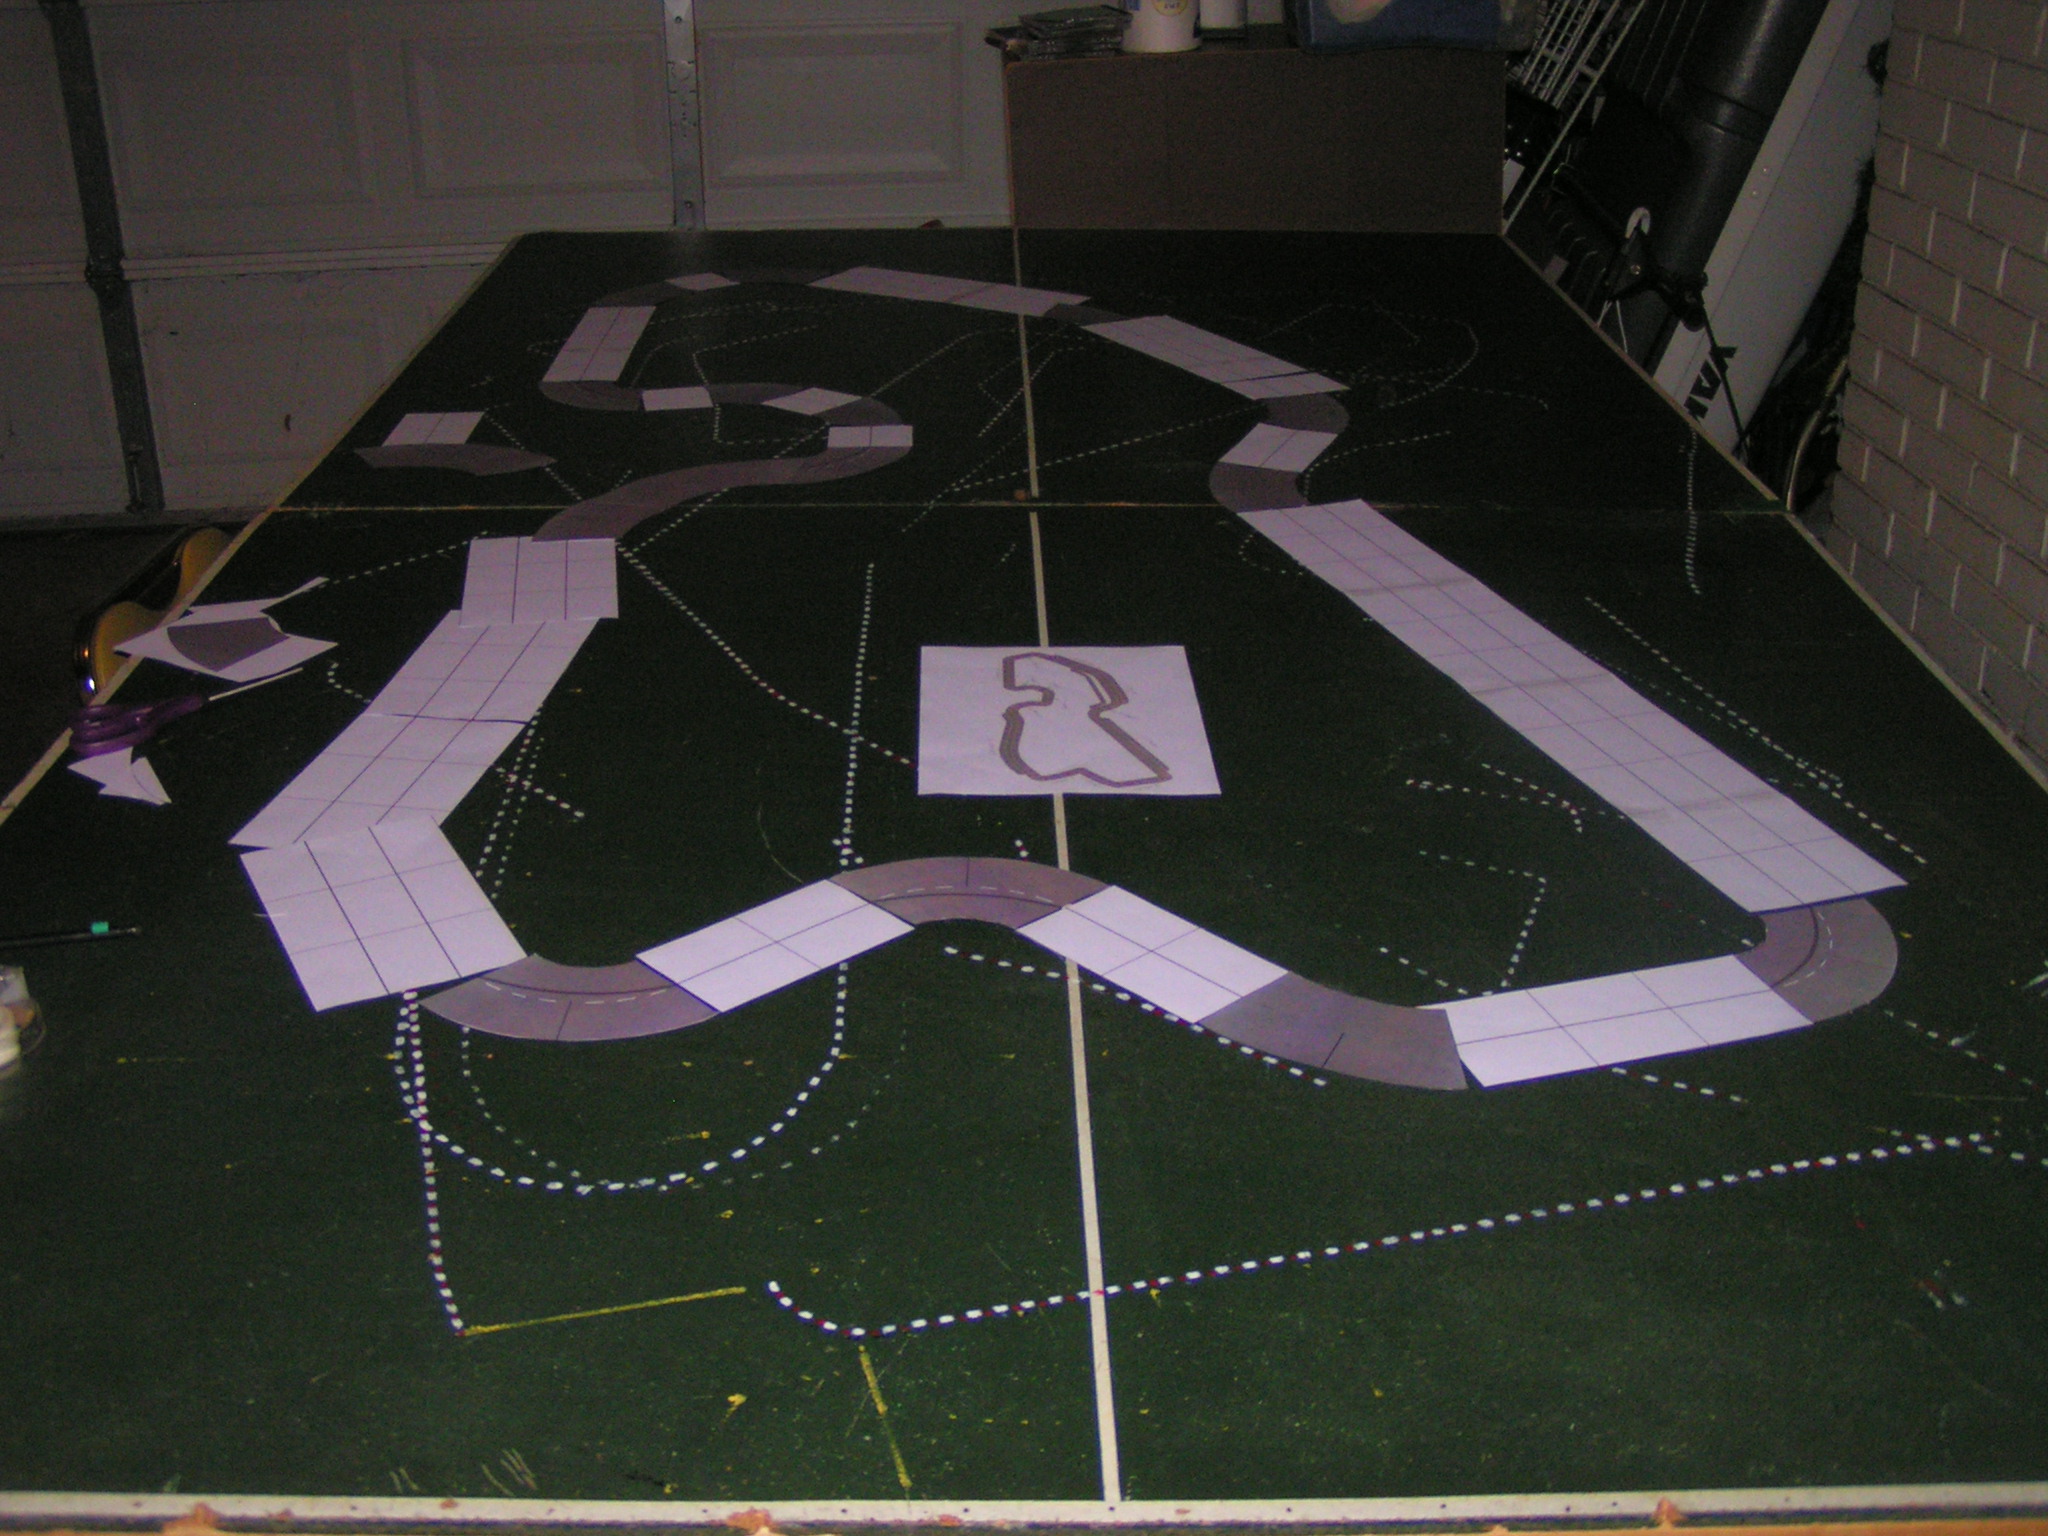
Curves have been added to the track.
In my example above, you can see that the track will actually fit on the table. Yay!
A view of the other side of the track.
The next step is to measure the longest distance of the track’s length and width, and write down the numbers.
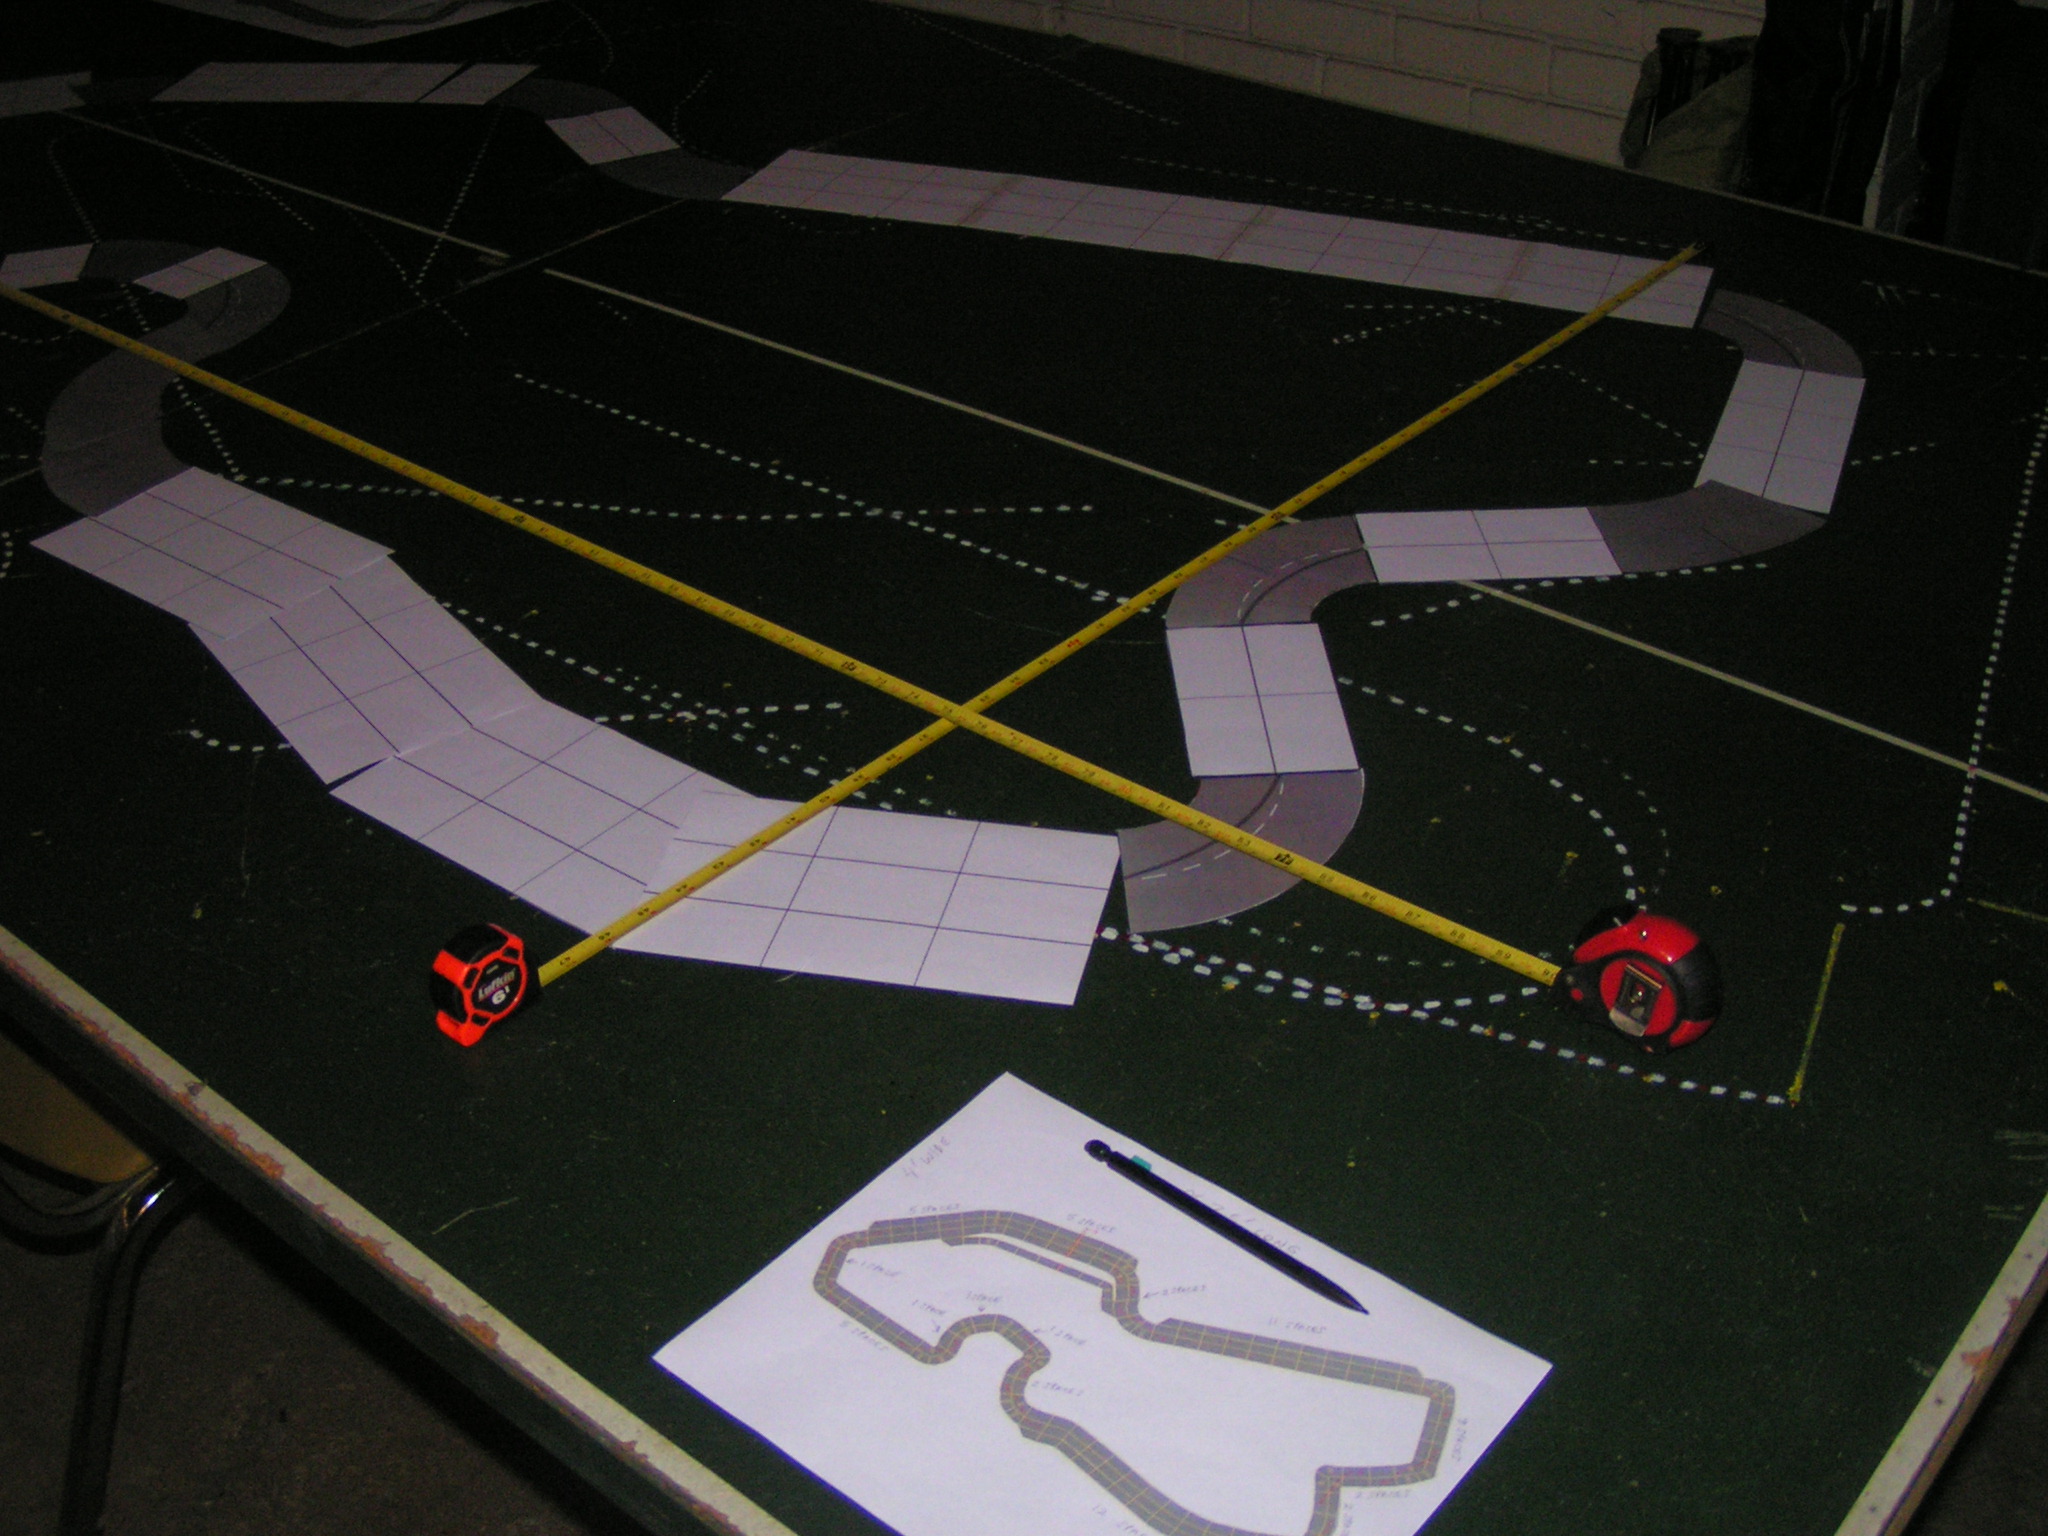
Measuring the track dimensions.
For my Belle Isle track, I found the rough layout was about 4′ wide and 7’6″ long, so the finished track should be able to be played on a 4′ x 8′ table size. This is now the time to purchase the flat bed sheet. I was able to purchase a flat sheet that is 66″ x 96″, or 5’6″ x 8’0″, for about $5 (US). For you metric folk, that sheet is 168cm x 244cm. Of course, before you can use the sheet, you will need to wash it, as the sheets are usually packed very densely, and the wrinkles will make it difficult to paint the track later. Also throw the sheet in the dryer (if you have one) after washing to “pre-shrink” it.
Continued in Part 2 – Marking the track on the sheet.
Also see Part 3 – Painting the track.
Tags: 1:64, Acorn, Belle Isle, BoardGameGeek, CFR, Championship Formula Racing, Detroit, flat sheet, Flying Meat Software, IndyCars, Photoshop, Speed Circuit, Wikipedia