Posts Tagged ‘Hot Wheels’

Making a 1:64 Scale Track — Part 2 — Marking the Track on the Sheet

Thursday, July 20th, 2017

In this blog post, we’ll tape our sheet to the table, then lay out the track sections again. Read Part 1 of Making a 1:64 Scale Track to see how we arrived here. Note that you can make a similar track for other scales of cars. If you use something like 1:43 scale, you would have to adjust the size of the spaces (and a full track probably wouldn’t fit on a sheet). You could of course make large tracks on foam-core board, or other material. Part of the reason we went with 1:64 scale cars originally is that in the 1980s, when we starting making the large tracks, Hot Wheels cars were the easiest cars to find. We also found that most of Avalon Hill’s Accessory Pack tracks would fit on a sheet at 1:64 scale.

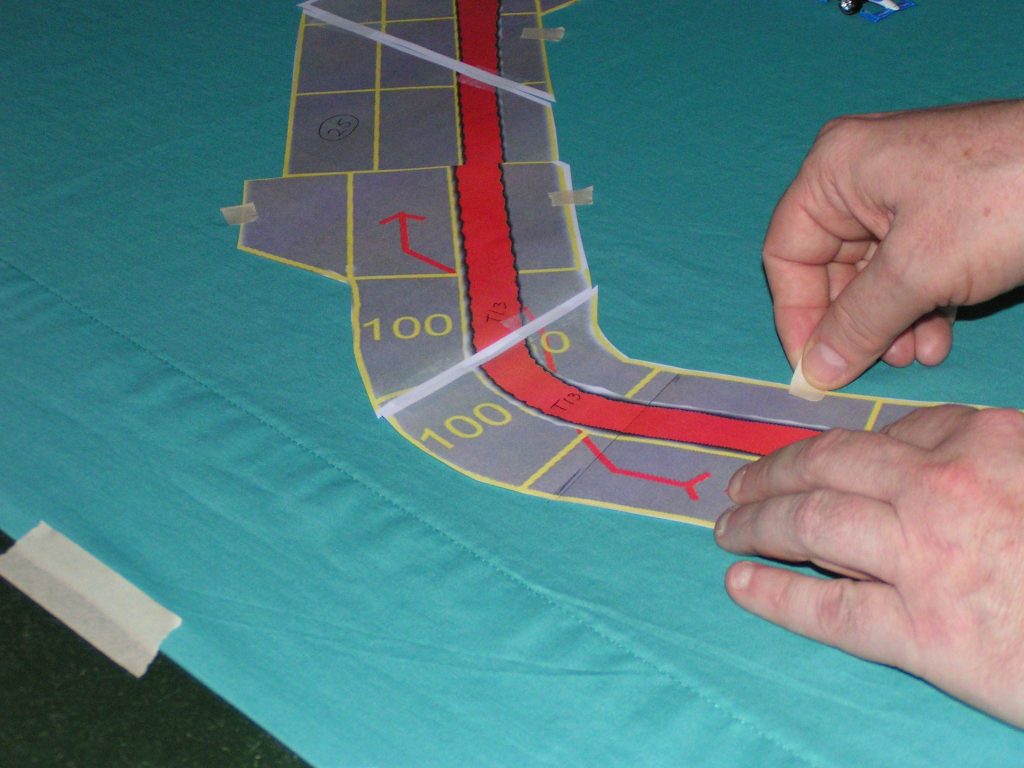
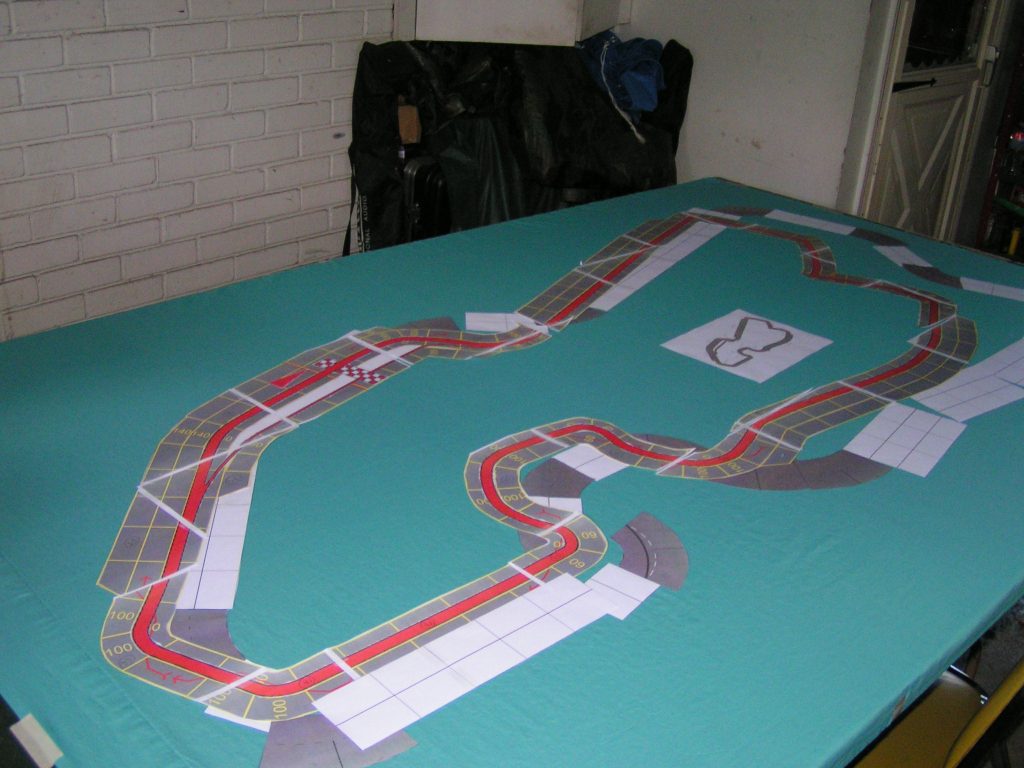
So, I finished washing and drying my twin bed flat sheet, then stretched it out on my ping-pong table, and then taped it so it would stay fairly tight so it would avoid wrinkling while I marked it up. I laid out the former track sections on the sheet, but the outline just didn’t look quite right to me.  In particular, some of the corners on the real track were sharp, 90-degree turns, while the templates I used for 90-degree turns were more gradual and rounded. So, I then printed out the actual track file using the Acorn program (from Flying Meat Software), then taped some sections together, then laid them on the table on top of the former outline. That original track plan is with the red stripe down its middle.

The new track outline is on top of the old track outline.

The new track outline is on top of the old track outline.

It was very apparent that the new outline seemed much smaller than the former outline.

The new track outline is smaller than the old track outline.

The new track outline is smaller than the old track outline.

The former outline that I used was based on templates, where all of the straight pieces had spaces that were 3″ long by 1.75″ wide, and the template corner spaces had been printed so my 1:64 cars would fit on them without encroaching on the spaces of other cars. When I printed the actual track outline (with the red stripe), I printed it at 775% of my original file’s size. That made most of the straight spaces 3″ long, but it also meant that the corner spaces were too small. If you had more than one car in a corner area, the cars would interfere with each other. Since you can only paint the track once, it is better to resolve any issues in this, the planning stage! Naturally, I had to cut out these new track sections and tape some of them together with clear cellophane tape. Note that I cut close to the track outline as eventually I will trace around the track outline with a pencil. If I just placed the printed pages on the sheet, I would have to cut them later before I could trace the edges, and that would then put pieces out of alignment.

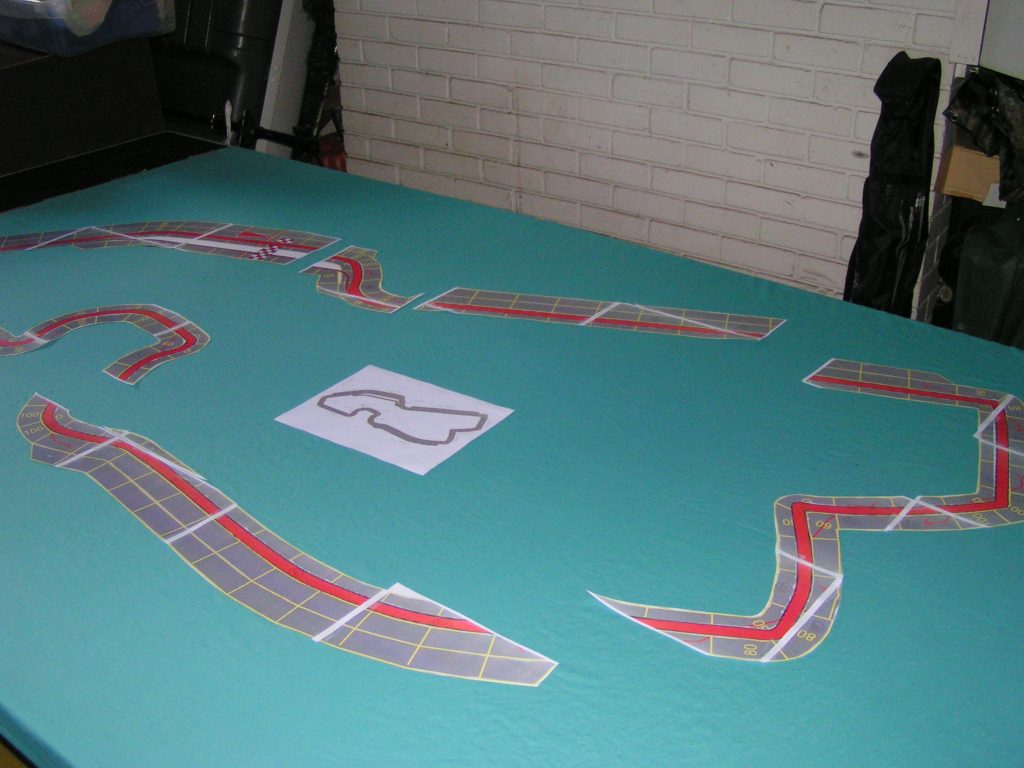
Now, of course, the table top was too cluttered, so I picked up all of the template sections and left just the new track outline pieces on the table.

Track outline sections.

Track outline sections.

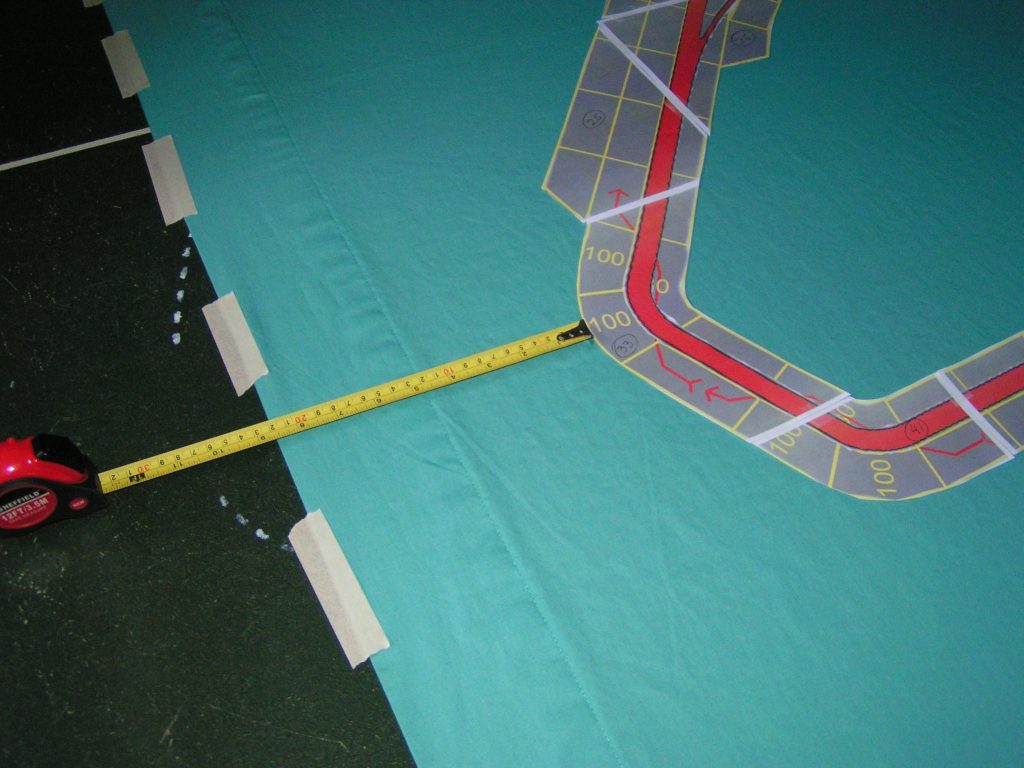
I then measured from the different edges of the track, and tried to center the sections as much as possible. This is not only for aesthetics, but for practicality, as when playing Championship Formula Racing, each driver needs to lay out their cards without laying them on the track. While you should try to leave an open “border” around all edges of the track, that won’t be possible with some tracks.

Measuring from the edges to center the track on the sheet.

Measuring from the edges to center the track on the sheet.

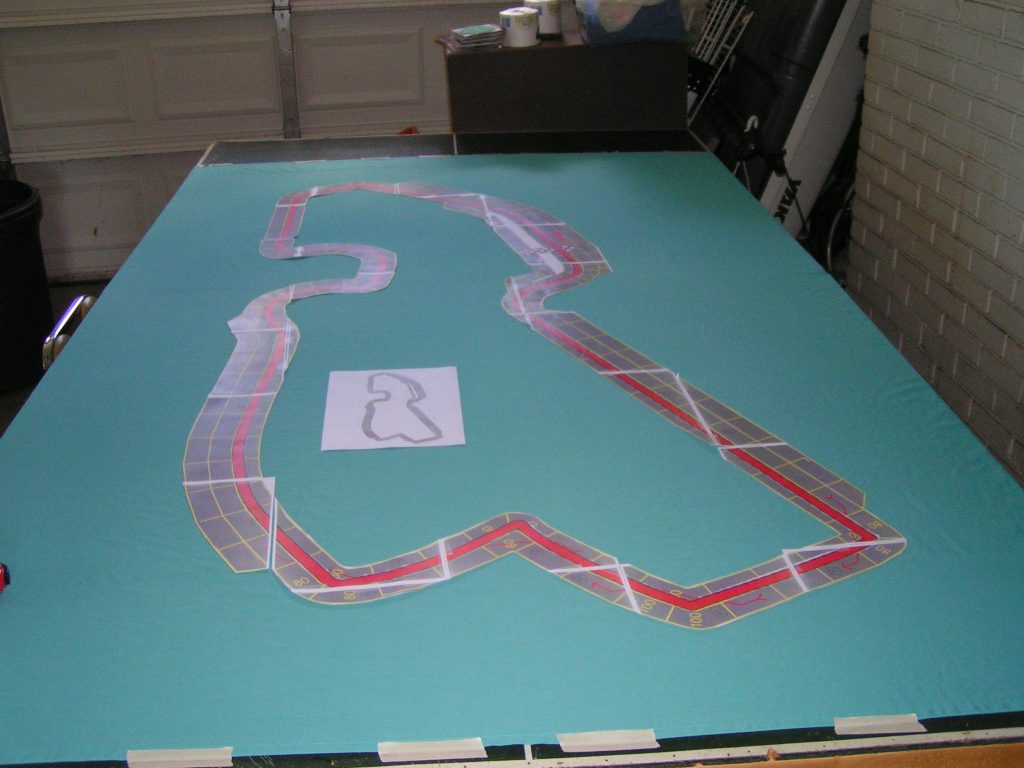
I then centered the pieces, and placed them together to see how it looked.

The centered track.

The centered track.

Now comes the task of checking how the 1:64 scale cars fit. Get out your scale cars and see how they fit on actual parts of the track outline.

Cars fit on the straight sections.

Cars fit on the straight sections.

It looks like the straight sections are long enough for my Greenlight IndyCars to fit. I also tested the sections with my old Hot Wheels open-wheel race cars that are the same length as the newer Greenlight cars. Note that the printed track is narrower than I will paint the finished track. The proportion of the rectangles for a poster-board size track is different than I want for my large track. When I design a poster-board size track, I make the straight spaces 1″ long by 0.5″ wide. That usually works well with small race cars. However, for the large track, I make spaces that are 3″ long by 1.75″ wide. That means that when I trace around the edge of the finished track layout, I will have to do a little more marking.

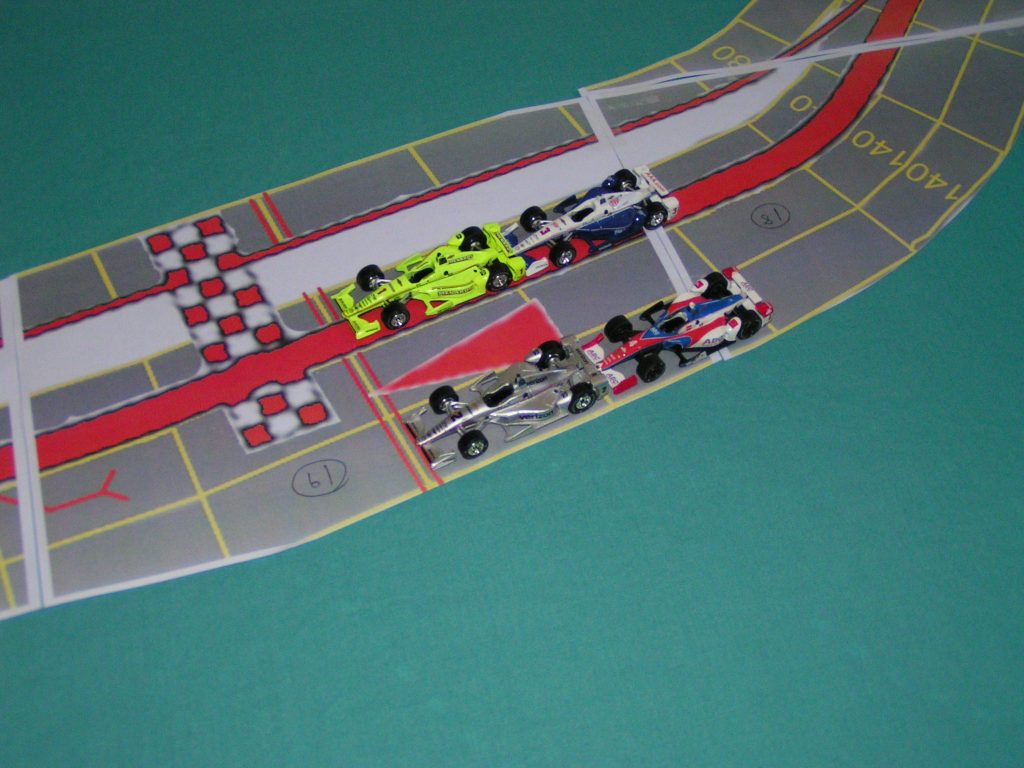
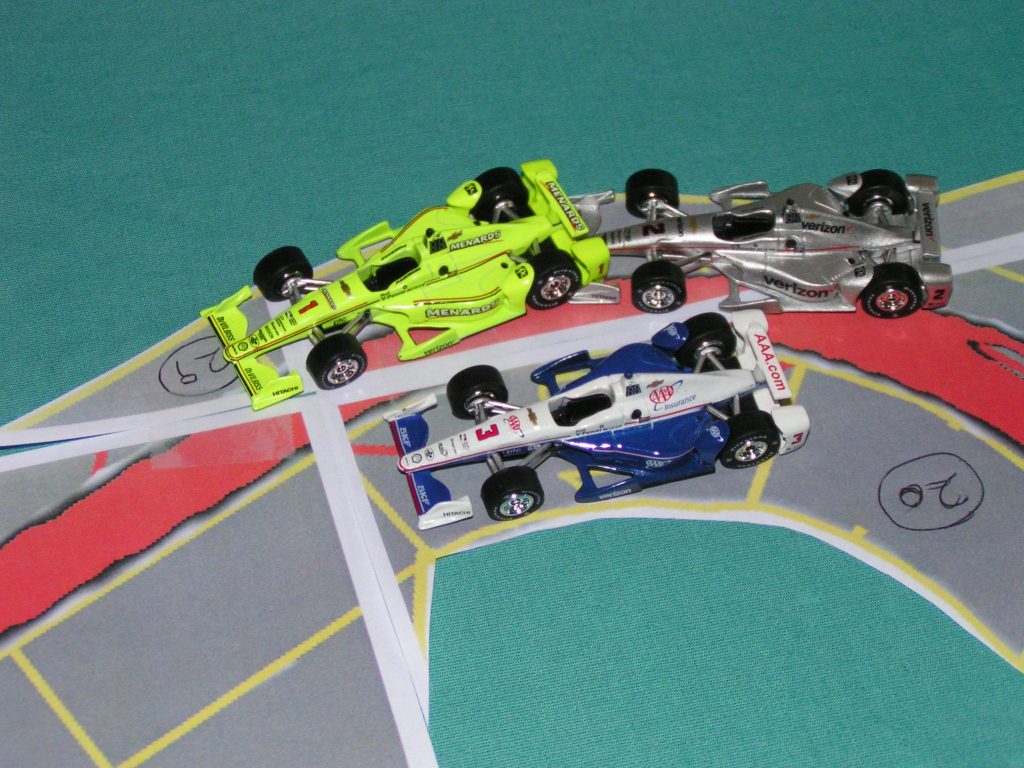
Now, to check the fit in a corner. Oh-oh! The corner spaces are too small!

Cars don't fit in the corners.

Cars don’t fit in the corners.

While the #3 car in the picture above fits on the inside space, the two cars on the outside of the corner (which is two spaces long) don’t fit into their spaces. This means I will have to allow for more space. In years past, I would just move the straight track sections a little and “fudge” or estimate the new corner area. I would put a clean piece of paper under the corner area, and pencil in where the lines should go. But this time, I decided to go back and reprint the corner sections. I printed the corners at 900% (instead of 775%) of original this time, and they printed just about right.

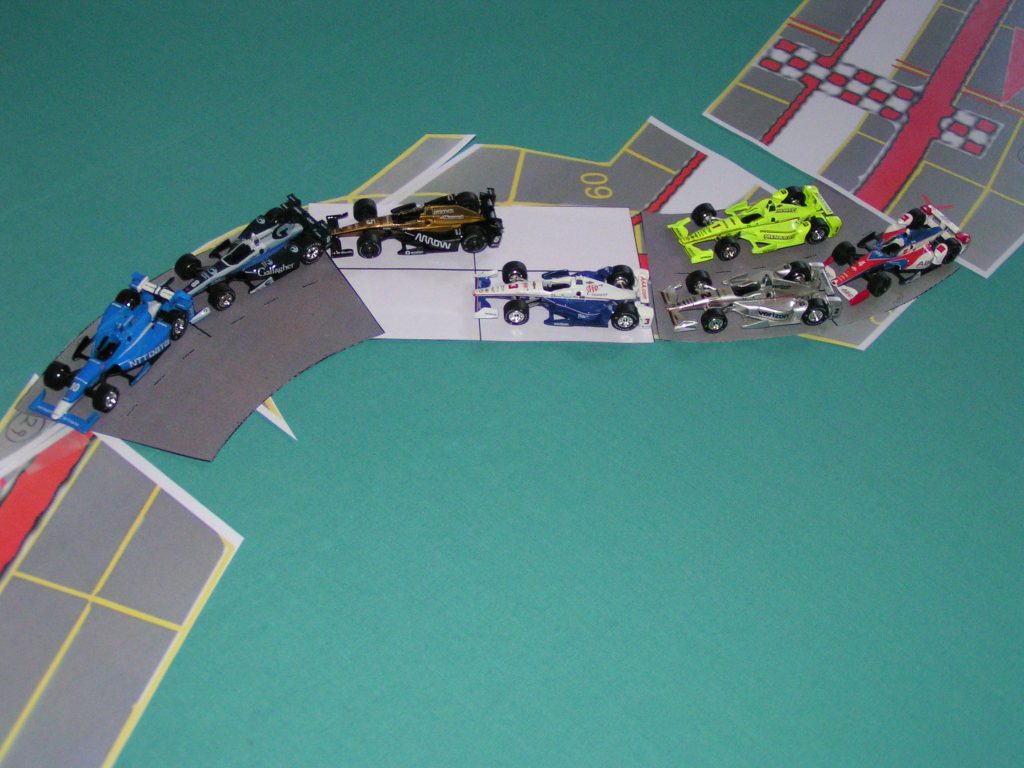
But before I reprinted the corners, I substituted the template pieces.

Cars on template sections.

Cars on template sections.

Using the template sections, I can see that the cars will fit. Of course, by allowing for a longer corner section in this area of the track (this is turns 1 and 2, just past the start-finish line), it will affect the alignment of other parts of the track.

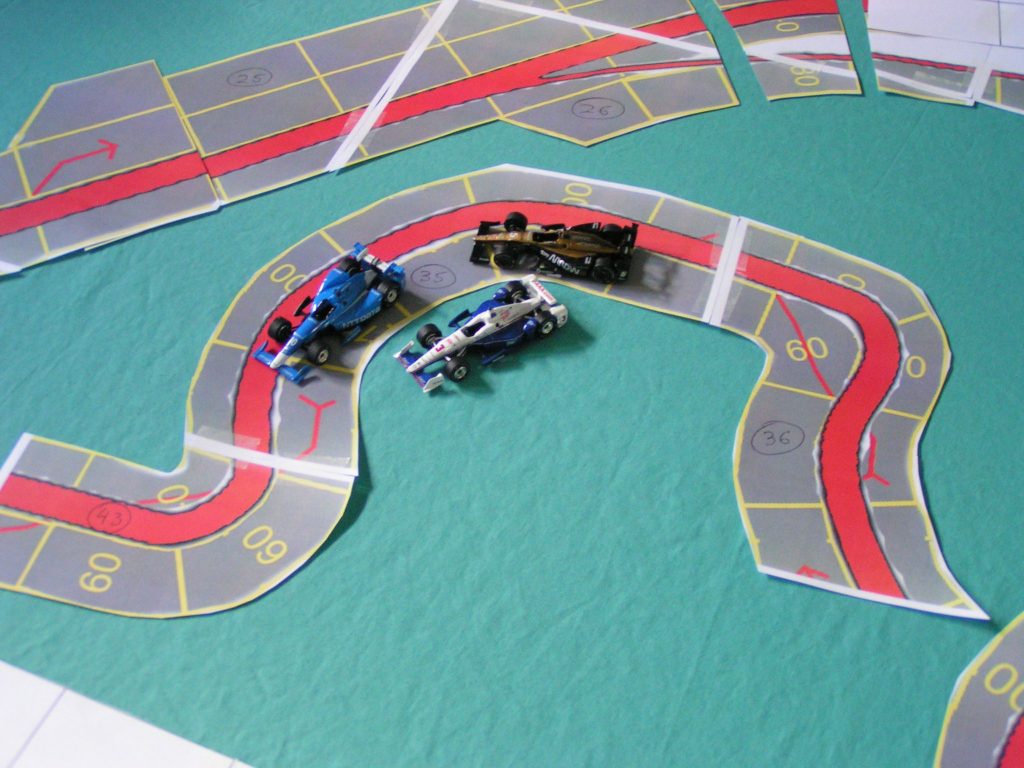
Another part of the track where the cars don't fit.

Another part of the track where the cars don’t fit.

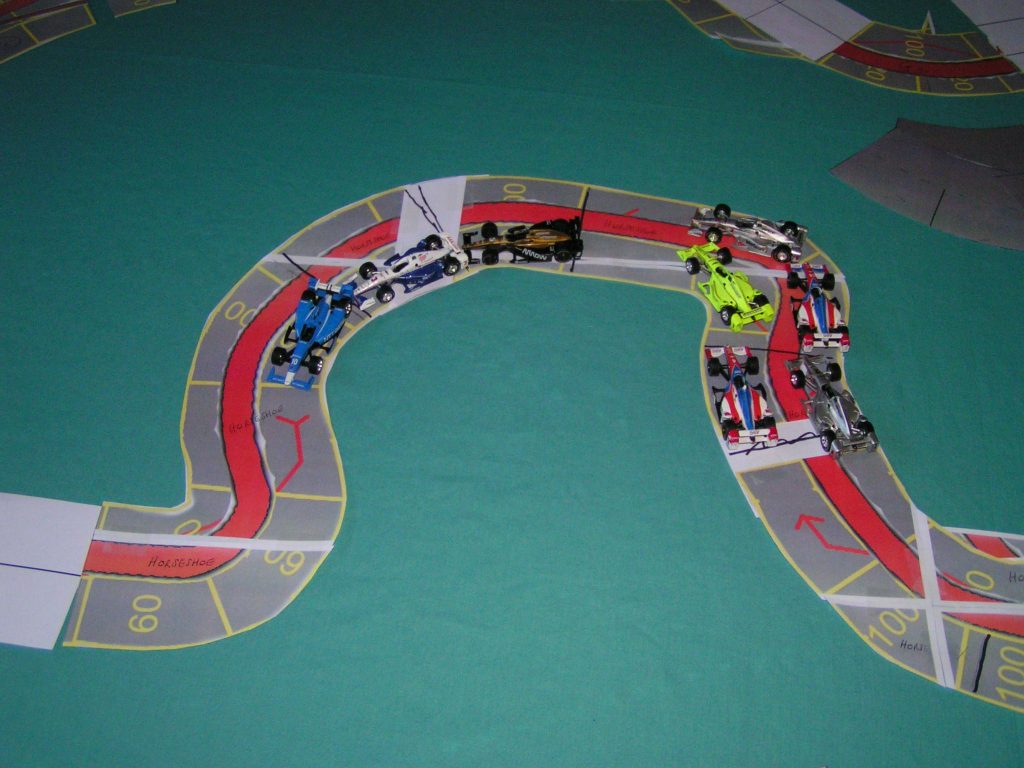
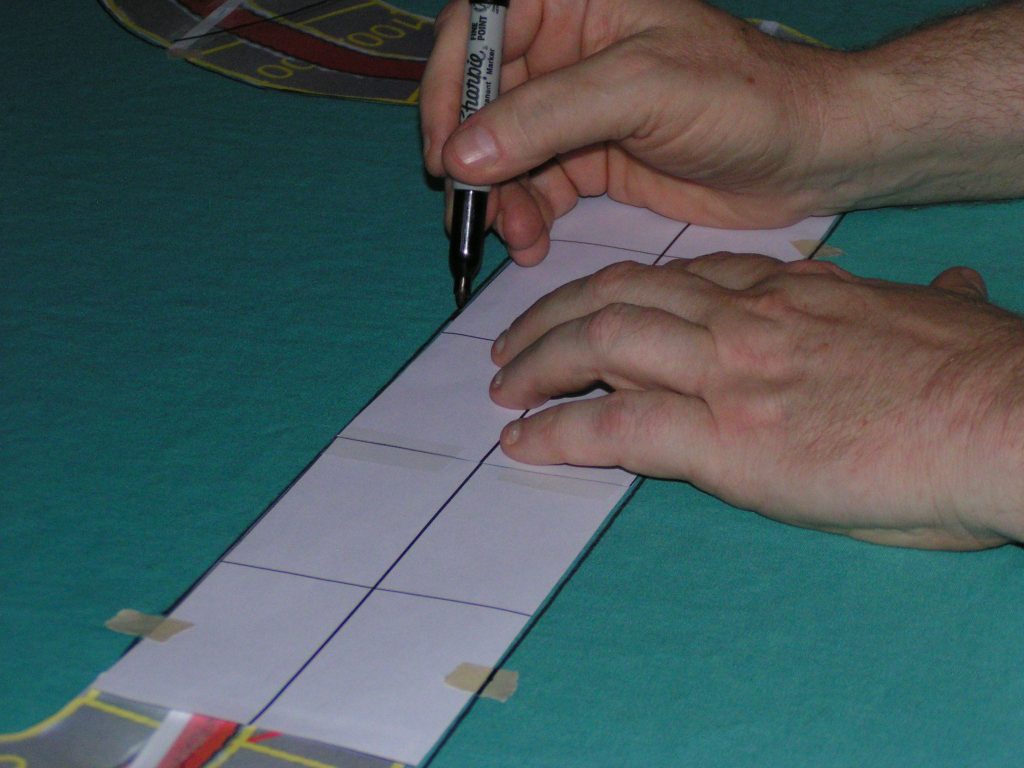
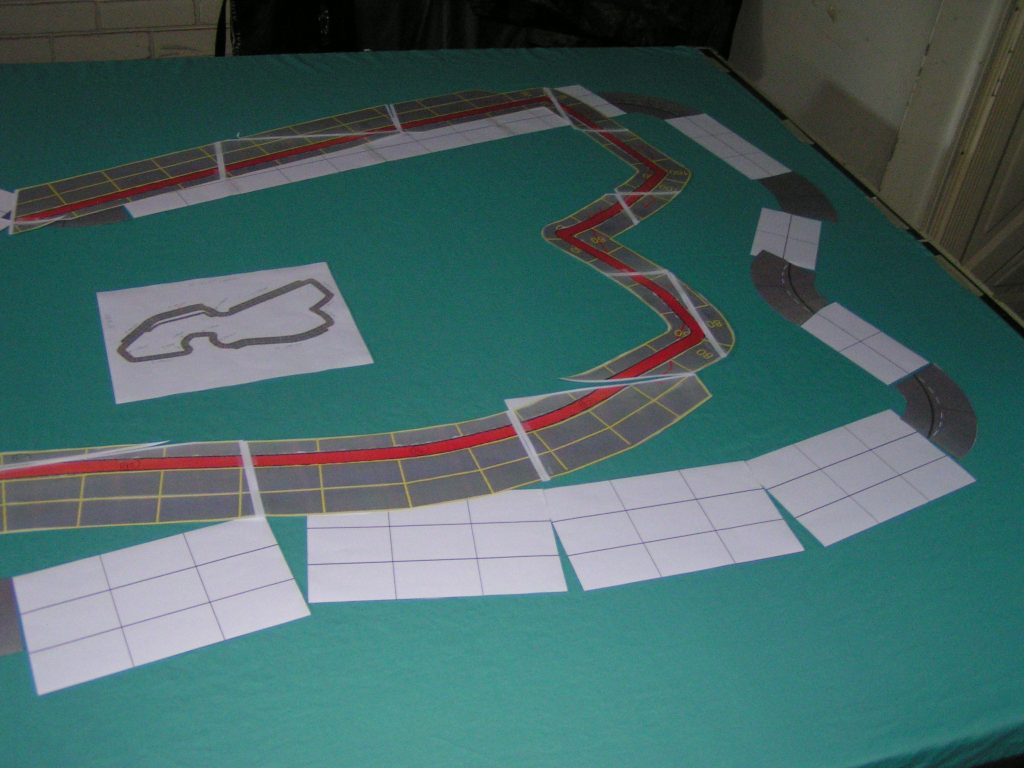
I also found a part of the track that was in a “U” shape also didn’t fit the cars well, not for the curvy-“straight” sections nor in the actual numbered corner spaces. So I had to re-print that entire section. And even after I printed that section at 900%, some of the spaces were still too short. So, I spliced in a couple of pieces of paper to “expand” that section slightly, and also used a permanent marker to mark new lines between the spaces.

Splices added and spaces re-marked in the "U" section.

Splices added and spaces re-marked in the “U” section.

After checking all of the sections so that the cars would fit the spaces (particularly in the corners), and rechecking the track alignment (also  re-centering the track sections on the sheet), it is time to tape down the track sections so they don’t move when you mark off the outline of the track. I just use small pieces of masking tape to tack down the track sections. I’ll usually just use four small pieces of tape per track section to ensure that section doesn’t move when I mark its outline on the sheet.

Taping the sections of the track.

Taping the sections of the track.

Note that the above track sections were printed at two different scales, which is why they don’t line up along their outside edge. Since I am using the inside border of the track as a reference, that is not critical.

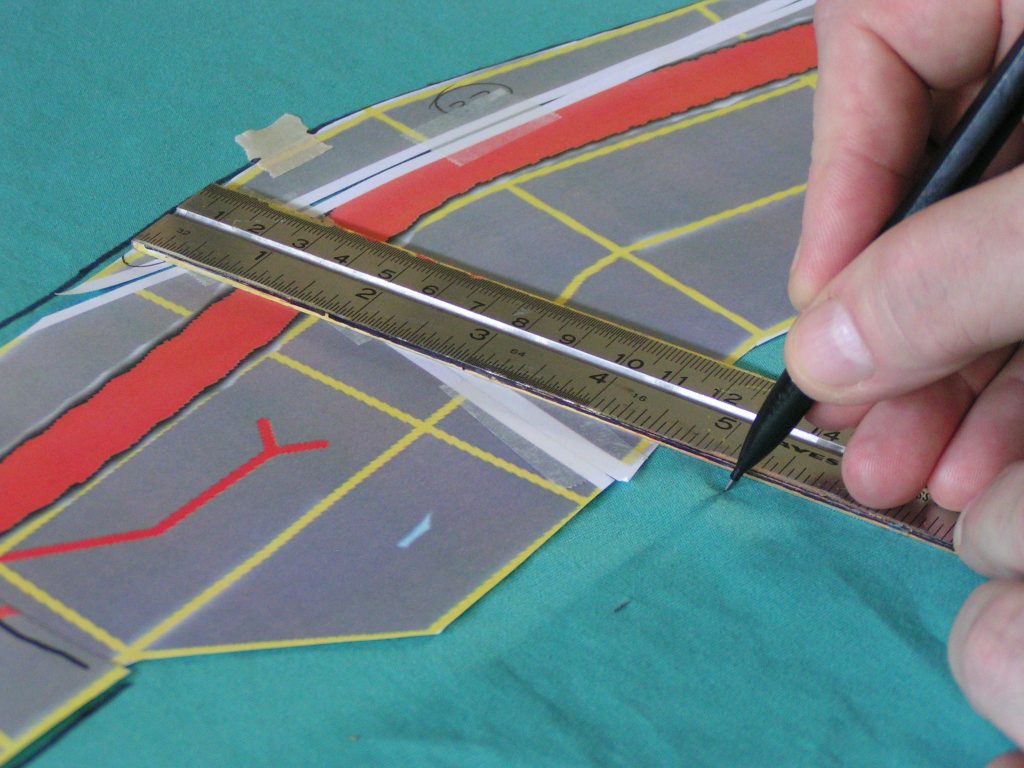
Now is the time to mark the outline of the track. Use a pencil for the “first pass” as if you make any mistakes, you can easily correct them! At first, I only marked off the inside edge of the track sections, as that was my “reference” point. Some of the printed track sections that I used for laying out the track were not wide enough, so I had to make sure that I marked the track as wide as it needs to be for each section. Remember that I am making each space 1.75″ wide, so if the track is “2-wide” (meaning the track is two spaces wide) in an area, then the total track width is 3.5″. (Sorry, I didn’t warn you there would be math involved in painting a large-scale track!) If a track section is “3-wide” (three lanes side by side), then the total track width is 5.25″ in that area. I use the straight edge to check the width of a section before marking the outside lines of the track.

Using a ruler to check the track width.

Using a ruler to check the track width.

In the above picture, I am making pencil “tick” marks where the 5.25″ outer edge of the track will be for this 3-wide section. I had to do this because of the varying scale of my template pieces. Even if you have perfectly sized templates, you should check the width of your track before masking and painting it. After making tick marks in an area, I used a pencil to “connect the dots (ticks).” When I was satisfied with the pencil inside and outside borders, then I went over the pencil marks with a permanent marker.

Outlining the track with a permanent marker.

Outlining the track with a permanent marker.

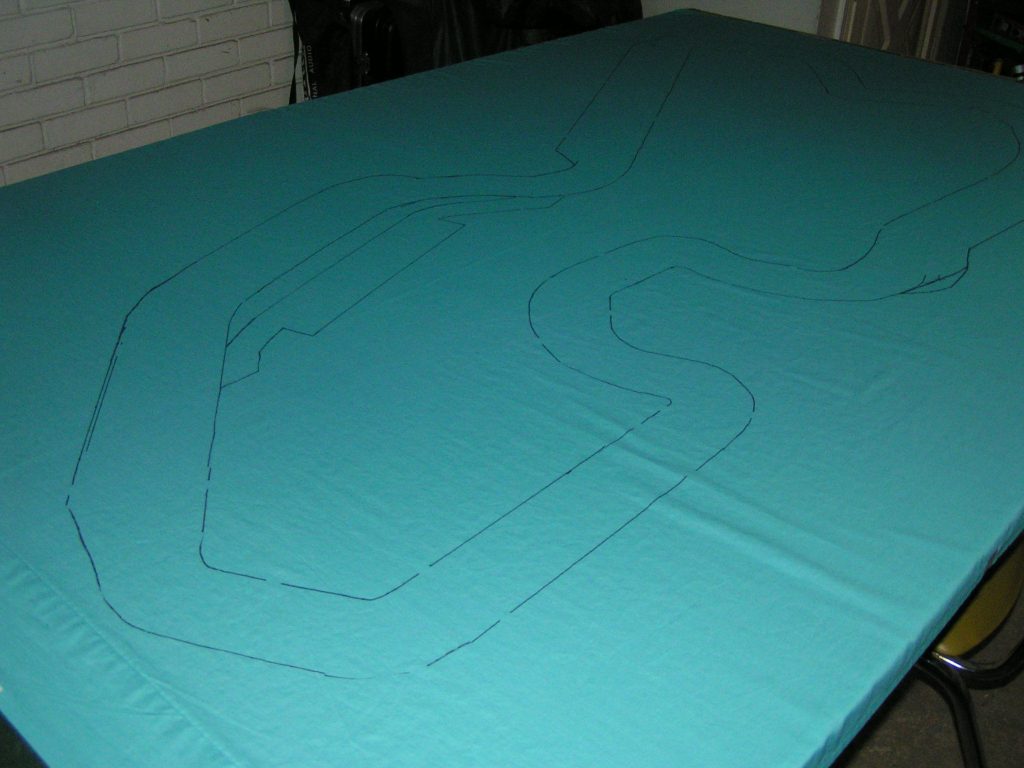
When the outlining was completed, I removed the paper templates. I removed the small pieces of tape from the templates, then stacked them carefully out of the way, in order, as I will need them again to aid in actually painting the lines for the spaces on the track (see Part 3 of this series).

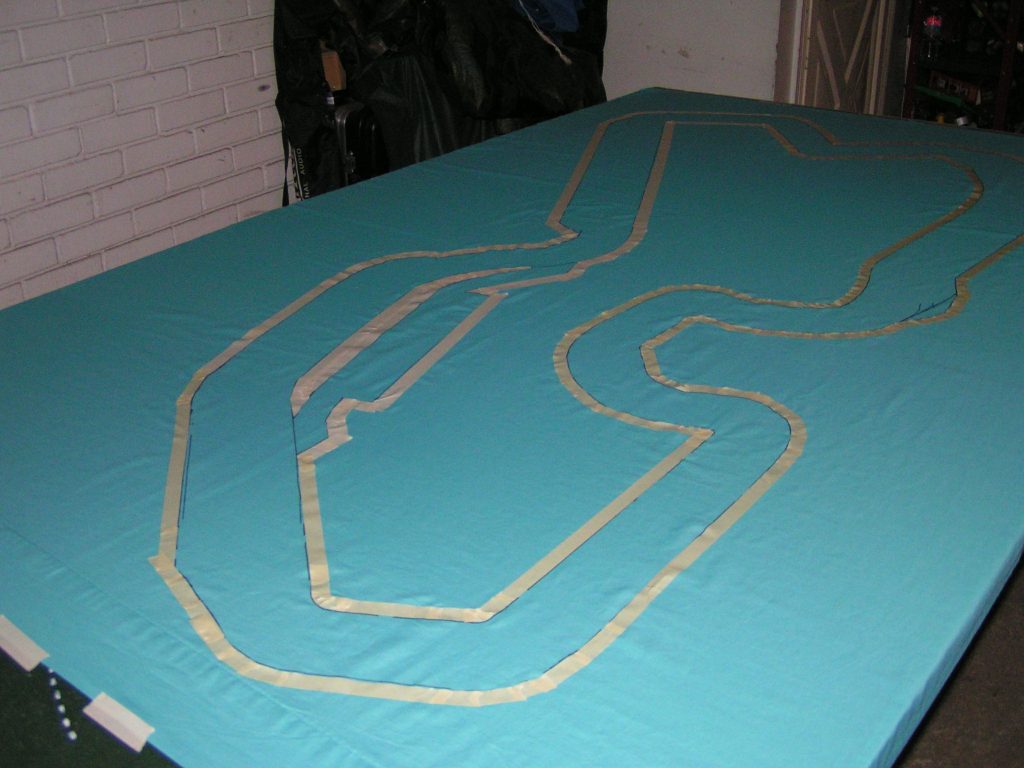
The completed permanent marker outline of the track.

The completed permanent marker outline of the track.

Note that there is a pit lane to the left. Although Championship Formula Racing doesn’t use a formal “pit lane,” we are thinking of using our older Speed Circuit era pit stop rules, and we would need to drive down pit lane. I felt it would be easier to add the pit lane at this time, rather than to try to add it at a later time, when I would have to re-mask the track and paint part of it again. Towards the right side of the picture I also made an adjustment so a 3-wide straightaway section could blend into a 2-wide corner.

The track outline has been masked with tape.

The track outline has been masked with tape.

Next, we will need to cover all parts of the sheet with newspapers (or whatever you have on hand) and then tape it down to the inside and outside track outline, and then we’ll start painting. That process will be continued in Part 3 – Painting the track.
Championship Formula Racing/Speed Circuit

Friday, June 9th, 2017

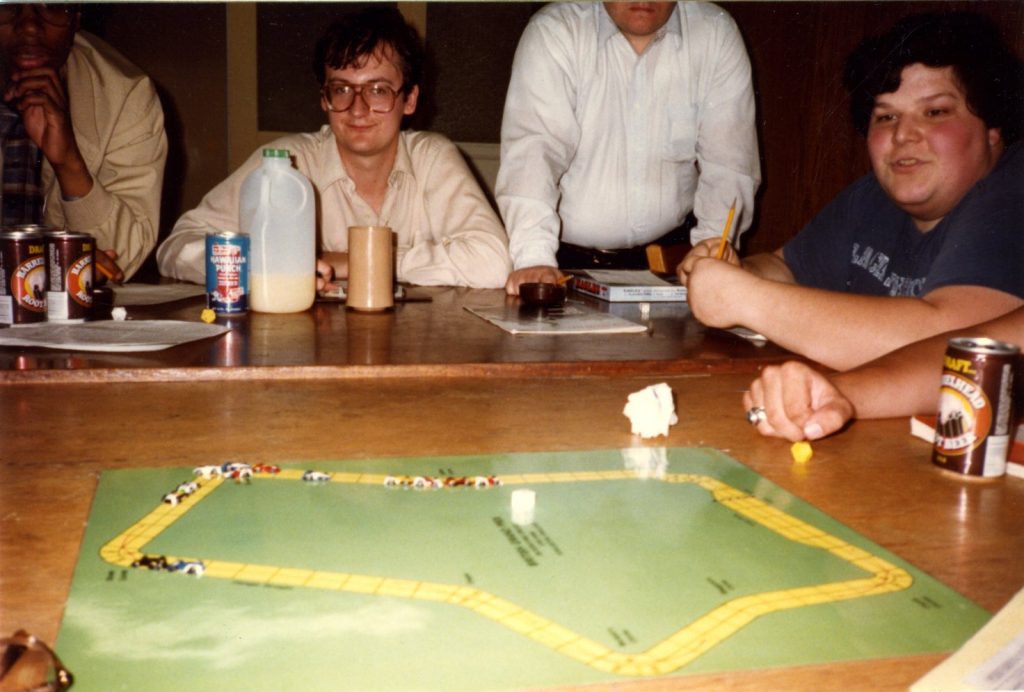
I was first exposed to the Avalon Hill version of Speed Circuit in the late 1970s, at a Metro Detroit Gamers MichiCon game convention. Someone (I can’t remember who) had made a very large scale track and used 1:64 scale cars. There were a number of us playing that game that day, but I don’t remember anything else about that race.

Speed Circuit large-scale track

Speed Circuit played on a hand-made large-scale track at MichiCon, circa 1978.

I then bought the Avalon Hill version of Speed Circuit, but couldn’t find any other folks to play it with. It seems none of my gaming friends were interested in auto racing games. About that same time, I played USAC Auto Racing at local MDG game cons. I believe it was Don Walker who made a large scale Indy 500 track and used painted Mattel Hot Wheels cars. Don stopped running those events, so then I built a large scale Indy 500 track and bought and painted some Hot Wheels cars, and ran USAC Auto Racing at cons a couple of more times.

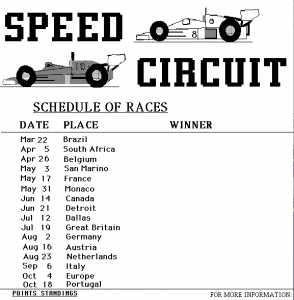
Then in early 1984, I took the regular sized board game of Speed Circuit to the Michigan Gaming Center in Ferndale, Michigan (it was on Woodward, just north of Nine Mile Rd.), one day. Interestingly, several other folks wanted to play it. After we got done racing, somebody suggested that we should make it a regular game. Then we proposed a series of races, like the real-life Formula One race series. We posted a flyer at the Michigan Gaming Center that looked sort of like this:

Speed Circuit flyer from 1985.

Speed Circuit flyer from 1985.

A number of other guys then contacted me, and after having another demo race, we started our 15-race season on March 16, 1984, racing the Brazilian Grand Prix around the Jacarepagua track. Tom Kane took the first pole position, and was leading the entire race, only to have Tony Ploucha pass him at the last corner, and then Tony won the race! I managed to finish 3rd after qualifying 11th (out of 13 racers), mostly due to retirements of other drivers.

That first Speed Circuit season in 1984 was won by Ray Eifler with 67 points (we used the 9-6-4-3-2-1 scoring system at that time). Richard White was 2nd with 62 points for the season, and Steve Zack was 3rd with 35 points. Race winners were Ray Eifler (5 victories), Richard White (2 victories), Andy Balent, Mark Hesskamp, Tom Kane, Tony Ploucha, Jim Robinson, Jeff Schwartz, Don Woodward, and Steve Zack. I managed to finish in 9th place with 19 points. We had a total of 26 different drivers during that season, and we averaged 12.8 drivers per race. The most drivers at a race was 17, at both Italy and Brands Hatch, and the fewest was 8, at Detroit.

At that time, we were using the various Avalon Hill Accessory Pack tracks, in standard board-game size. We were also using the plastic cars from USAC Auto Racing that I had painted like the real Formula One cars of the mid-1980s.

Avalon Hill's Silverstone track.

Avalon Hill’s Silverstone, England, track from Accessory Pack I.

Starting in 1985, I had to make some tracks that were not available from Avalon Hill. In particular, I made the downtown Detroit, Michigan track:

Detroit Grand Prix track.

Playing Speed Circuit on the 1983-1988 version of the downtown Detroit Grand Prix track.

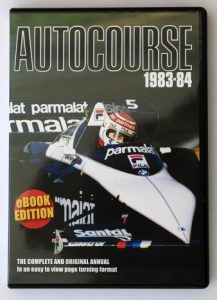
Avalon Hill had a Detroit Grand Prix track you could buy, but it was of the 1982 course that had the hairpin turn at East Jefferson going into Chrysler Drive. The west end of the track wasn’t totally accurate, either, for either 1982 or for years 1983-1988. I got data for tracks from Road & Track magazine, but then I started buying the Autocourse books, which had much more detail about the races.

Autocourse 1983.

Autocourse 1983.

It was also evident that playing on small tracks made it hard for everyone to sit around the table and be able to see which of the miniscule cars was theirs. So, we started making large-scale tracks on bedsheets, using 1:64 scale Hot Wheels cars. Richard White made most of the large tracks, and also made most of the cars. I helped cut off a few sidepods and wings, but Richard did a magnificent job of molding new sidepods, engine cowlings, and made new wings. He then painted the cars to look like the real Formula One Ferraris, McLarens, etc. Richard even painted the driver’s helmets to look like the helmets of the real-life drivers. This was back in the era when you couldn’t buy “collectible” cars that were molded and painted like the real cars.

So then we eventually started playing on the large-scale tracks, with the larger cars, and it was much easier to have a large number of folks sit around the table and see the track and where their car was on the track.

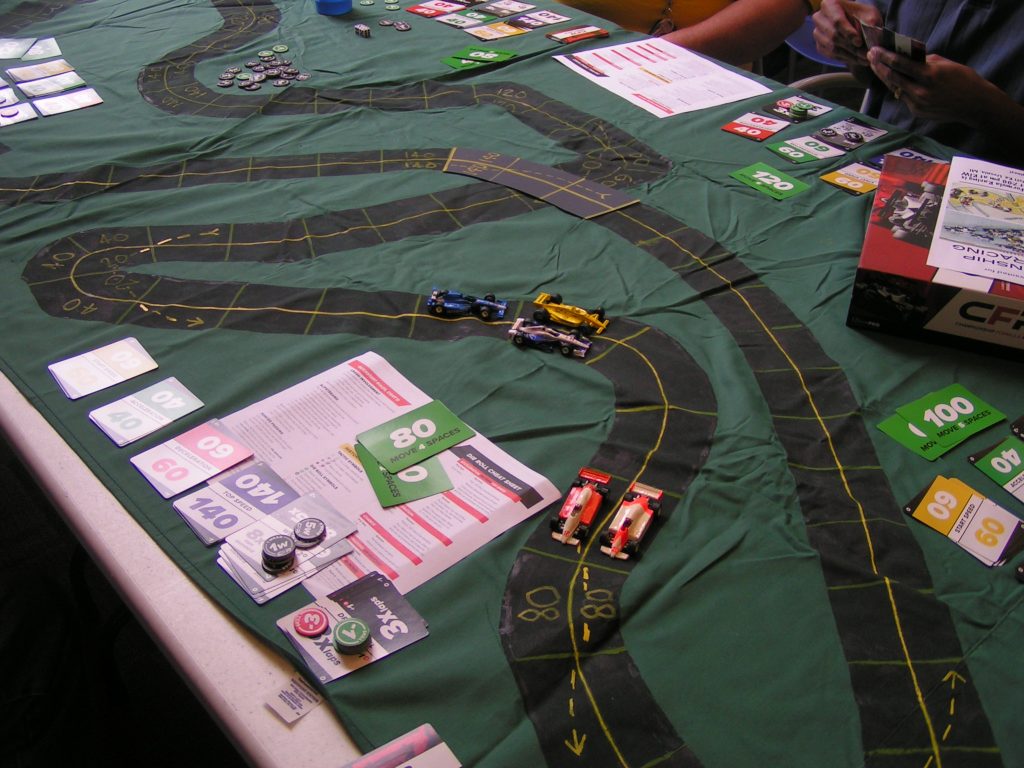
Suzuka, Japan, track.

Large scale Suzuka, Japan, track.

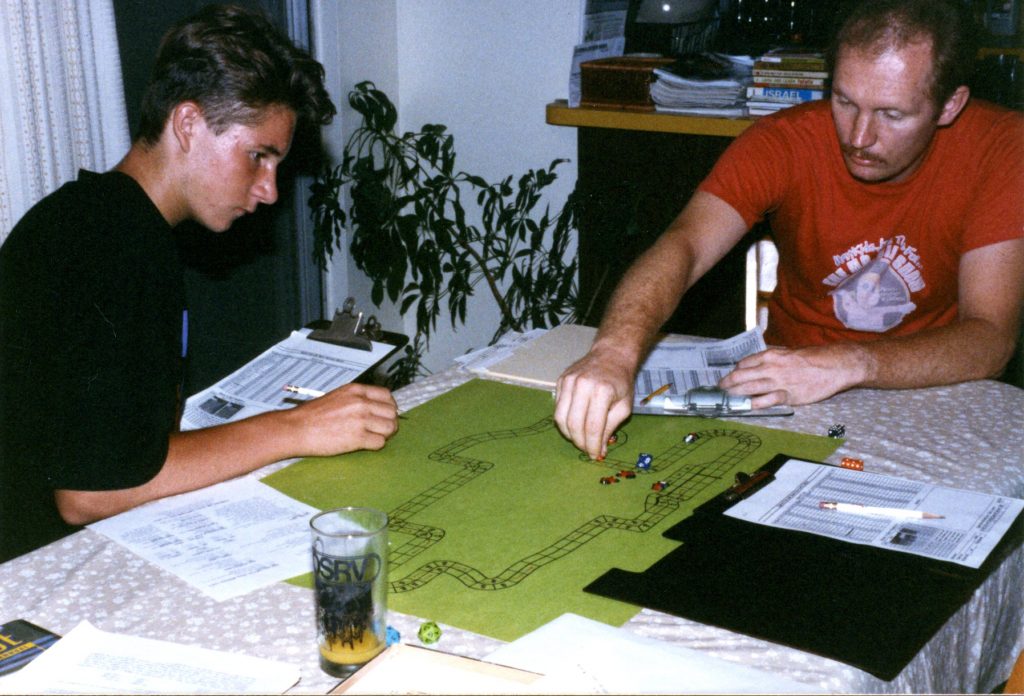
Alas, I can’t find any pictures of our old Speed Circuit races using the large tracks, so the above picture is of one of the large-scale tracks that was made in our Speed Circuit days. We are using that track with Championship Formula Racing, though. You can see some of the CFR driver and speed cards on the table.

Championship Formula Racing

I ran the Speed Circuit campaign from 1984 until 1991. The Detroit-area campaign continued on without me for a few more years, then sort of faded away. Then, when I was GMing the Gutshot game at MDG’s WinterCon 2017, I met Jack Beckman. He was playing a Formula One style game with someone else, and as I am interested in auto racing board games, I started talking with Jack. He told me that a new game had just been published, Championship Formula Racing (henceforth known as CFR) from Jolly Roger Games, and that I should check it out as it was just like Speed Circuit (SC). Of course, when we played SC, we extended the rules and called our version of the game Advanced Speed Circuit (ASC). I downloaded the CFR rules, and while reading them, I thought, “these are almost exactly our old ASC rules!”

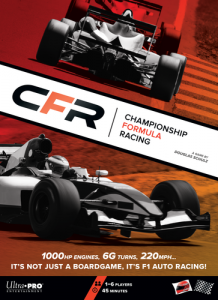
Championship Formula Racing.

Championship Formula Racing.

I exchanged some emails with the creator of CFR, Douglas Schulz, and he said he was given a copy of some “advanced” Speed Circuit rules from someone in the Baltimore area in the late 1980s. I believe they were a copy of our Detroit area ASC rules, as I had given copies to some folks in the Baltimore area when I attended an Origins game con there in the late-1980s.

There are a few differences between ASC and CFR. For one thing, CFR uses a simplified qualifying procedure where you “bid” some of your Wear and Skill markers; the higher bidders starting in front of the lower bidders. Also, we had used an attribute called “-2 DRM” and CFR uses “Skill” markers, where you can pre-designate using Skill to modify dice rolls. In our ASC days, we had actual qualifying sessions that were somewhat time consuming, but ensured that the better (or luckier!) drivers would start in the front.

CFR also uses different (optional) rules for pit stops than we did. In CFR, you just move your car off the track and into the pits, whereas in ASC you had to drive down pit lane and into your numbered pit stall. Probably the most interesting rule in CFR are the hard tires/soft tires rule (which is used with the optional pit stops). If using the pit stop rules, your car will only start with about 40% to 60% of the Wear it would have received if you weren’t using the pit stop rules. If you are on hard tires, your car will regain a few Wear every time it completes a lap. But the coolest thing (for us maniac drivers) are the soft tires. Soft tires will enable you to use Wear for some things that you would have had to roll dice for. In particular, if you are on soft tires and are 60 mph over the speed limit in a corner, you can use 3 Wears instead of having to use 2 Wears and roll a Chance (to see if you might spin out or crash).

Doug has also designed a number of tracks, especially newer tracks that didn’t exist in Speed Circuit’s heyday, and they are available as 8.5″ x 11″ printouts (downloadable from the Lucid Phoenix web page). I believe that Doug has given too many tracks “three-wide” sections of track (and the Monte Carlo track that comes with the board game of CFR is way overly simplified), but all-in-all, Doug has produced a lot of good stuff for folks who want to race cars in a table-top board game! I believe Doug’s philosophy is to produce playable games, whereas our dedicated ASC group were more into an accurate simulation of tracks.

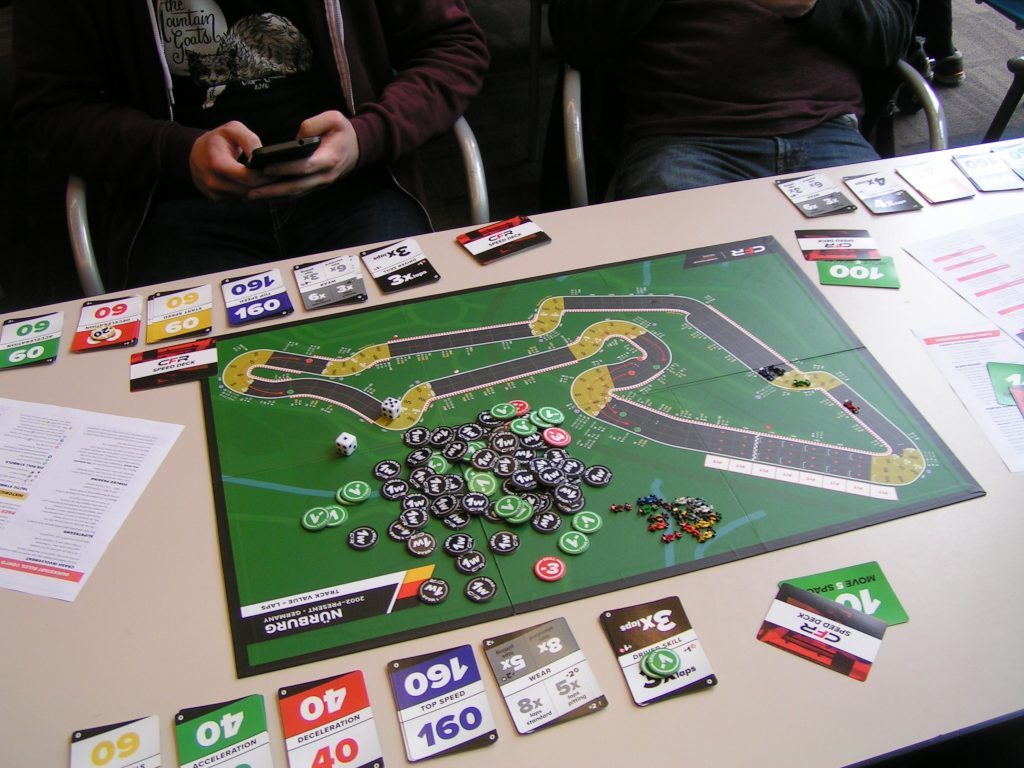
CFR Nurburgring track.

CFR Nurburgring track.

We have a web page for our new local races using the CFR rules. Anyone who wants to race with us in the Metro Detroit, Michigan area, is welcome to attend our races. We have a demo race on Friday, June 9th, 2017, at 7:00 pm, at RIW Hobbies & Games in Livonia, Michigan. We plan on having races in several different game stores in the metro Detroit area, to even out the traveling miles and times for folks. This is so west-siders won’t always have to drive to the east side of town, or vice versa.

–Posted by Garry