In this blog post, we’ll tape our sheet to the table, then lay out the track sections again. Read Part 1 of Making a 1:64 Scale Track to see how we arrived here. Note that you can make a similar track for other scales of cars. If you use something like 1:43 scale, you would have to adjust the size of the spaces (and a full track probably wouldn’t fit on a sheet). You could of course make large tracks on foam-core board, or other material. Part of the reason we went with 1:64 scale cars originally is that in the 1980s, when we starting making the large tracks, Hot Wheels cars were the easiest cars to find. We also found that most of Avalon Hill’s Accessory Pack tracks would fit on a sheet at 1:64 scale.
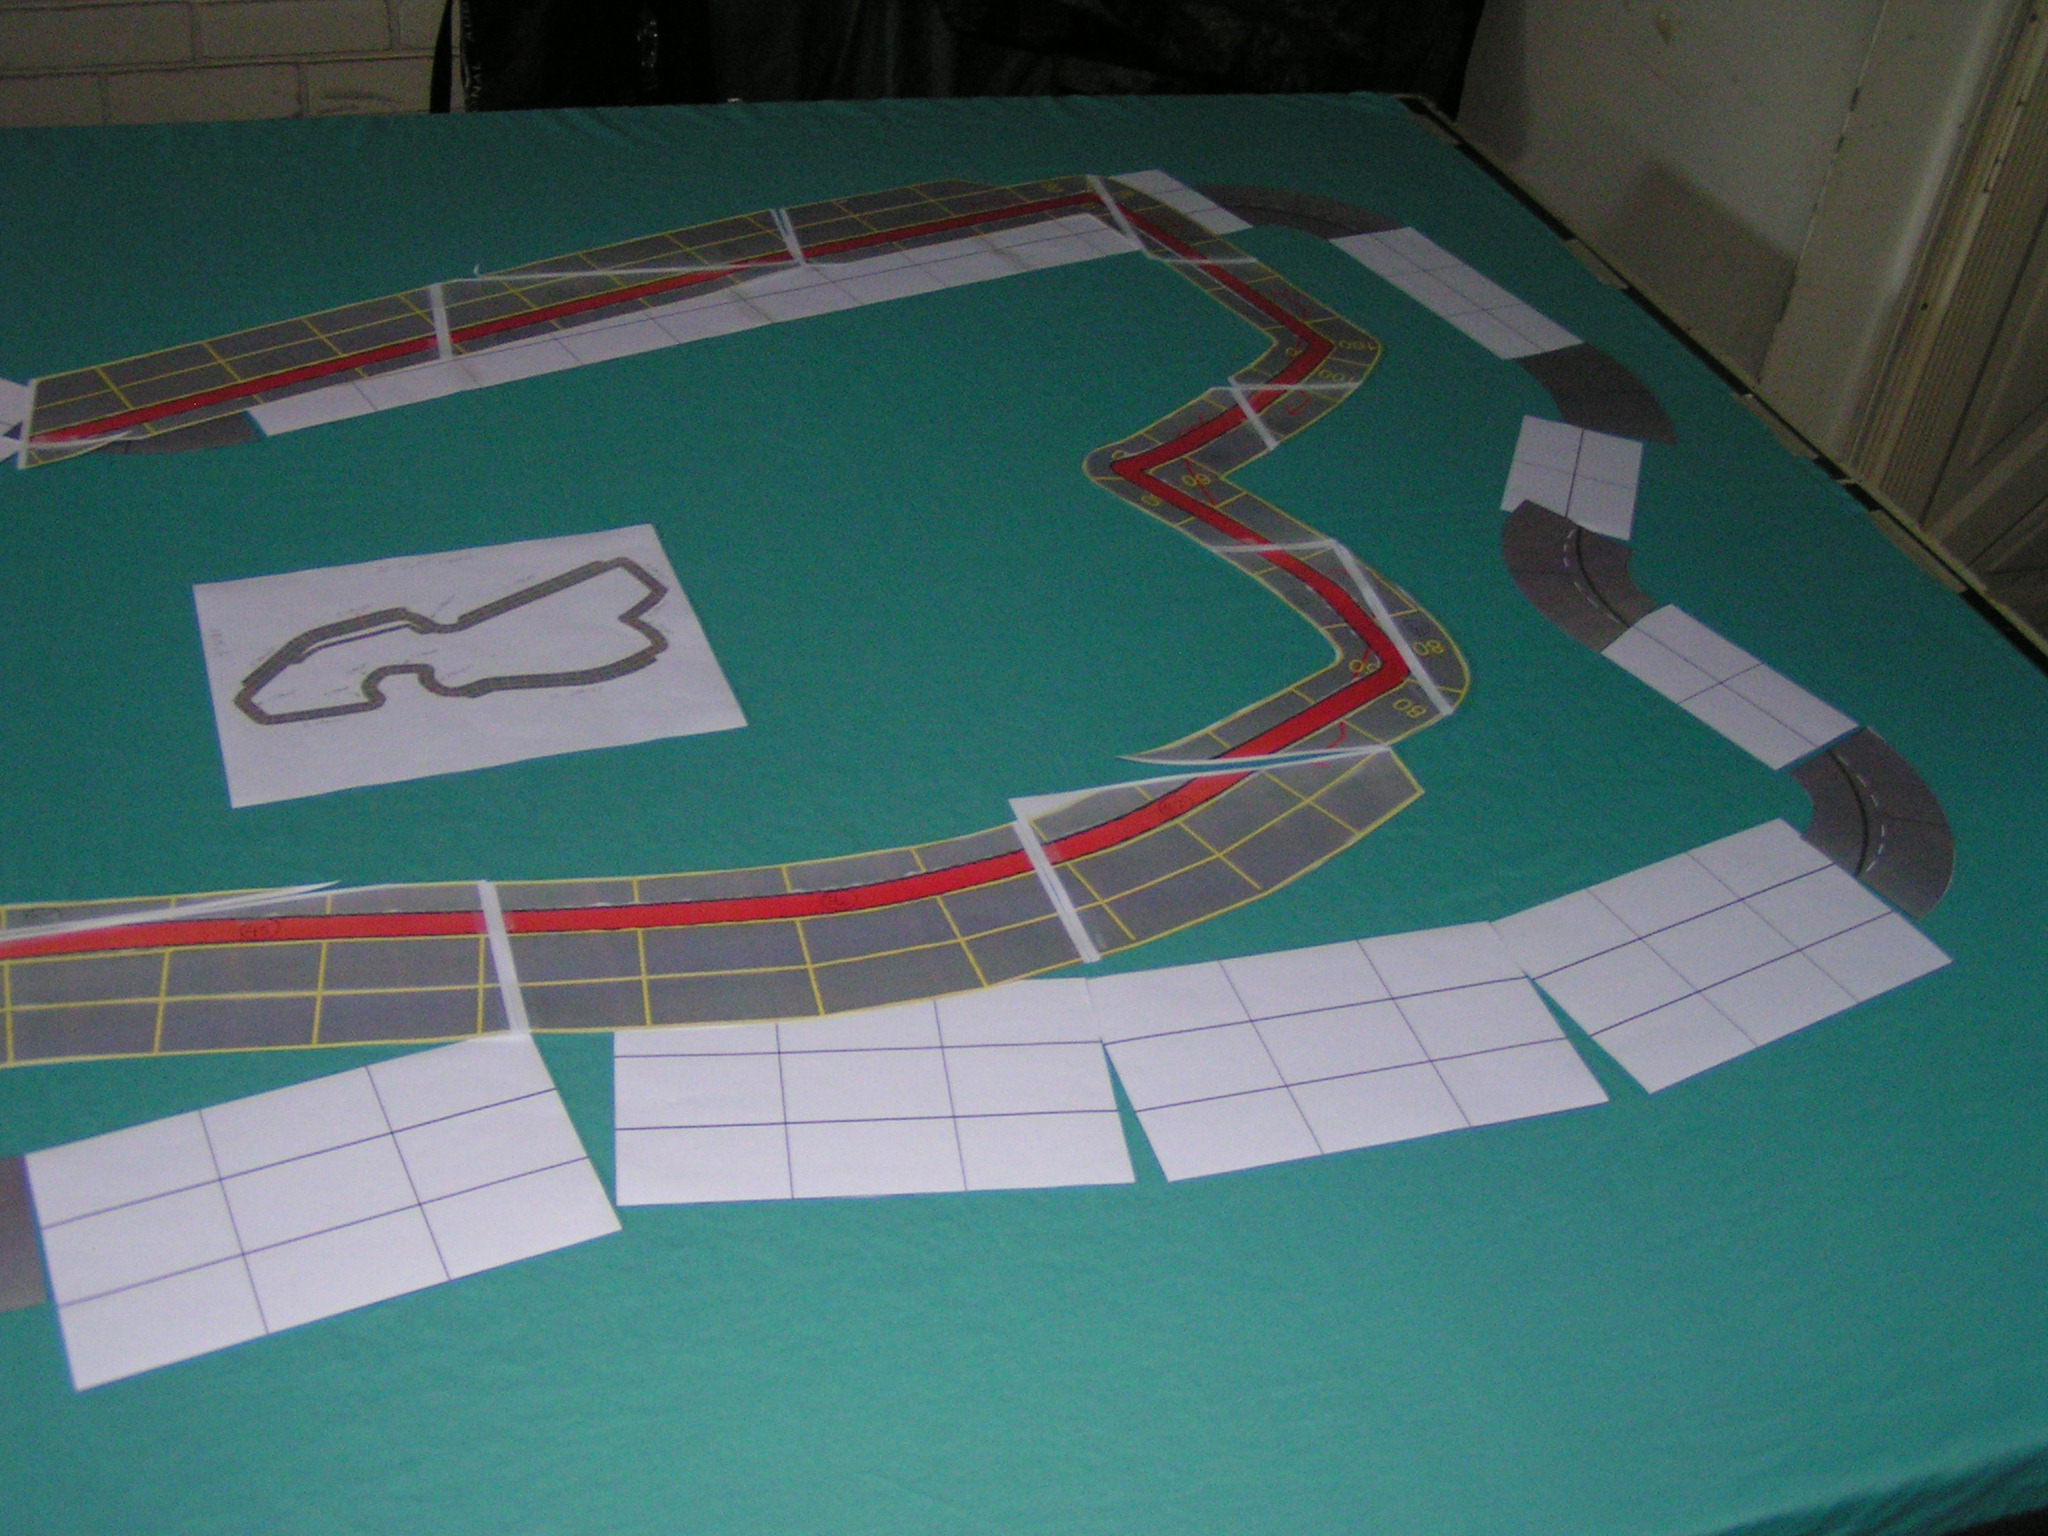
So, I finished washing and drying my twin bed flat sheet, then stretched it out on my ping-pong table, and then taped it so it would stay fairly tight so it would avoid wrinkling while I marked it up. I laid out the former track sections on the sheet, but the outline just didn’t look quite right to me. In particular, some of the corners on the real track were sharp, 90-degree turns, while the templates I used for 90-degree turns were more gradual and rounded. So, I then printed out the actual track file using the Acorn program (from Flying Meat Software), then taped some sections together, then laid them on the table on top of the former outline. That original track plan is with the red stripe down its middle.

The new track outline is on top of the old track outline.
It was very apparent that the new outline seemed much smaller than the former outline.
The new track outline is smaller than the old track outline.
The former outline that I used was based on templates, where all of the straight pieces had spaces that were 3″ long by 1.75″ wide, and the template corner spaces had been printed so my 1:64 cars would fit on them without encroaching on the spaces of other cars. When I printed the actual track outline (with the red stripe), I printed it at 775% of my original file’s size. That made most of the straight spaces 3″ long, but it also meant that the corner spaces were too small. If you had more than one car in a corner area, the cars would interfere with each other. Since you can only paint the track once, it is better to resolve any issues in this, the planning stage! Naturally, I had to cut out these new track sections and tape some of them together with clear cellophane tape. Note that I cut close to the track outline as eventually I will trace around the track outline with a pencil. If I just placed the printed pages on the sheet, I would have to cut them later before I could trace the edges, and that would then put pieces out of alignment.
Now, of course, the table top was too cluttered, so I picked up all of the template sections and left just the new track outline pieces on the table.
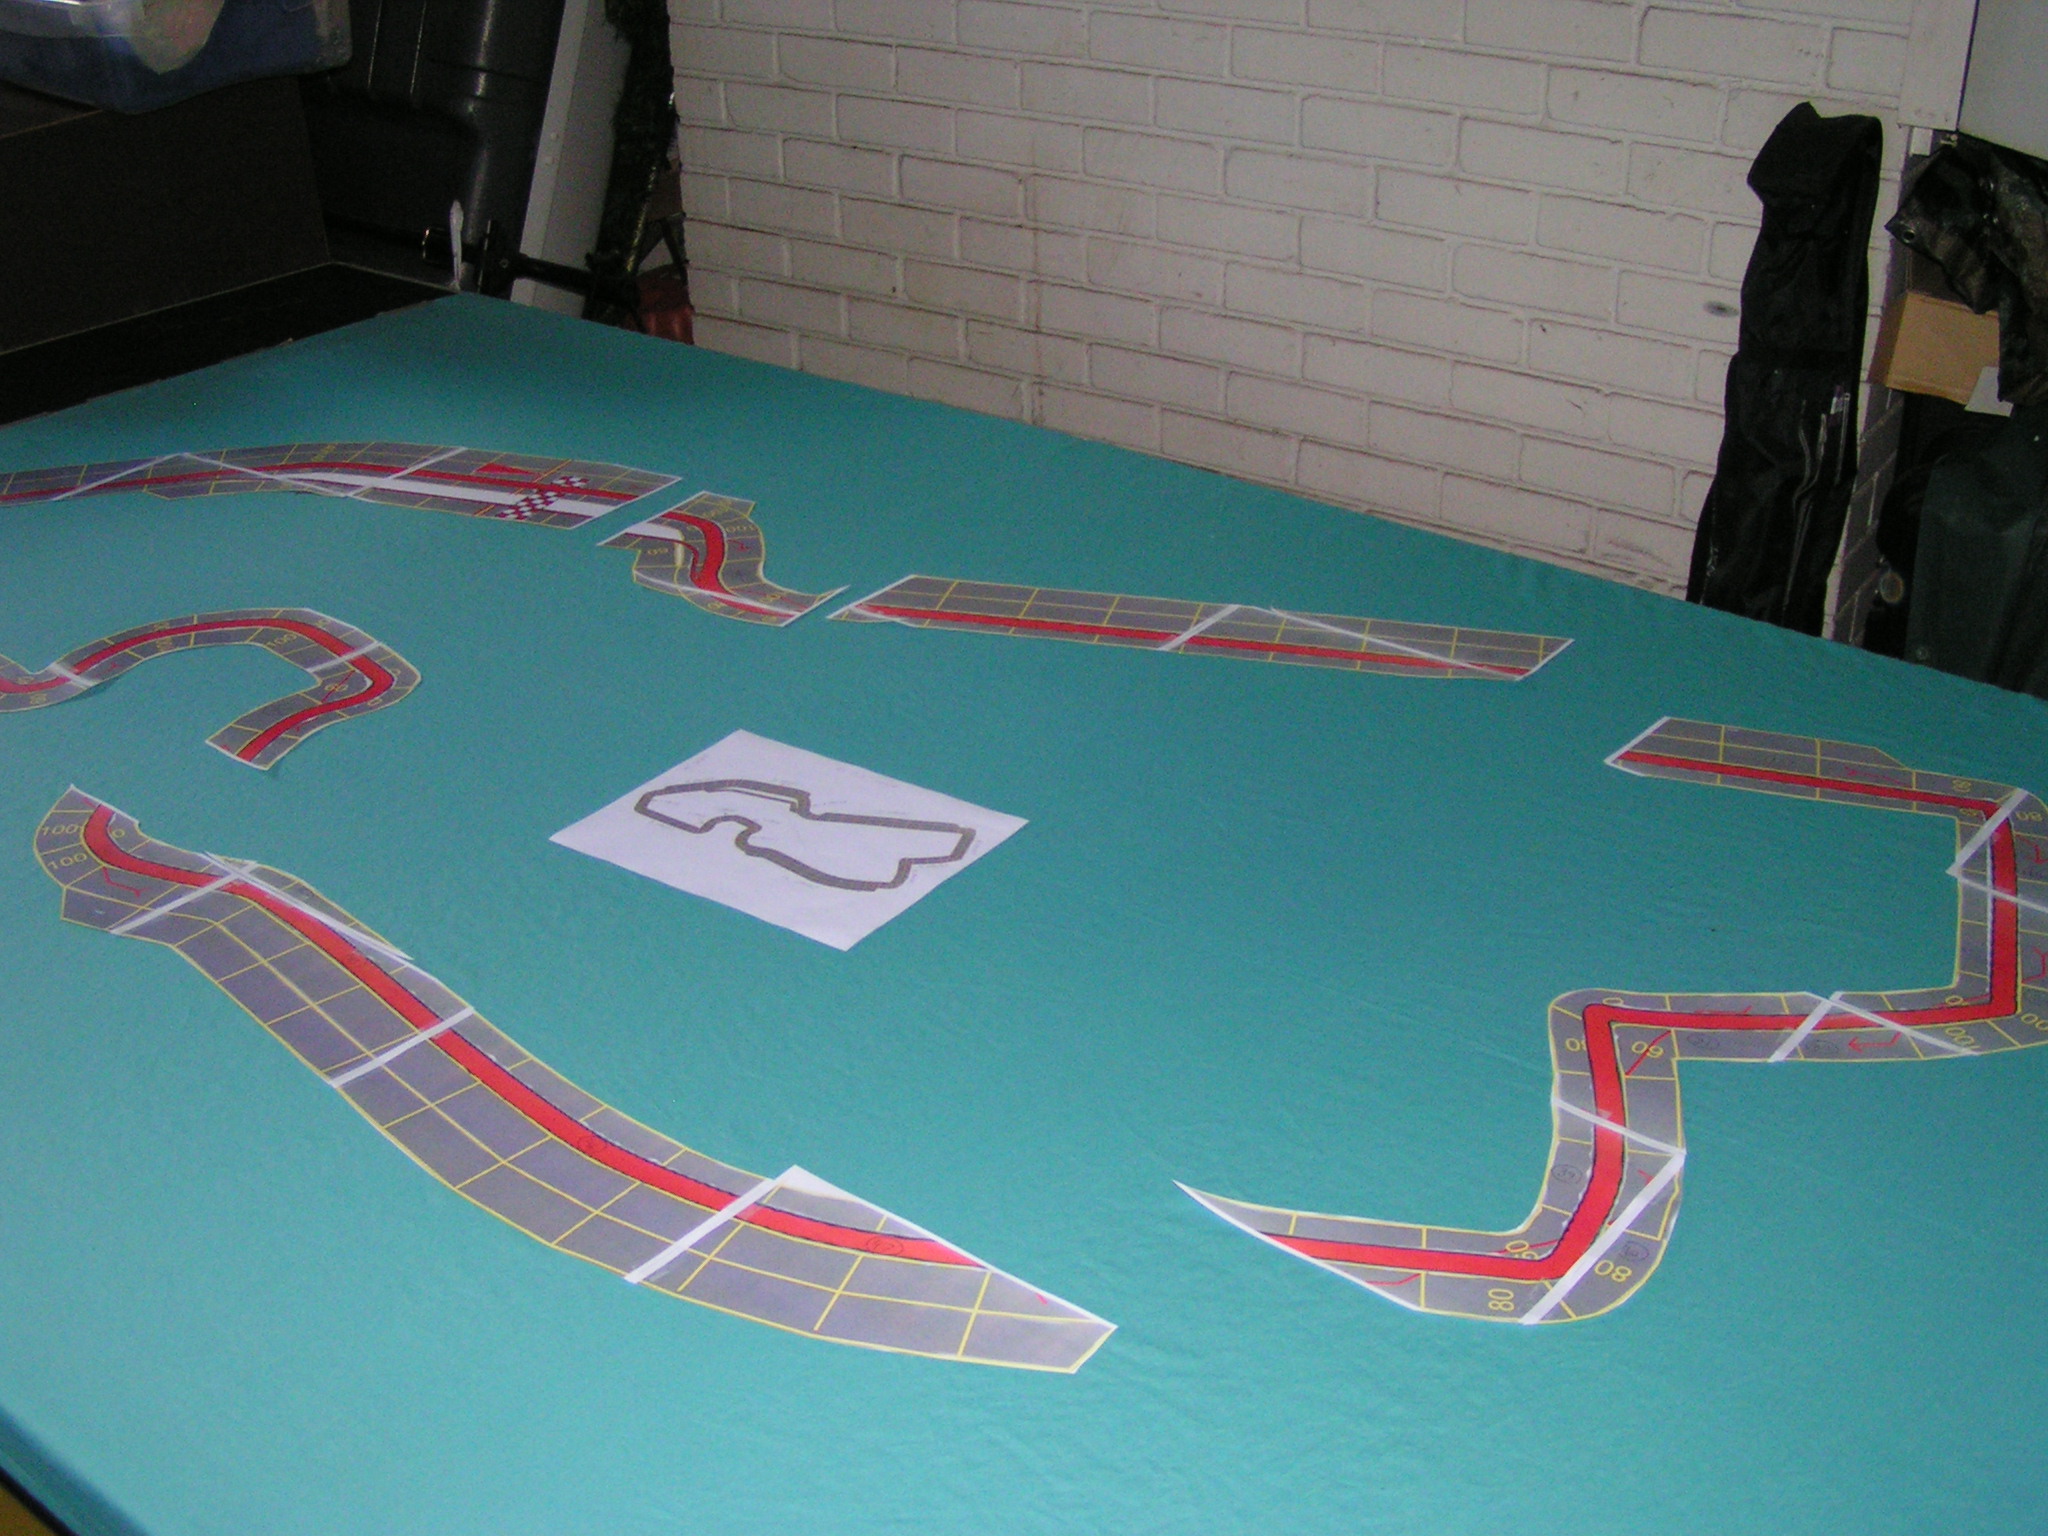
Track outline sections.
I then measured from the different edges of the track, and tried to center the sections as much as possible. This is not only for aesthetics, but for practicality, as when playing Championship Formula Racing, each driver needs to lay out their cards without laying them on the track. While you should try to leave an open “border” around all edges of the track, that won’t be possible with some tracks.
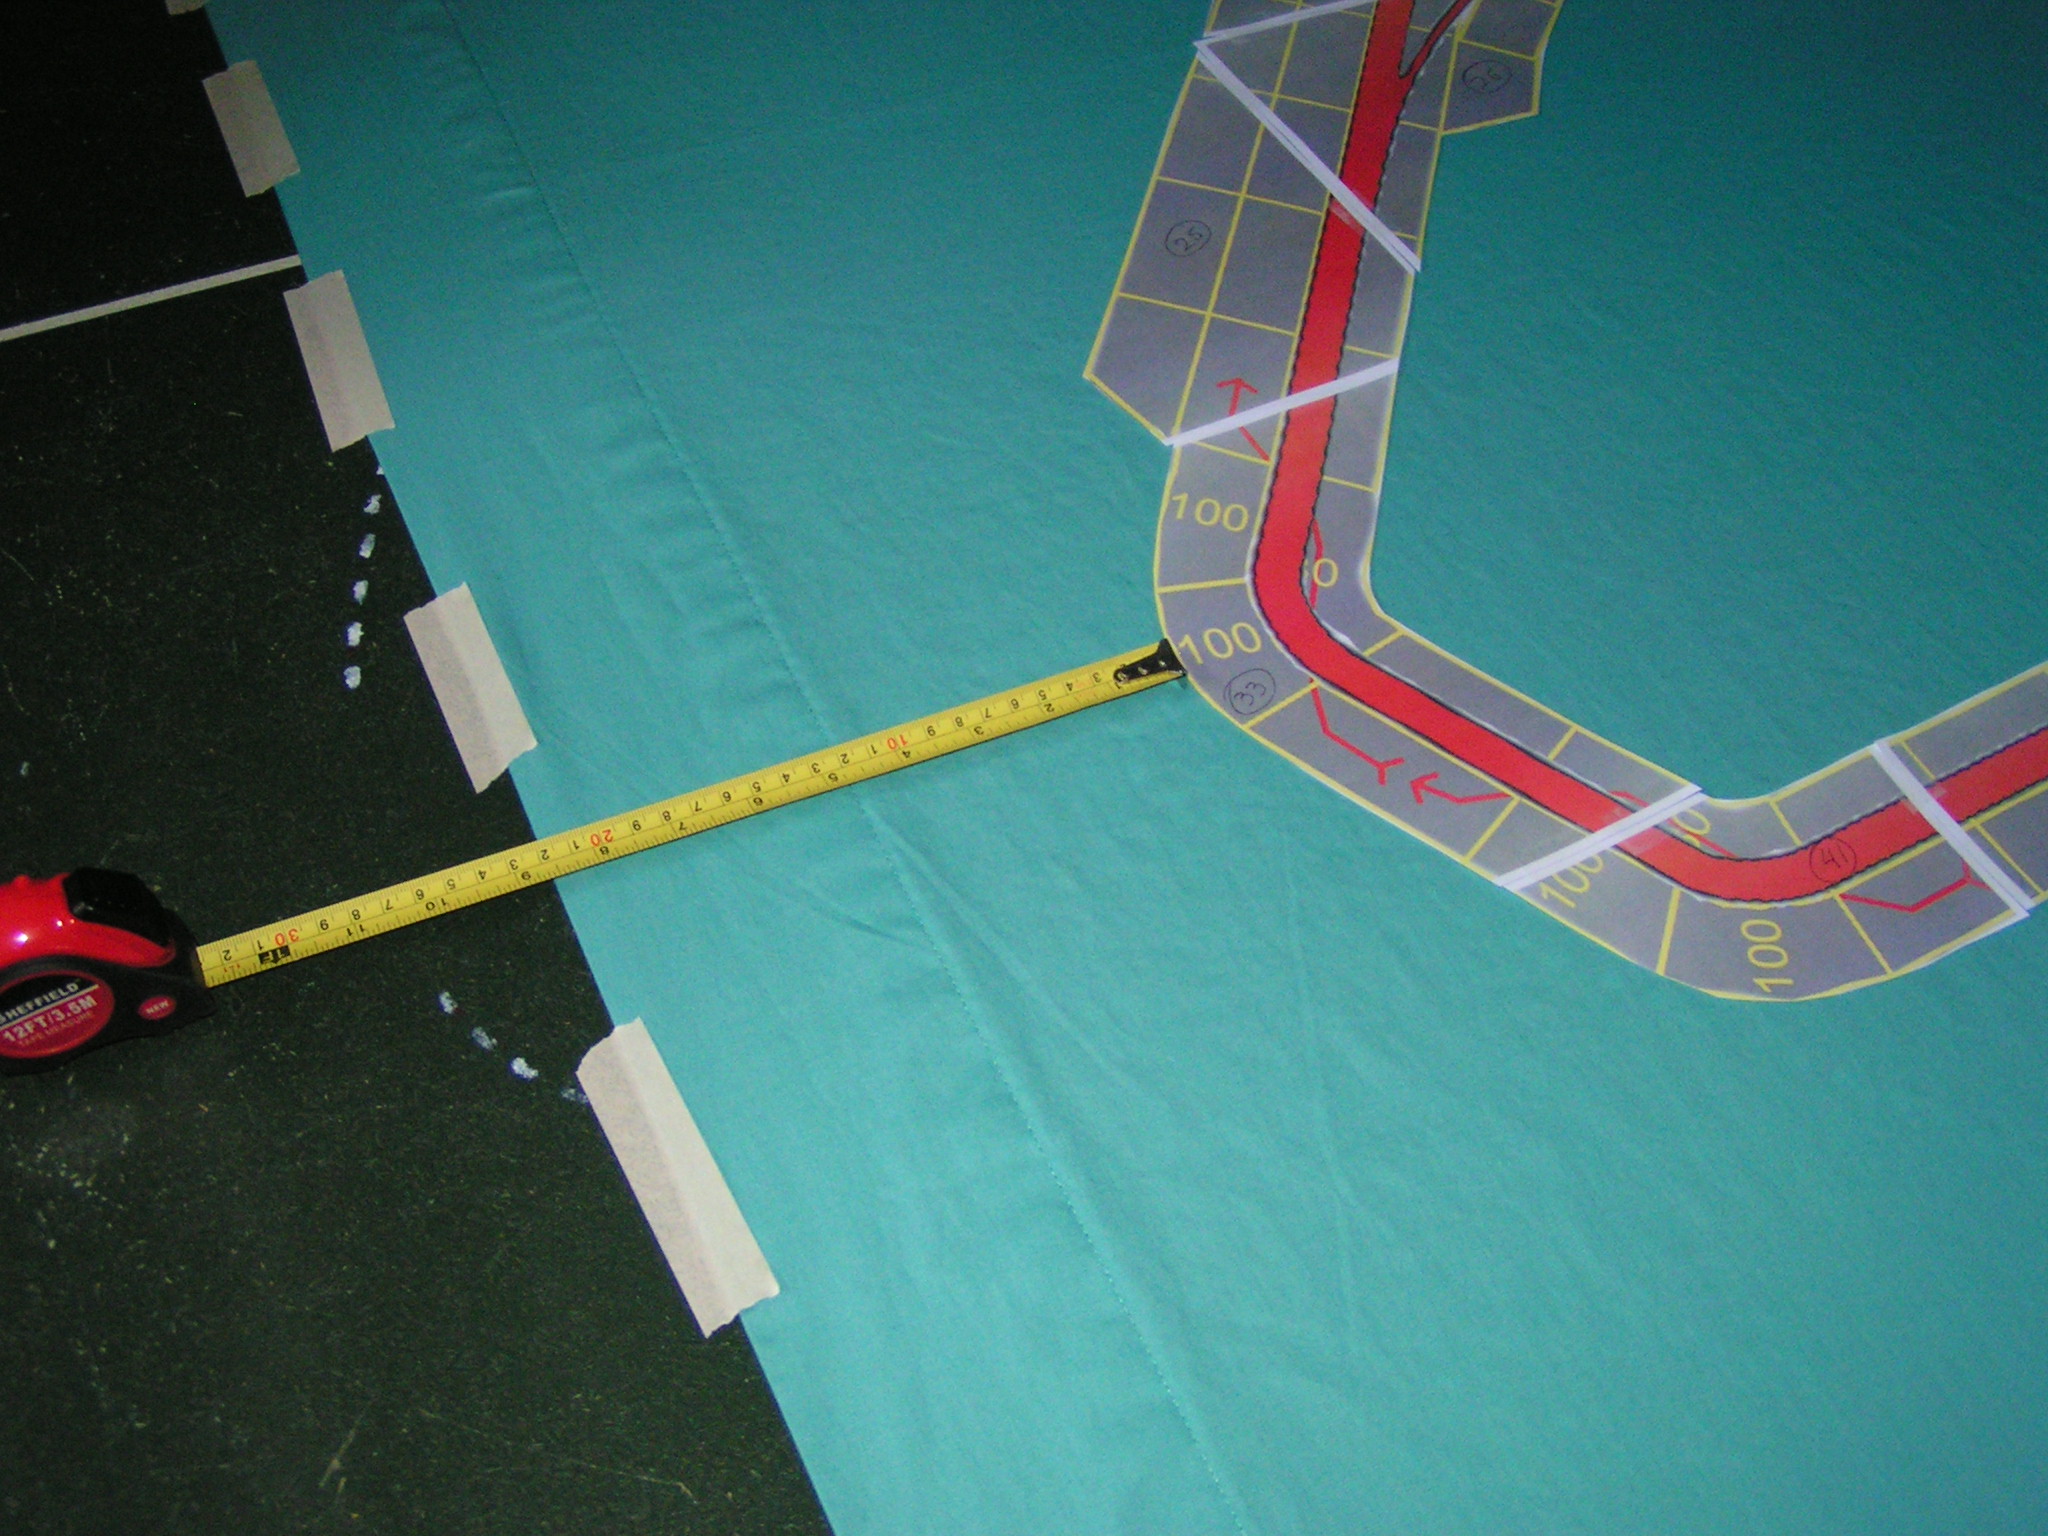
Measuring from the edges to center the track on the sheet.
I then centered the pieces, and placed them together to see how it looked.
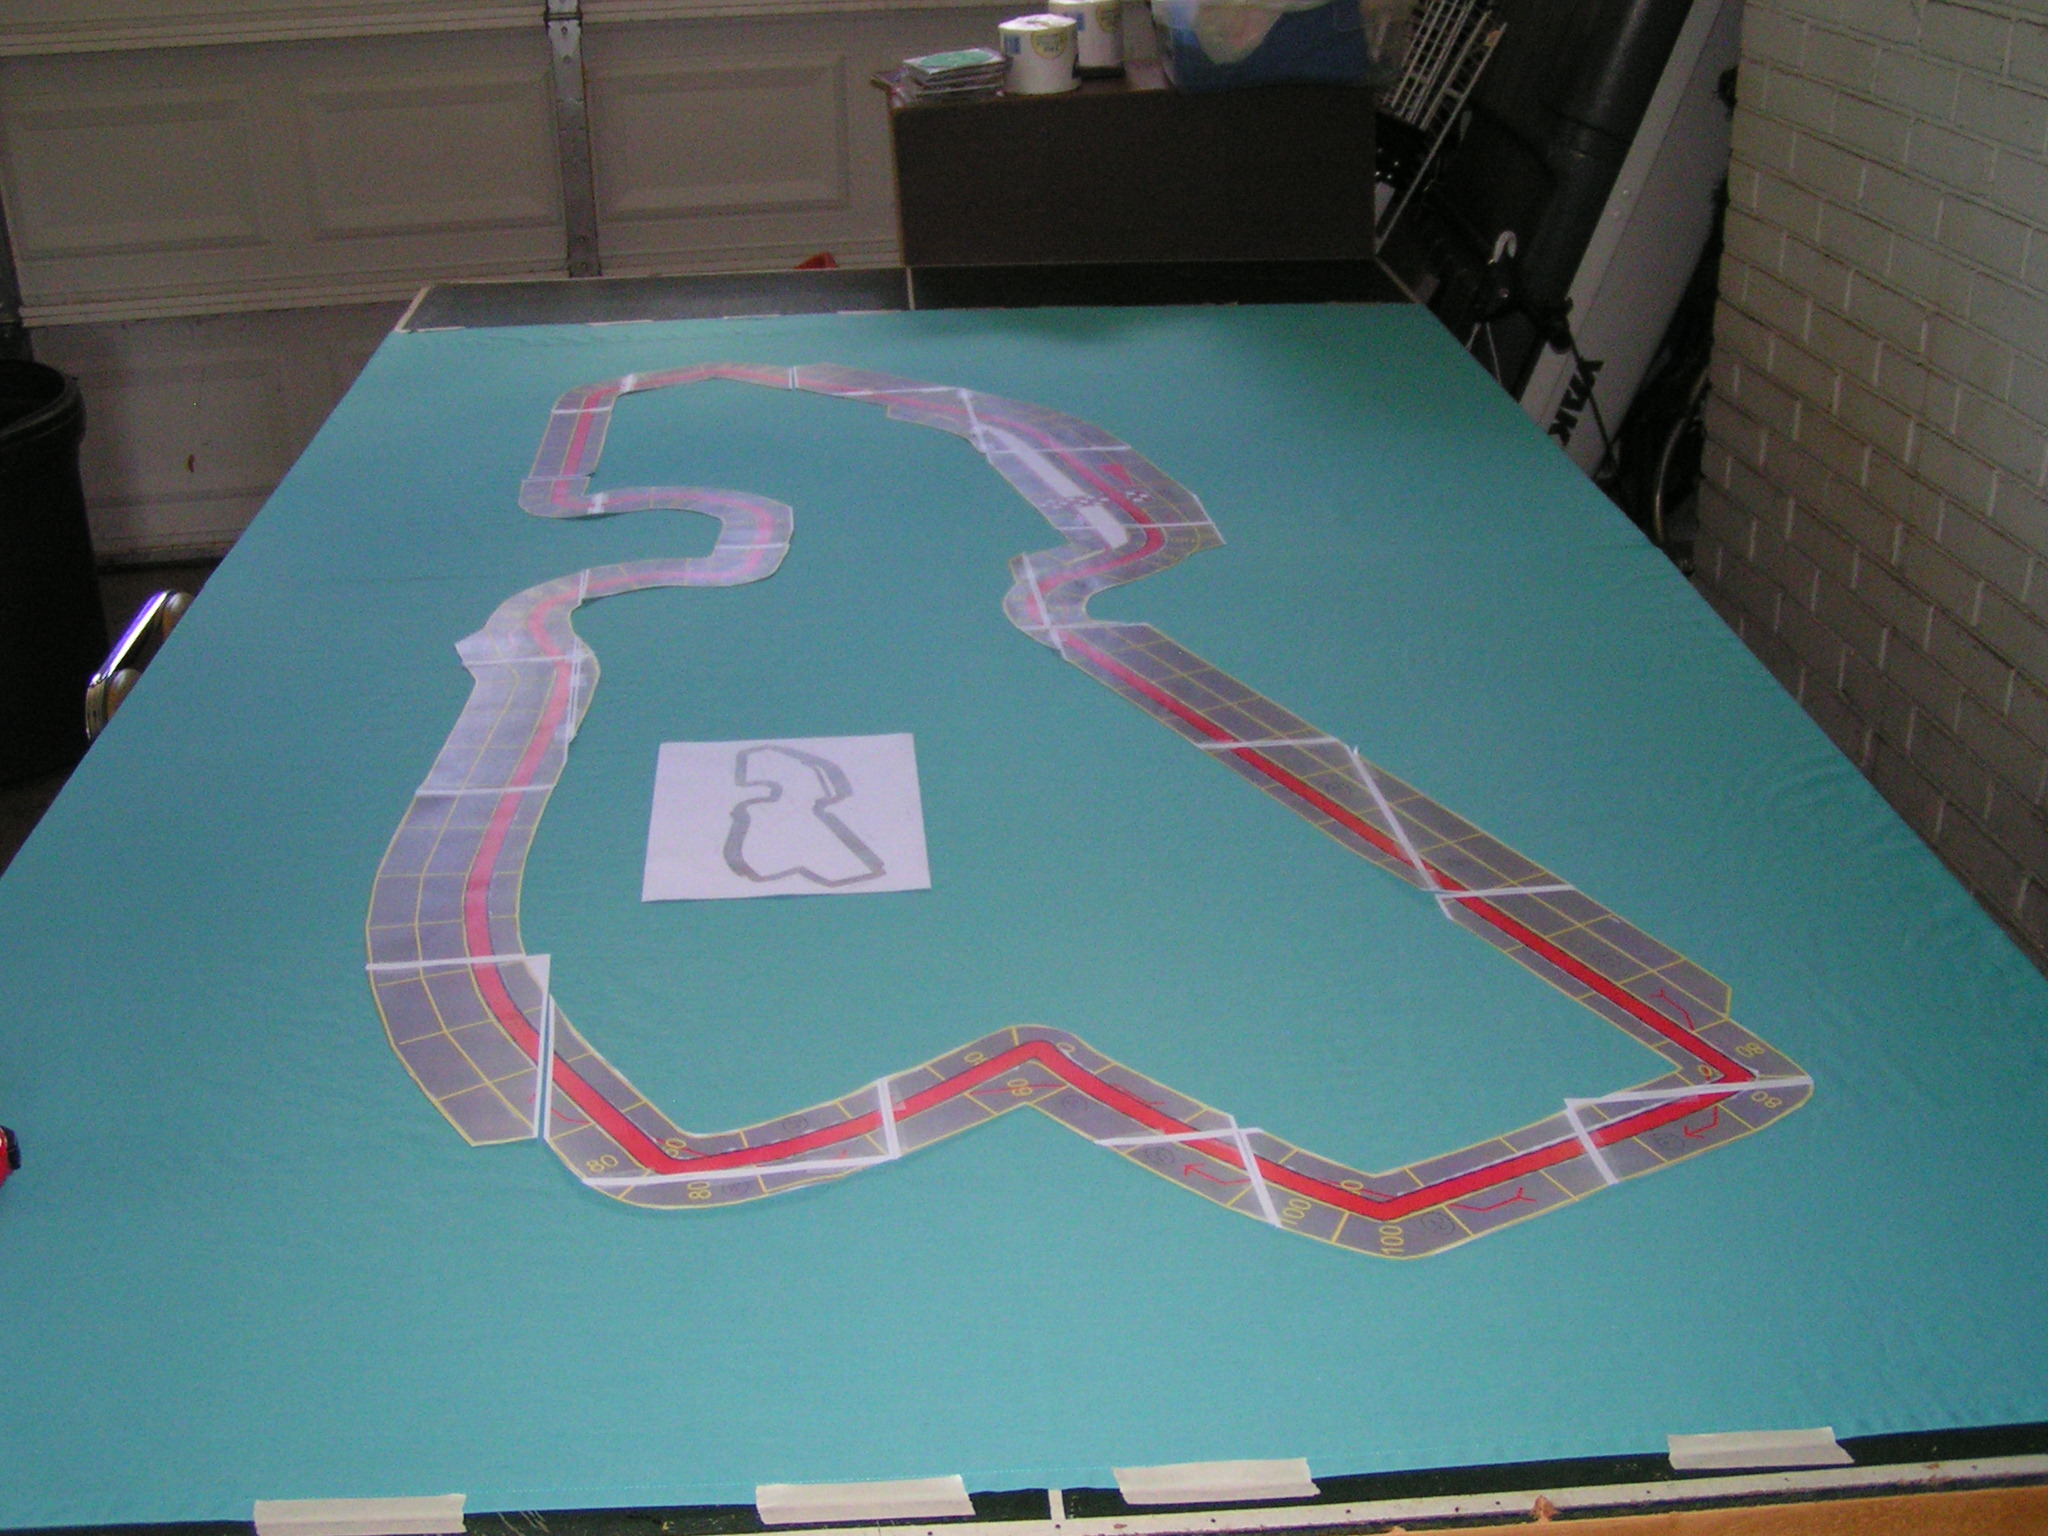
The centered track.
Now comes the task of checking how the 1:64 scale cars fit. Get out your scale cars and see how they fit on actual parts of the track outline.
Cars fit on the straight sections.
It looks like the straight sections are long enough for my Greenlight IndyCars to fit. I also tested the sections with my old Hot Wheels open-wheel race cars that are the same length as the newer Greenlight cars. Note that the printed track is narrower than I will paint the finished track. The proportion of the rectangles for a poster-board size track is different than I want for my large track. When I design a poster-board size track, I make the straight spaces 1″ long by 0.5″ wide. That usually works well with small race cars. However, for the large track, I make spaces that are 3″ long by 1.75″ wide. That means that when I trace around the edge of the finished track layout, I will have to do a little more marking.
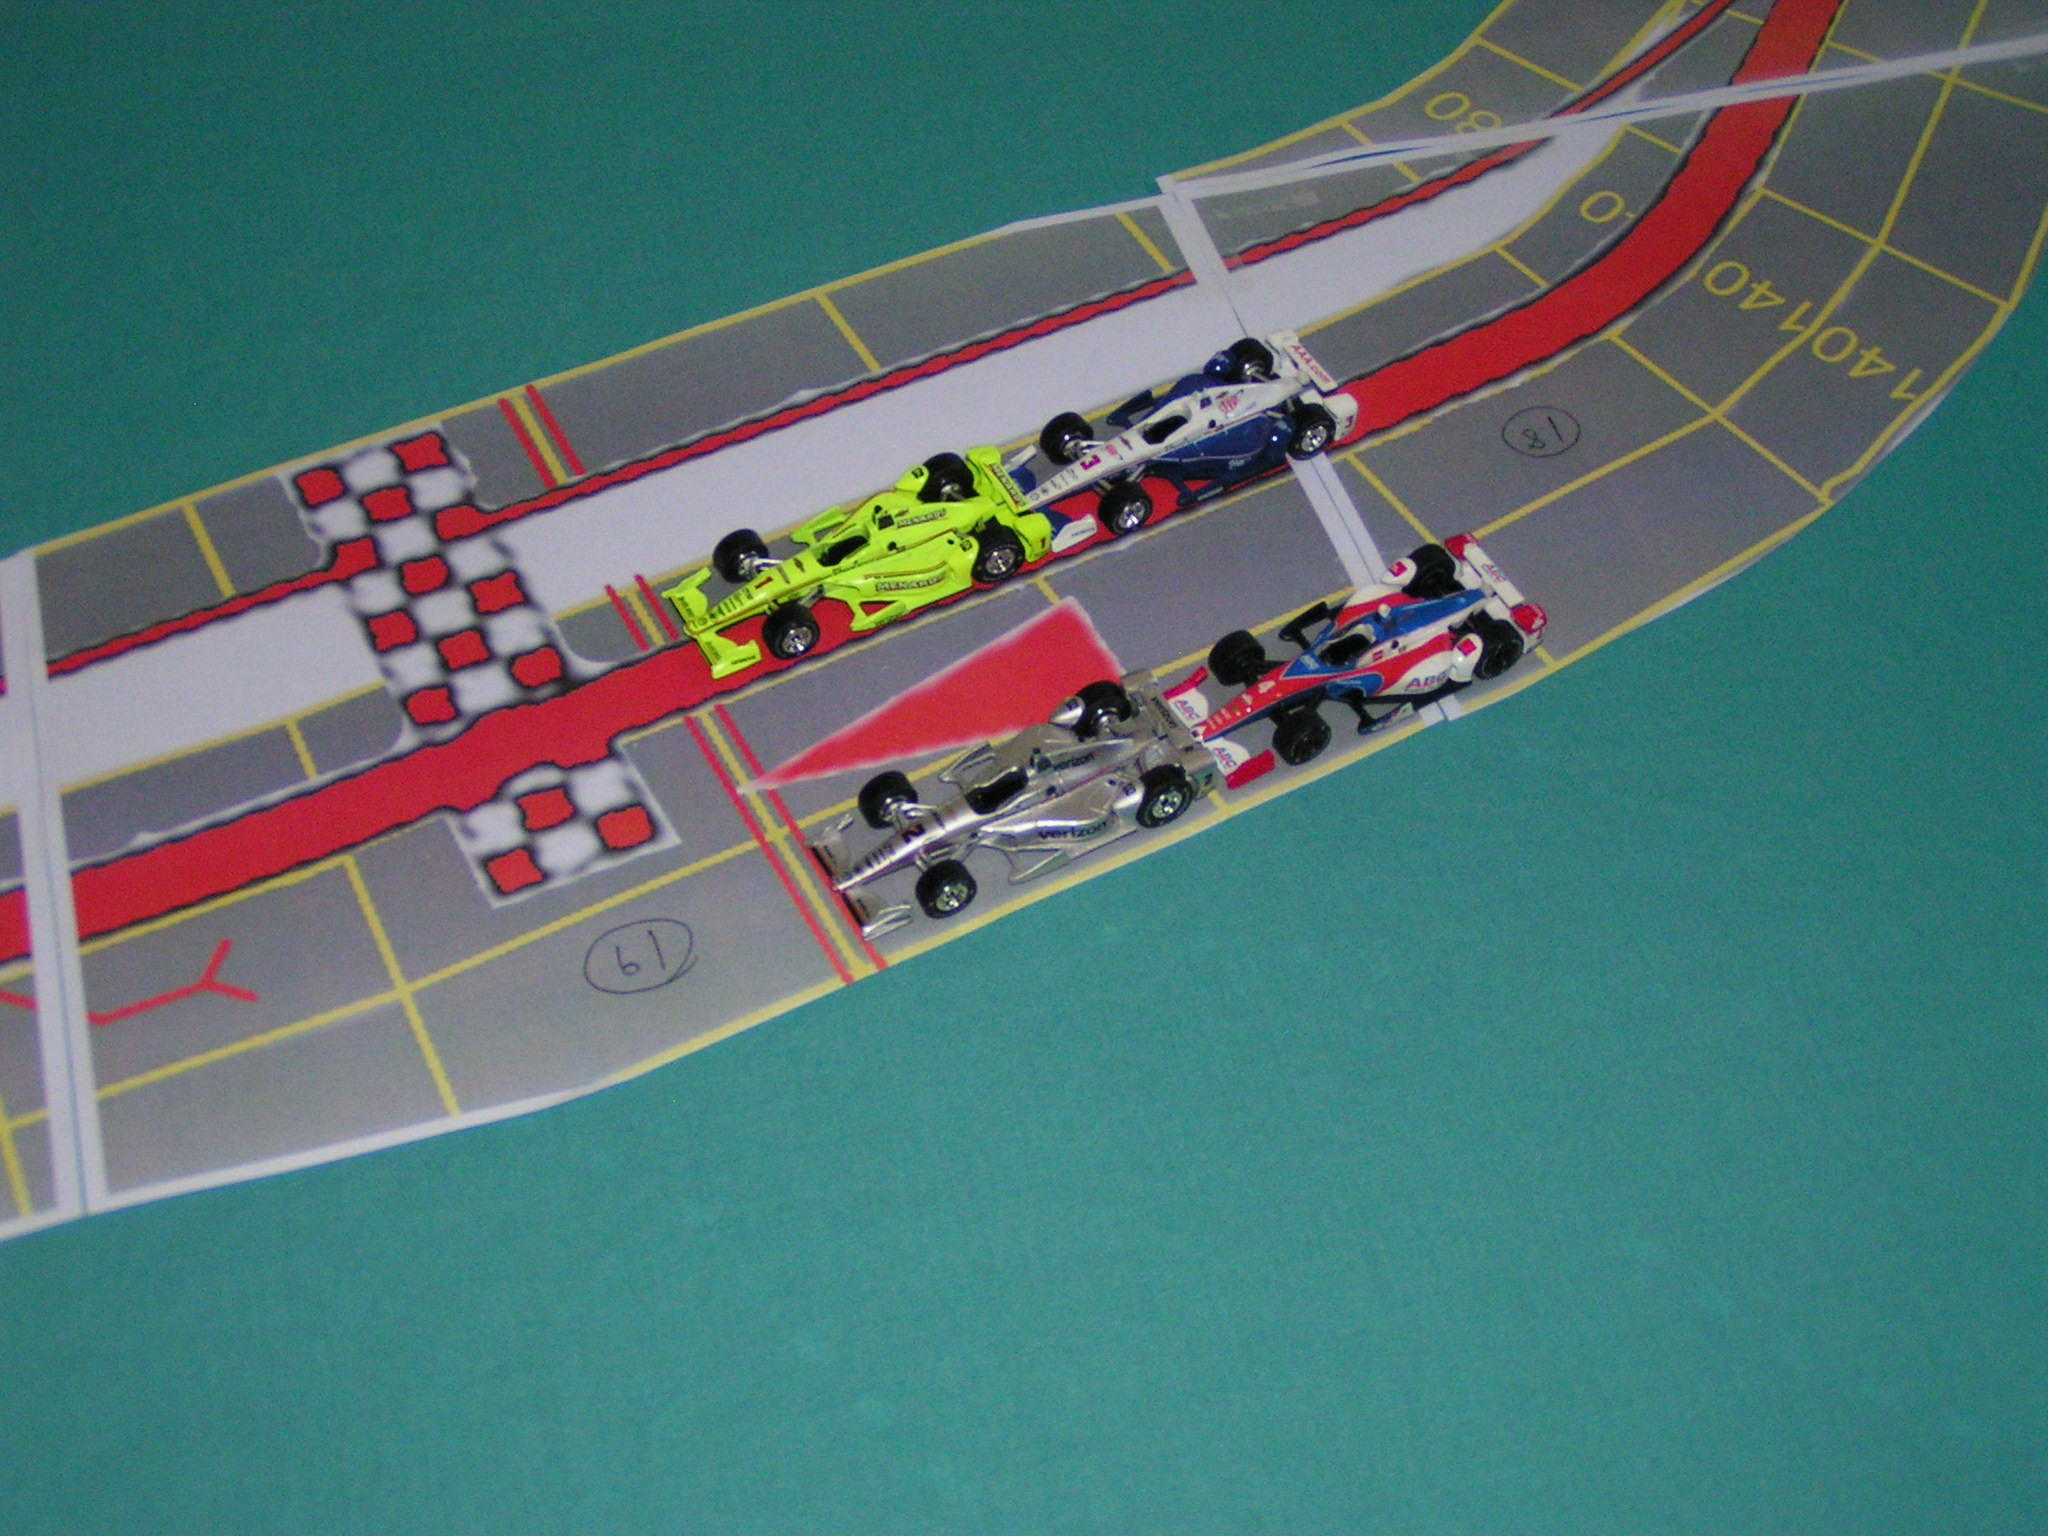
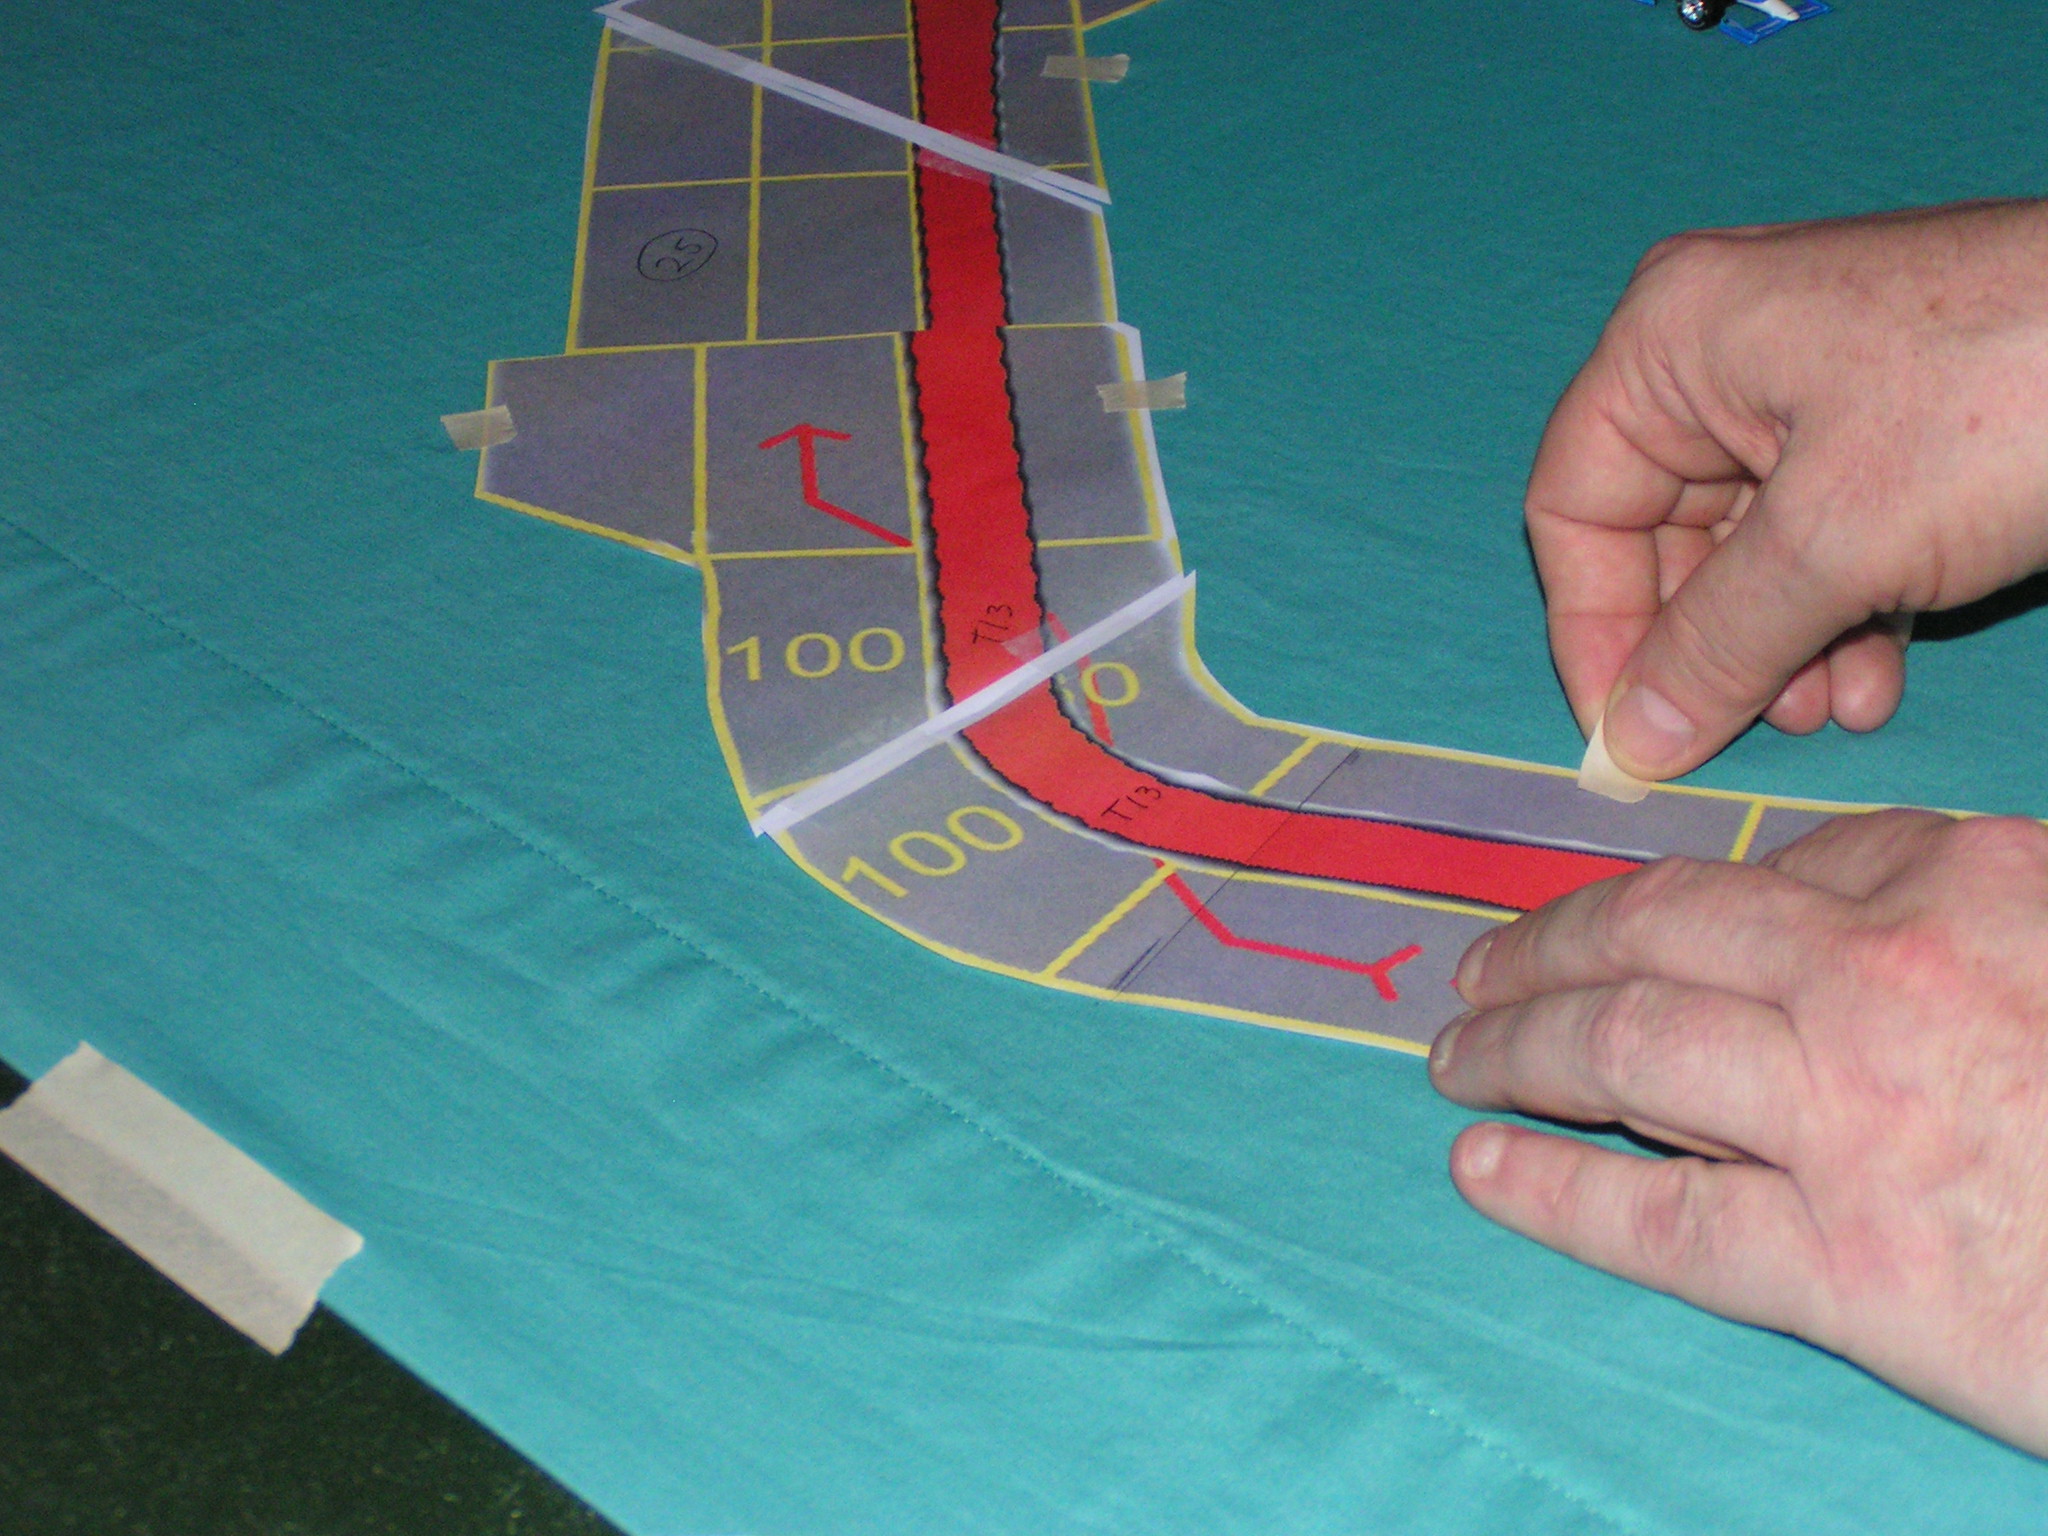
Now, to check the fit in a corner. Oh-oh! The corner spaces are too small!

Cars don’t fit in the corners.
While the #3 car in the picture above fits on the inside space, the two cars on the outside of the corner (which is two spaces long) don’t fit into their spaces. This means I will have to allow for more space. In years past, I would just move the straight track sections a little and “fudge” or estimate the new corner area. I would put a clean piece of paper under the corner area, and pencil in where the lines should go. But this time, I decided to go back and reprint the corner sections. I printed the corners at 900% (instead of 775%) of original this time, and they printed just about right.
But before I reprinted the corners, I substituted the template pieces.
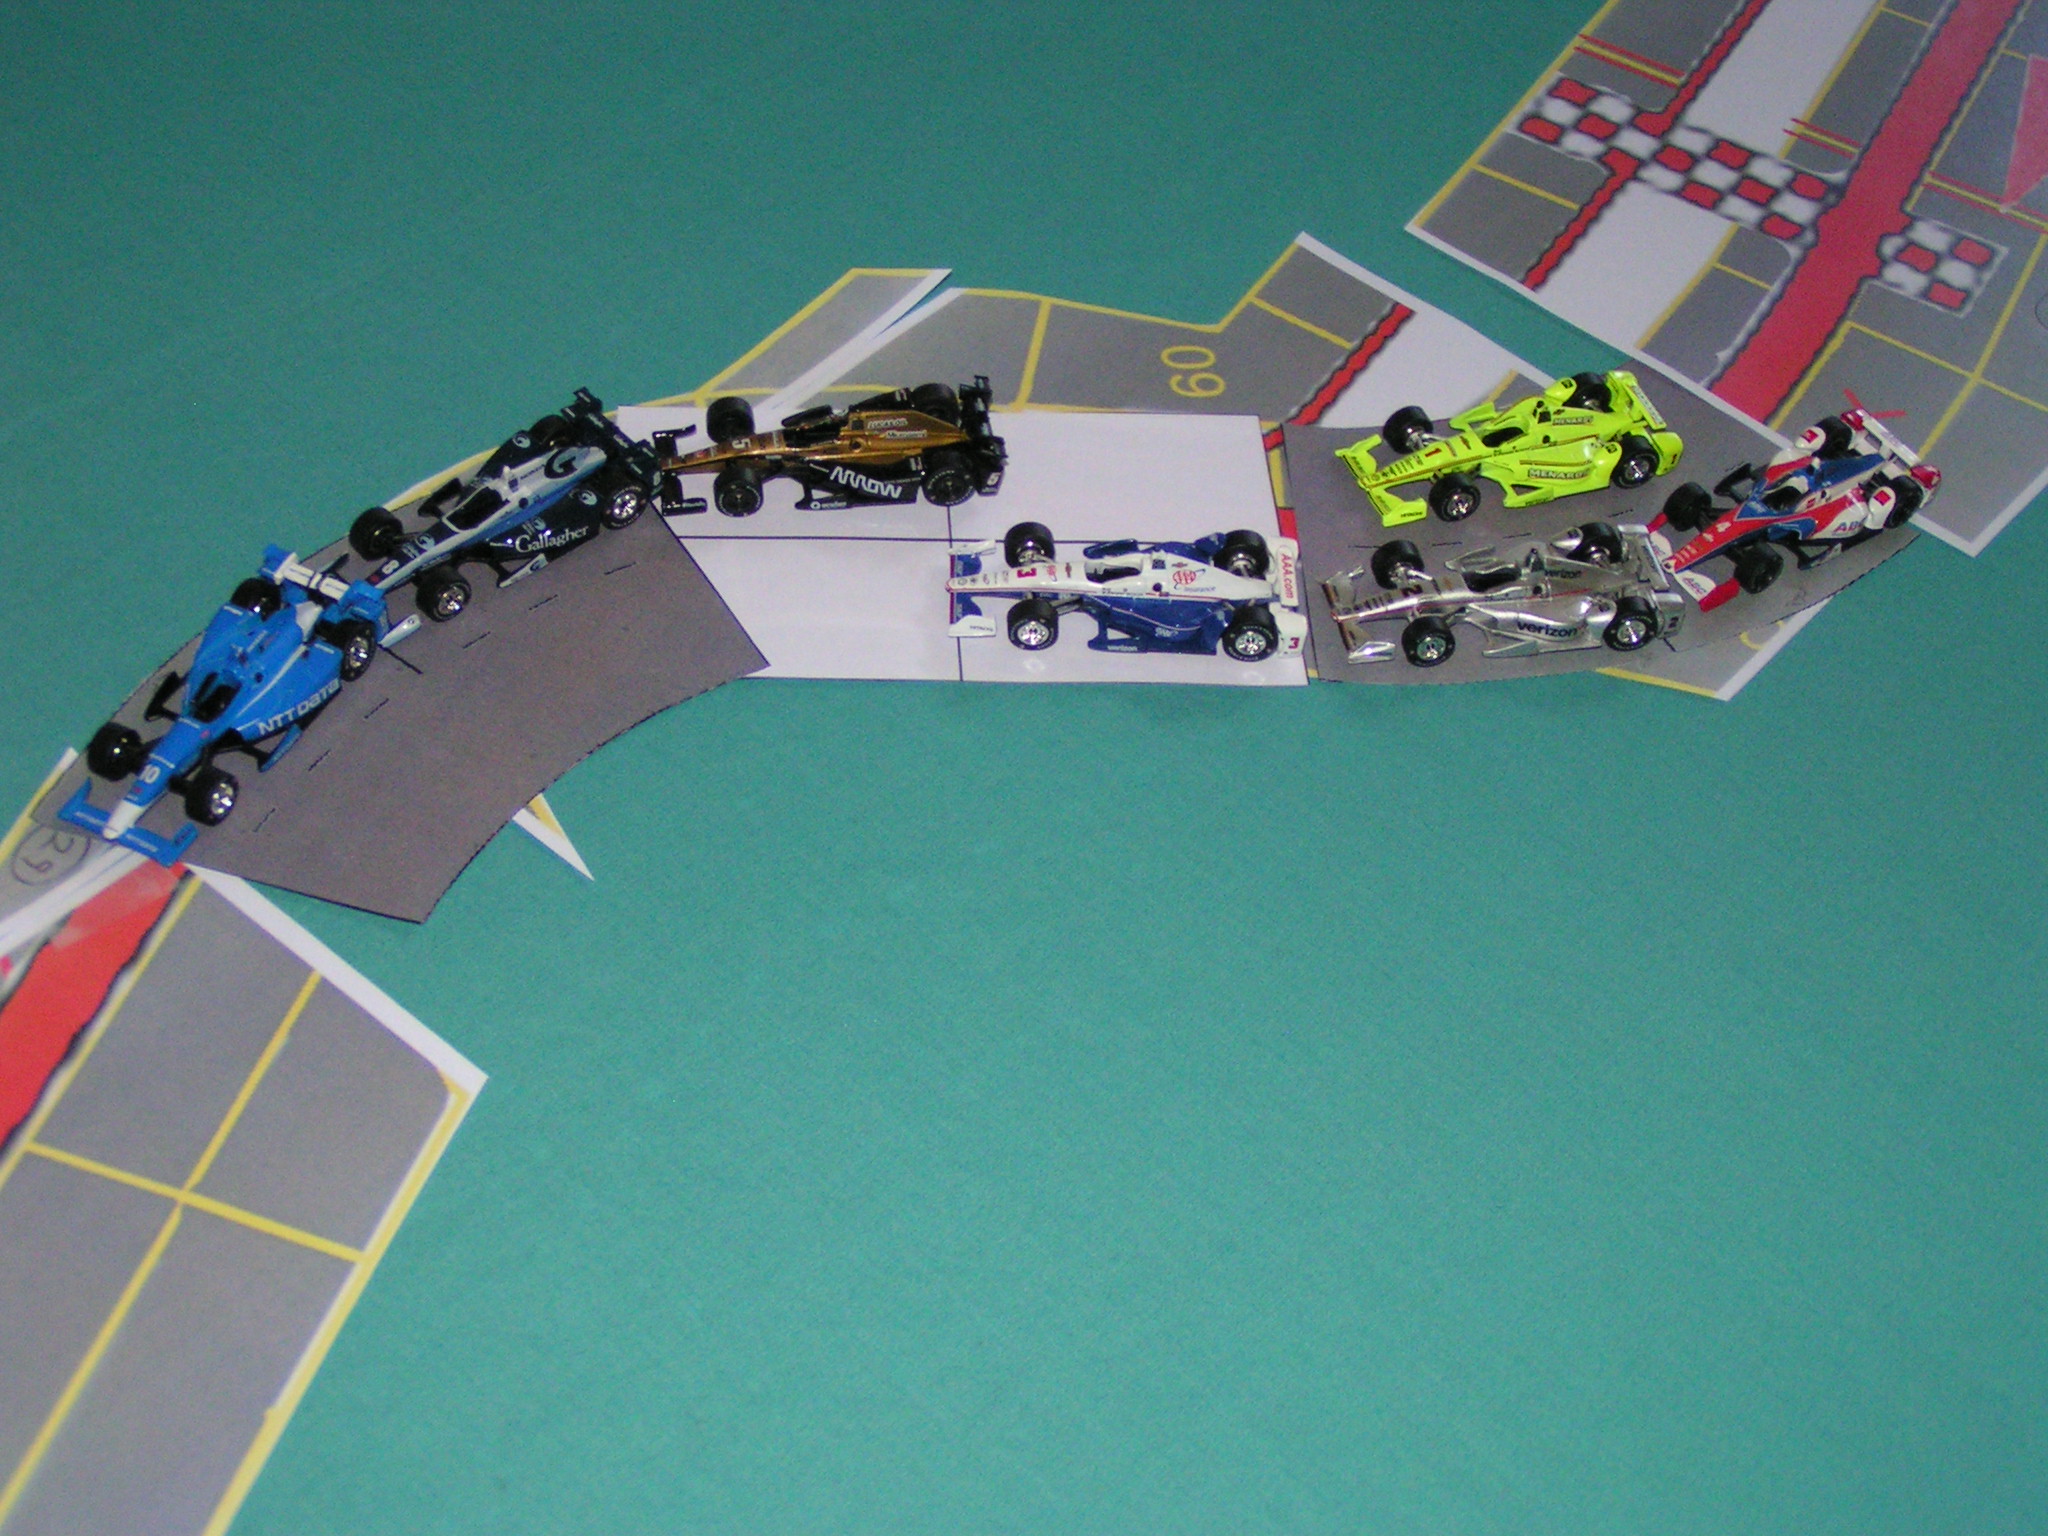
Cars on template sections.
Using the template sections, I can see that the cars will fit. Of course, by allowing for a longer corner section in this area of the track (this is turns 1 and 2, just past the start-finish line), it will affect the alignment of other parts of the track.
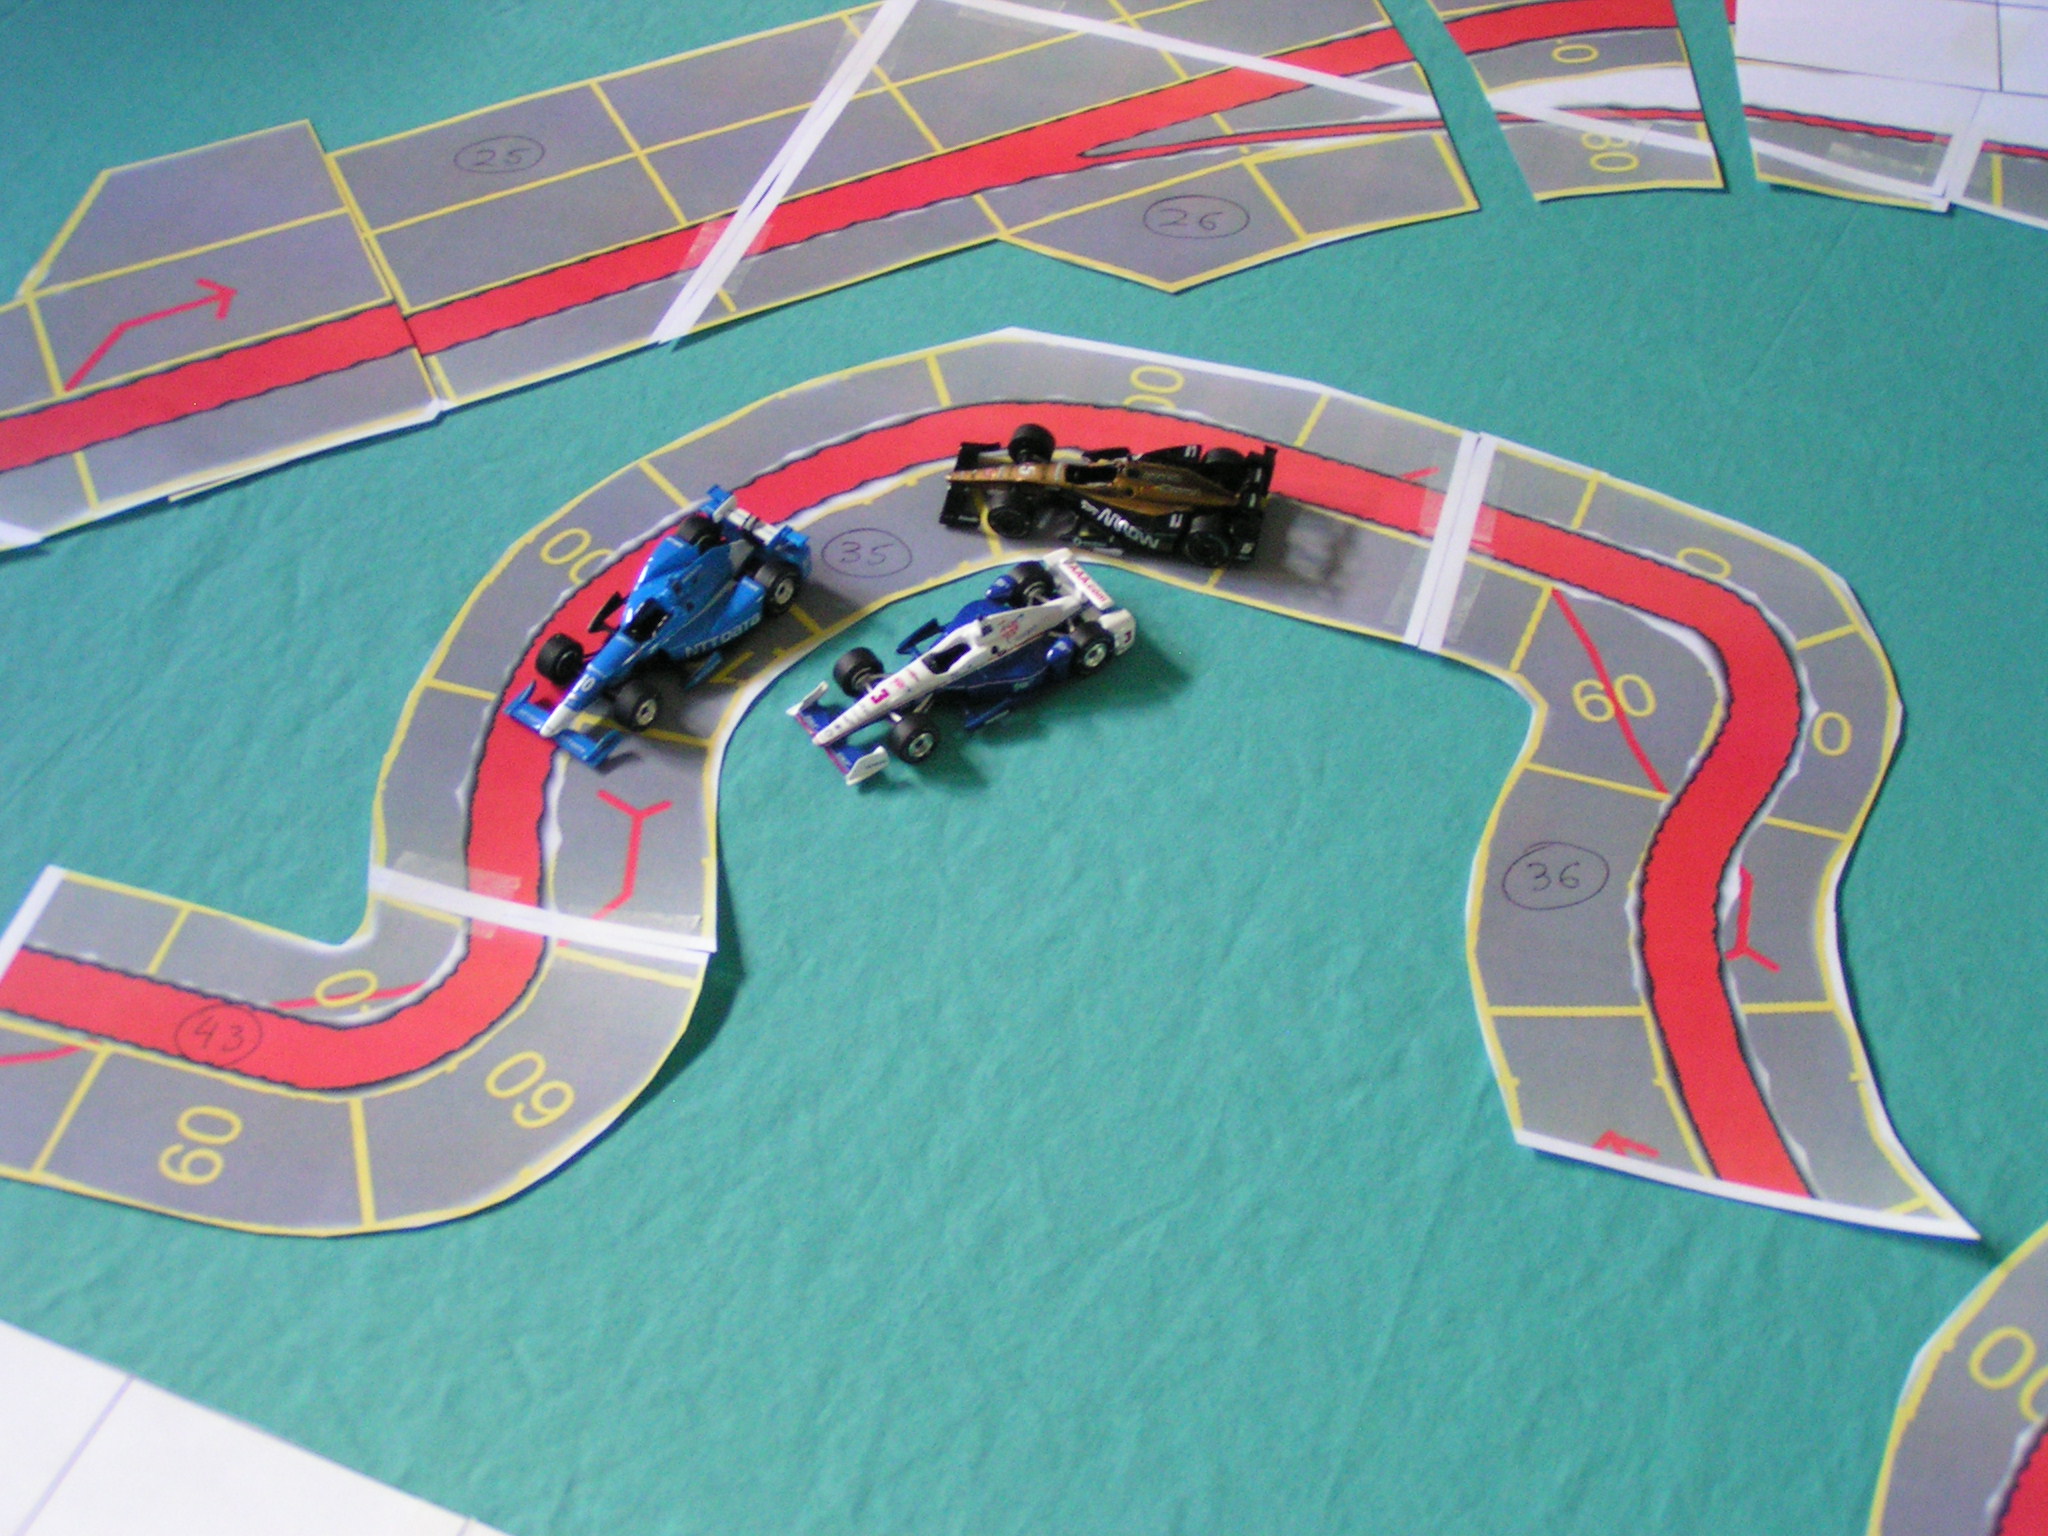
Another part of the track where the cars don’t fit.
I also found a part of the track that was in a “U” shape also didn’t fit the cars well, not for the curvy-“straight” sections nor in the actual numbered corner spaces. So I had to re-print that entire section. And even after I printed that section at 900%, some of the spaces were still too short. So, I spliced in a couple of pieces of paper to “expand” that section slightly, and also used a permanent marker to mark new lines between the spaces.
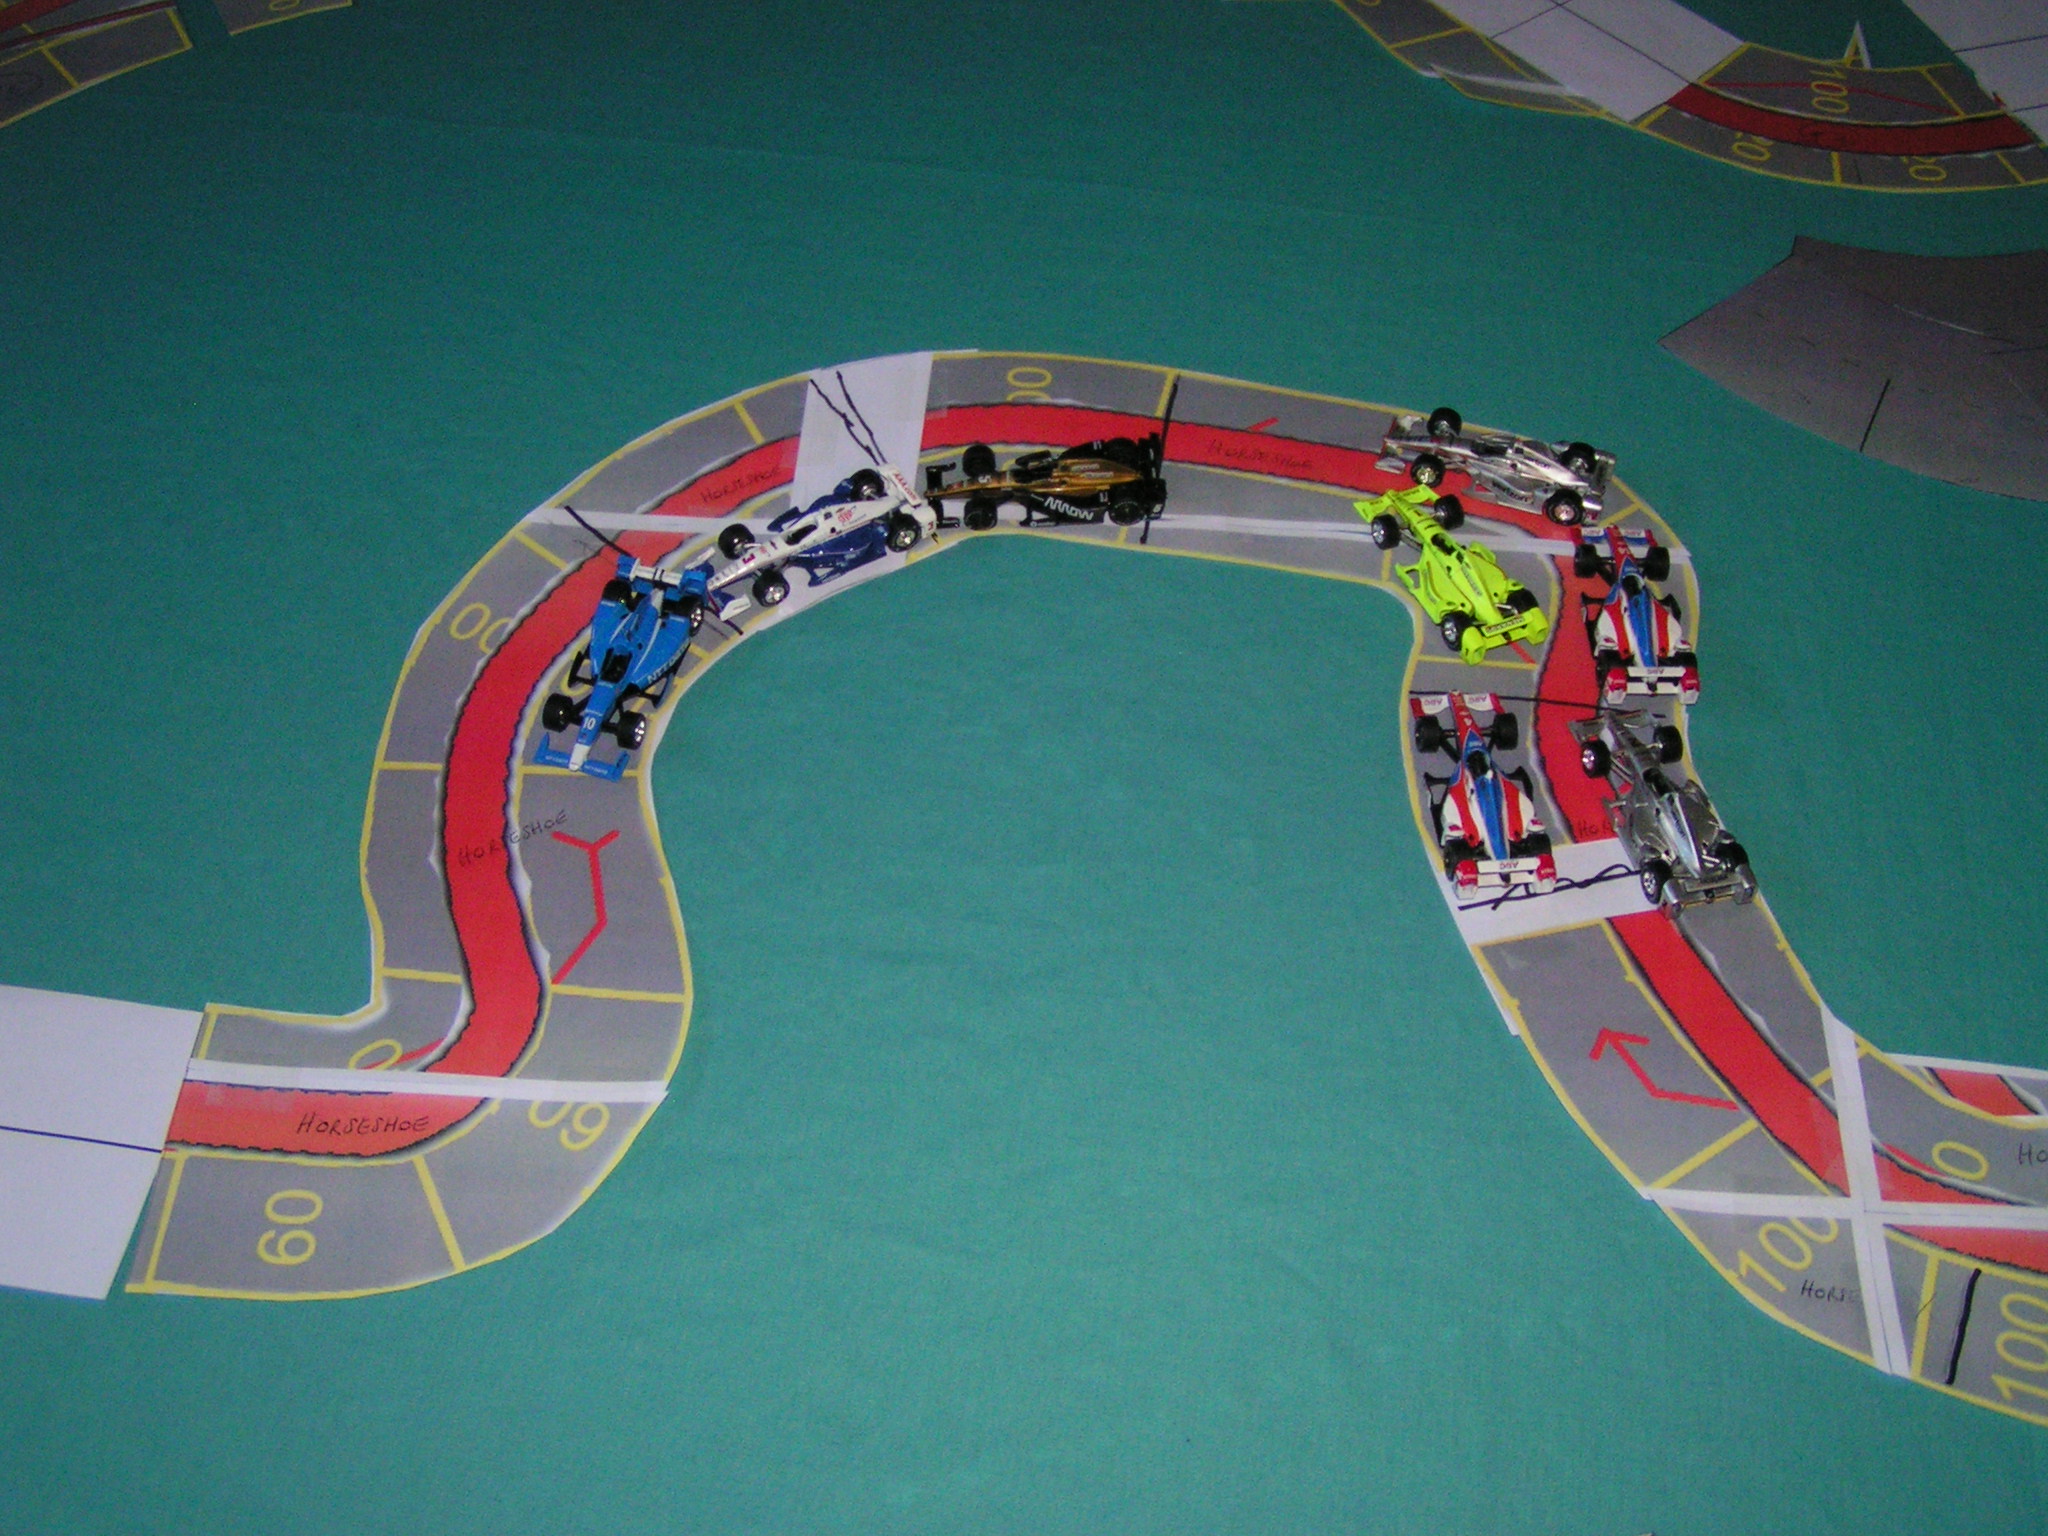
Splices added and spaces re-marked in the “U” section.
After checking all of the sections so that the cars would fit the spaces (particularly in the corners), and rechecking the track alignment (also re-centering the track sections on the sheet), it is time to tape down the track sections so they don’t move when you mark off the outline of the track. I just use small pieces of masking tape to tack down the track sections. I’ll usually just use four small pieces of tape per track section to ensure that section doesn’t move when I mark its outline on the sheet.
Taping the sections of the track.
Note that the above track sections were printed at two different scales, which is why they don’t line up along their outside edge. Since I am using the inside border of the track as a reference, that is not critical.
Now is the time to mark the outline of the track. Use a pencil for the “first pass” as if you make any mistakes, you can easily correct them! At first, I only marked off the inside edge of the track sections, as that was my “reference” point. Some of the printed track sections that I used for laying out the track were not wide enough, so I had to make sure that I marked the track as wide as it needs to be for each section. Remember that I am making each space 1.75″ wide, so if the track is “2-wide” (meaning the track is two spaces wide) in an area, then the total track width is 3.5″. (Sorry, I didn’t warn you there would be math involved in painting a large-scale track!) If a track section is “3-wide” (three lanes side by side), then the total track width is 5.25″ in that area. I use the straight edge to check the width of a section before marking the outside lines of the track.

Using a ruler to check the track width.
In the above picture, I am making pencil “tick” marks where the 5.25″ outer edge of the track will be for this 3-wide section. I had to do this because of the varying scale of my template pieces. Even if you have perfectly sized templates, you should check the width of your track before masking and painting it. After making tick marks in an area, I used a pencil to “connect the dots (ticks).” When I was satisfied with the pencil inside and outside borders, then I went over the pencil marks with a permanent marker.

Outlining the track with a permanent marker.
When the outlining was completed, I removed the paper templates. I removed the small pieces of tape from the templates, then stacked them carefully out of the way, in order, as I will need them again to aid in actually painting the lines for the spaces on the track (see Part 3 of this series).
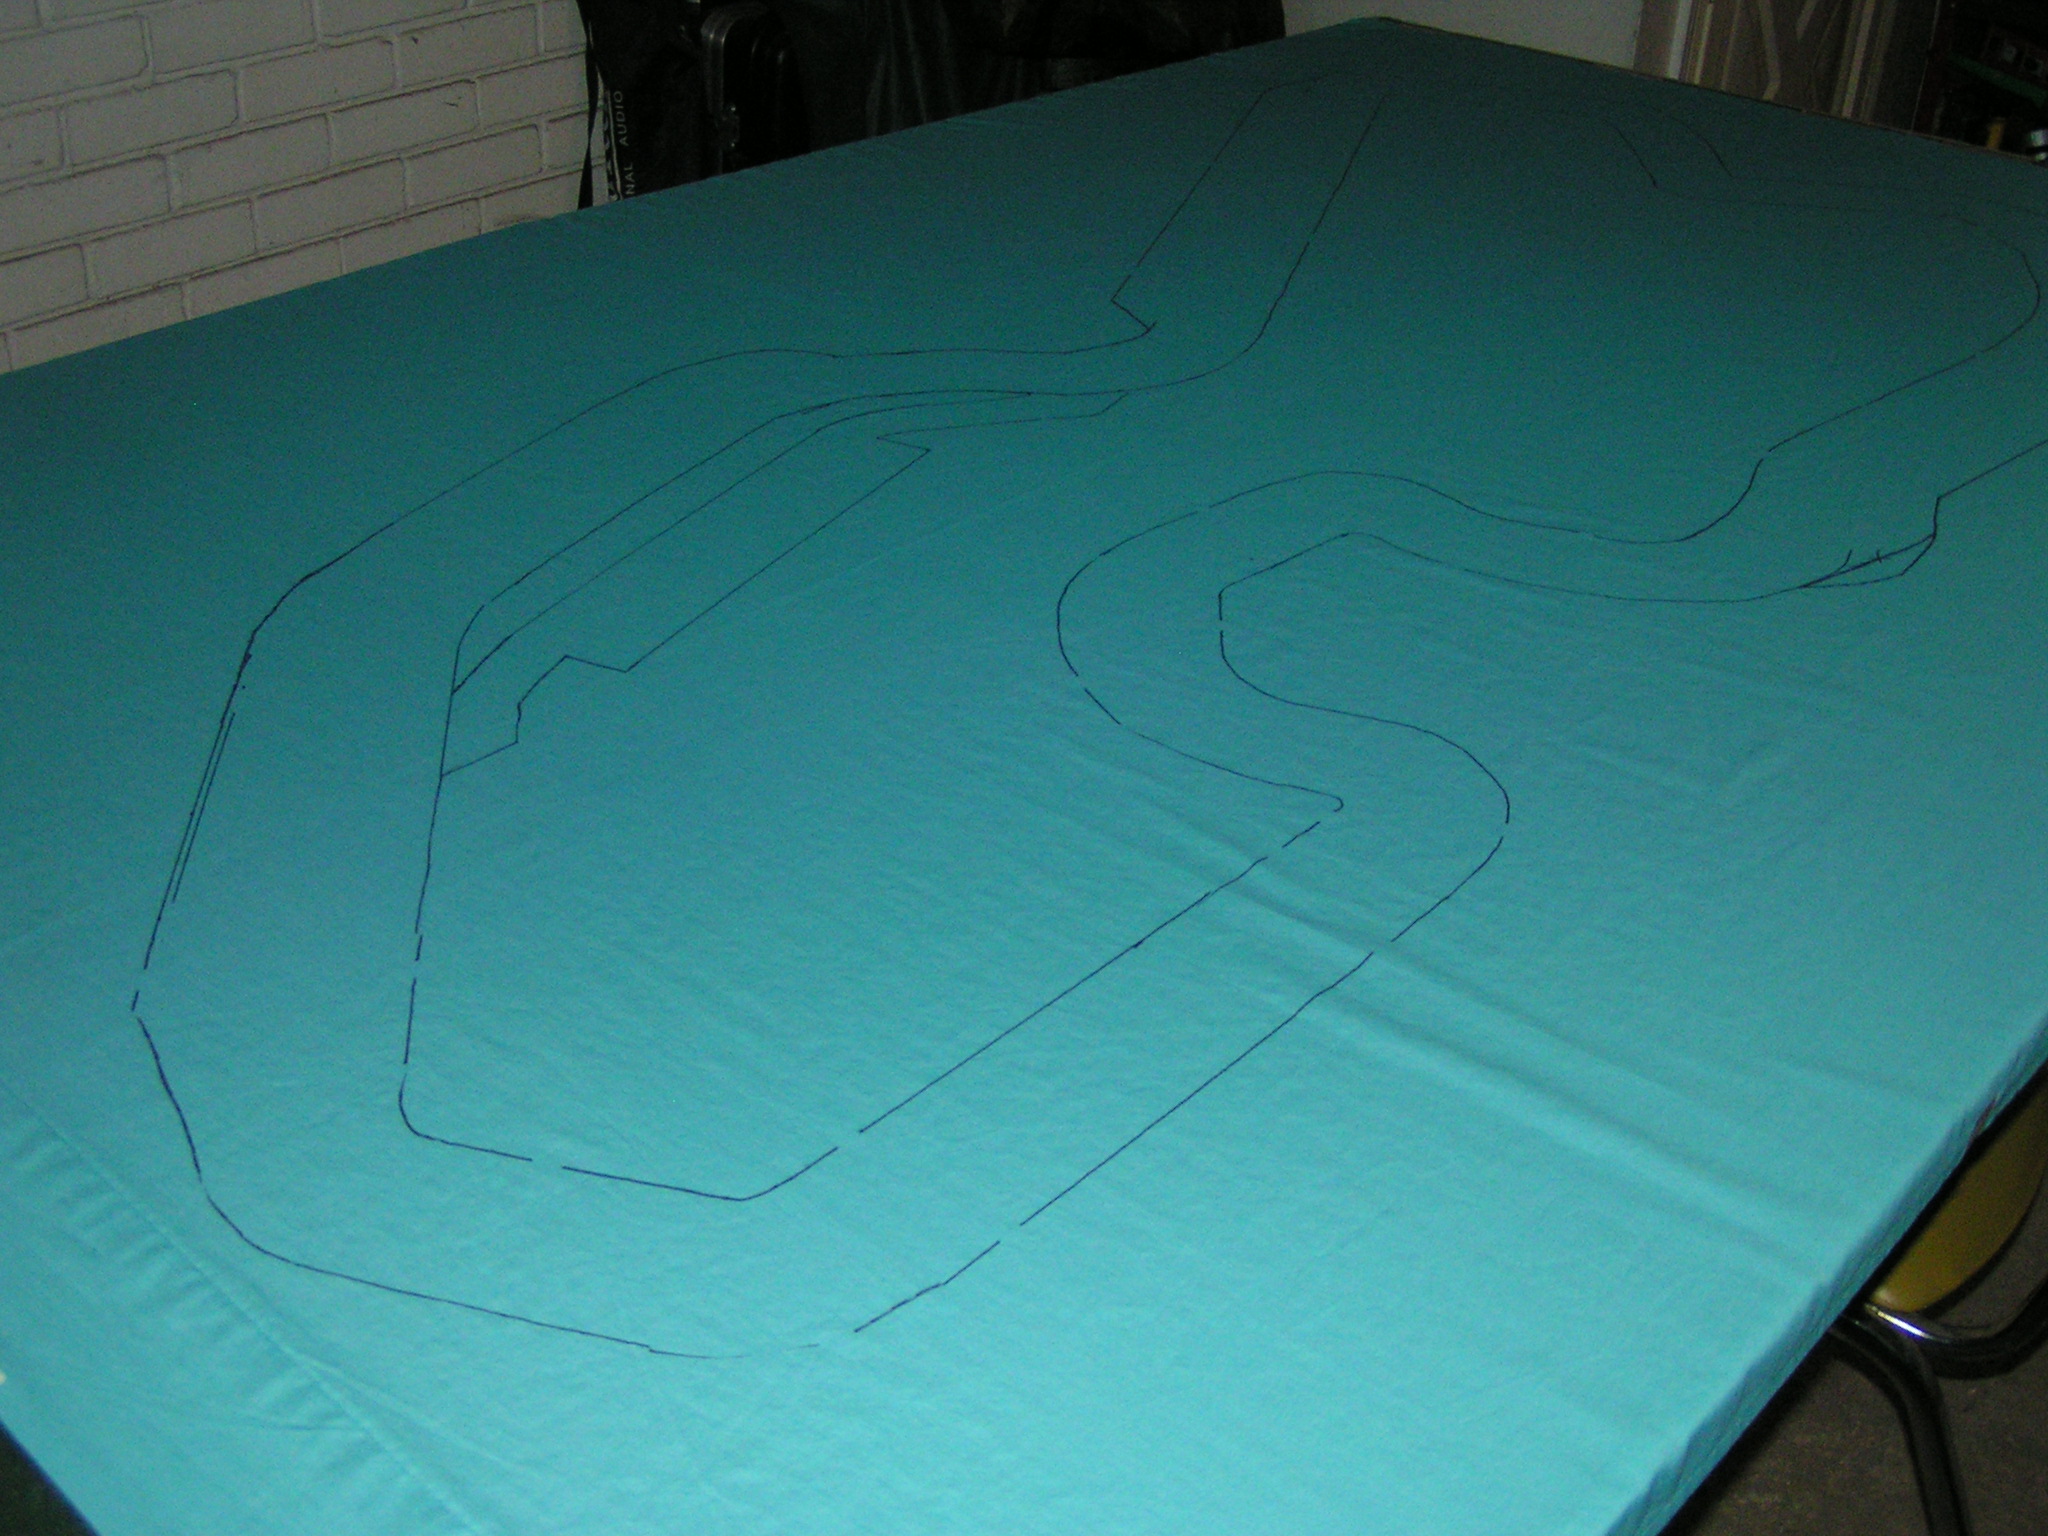
The completed permanent marker outline of the track.
Note that there is a pit lane to the left. Although Championship Formula Racing doesn’t use a formal “pit lane,” we are thinking of using our older Speed Circuit era pit stop rules, and we would need to drive down pit lane. I felt it would be easier to add the pit lane at this time, rather than to try to add it at a later time, when I would have to re-mask the track and paint part of it again. Towards the right side of the picture I also made an adjustment so a 3-wide straightaway section could blend into a 2-wide corner.
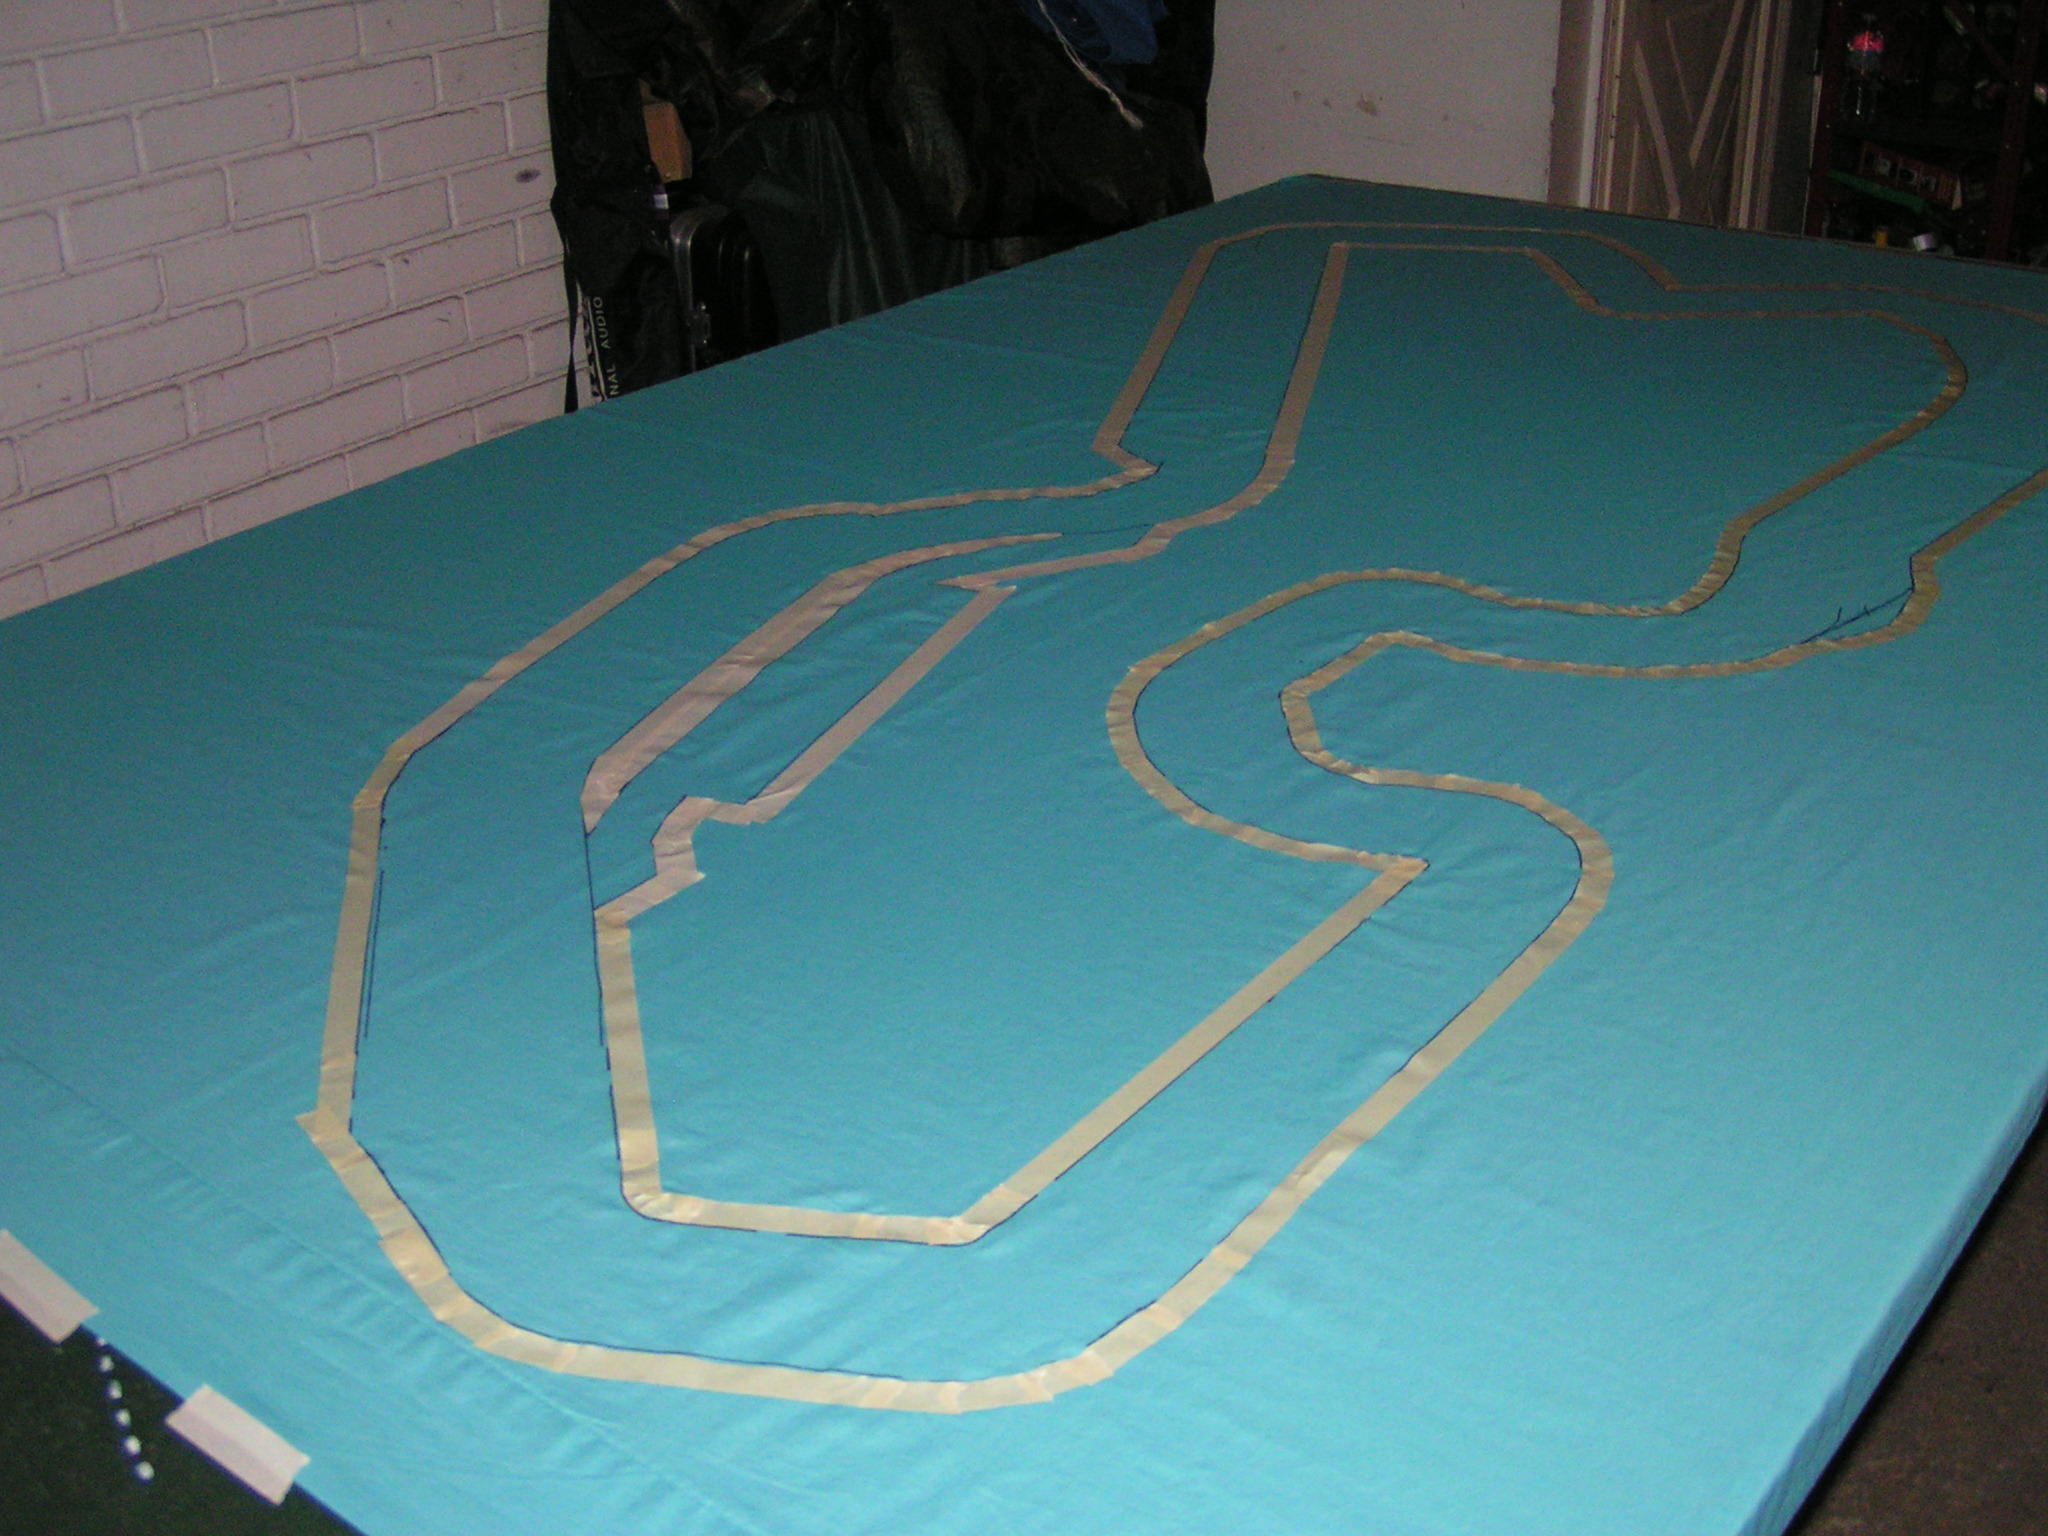
The track outline has been masked with tape.
Next, we will need to cover all parts of the sheet with newspapers (or whatever you have on hand) and then tape it down to the inside and outside track outline, and then we’ll start painting. That process will be continued in Part 3 – Painting the track.