Welcome to the final installment of how to make a large scale race track on a bed sheet. Of course, by “large scale” I am not writing about a “real life” size race track, but a track that can be used to play auto racing board games on something larger than a small board game sized board. Previous blog posts in this series were:
Part 2 — Marking the track on the sheet
At the end of part 2, we used masking tape to mask off the inside and outside edges of the track. We then mentioned masking off the parts of the sheet that you don’t want to paint, and then start spraying the track. After I finished masking the sheet with newspapers, I then sprayed the first coat of flat black paint on the sheet. It looked like this:
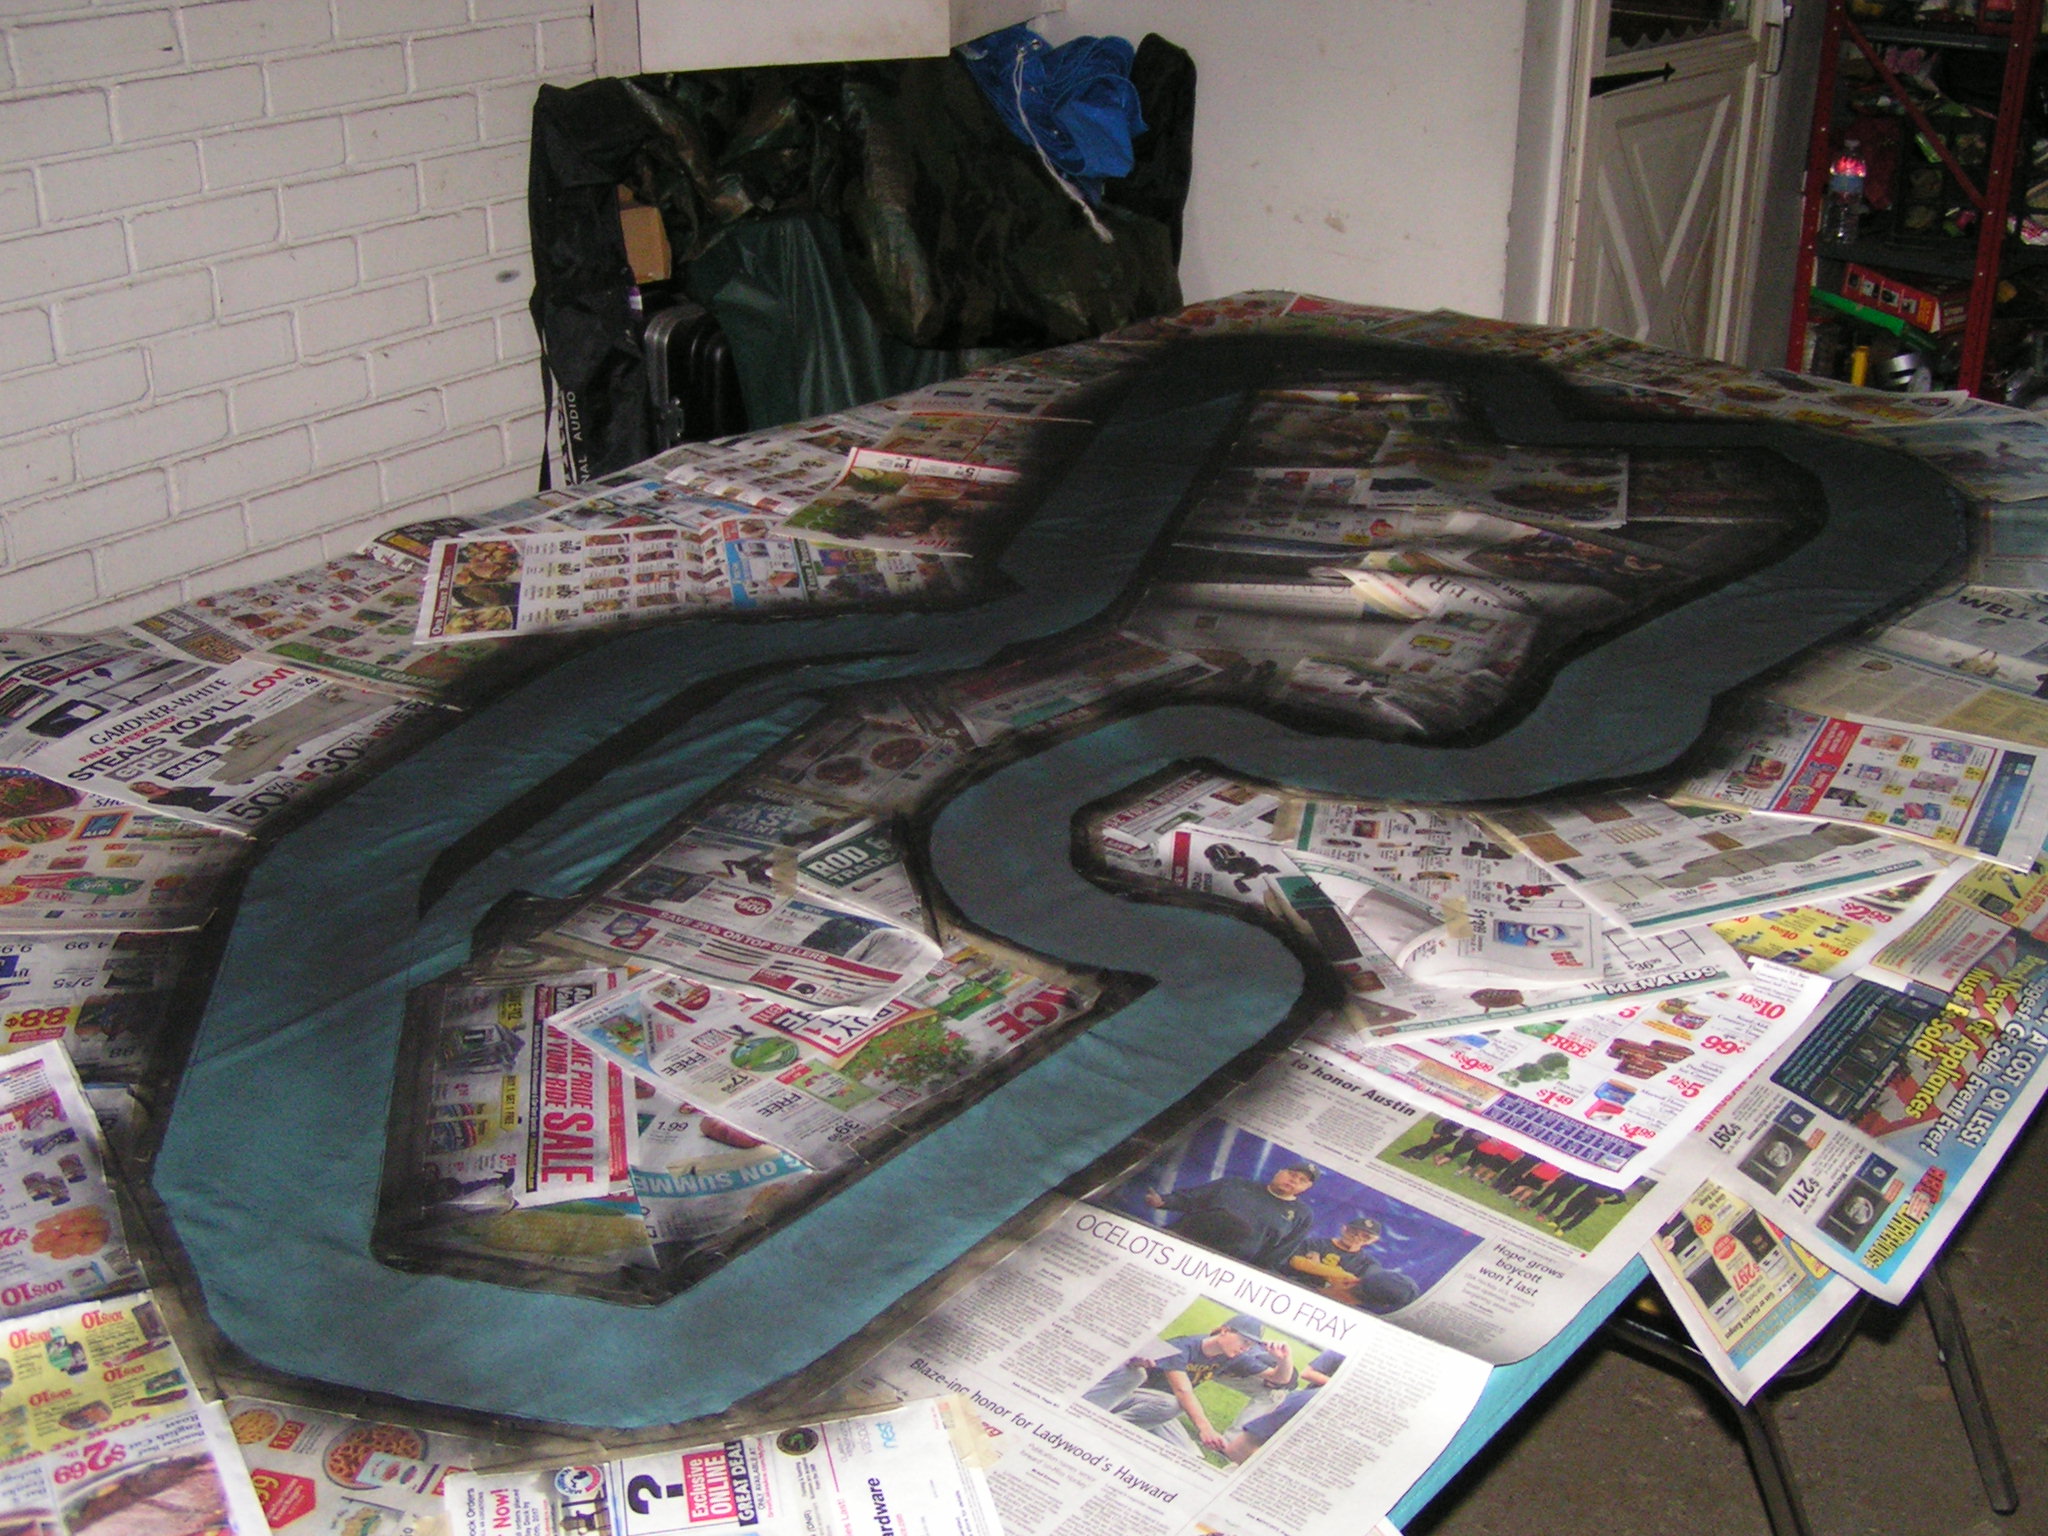
First coat of paint has been sprayed.
As you can see, although I tried to spray the paint fairly heavily, it soaked into the sheet and almost looks like it wasn’t sprayed very well. While I found that I usually only had to spray two coats of paint to fully cover a track in the past (allowing about 30 minutes between spraying each coat), this time I went cheap. Instead of buying a “name brand” of flat black spray paint, I opted for the “house brand” paint from a local hardware store. Big mistake. With the house brand paint, I had to apply about five coats of paint to get good coverage, and one can of spray paint wasn’t enough to do the entire job! I had to start using a second can of spray paint. When I previously used the higher quality paint on other tracks, it would usually only take 3/4 to an entire can of paint to cover the track satisfactorily.
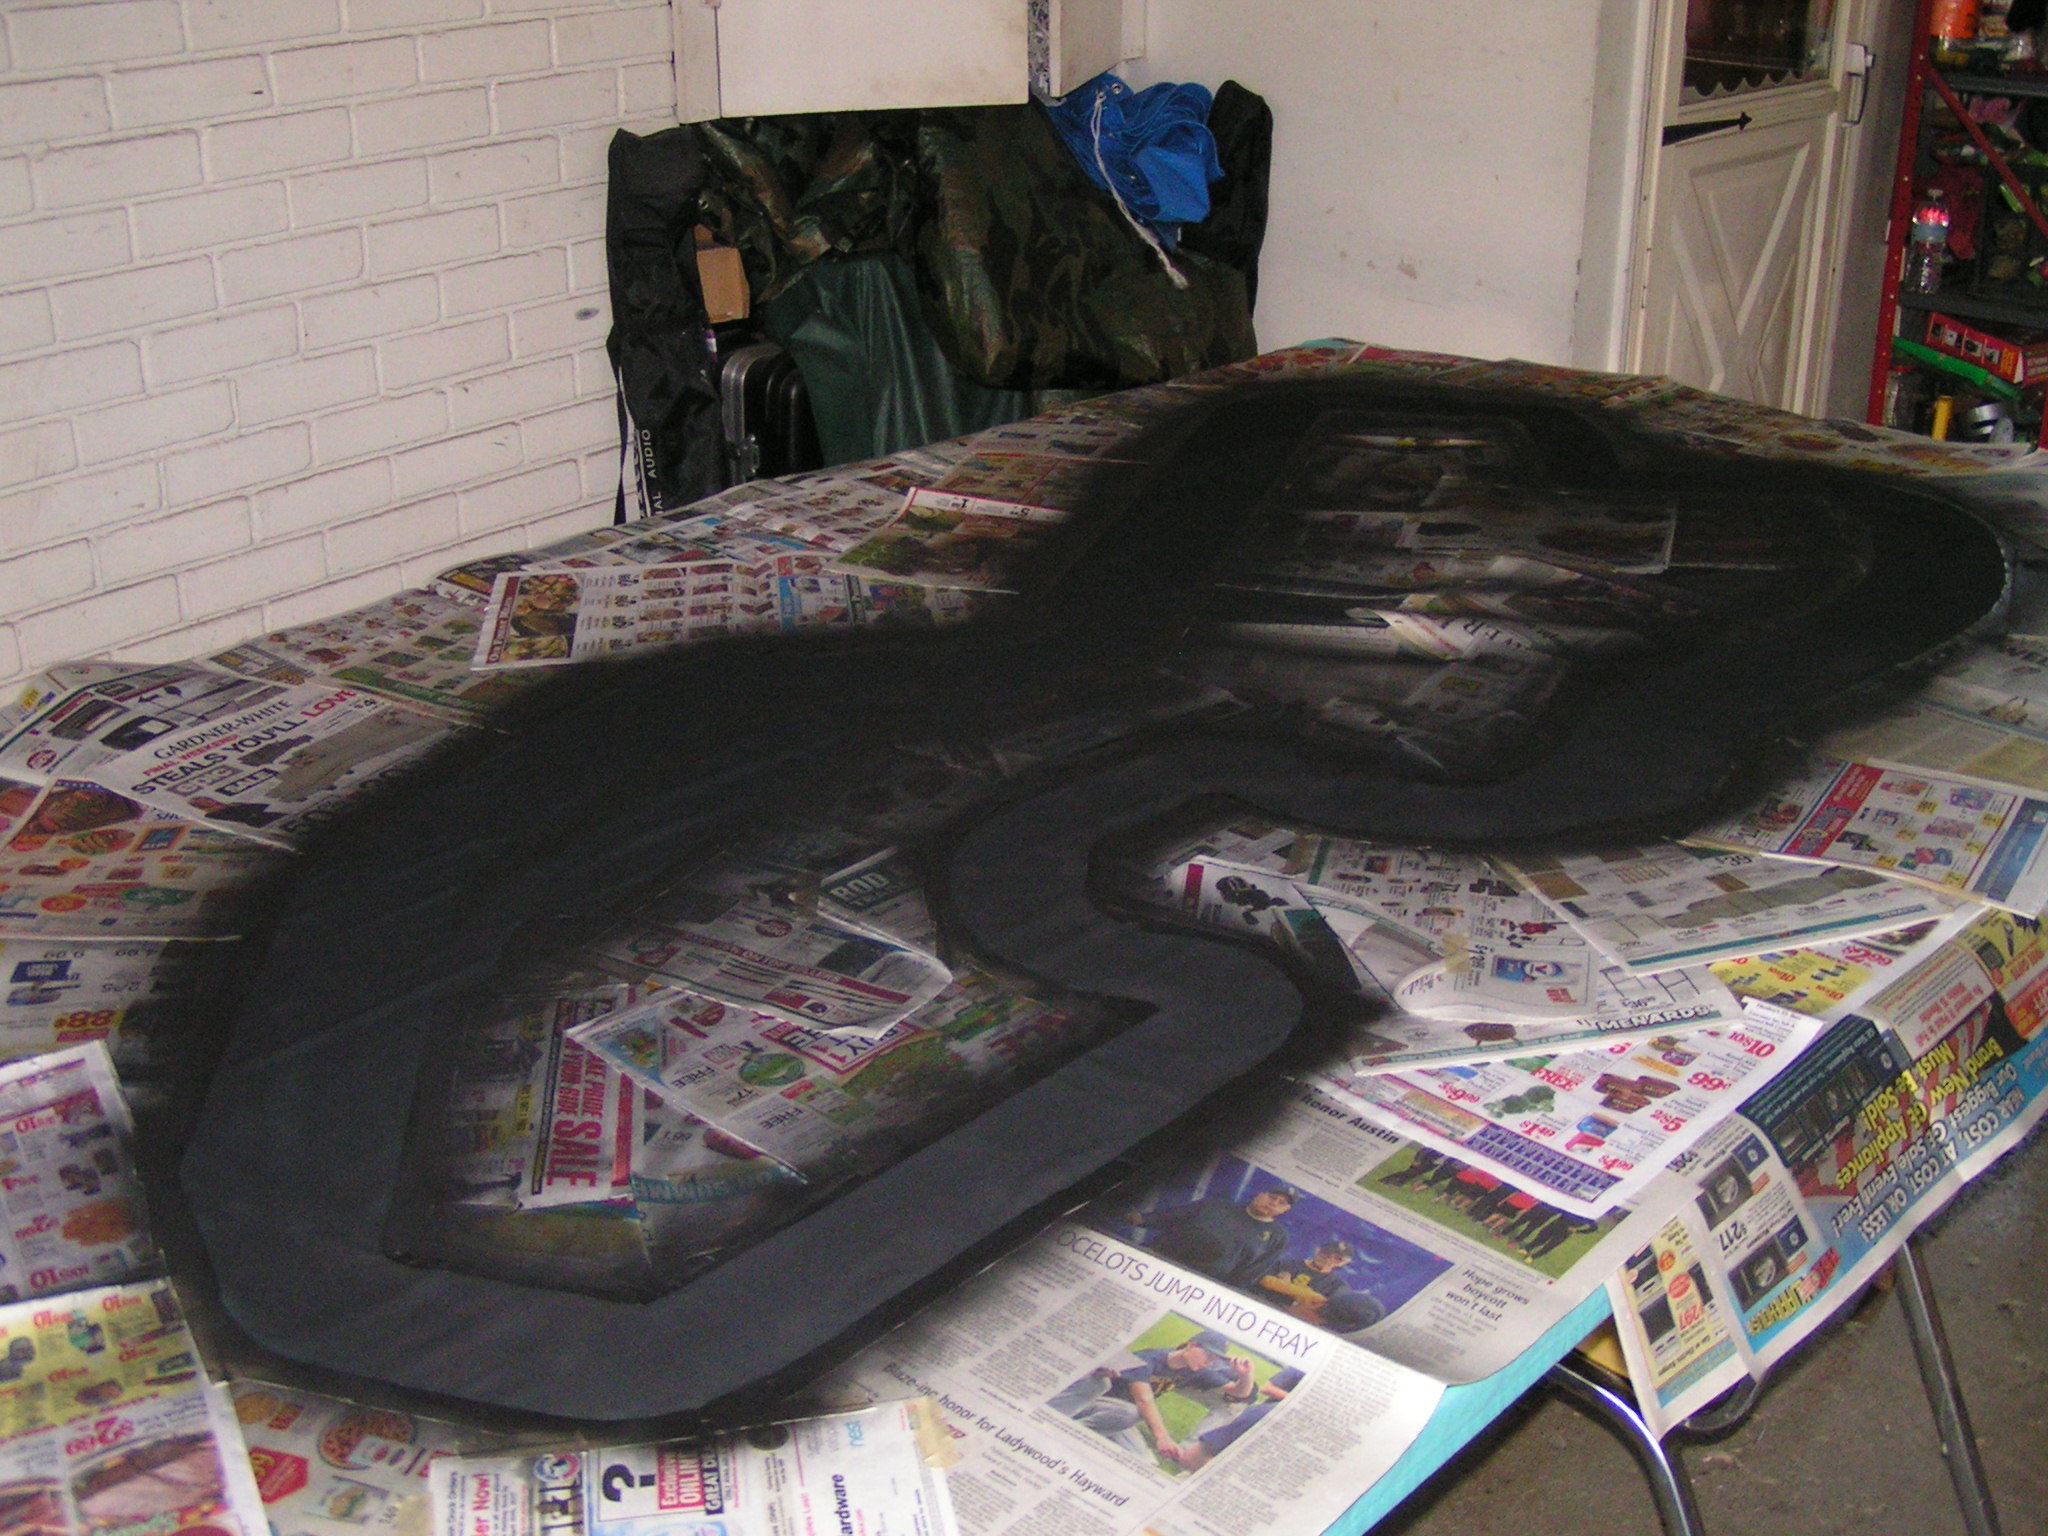
The track after several coats of paint.
Let the coats of paint dry enough to where you are satisfied with the results, then remove all of the masking. I suggest letting the paint dry at least a full day before applying any other markings to the track.
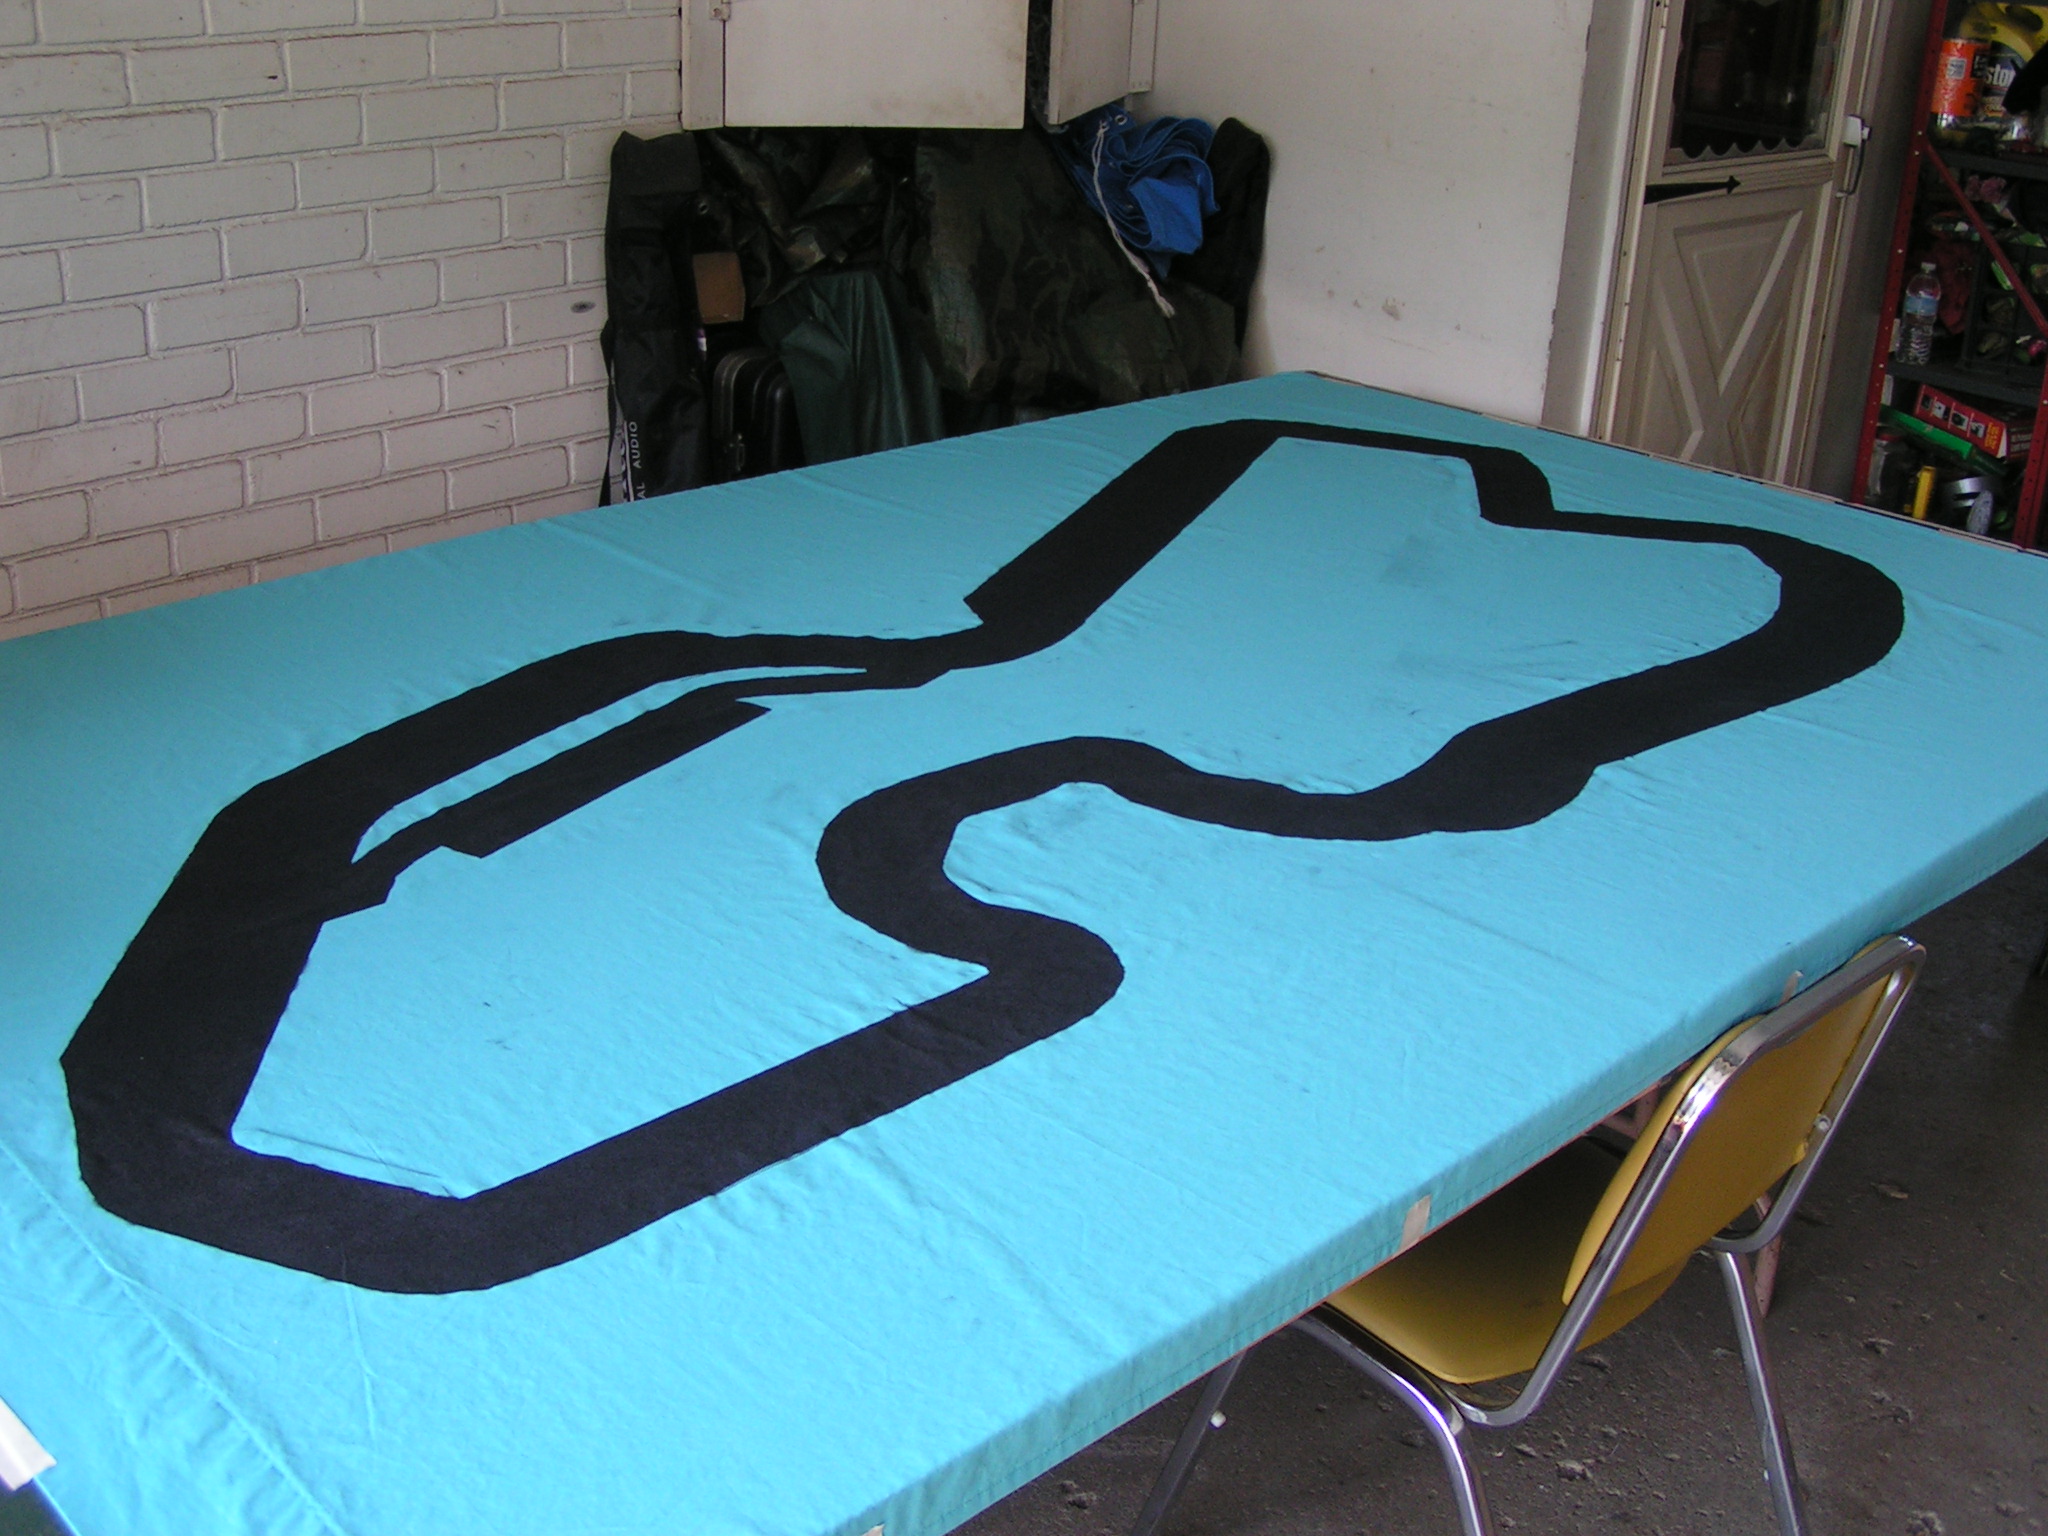
Masking has been removed.
There was a little bit of spray paint that “bled” onto the sheet, but it’s not too bad. C’est la vie, as they would say in France.
Next, retrieve the track templates you saved, and place them on the track where they belong (i.e., put the turn 1 template where turn 1 should go, etc).
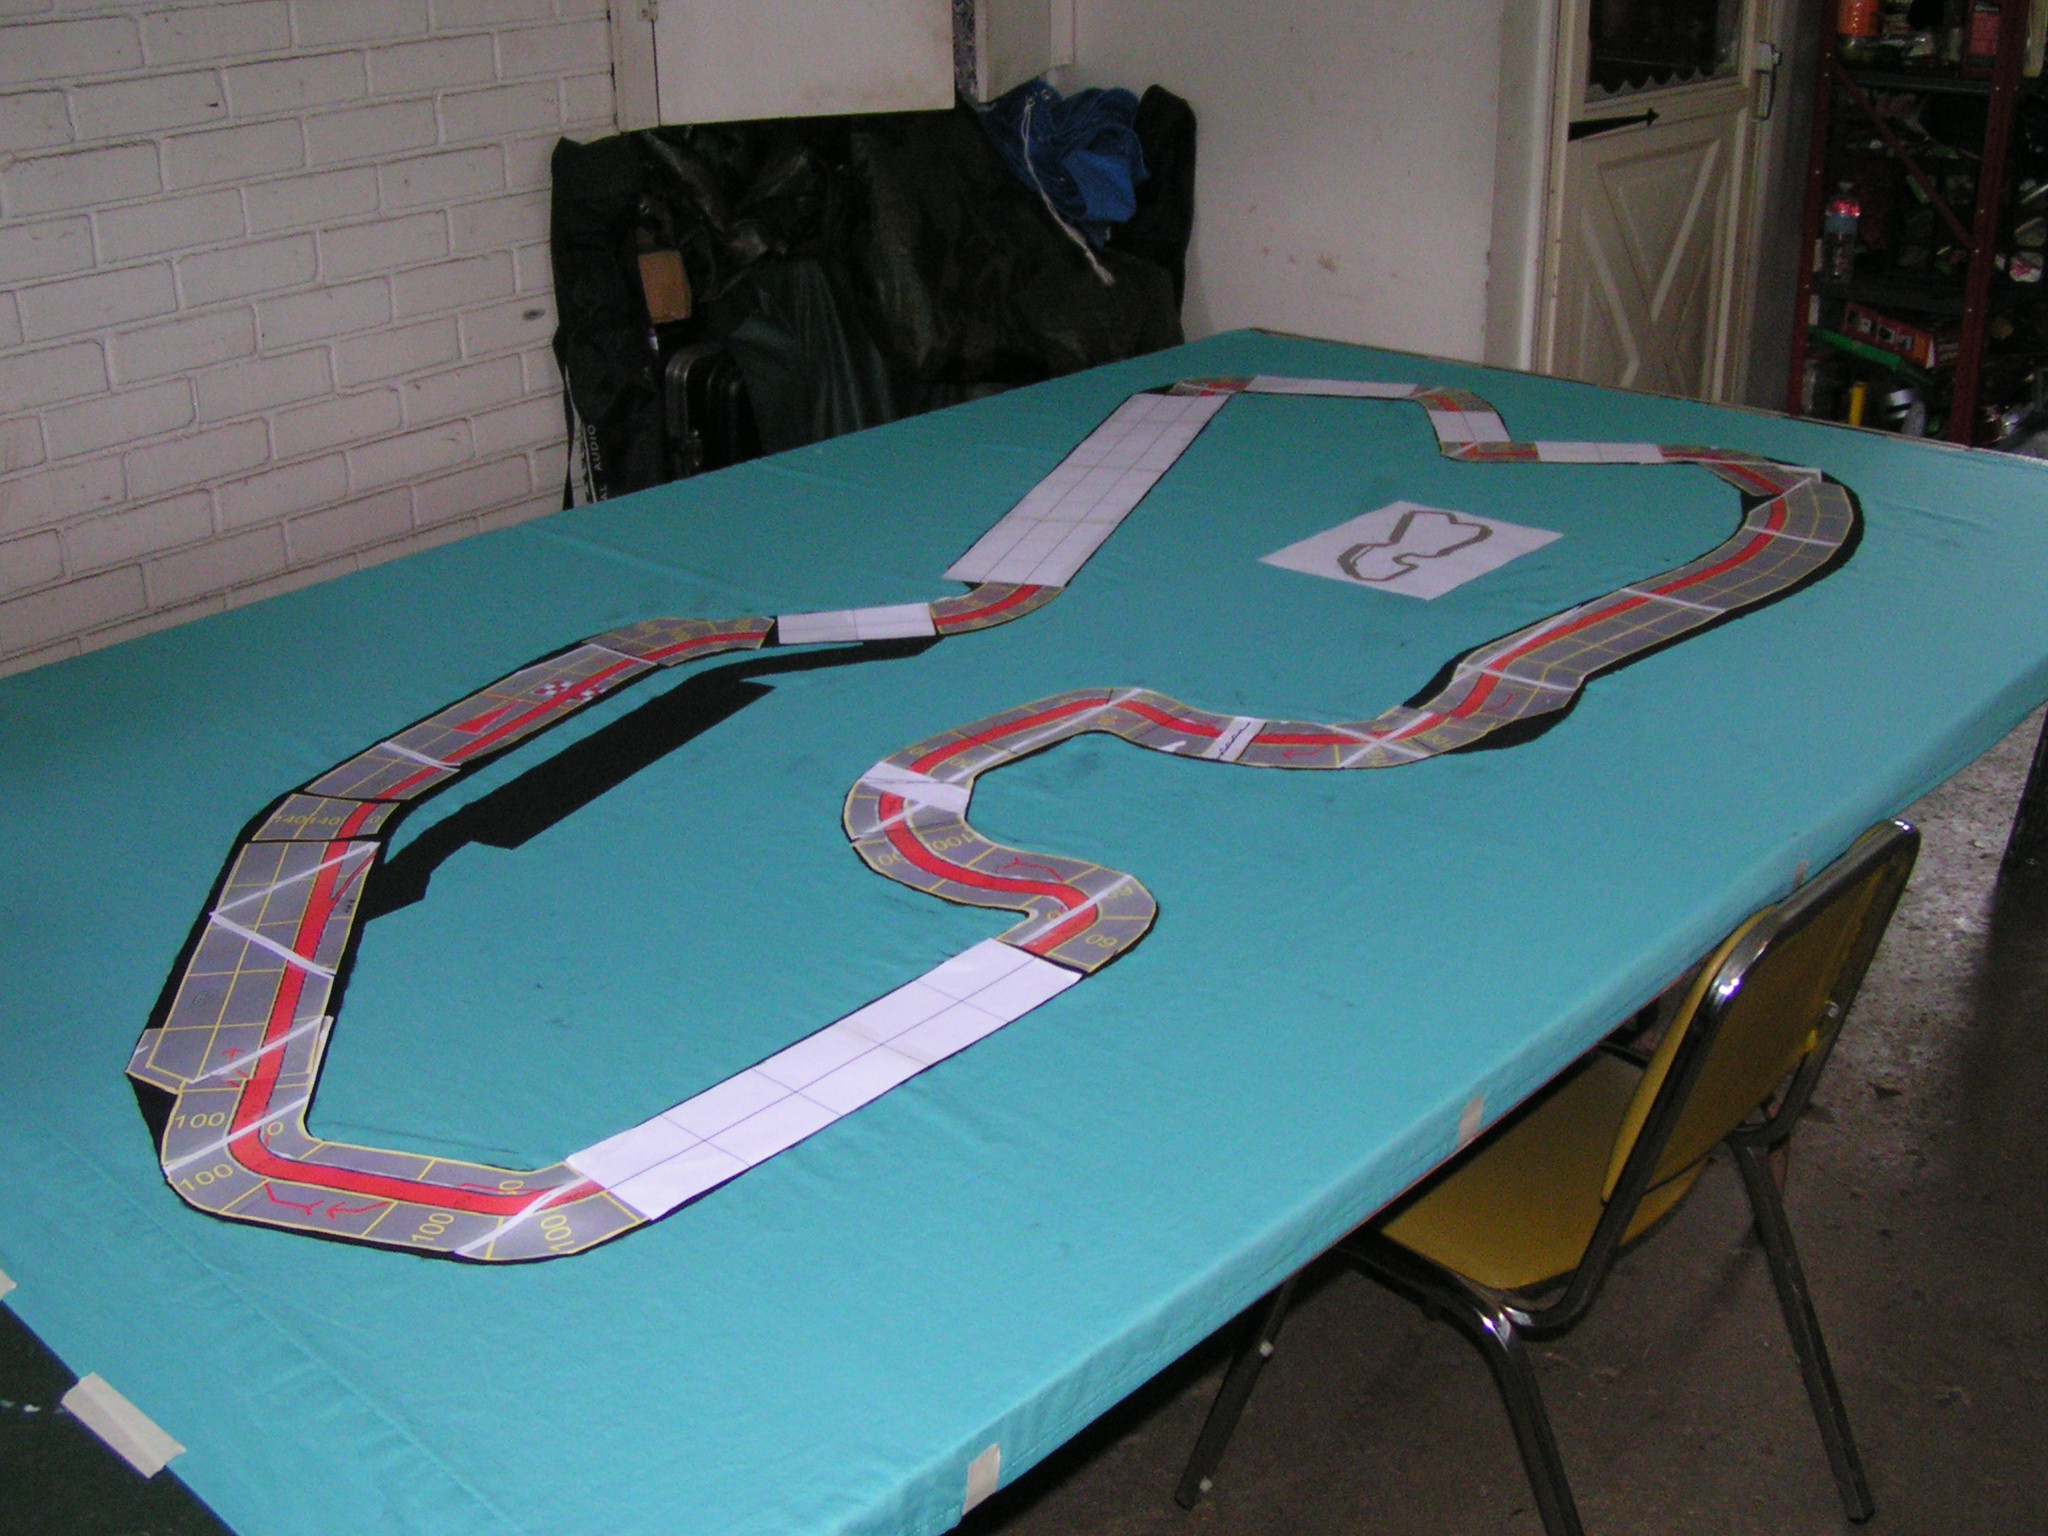
Track templates are back on the track.
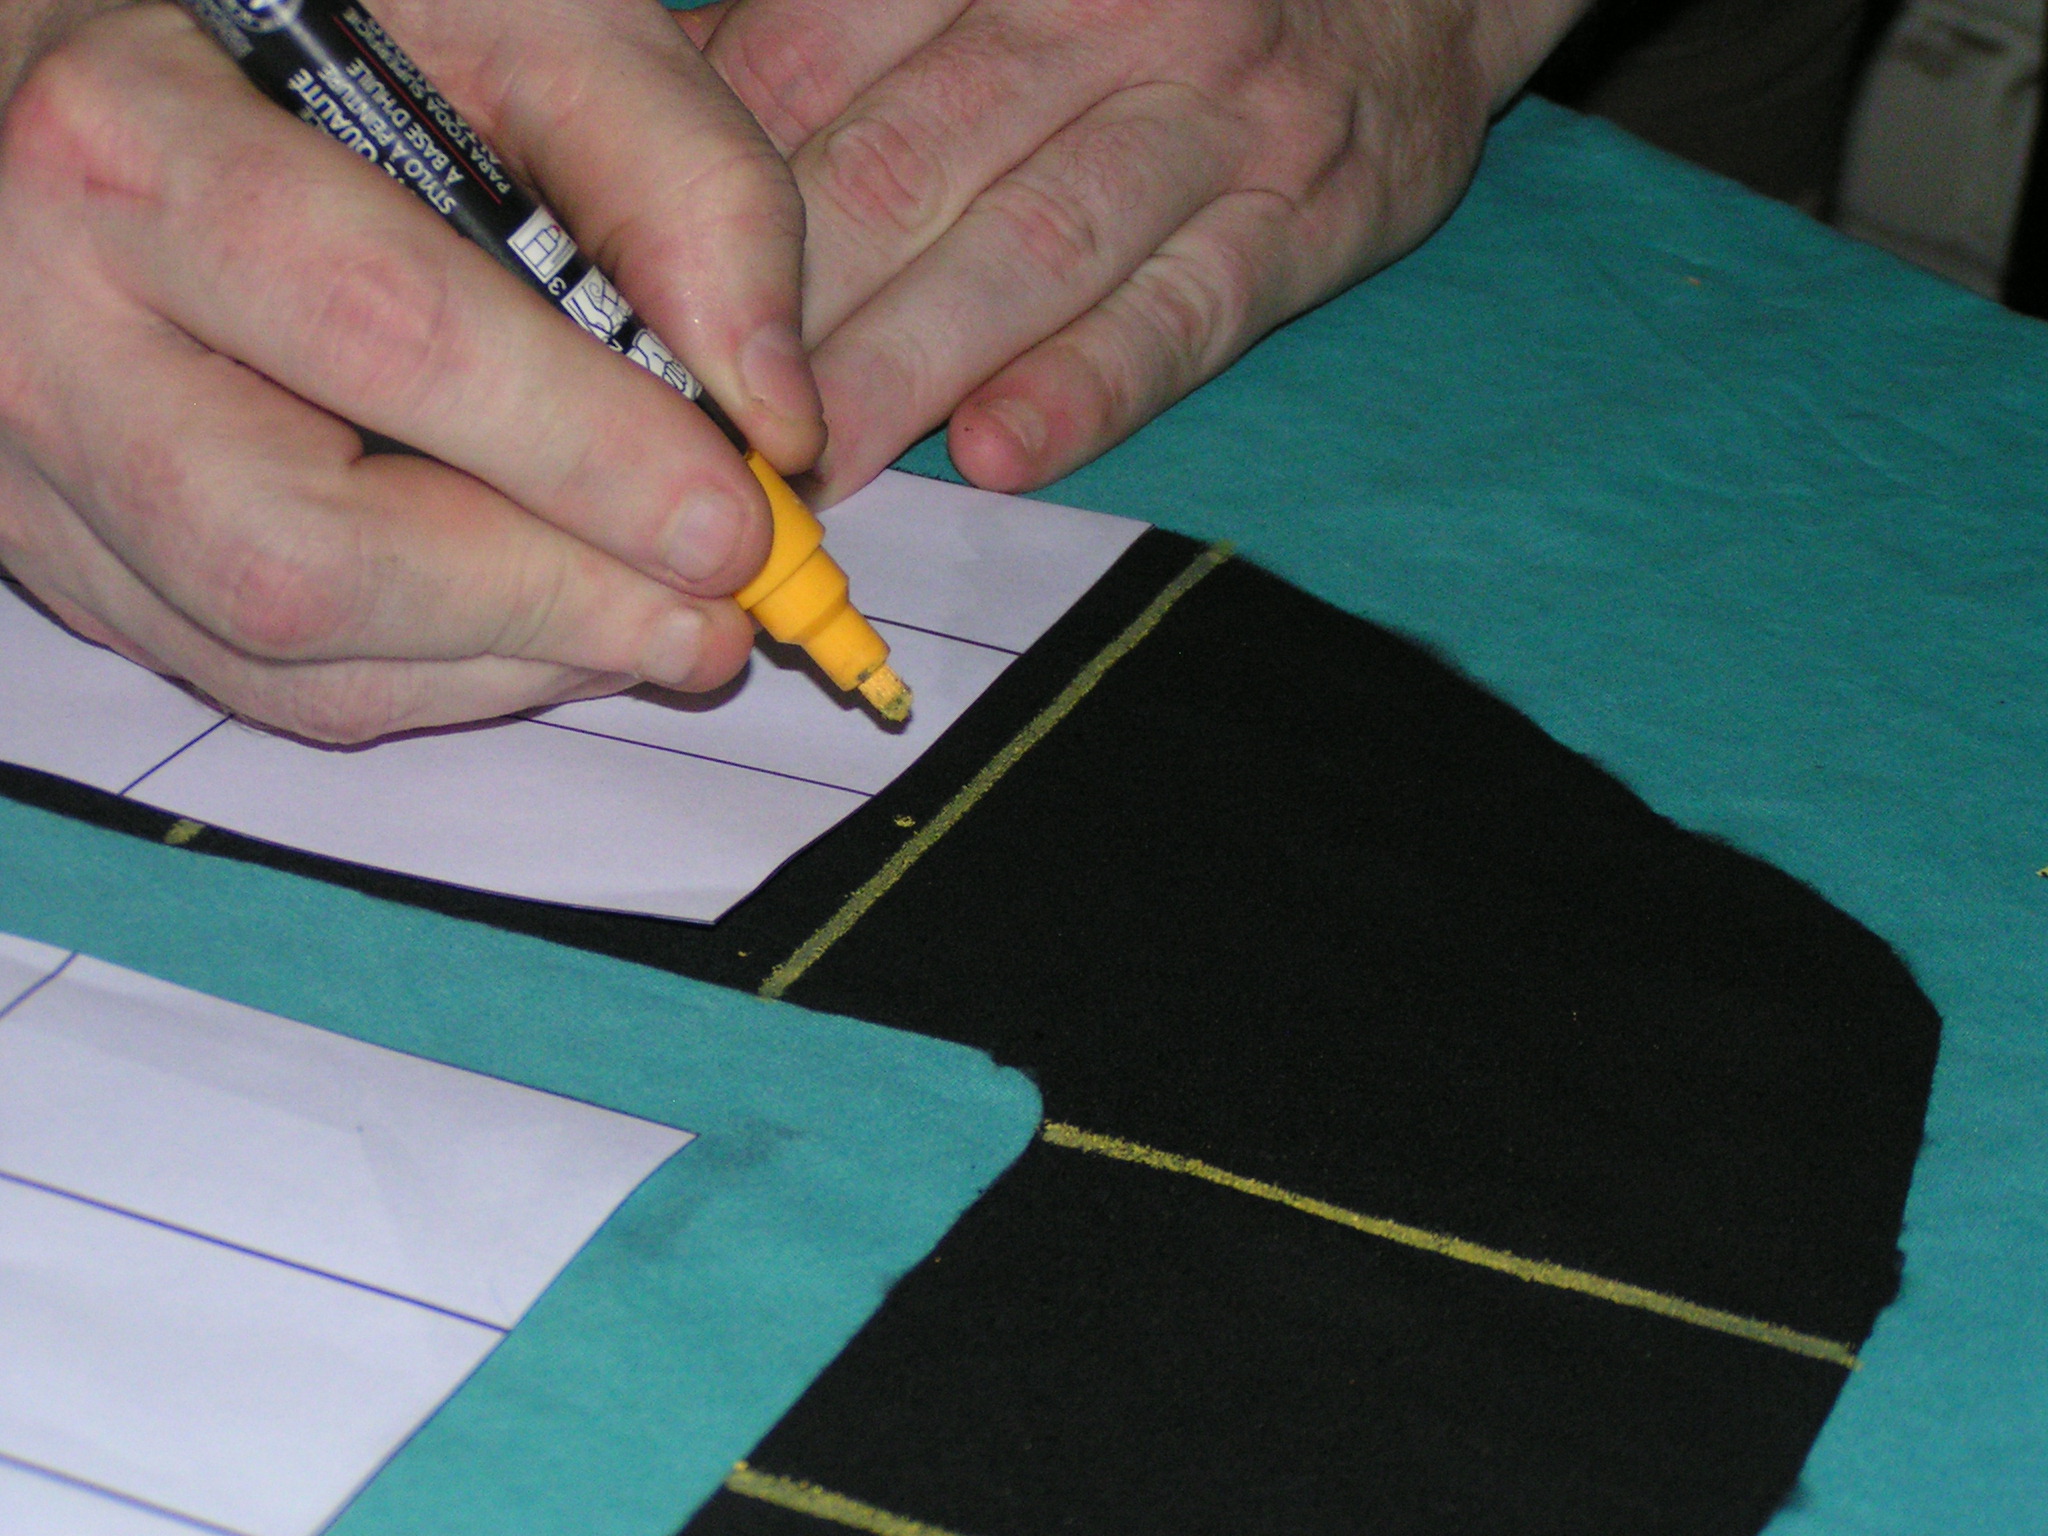
When you are satisfied with the track template placement, use your templates to mark where the horizontal lane lines will go to divide the track spaces. You should use a pencil to make “tick marks” on the sheet, just inside and outside the track. Then make tick marks with your yellow paint marker on the edges of the track. Note: You should only mark the spaces on straight sections at this time. Leave the corners and “curvy” straights for a little later.
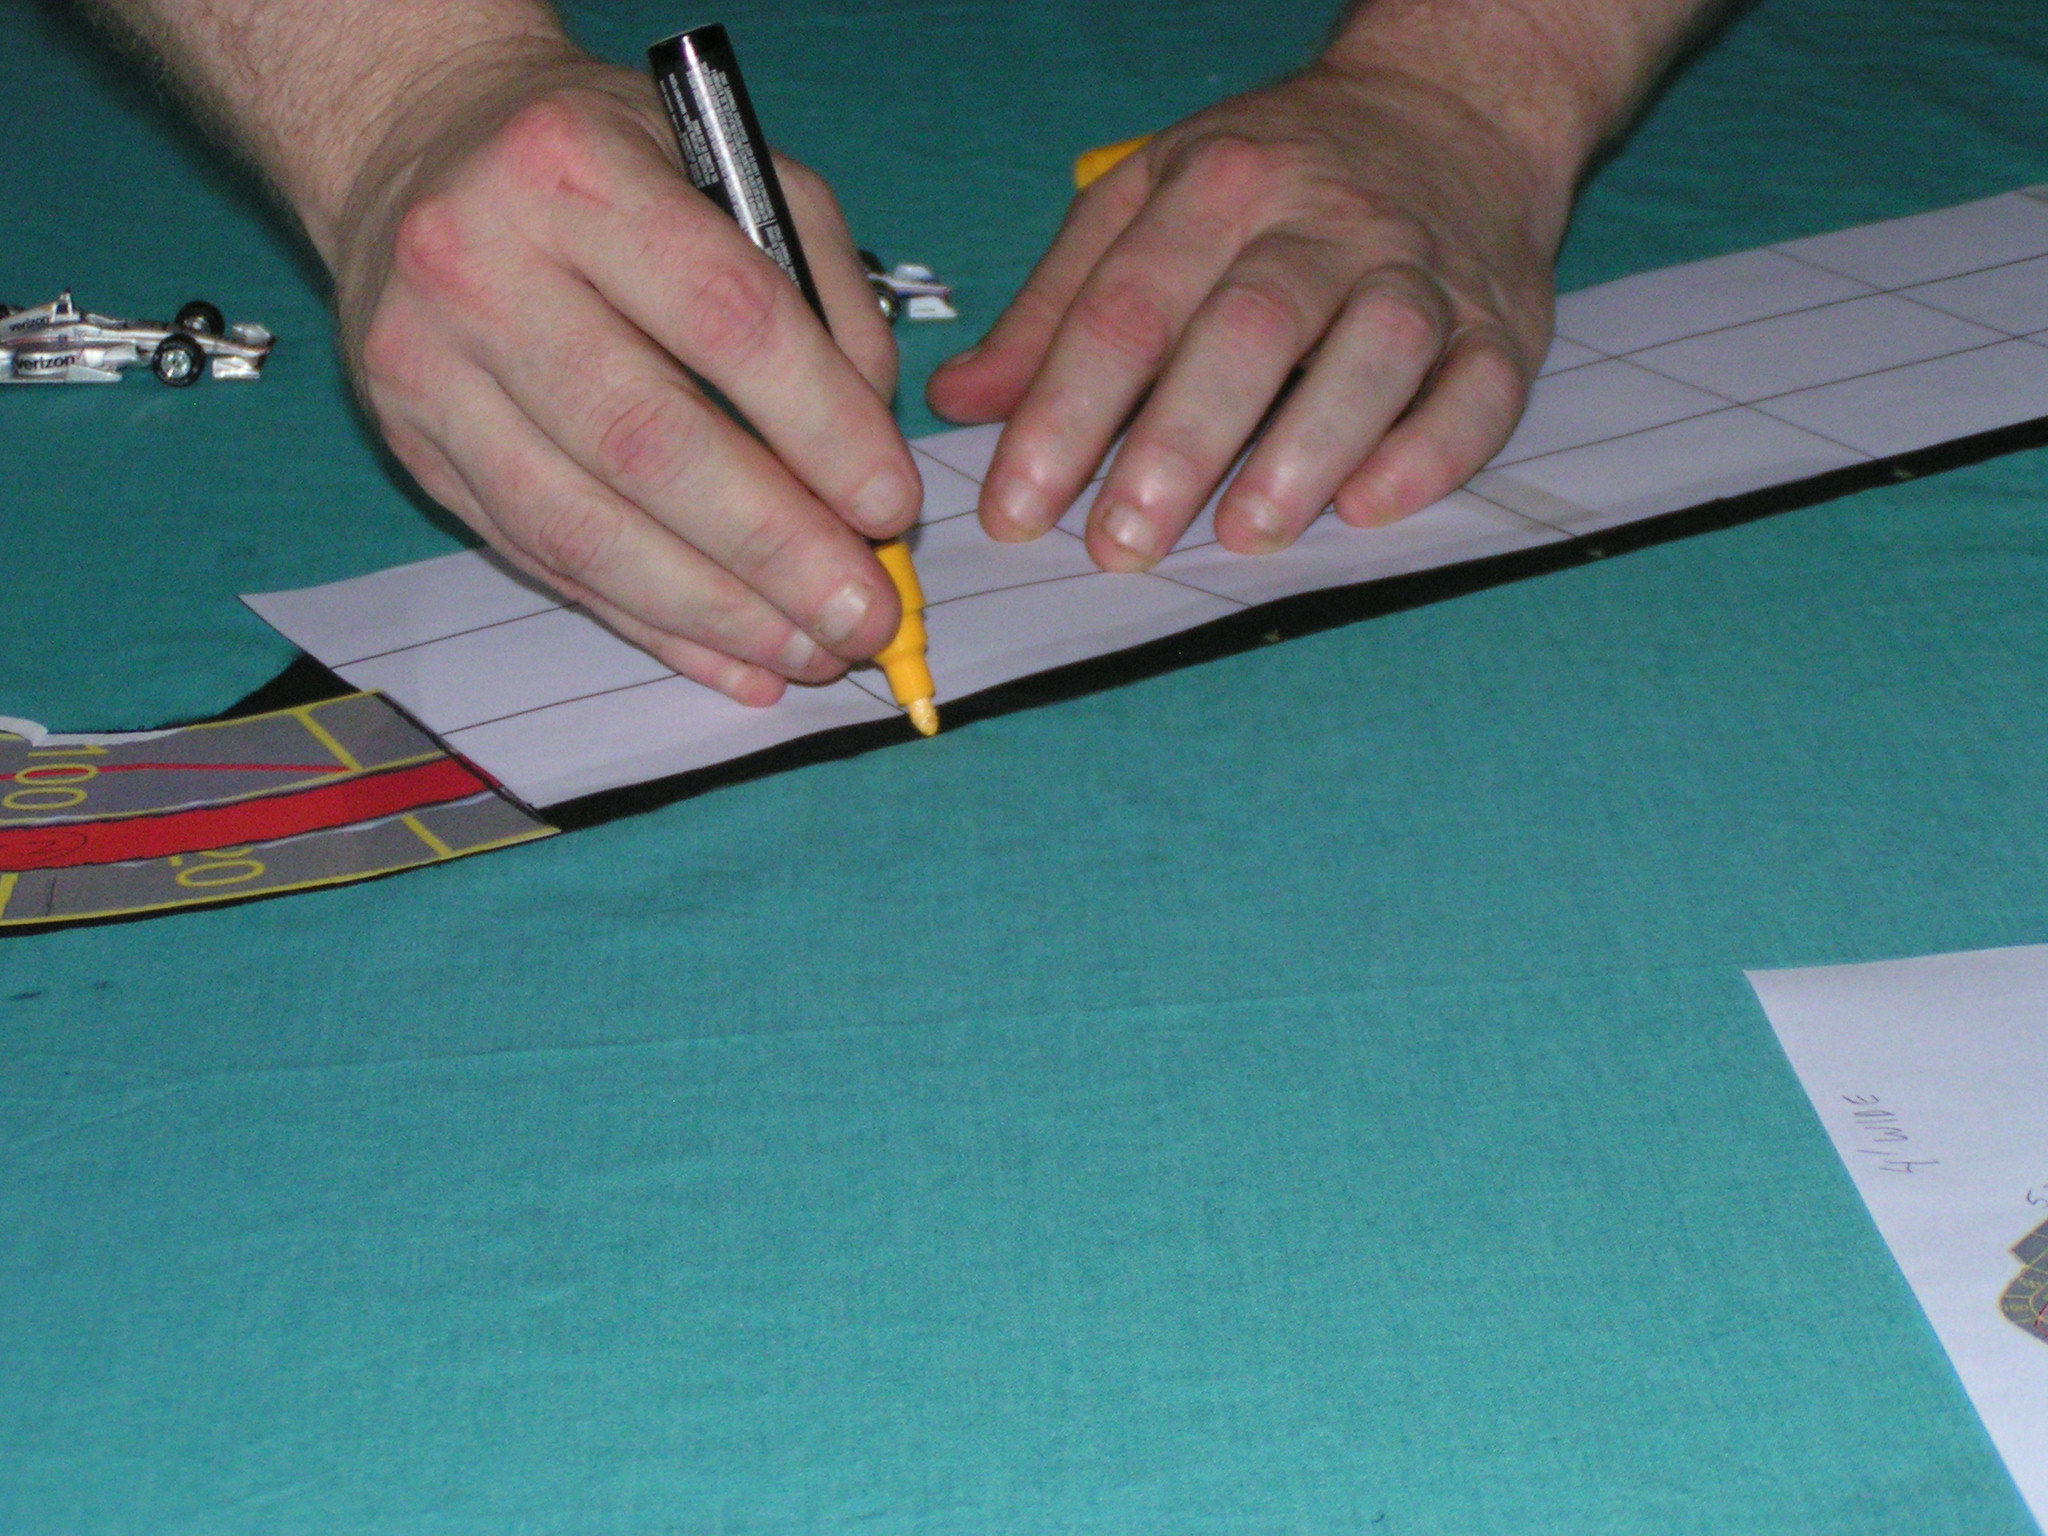
Tick marking the horizontal lines.
Then remove the template and use a ruler/straight-edge to make straight horizontal lines across the track with your yellow paint marker.
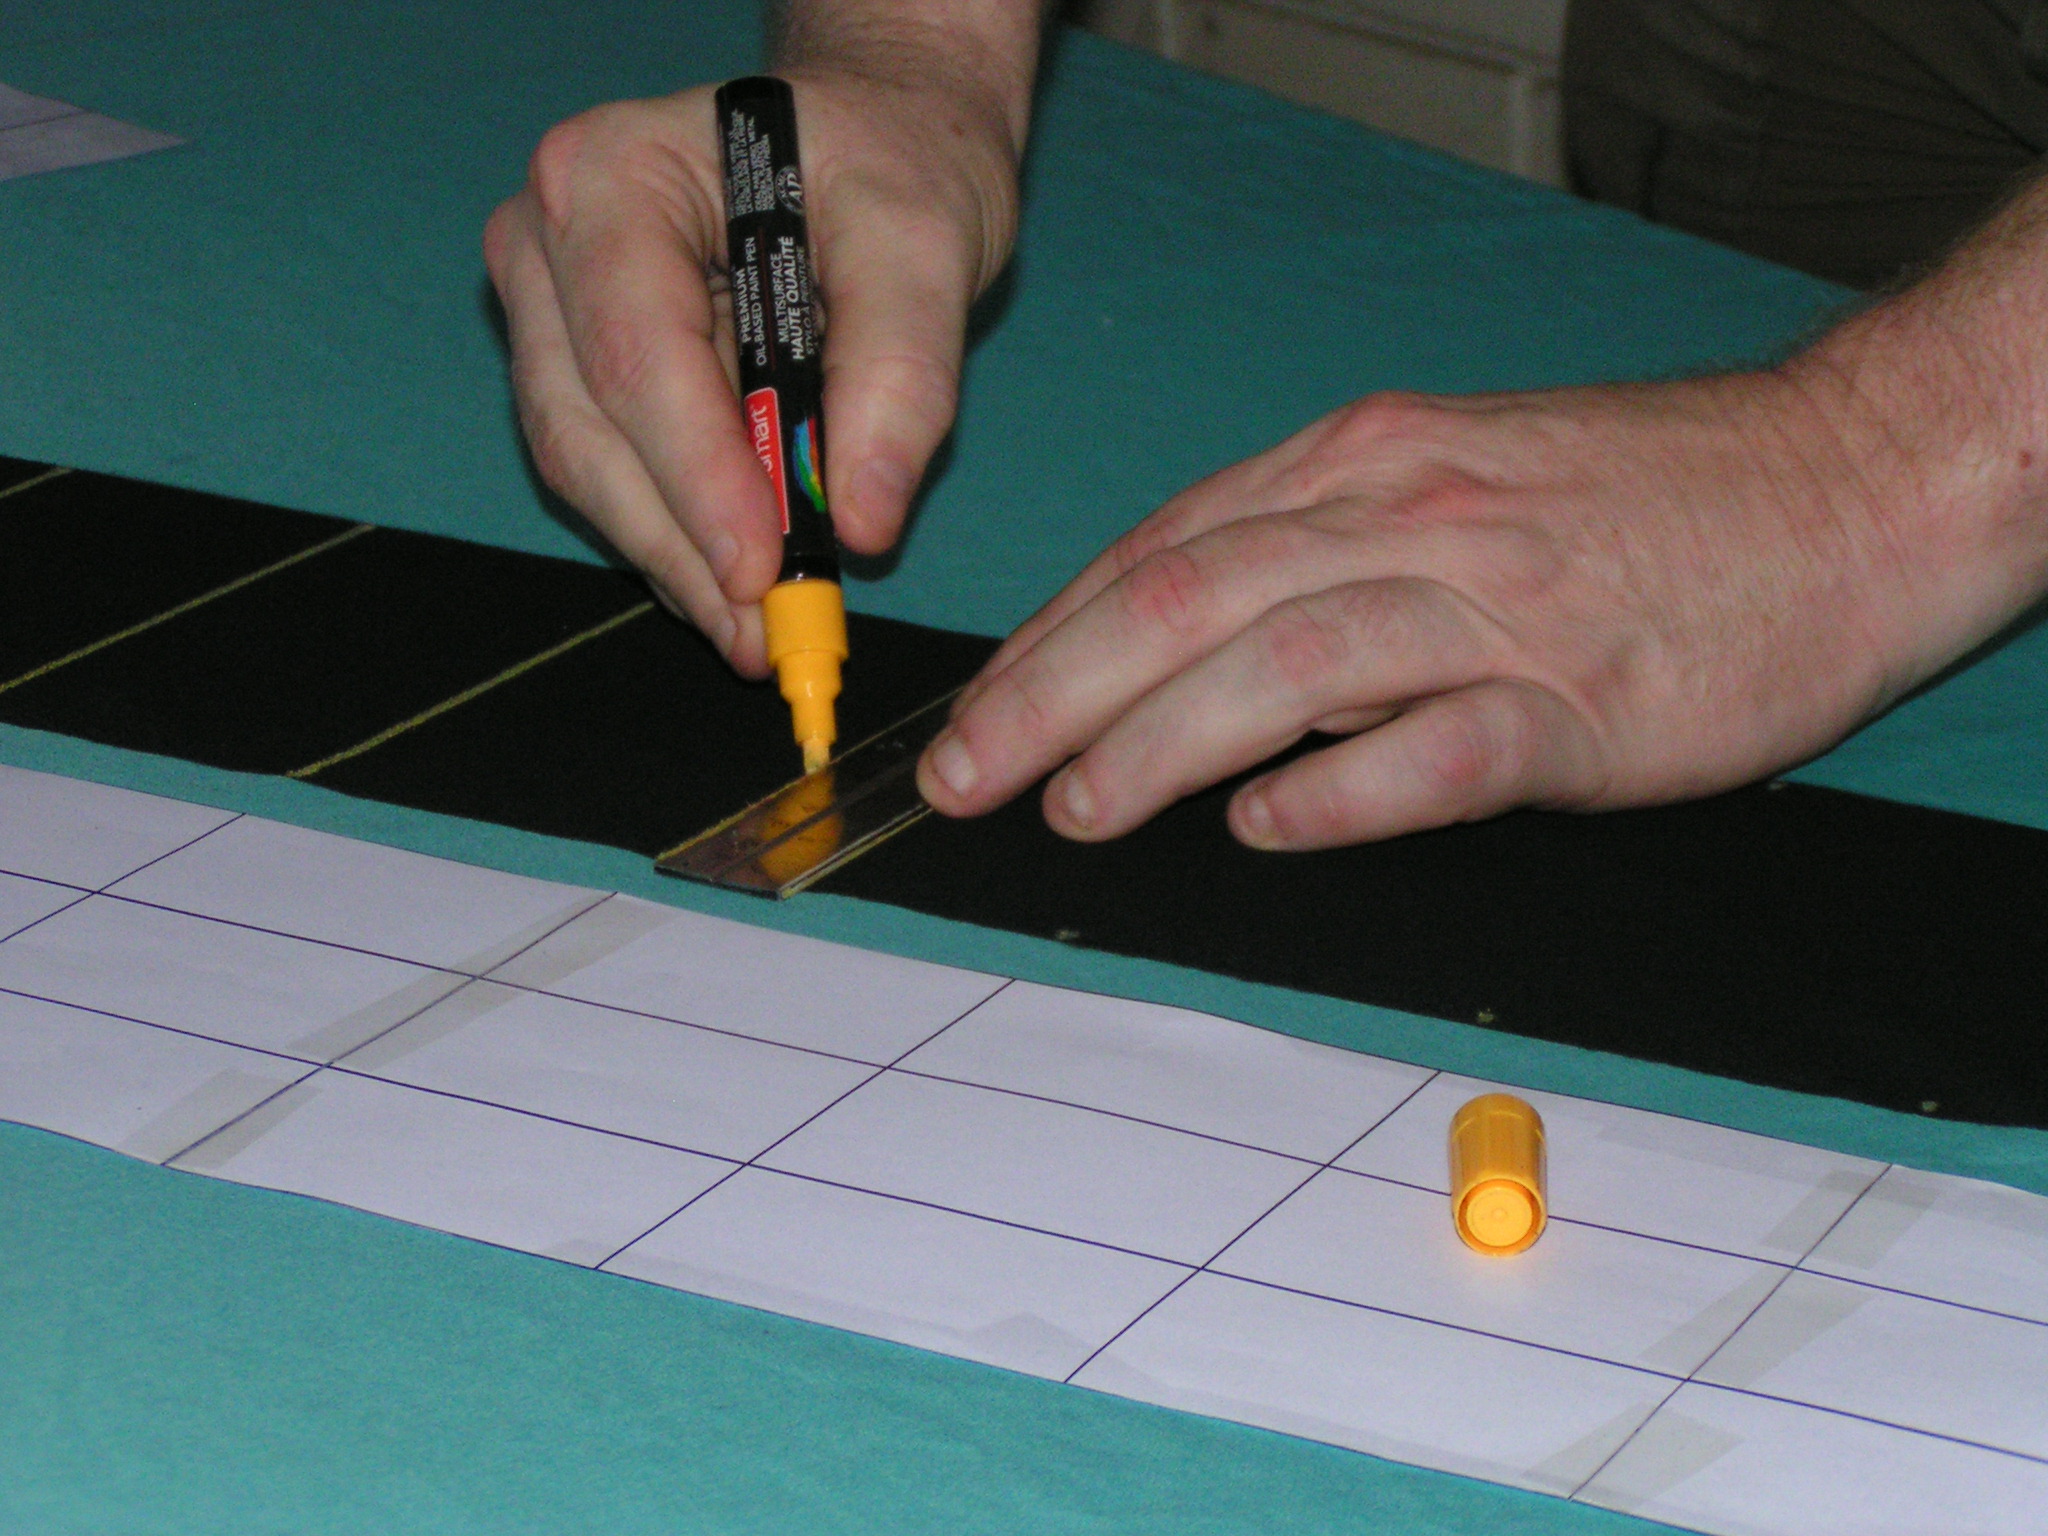
Marking the horizontal lines.
There are usually a few special cases for marking the horizontal lines. On the Belle Isle track, the southeast “straightaway” actually has a gentle curve to its right when it starts outside of turn 6, and then it kinks a bit to its left just before turn 7. See the track diagram:
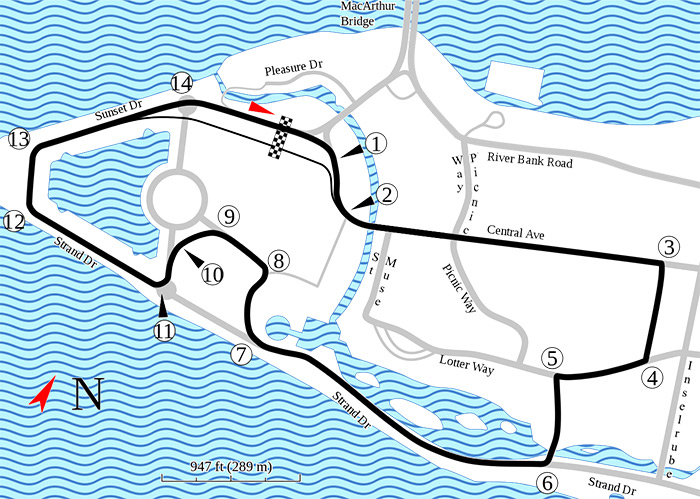
The Belle Isle track layout from Wikipedia.
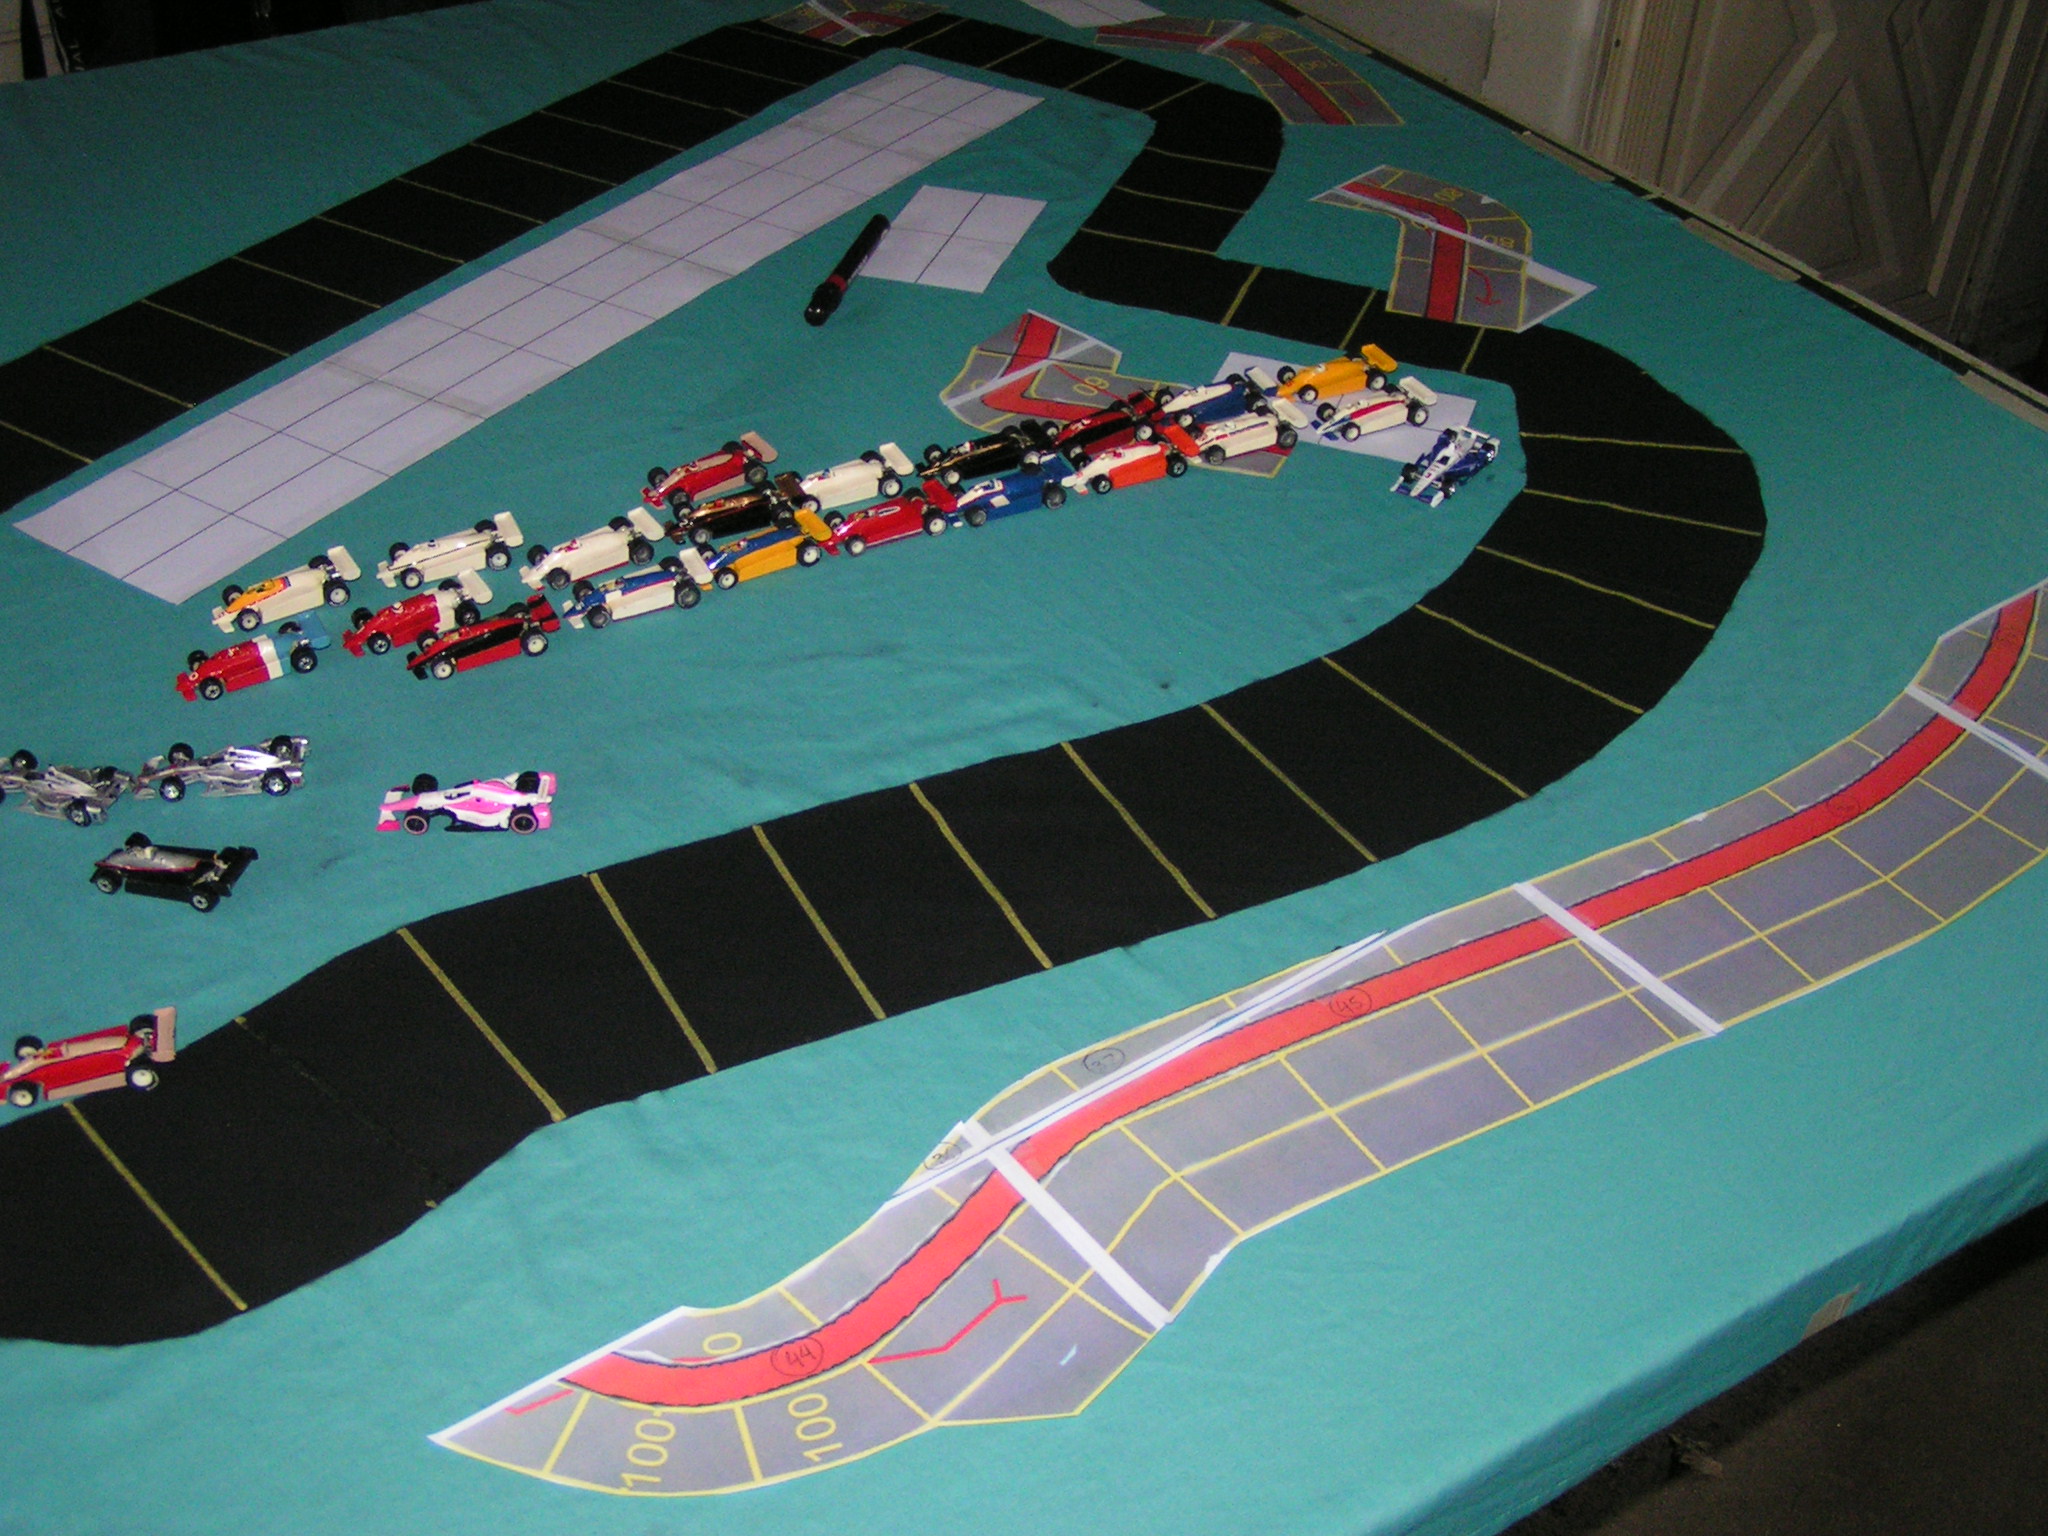
It was difficult to layout the horizontal spaces using a ruler or tape measure, so finally I just placed three rows of 1:64 scale cars on the track (with 12 cars in each row).
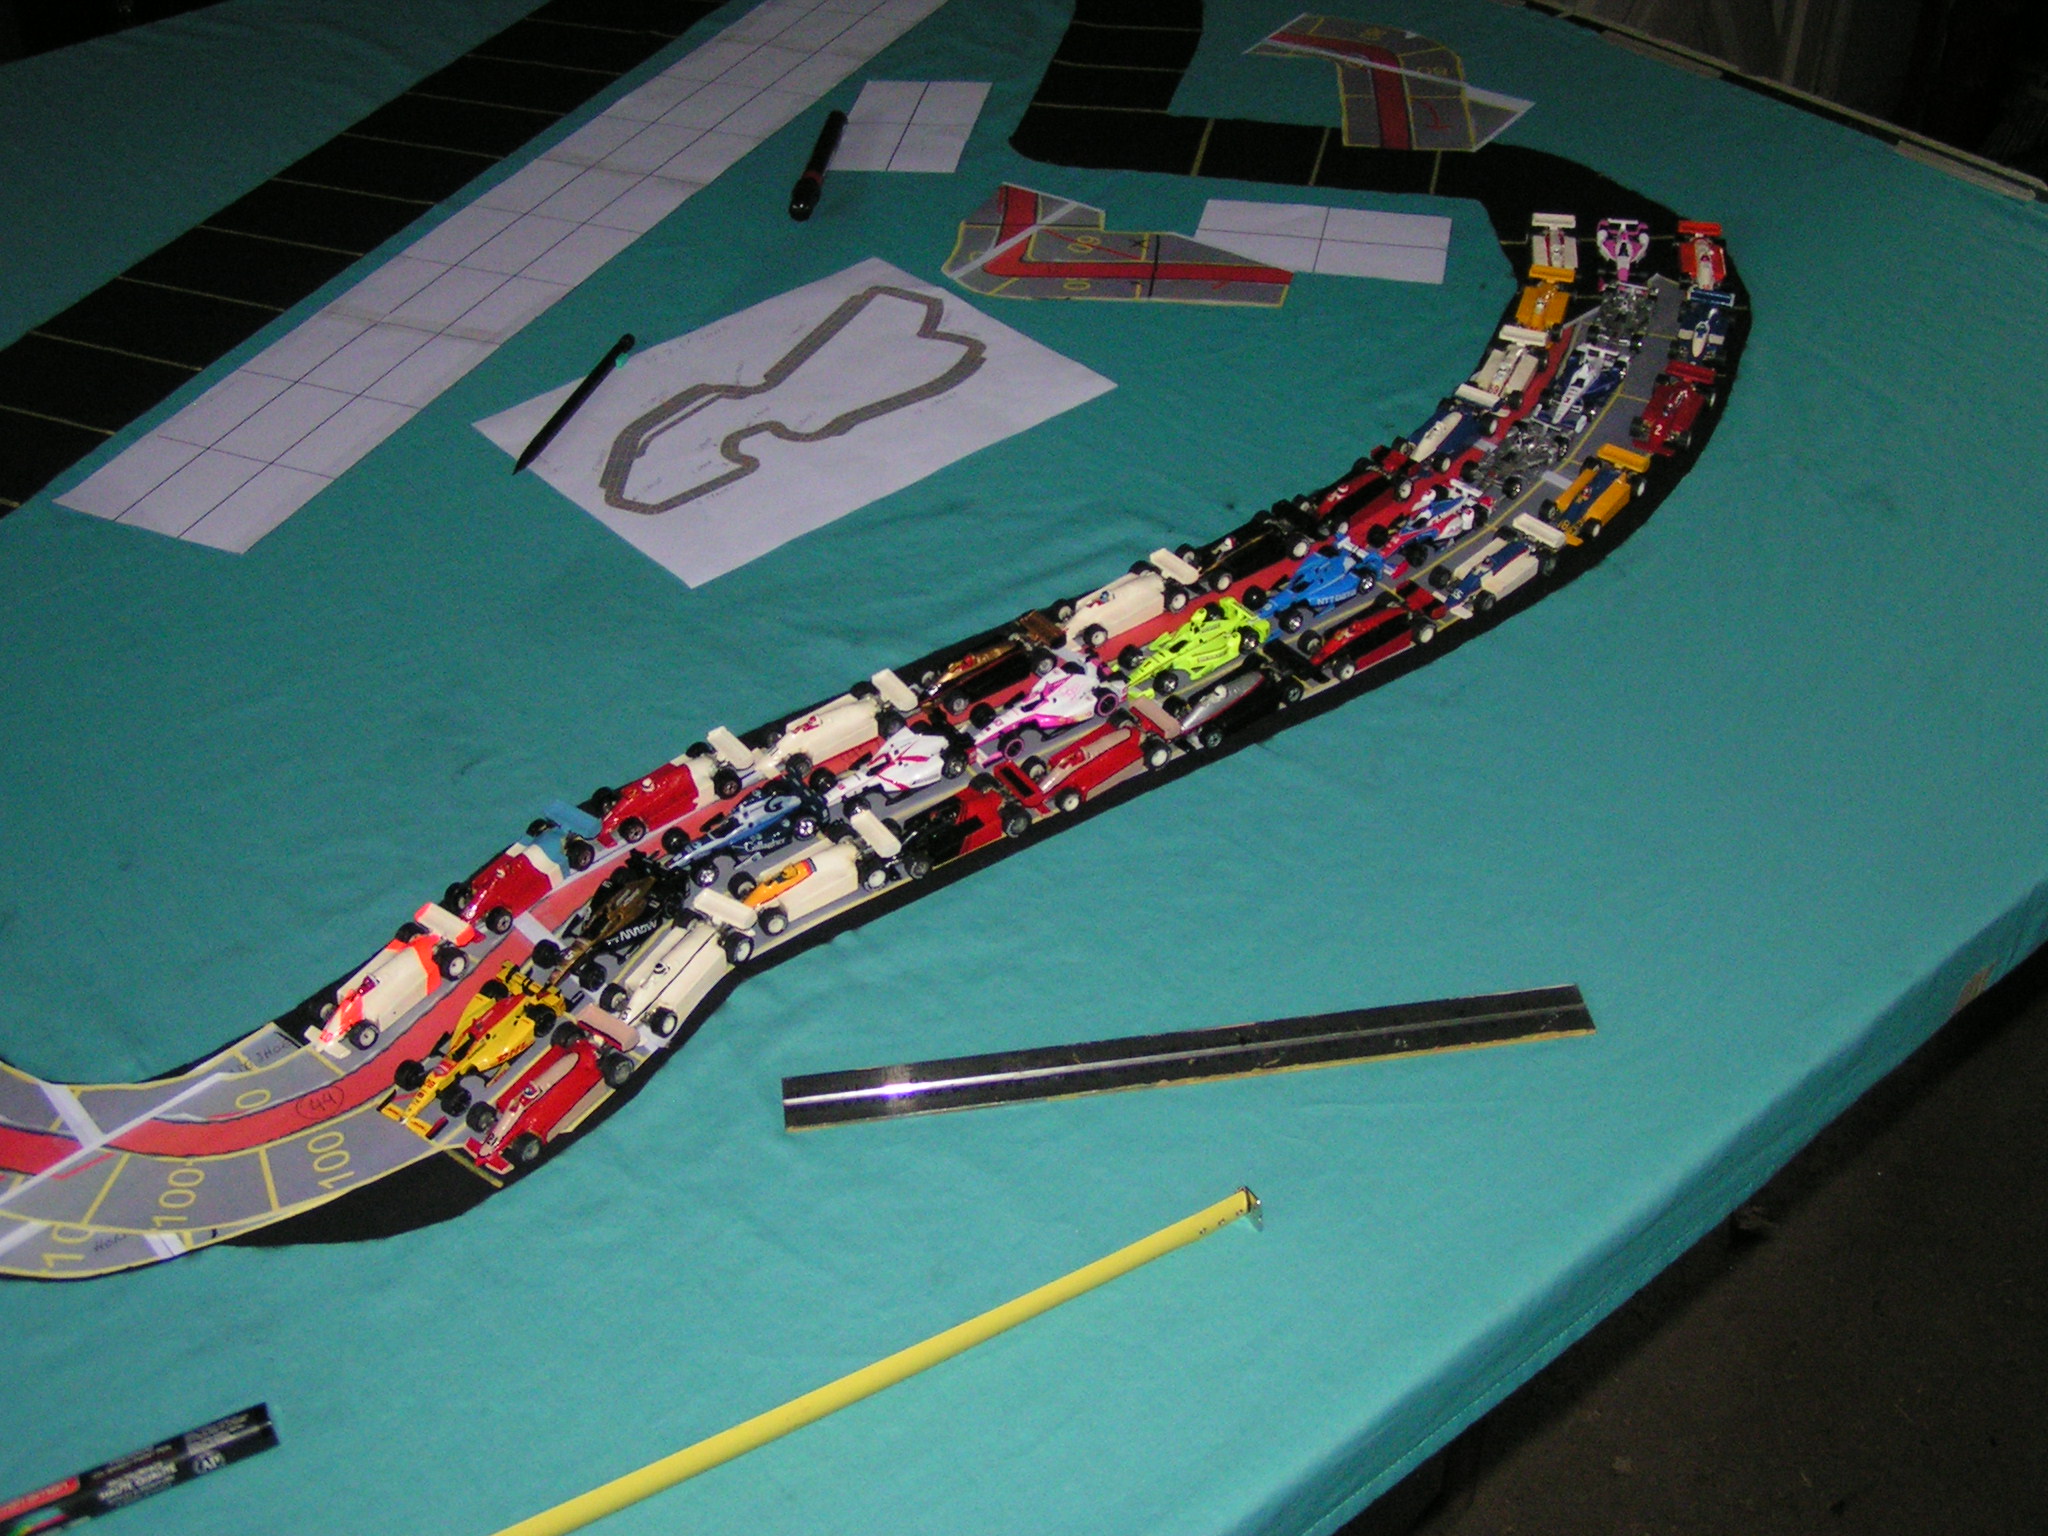
Using scale cars to determine track spaces on a curvy section of the track.
There needed to be 12 spaces in this curvy section, so lining up the cars on the track template helped with initial alignment, but then I moved the cars a little until the spacing looked right. I then made tick marks with the yellow paint marker on both sides of the track, then removed the cars and the track template, then used a straight-edge to paint the horizontal lines in this section of the track.
Horizontal lines are painted on the curvy section of the track.
Note that a yellow line is missing in the left side of the above picture. I still wasn’t satisfied with where I had painted the yellow line, so then later I went over it with the black paint marker, effectively erasing that yellow line. Later, when the black paint dried, I re-painted the yellow line in a slightly different location.

Horizontal lines are painted on the track.
Give the just painted yellow horizontal lines a little time to dry (so you don’t smear them by rubbing your hand across them in the next step), perhaps 15 to 30 minutes, then paint the lane divider lines. For straight sections, I usually use the straight section templates, and make tick marks where the lanes should be.
Placing tick marks where the lane lines will go.
Move the template down the track, making more tick marks every two or three spaces along the track. When you have marked that entire straight section of track, then use a straight-edge and mark the yellow lane lines. When you have finished a straight section, it should look something like this:

Lane lines have been added to a straight section.
After marking the lane lines on all of the straight sections of the track, we have to add lane lines to corners and other curvy parts of the track. I use the ruler to make tick marks along the curves, then draw the actual lane lines “freehand.” It’s not that difficult to draw an arc. Just place the side of your hand on the table, and slowly “connect the dots.” To make the tick marks on this “3-wide” section of track, I marked ticks at 1.75″ and at 3.5″ from one side of the track.
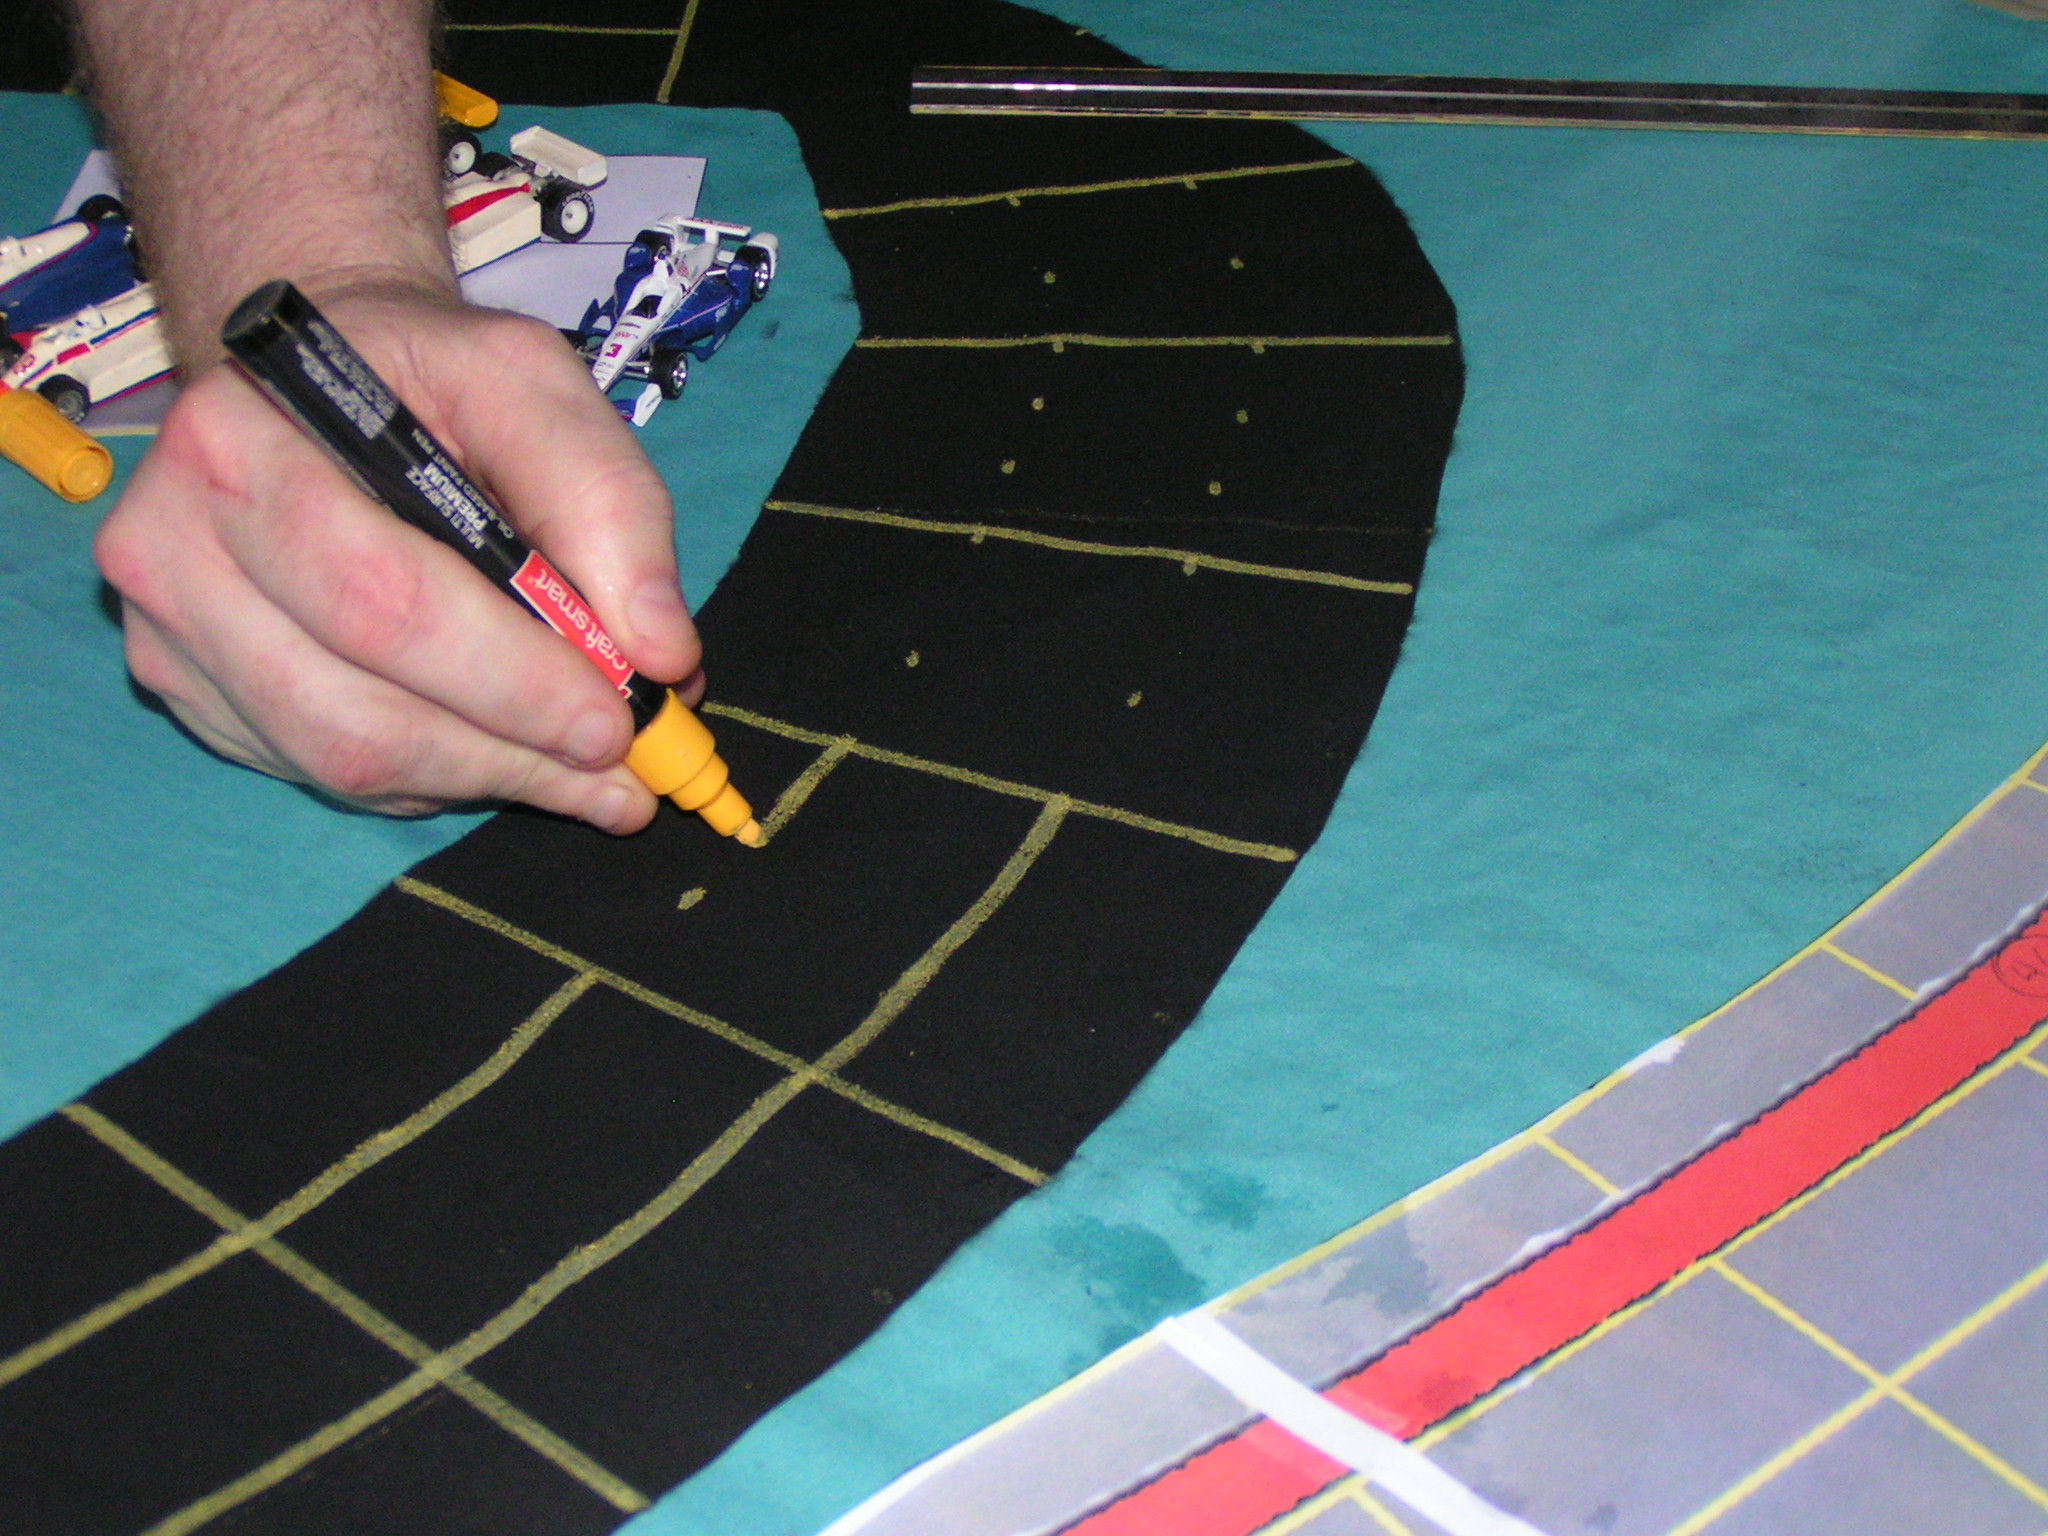
Drawing lane lines on curvy parts of the track.
In the above picture you can see me drawing a slightly curved lane line. If you are not sure about this step, you could always practice on some scrap material before you draw on your track. But don’t worry about mistakes, because you can always use your black paint marker to “erase” mistakes you drew with the yellow marker!
Now, some of the corners have one space in their inside lane, and two spaces in the outside lane. This means we need to draw a horizontal line to divide the spaces, but only in that outside lane. Which is why we had to mark all of the lane divider lines before we could divide the outside corner lanes into spaces. For this step, I once again like to use the actual cars I will use for races. Place the cars on the corner, and you can the best place to make that horizontal line. Make tick marks at either side of that outside lane, then remove the cars, and use a straight-edge to draw the line.
When all of the spaces have been marked on the track, it should look something like this:
All track spaces have been marked.
Start/Finish Line
Although I could have performed this next step earlier, I will now make a special start/finish line, to make it easily recognizable.
Most track spaces are marked with yellow lines, but to differentiate the start/finish line, I will use a white paint marker to create a sort of “checkered” line. Use a straight-edge, and draw “dots” across the width of the track where the start/finish line will go.
The start/finish line and starting spaces.
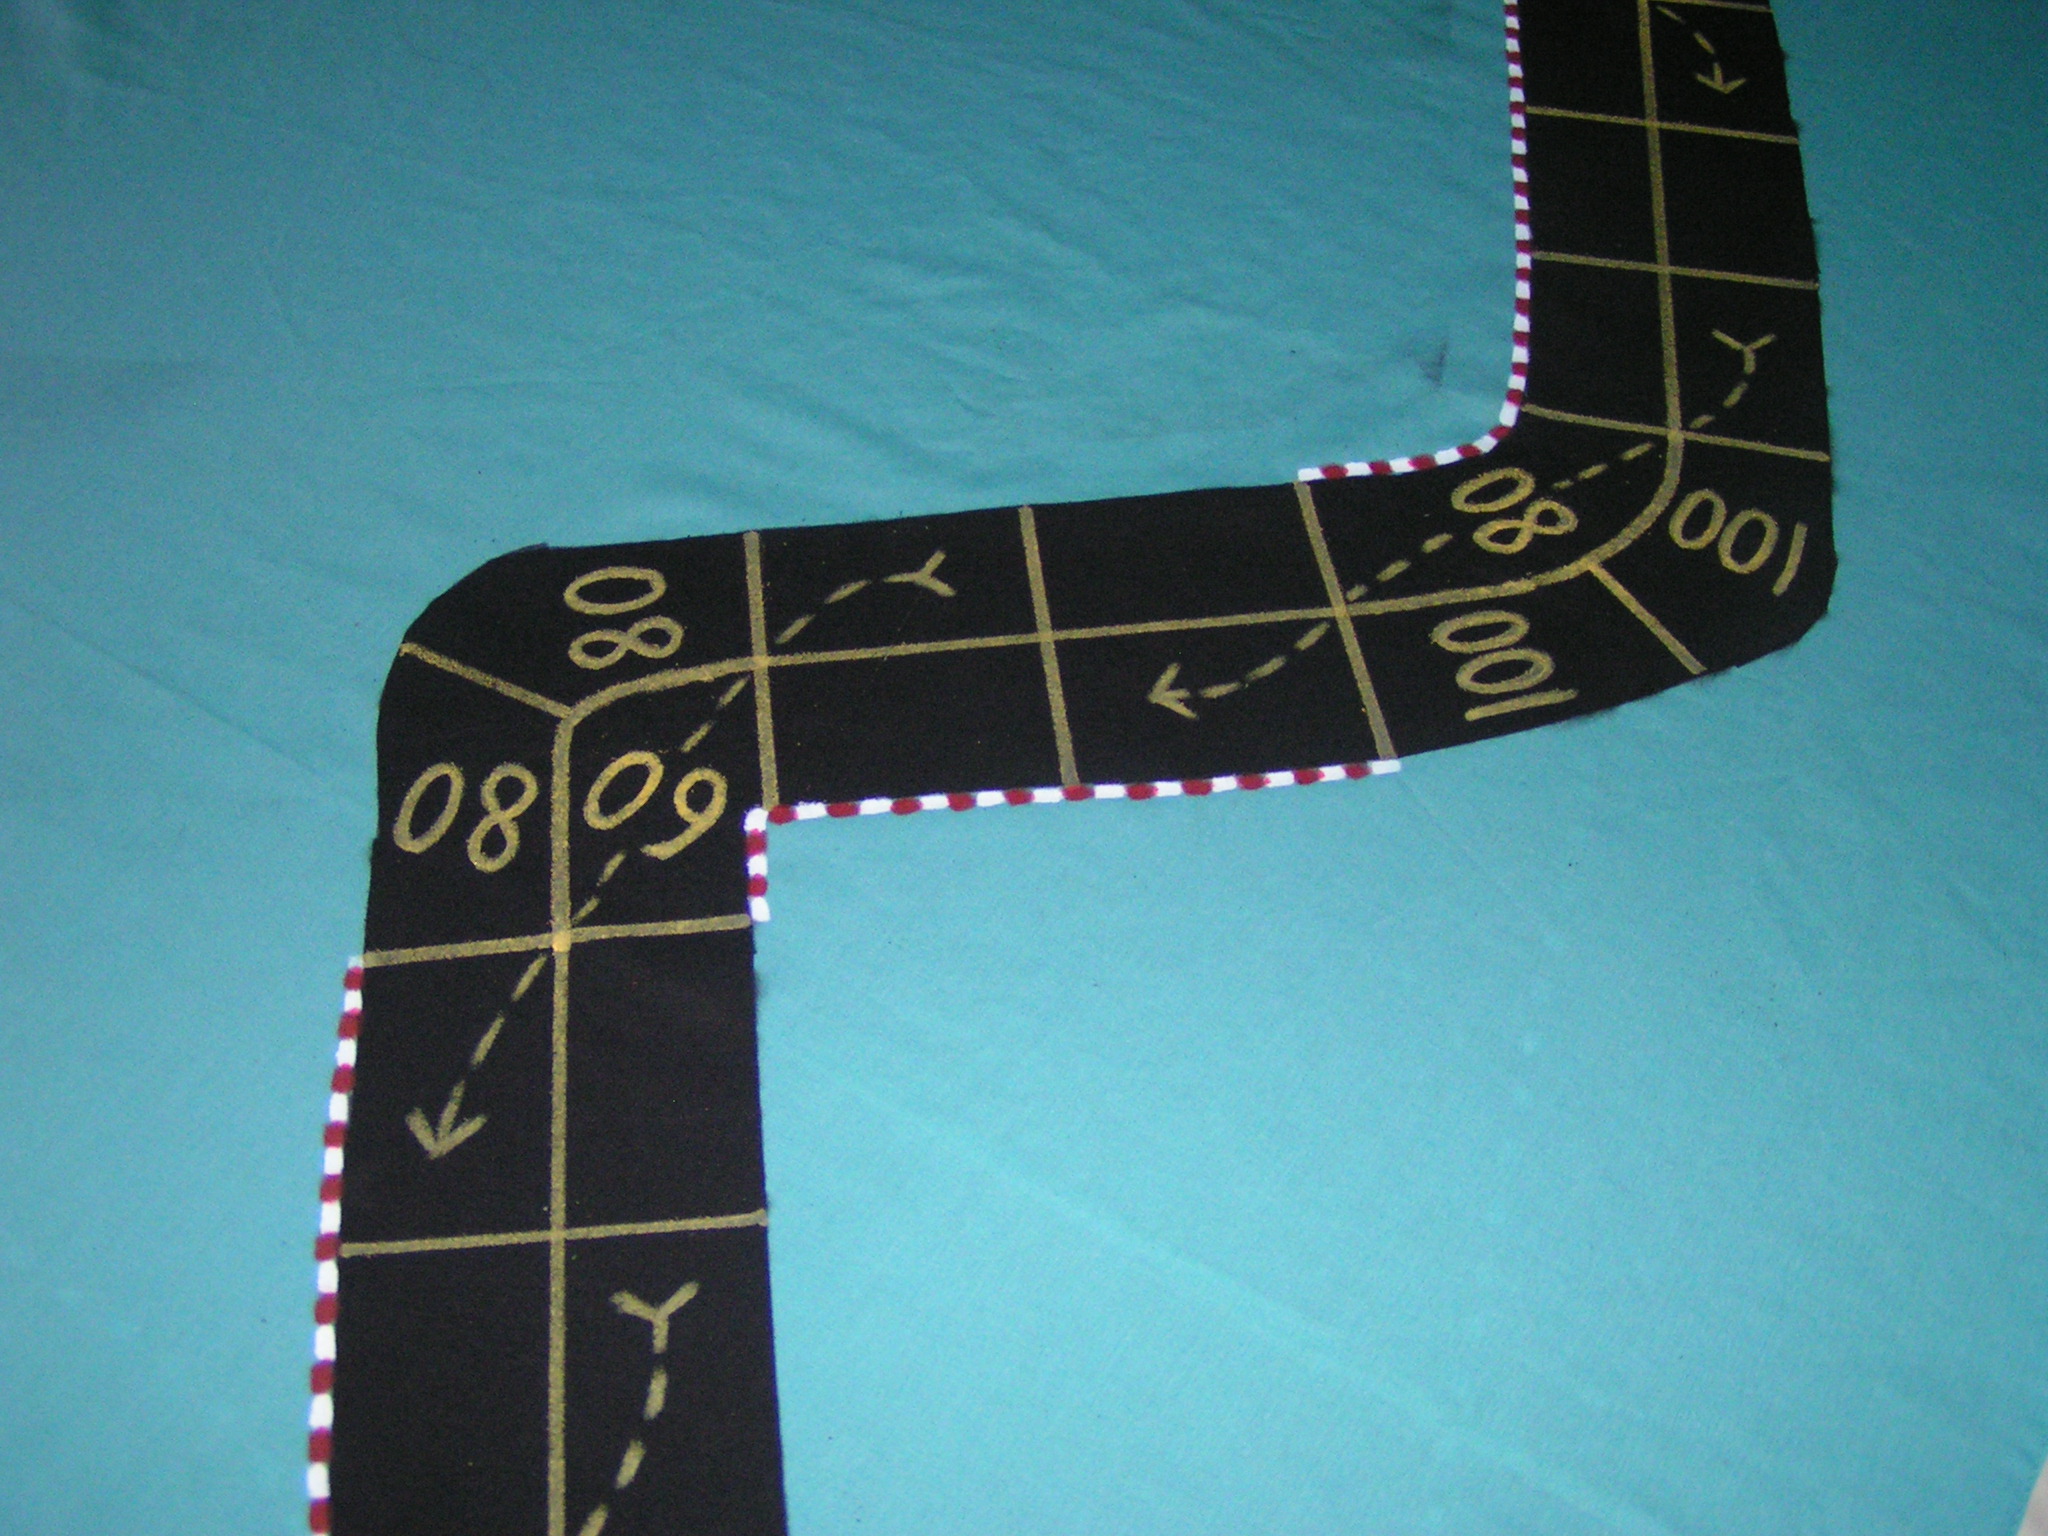
I also painted an arrow off the extended start/finish line as an aid as to which way the direction of travel goes on that track. Of course, there are also the other cornering arrows, and I also draw the corner speeds so they are readable in the direction you approach them from. Note I also marked six “starting” spaces, like a real F1 race track would have (the real tracks will have more than 6 spaces marked as above, but three rows are sufficient for our game needs).
———-
Once all of the spaces have been marked with the yellow paint marker, use that same yellow marker to apply the speeds in the corner spaces. Make sure you refer to your track diagram to get the speeds and arrows in the proper spaces.

Corner speeds and arrows have been added to the track.
I will make two passes for this step. First, I will go around the track and mark all of the cornering speeds, then I will make a second pass and add the arrows. I will let the paint dry in between each step, so I don’t smear any previously applied paint will adding more speeds or arrows. I also go backwards around the track, so I don’t smear any speeds that I just marked in a corner when I add speeds to other spaces in that same corner. And after the corner speeds and arrows have thoroughly dried, you probably should go over them again, to make them brighter and easier to read from the other end of the track.
When we originally made the tracks in the 1980s, we used red paint markers to mark off the track spaces, etc, but we found that the red lines are too hard to see from some angles. We now use either yellow or white for all of the lines and speeds and arrows. The higher contrast between the black track and the yellow or white lines makes it much easier to see the spaces, no matter where one sits around the track.
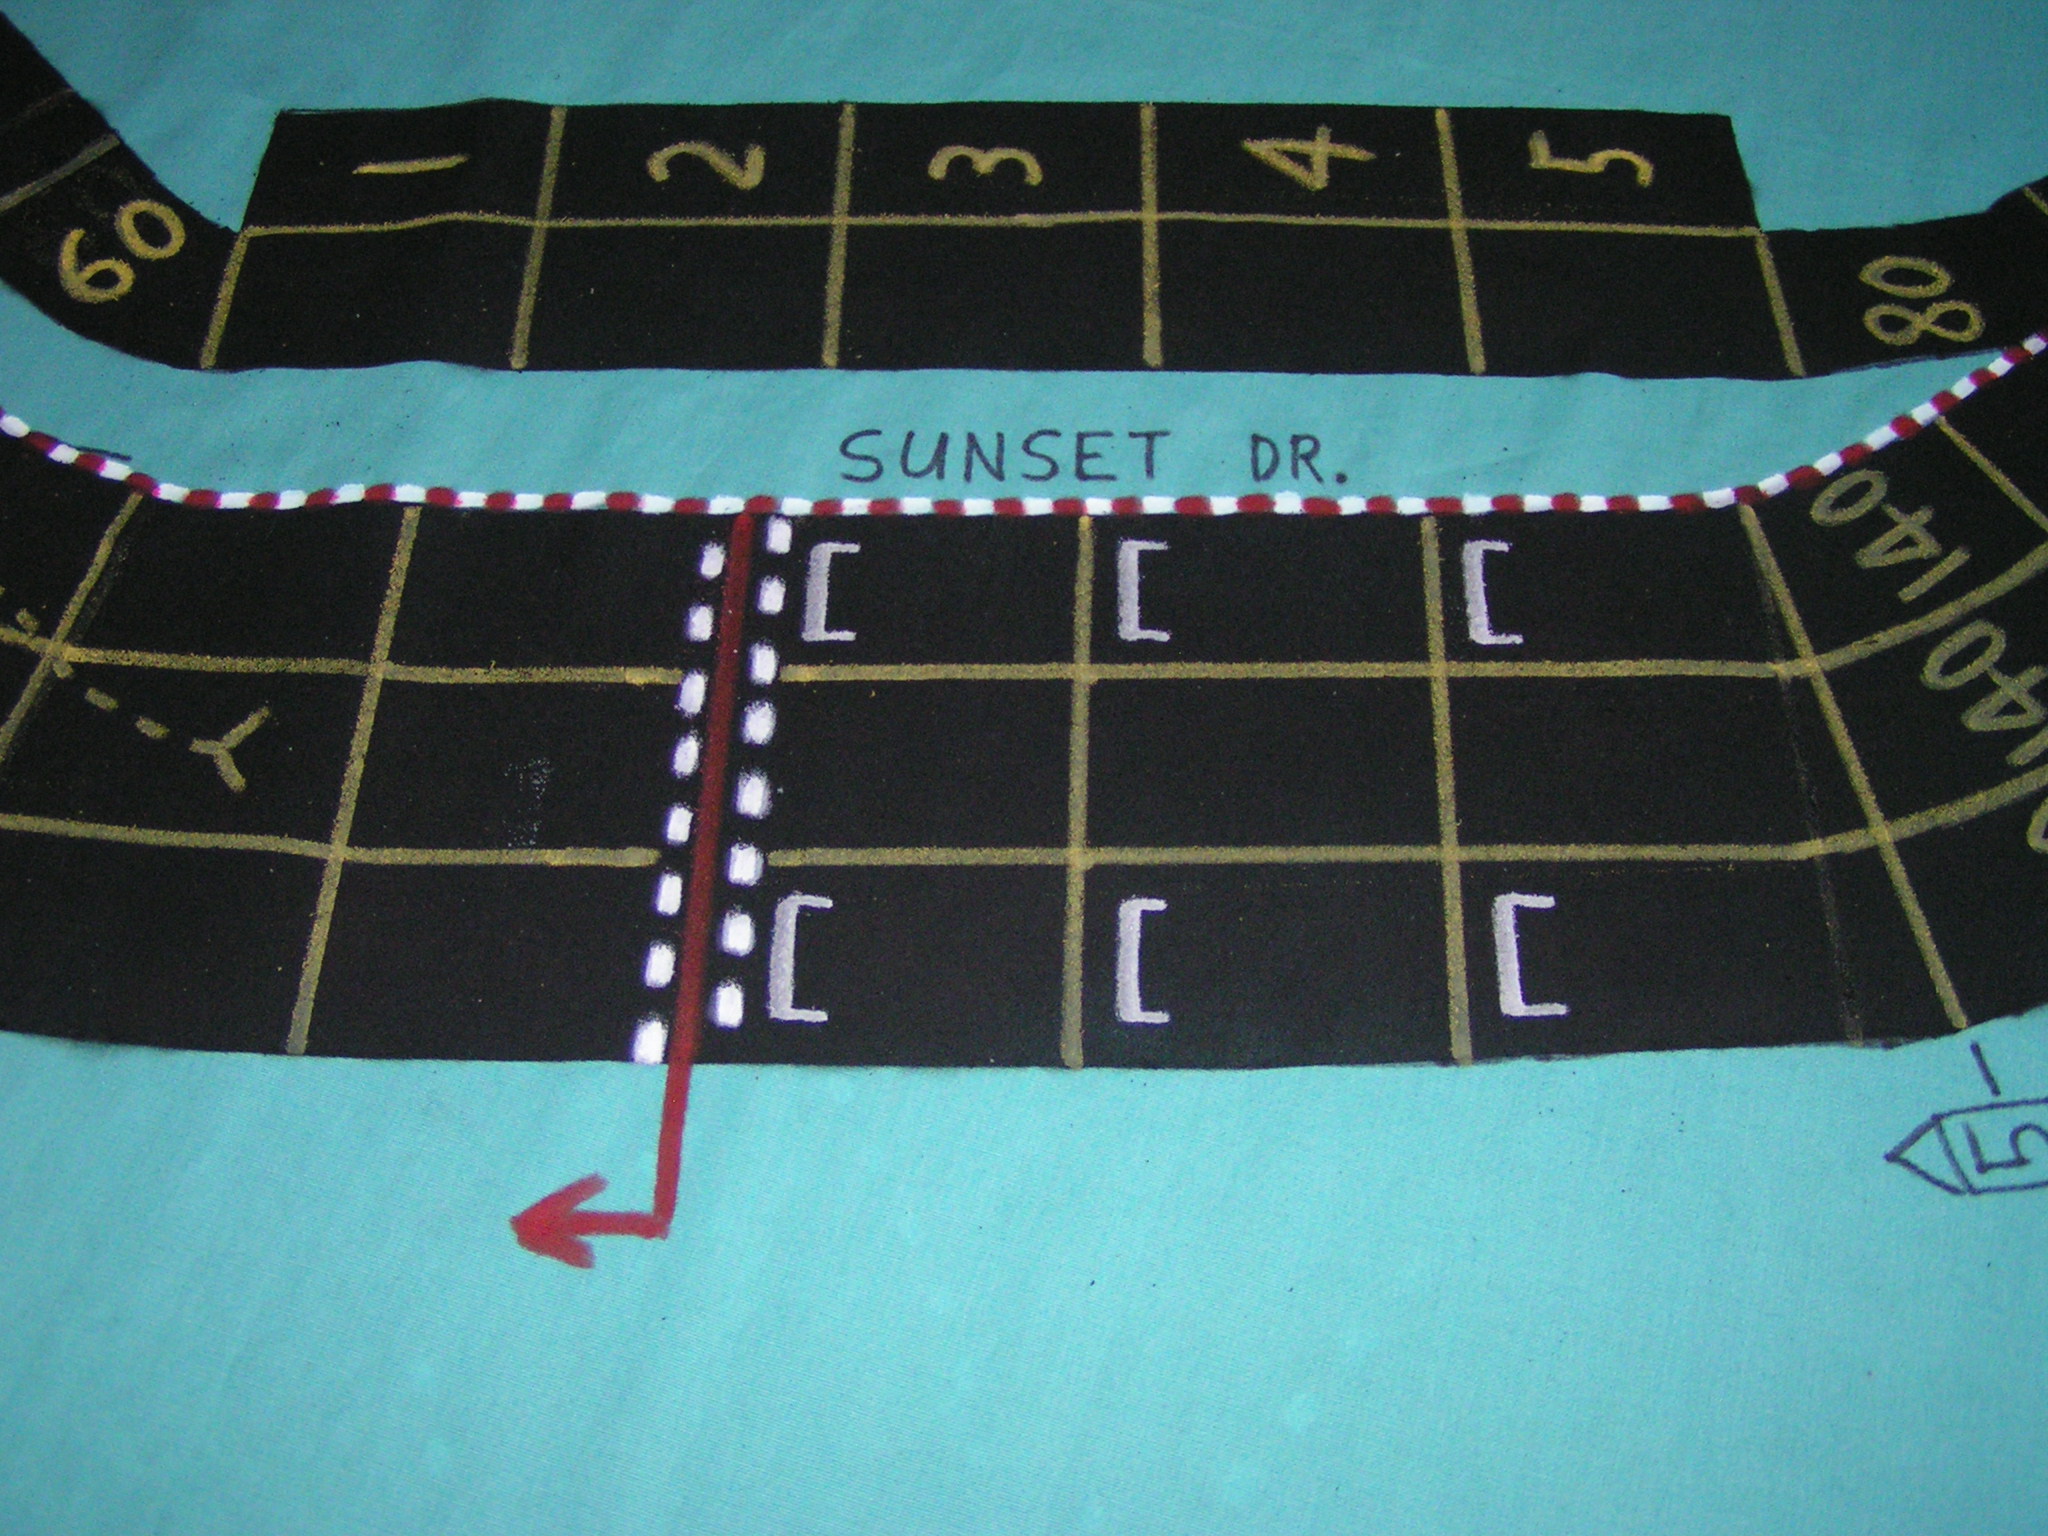
We next add the red-and-white stripes to denote the side of the track that is inside to the next corner. Although we never worried about this when we played Speed Circuit (we just designated the infield side of the track as the inside lane), with Championship Formula Racing (CFR) it is more important to know which side of the track is the inside lane to the next corner, so we need to add the red and white stripes. You could make a simpler marking, but the red and white stripe is easy to see at a glance. You will have to go over this striped line at least twice, as the first time you paint the unpainted sheet, the paint will soak in when it dries so that it will almost look like you didn’t paint it in those areas. The 2nd coat should look much better. Go around the entire track in this order: Mark the white dashes, then go around again and mark the red dashes in between the white dashes. Then make a second pass with white, and finally a second pass with red. After you add those stripes, it will look like this:
Red and white stripes have been added to the sides of the track.
Either use a black permanent marker or a black paint marker to add the name of the track, its location, miles per lap, and years it was raced on. Add this somewhere in the infield of the track, if you can, although it could be anywhere.
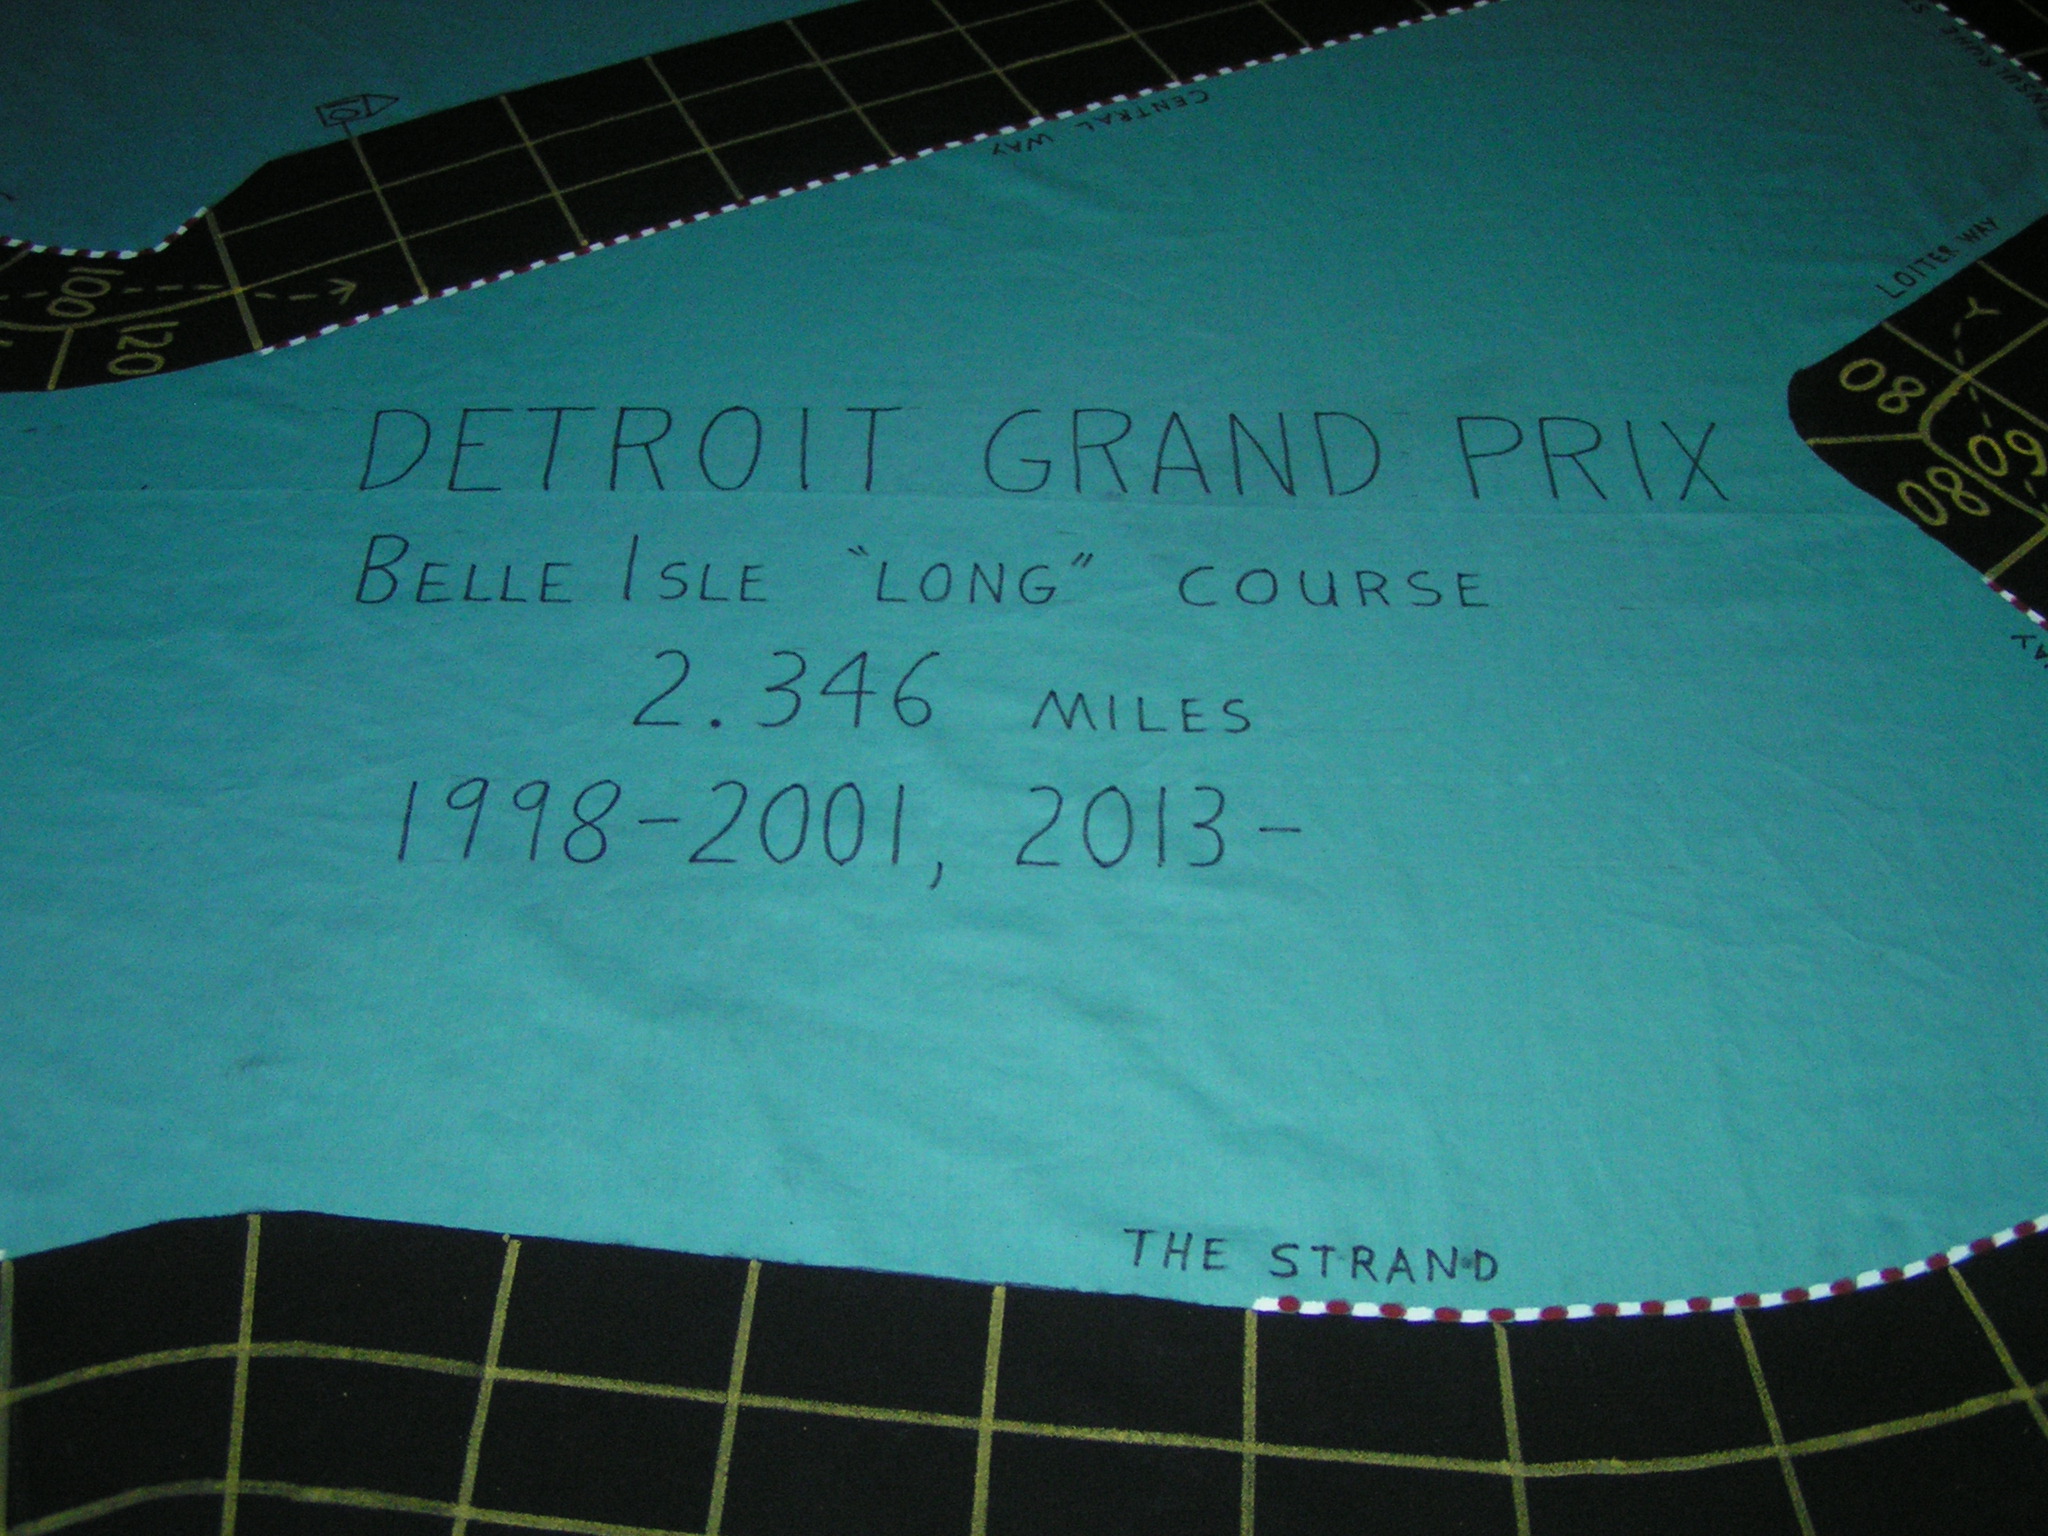
Name of the track has been added.
Notice that I also added the actual name of the road, “The Strand” that the track is on at that part of the Belle Isle track. In other pictures you can also see a “5” or a “10” in a box outside the track. Those numbers are a play-aid so drivers can more easily count the number of straight spaces remaining until the next corner space.
Here’s a little trick to line up the letters nice and even. Mark some pencil lines along where the top and bottom of the letters will go.
Pencil lines were used to line up the lettering.
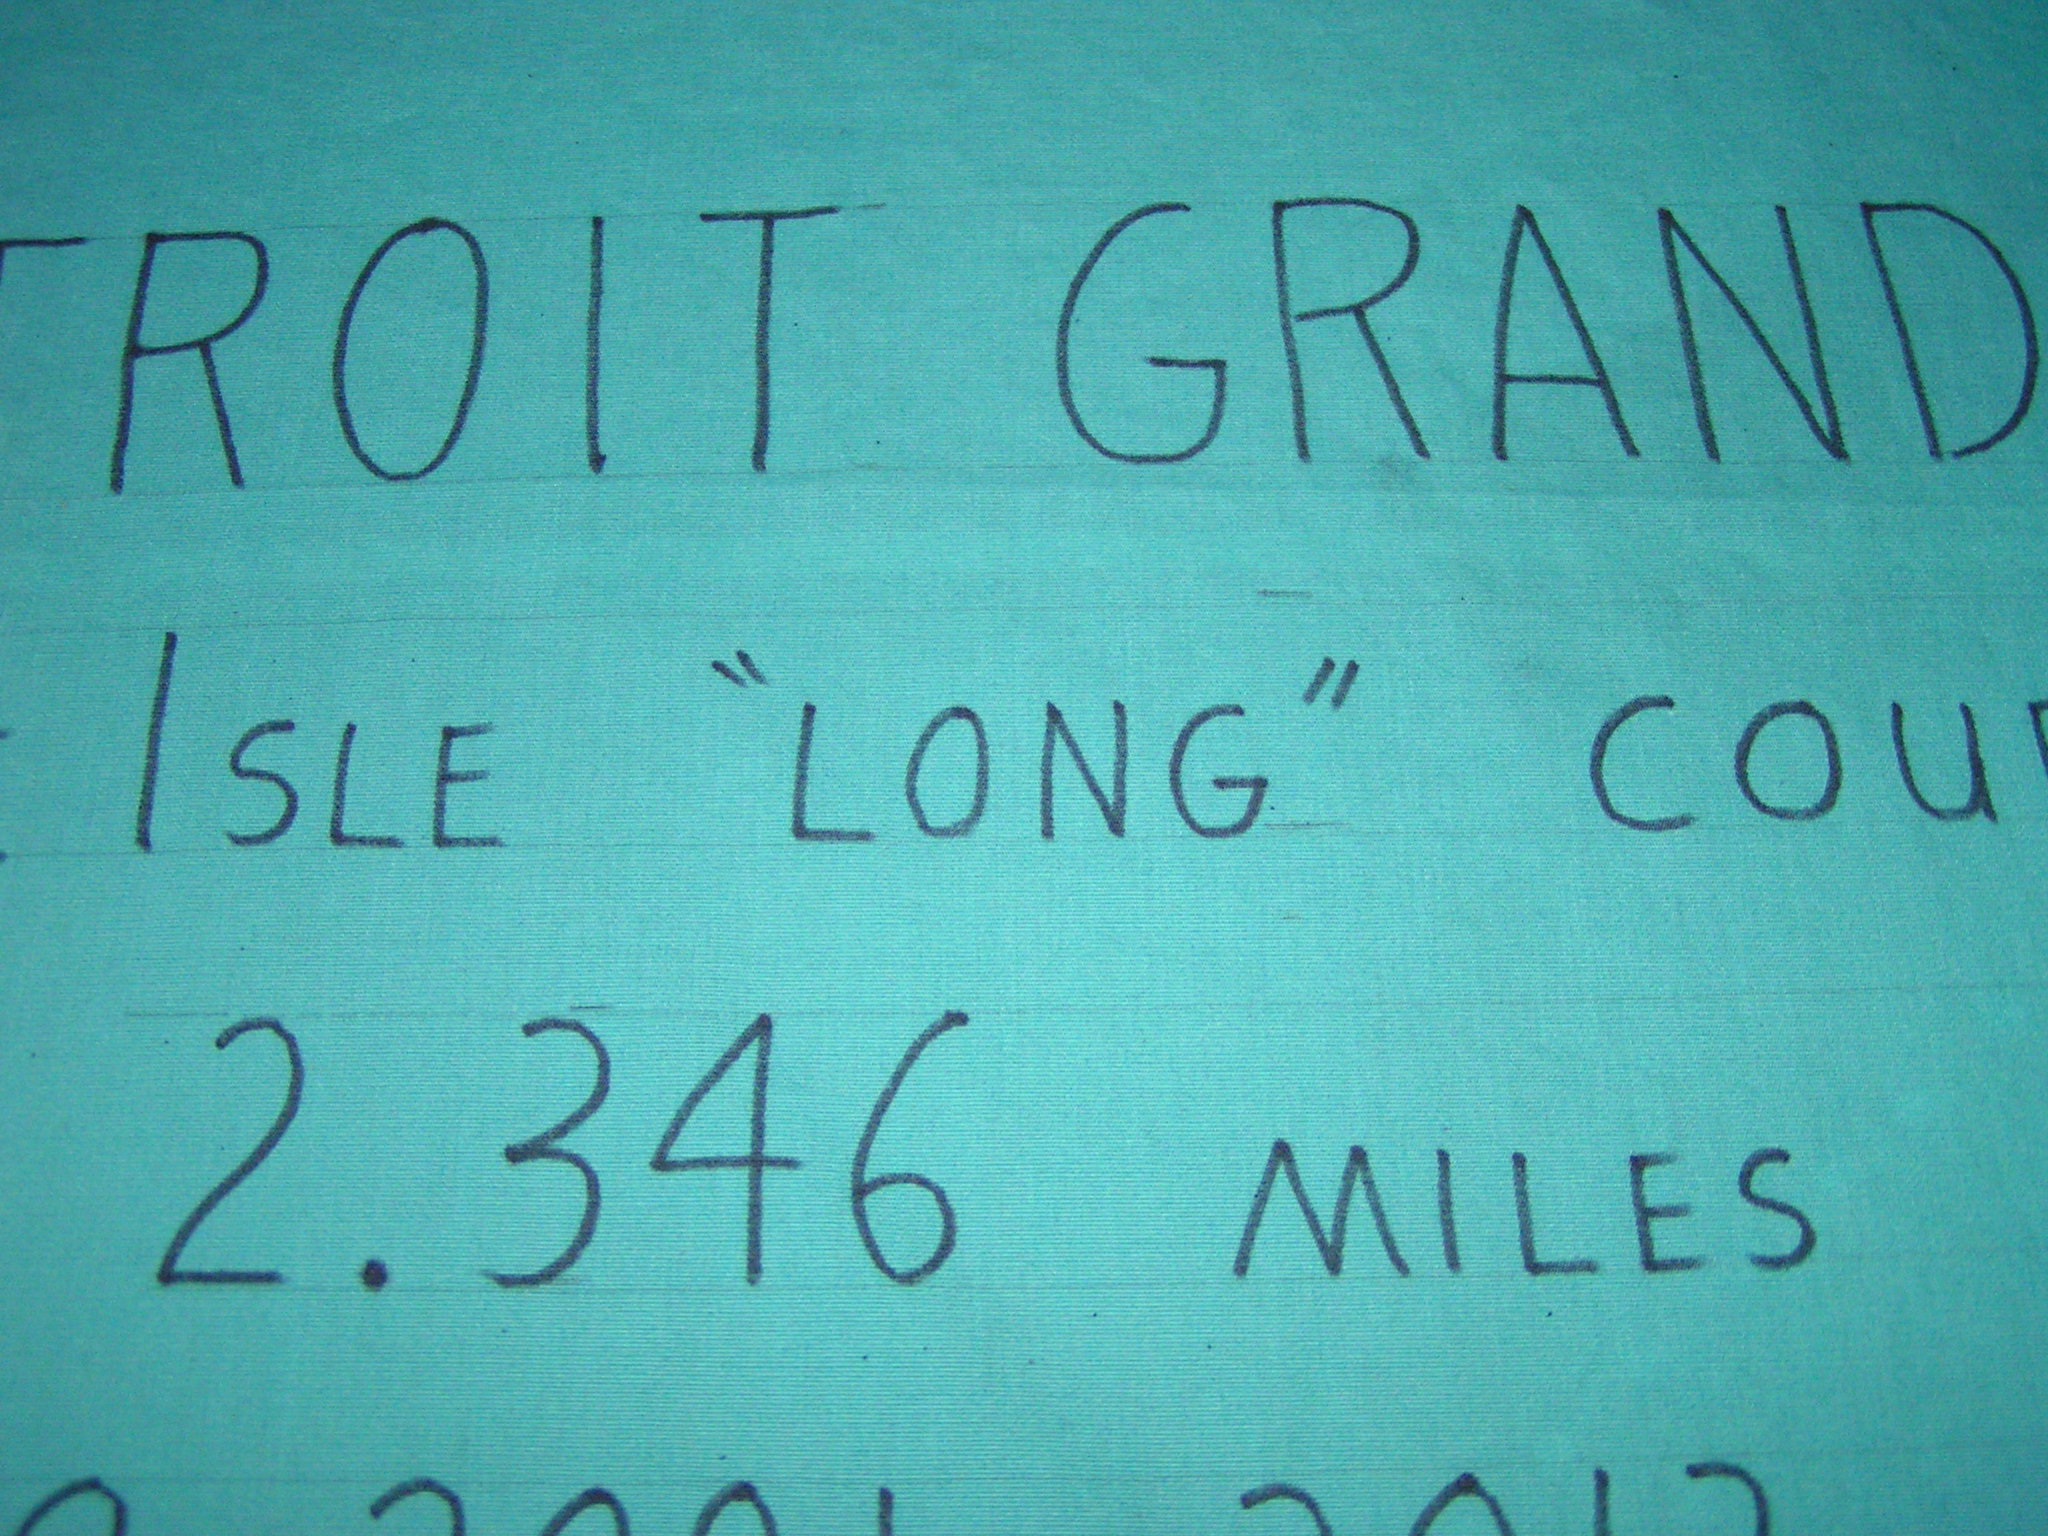
Although the pencil lines may be hard to see in this picture, they are there. I used my tape measure to make tick marks at several places, measuring from one side of the table’s edge. I made the tick marks for the top row (the “Detroit Grand Prix” row) 2″ apart, then the other rows are each 1.5″ high. There is a 1″ space between each row. You can use whatever spacing looks good to you. If you haven’t done this kind of lettering before, mark all of the letters in pencil before using a permanent marker. If you absolutely can’t print neatly, and don’t have time to take drafting classes so you can print neatly, you could always use some lettering stencils or get a friend who can print well to mark the name on your track.
I also add the track name to a corner of the sheet, to make it easier to tell which track it is when it is all folded up for storage. Recently, I’ve also been adding its years of use if you might have different versions of a track.
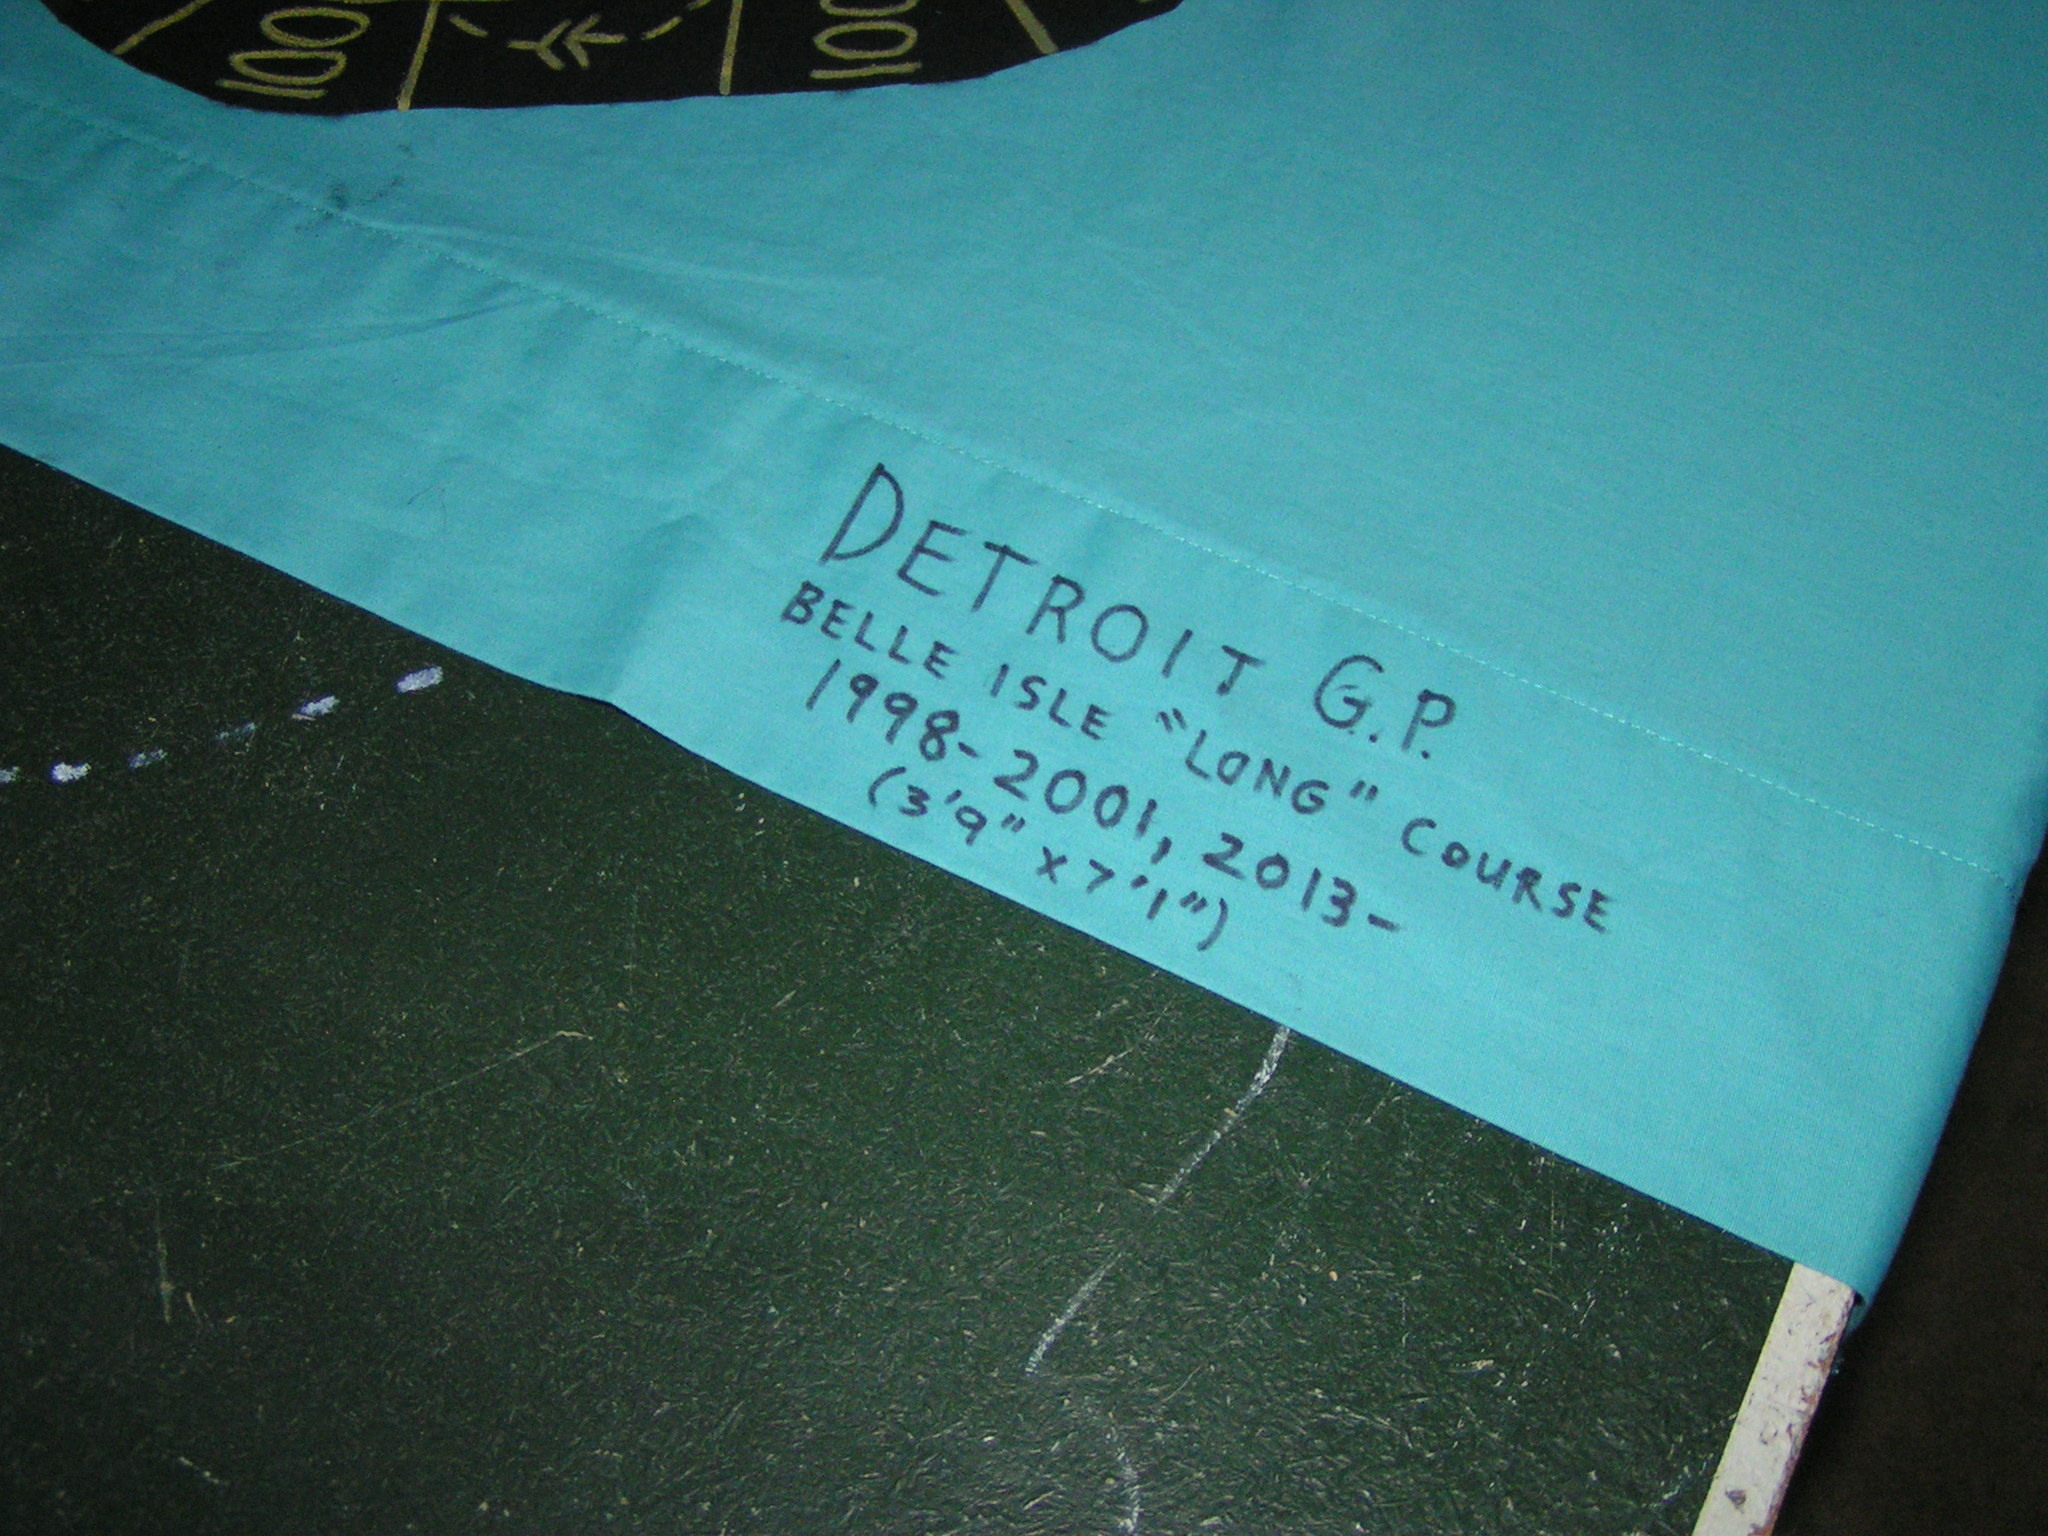
Track name on the corner of the sheet.
I wrote the track name on both sides of one corner of the track, so it doesn’t matter which side is folded to the inside when the track is folded. It is probably better to fold the track with the painted side to the inside, just to better protect it. We used to just apply a piece of masking tape to the folded track with the track’s name, but tape will fall off after a number of years, so using a permanent marker is a much better way to go. And since some tracks have had revisions over the years, (see the many changes of the real life Silverstone, England, track as an example), the years for a particular track configuration have been added. I’ve also been adding what minimum table size is needed to use that track, so you’ll know what size or how many tables you’ll need to set it up. In the case of this Belle Isle track, the minimum table size is 3’9″ wide by 7’1″ long. In practical purposes, this will probably be used on a 4′ x 8′ table top.
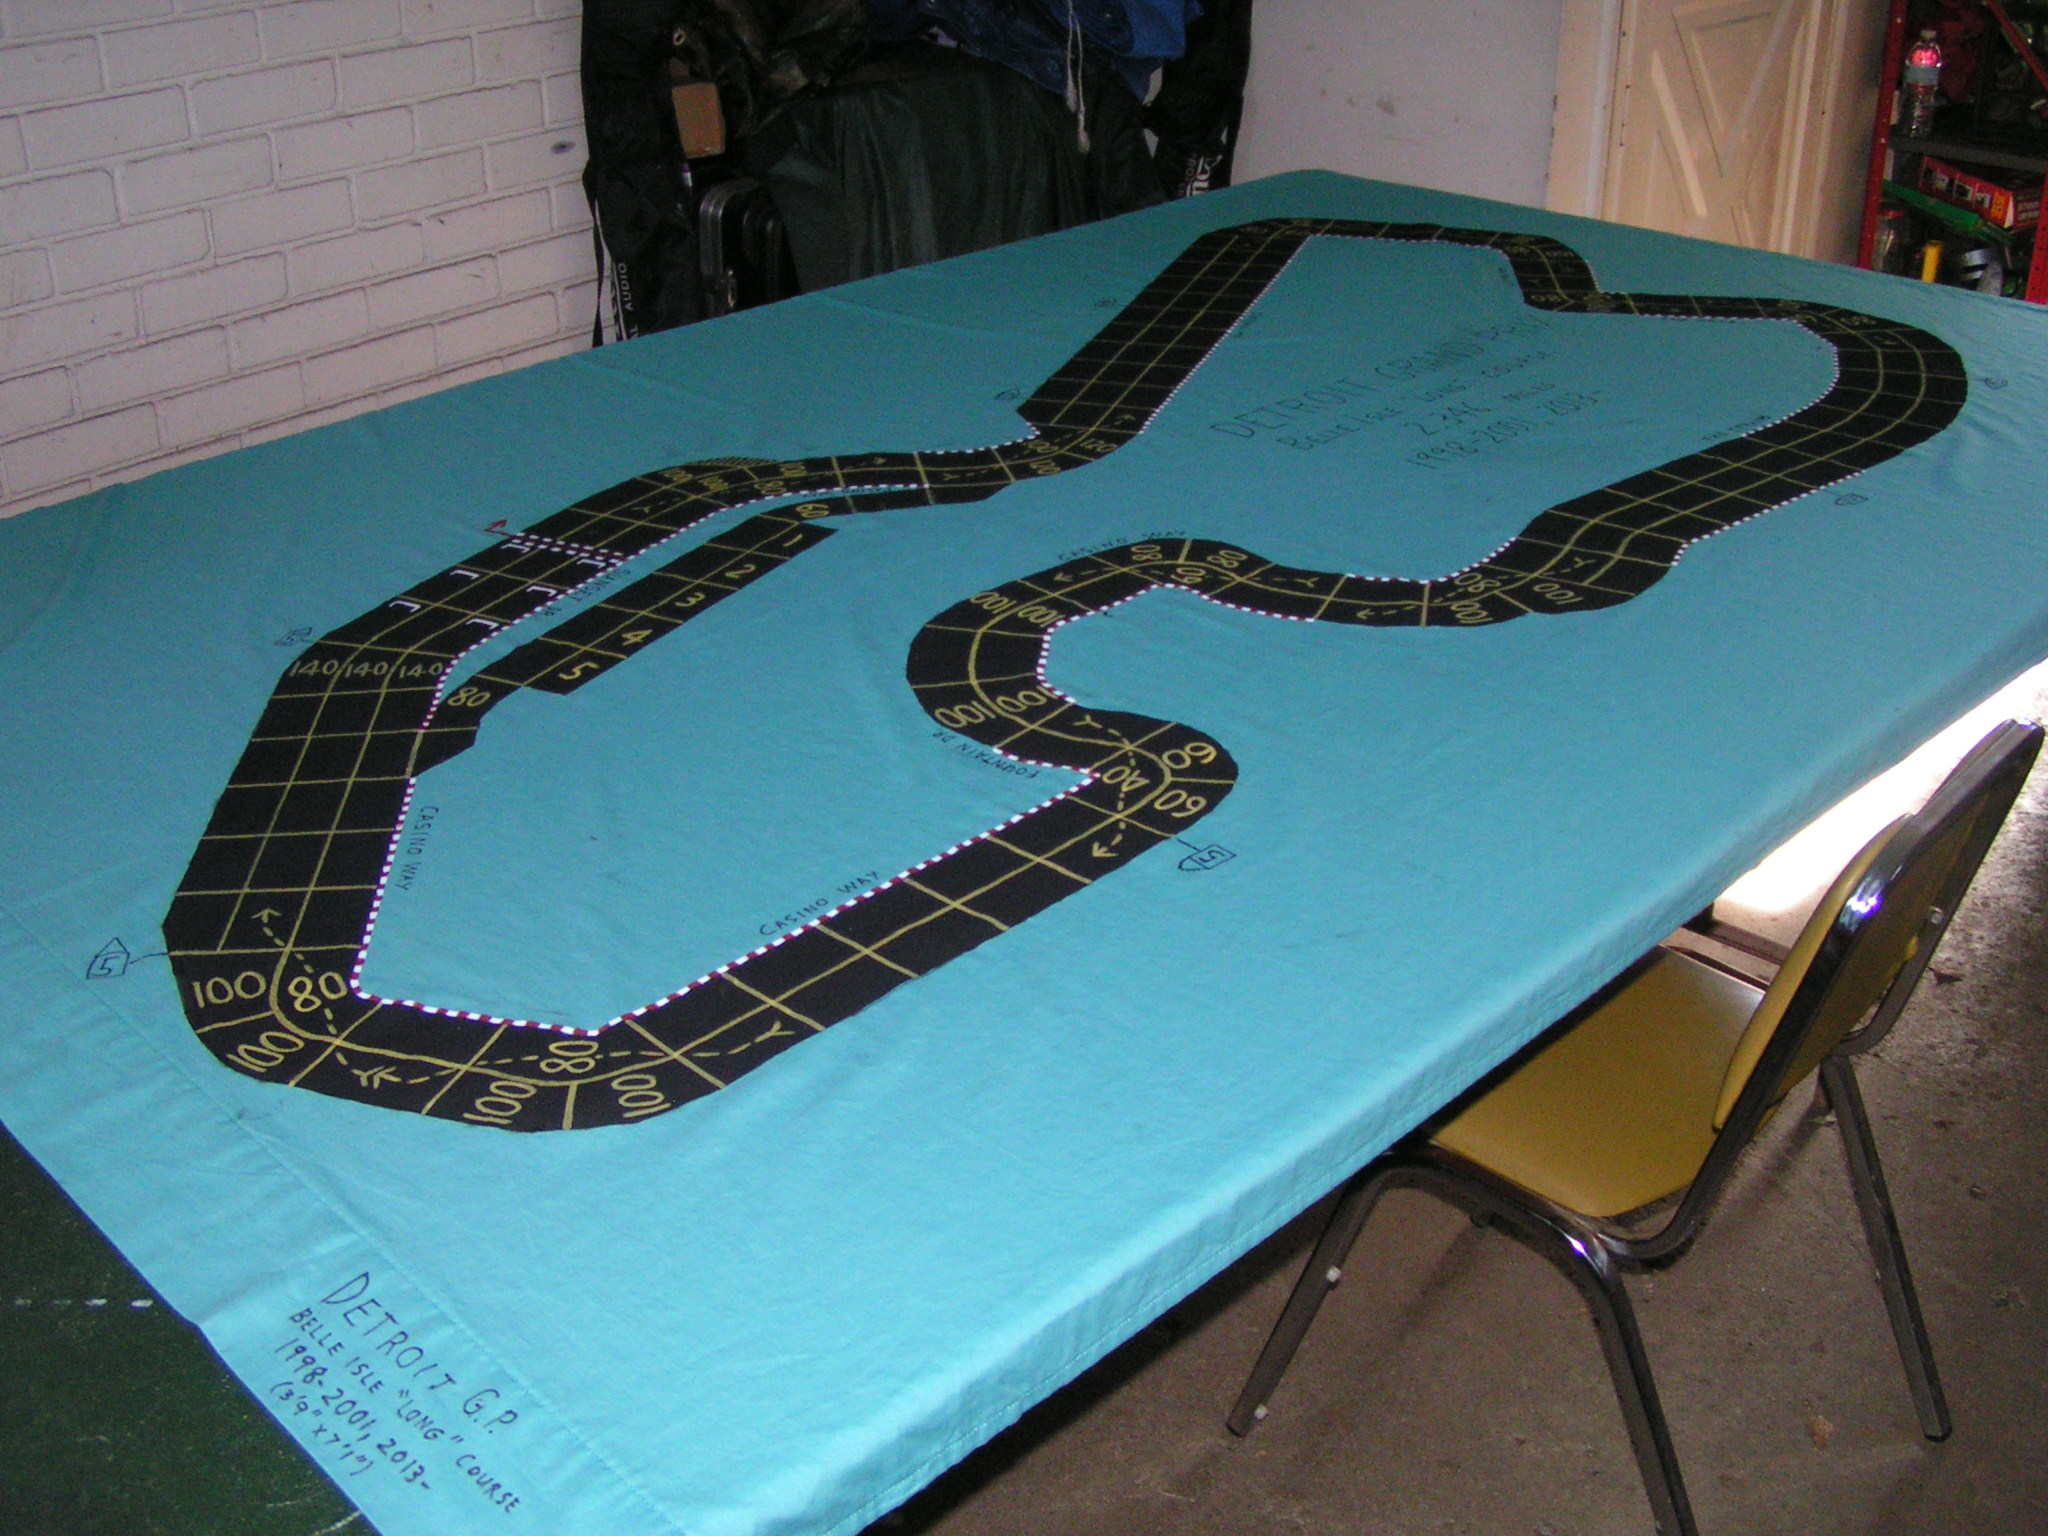
The finished track.
At last, the track is finished. It’s time to race!