Posts Tagged ‘Noble Knight Games’

Close Action in the Detroit, Michigan, area

Tuesday, February 5th, 2019

A number of years ago, I was introduced to the game “Close Action,” which is a board game about naval combat in the “Age of Fighting Sail,” circa the year 1800. It is basically an improvement of the old Avalon Hill game of “Wooden Ships & Iron Men.” Close Action was designed by Mark Campbell, although he has had a lot of folks play various scenarios and offer suggestions for improvements along the way. The game was published by Clash of Arms games in 1997. But then I didn’t get to play the game for more than a decade (probably closer to two decades).

Close Action box cover

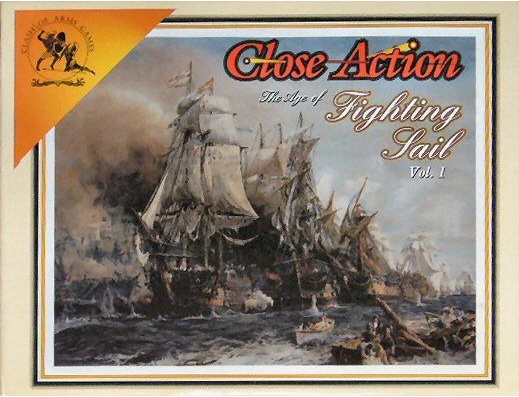
Close Action box cover, from Clash of Arms games.

So, probably around the middle of 2017, I was checking out the latest sales flyer from Noble Knight Games, and I saw they had a brand new copy of Close Action for sale. I immediately bought the game, because Close Action has been out of print. Noble Knight also had the two add-on scenario packs of Rebel Seas and Monsoon Seas for sale, so I bought those, too. (Rebel Seas is the only product from the Close Action series available for sale at the Clash of Arms web site, as of February 2019.) So now I owned the basic components of Close Action, but didn’t have any miniature ships to play the game with. Although CA was designed as a board game, it does seem more fun to play when using miniature ships.

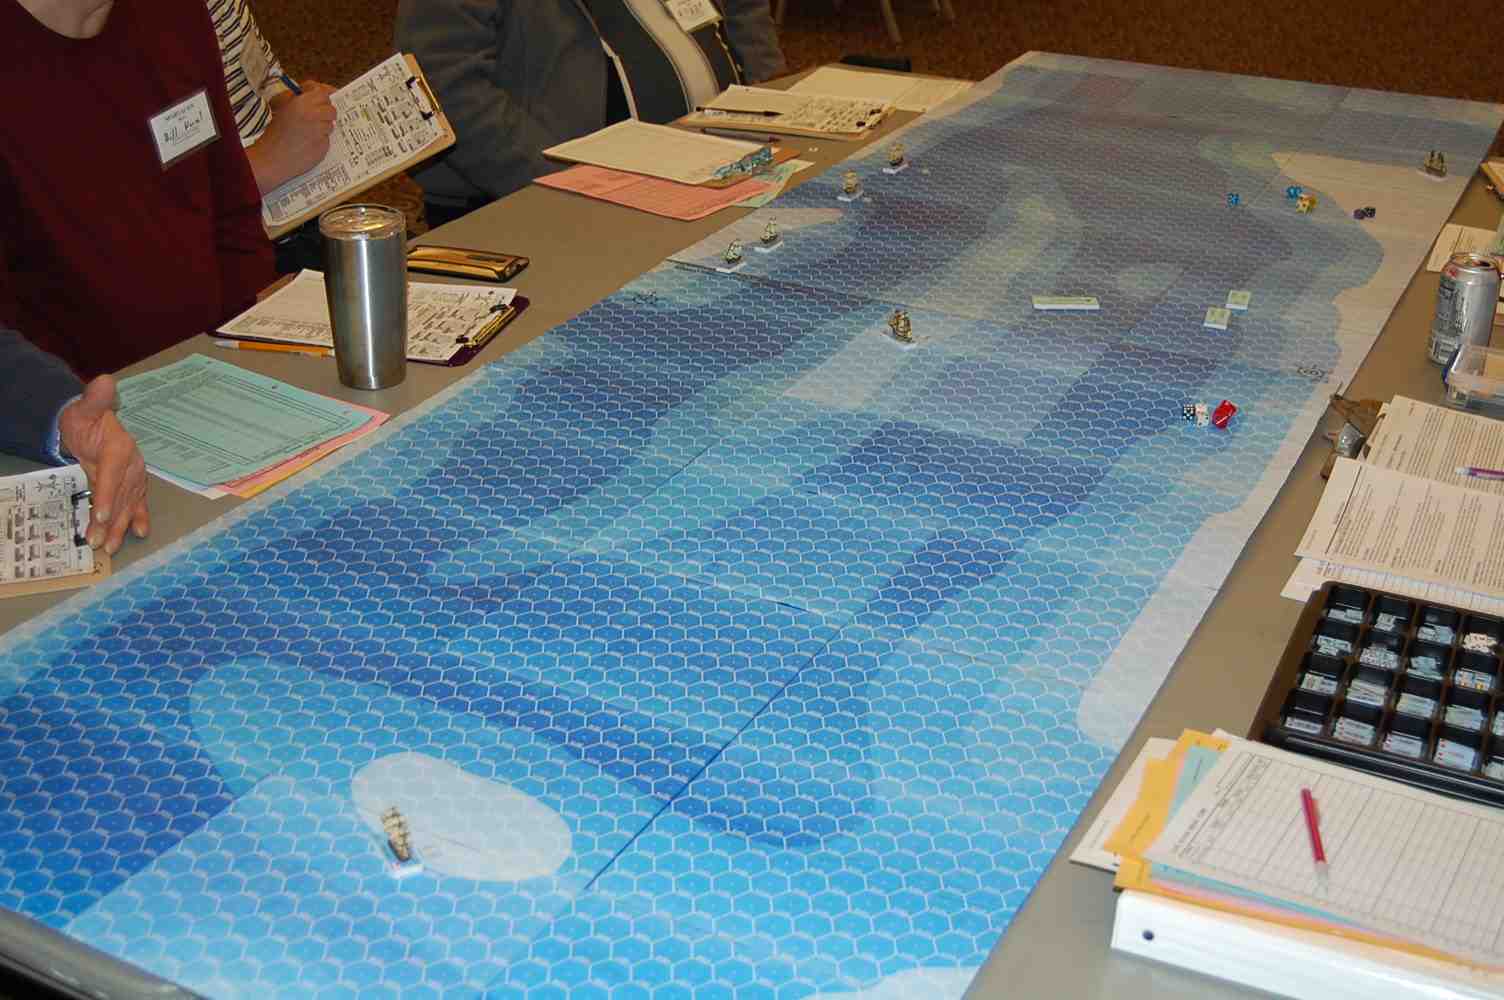
I was still in contact with Jim Robinson, as he races in our CFR-Detroit racing games. He’s the guy that introduced me to Close Action in the early 1990s. We were playing then with “pre-publication” rules for the game (version 4.30). Dennis Daughetee was another player, and between Dennis and Jim we had a good sized fleet of miniature ships to use. Anyway, in March 2018, we got several folks together to play a scenario of Close Action at the Canton (Michigan) public library during the first Saturday meetup boardgame day. We used (I believe) 1:900 scale ships on Jim’s large hex mat (with 2-inch hexes). It was pretty cool.

Close Action with 1:900 scale ships

Close Action with 1:900 scale ships at the Canton, Michigan, library.

Now, the large 1:900 scale ships are really neat, but later, while playing another scenario at Imperium Games, with about a dozen ships on each side, it became apparent that it would be very difficult to get all of the ships on the same playing mat at the same time. This made me want to use smaller scale ships. I began to look into the various ships available. It seems that 1:1200 scale is a very popular scale for naval minis from the Age of Sail, and it seems the two main sources for ships are GHQ’s “Micronauts” and Langton Miniatures. GHQ’s ships are about $17 each, though, and the Langton ships are about the same price, once you buy the hulls and sails. Sort of a steep price if you want to purchase enough ships for a 40-ship battle!

So then I discovered the 1:2000 scale ships available from Valiant Enterprises. While Valiant’s ships are not nearly as detailed as the larger 1:1200 scale ships, they are much more affordable, and they are “good enough” for minis gaming. You can buy a 3-pack of 74-gun ships-of-the-line from Valiant for less than $15, or $5 per ship. Now we’re talking affordable! Not to mention that the ships won’t take up as much space, so one can use a smaller hex grid to play on. What made it even better, just about the time I mentioned to some of our Championship Formula Racing group that I was going to start buying the Valiant 1:2000 scale ships, two of the CFR racers, Jim Robinson and Mike St. Peter, gave me a bunch of already built and painted ships! Jim gave me close to 40 ships, mostly 74-gunners but also a few larger and smaller ships. Mike donated around a dozen serviceable ships to me, and some other parts that can be salvaged to repair some other ships.

So, now I had a fleet of ships to use, so the next thing to do was to obtain a playing mat. Now, most folks I have seen online who play naval minis just buy a large hex-grid mat from folks such as Hotz Mats. While the mats from Eric Hotz are beautiful, they are also somewhat expensive, with a 45-inch by 72-inch “Mediterrean Sea Blue” mat costing $67 (with shipping). And you would need more than one mat. But there are two problems with using a plain-colored mat.  For one, the generic blue-hex-grid mats don’t have numbered hexes, making it difficult to correctly place the ships for the scenarios. Also, some of the scenarios in Close Action have land or shallow water. The original maps that come with Close Action have different colored hexes that can be used to depict shallow water or land, while the generic hex-grid mats are all the same color, making it difficult to designate areas as land or shallow water. Not to mention that I don’t want to limit my playing to only deep-water scenarios. So then I decided to use my flat-bed scanner to scan the CA maps, then enlarged them 160% so the hexes were 1-inch across. I then printed them out as tiles, and then glued them to a folding cardboard display board. The final result looks  like this:

Close Action enlarged maps A & B

Close Action enlarged maps A & B.

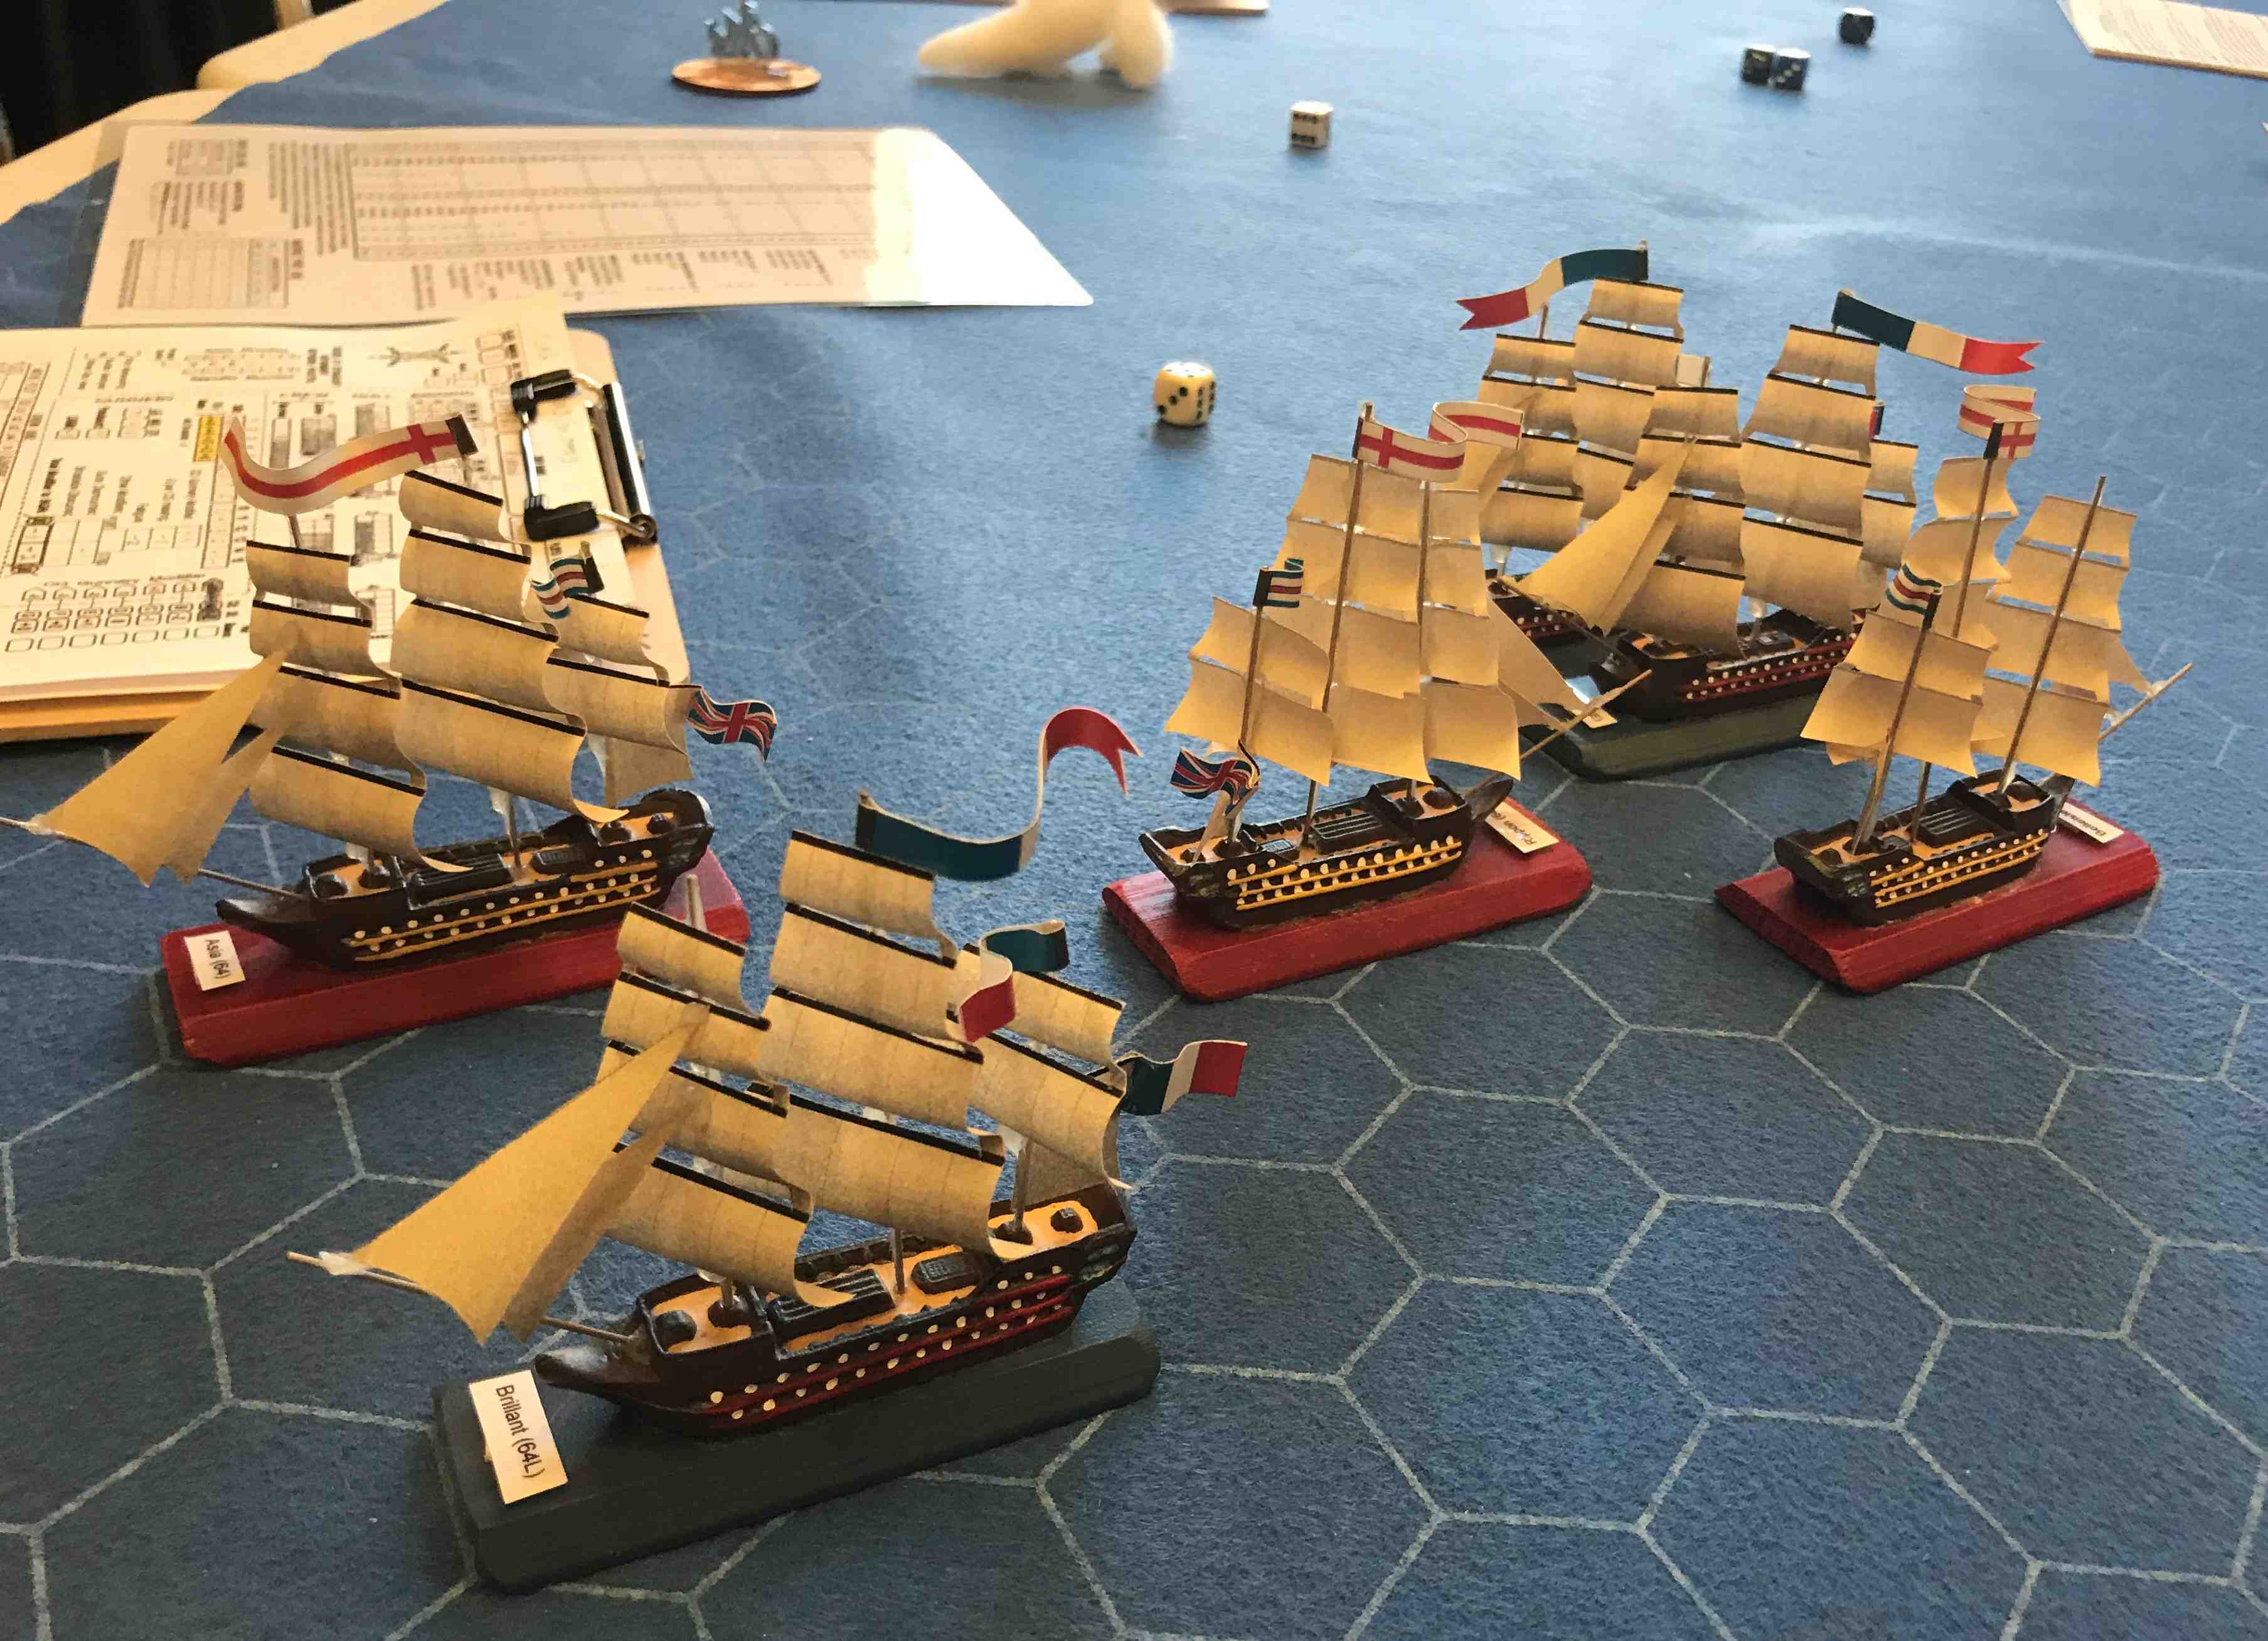
For basing the ships, I made some 1.75-inch by 0.75-inch rectangles, and added the number of guns, each ship’s name, and the country flag of that ship along both sides of the rectangle. Then I printed out the artwork and glued it to foam-core board, then used an X-Acto knife to cut apart all of the bases. The ships on their bases look like this:

1:2000 scale ships on foam-core bases

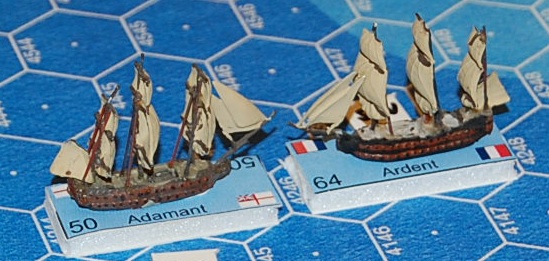
1:2000 scale British 50-gun Adamant and French 64-gun Ardent, mounted on foam-core bases.

So, now we’re ready to start playing some semi-regular games of Close Action in the Detroit, Michigan, area!


Playing Gutshot at MDG’s Wintercon – Part II (aka “Carnage Asada”)

Wednesday, February 15th, 2017

After I got done playing in the Siege of Budapest game near 7:00 pm on February 11, it was time to set up the wild west minis game I was running, “Gutshot.” I laid out a sand-colored piece of felt, then placed some cardstock buildings on the felt. BTW, the Gutshot rules are from Hawgleg Publishing, some folks from down Texas way. There are many wild west style “skirmish” rules out there for using with miniature figures, but Gutshot makes for a fast playing game at gamecons. There aren’t a lot of modifiers to figure out, so with a minimum of time spent teaching the basic game, players can be blazing away at each other right away!

Game Marshall Garry at Whitewash City

Game Marshall Garry at Whitewash City

I built the buildings out of cardstock, using the Whitewash City buildings that were designed by Eric Hotz. After downloading and assembling the free Imperial Saloon, I purchased the entire “Mother Lode” of buildings  which was a PDF file with more than 40 large buildings plus a number of smaller buildings and other accessories you could print. Although the buildings are supposed to be for 30mm scale minis, the stock buildings seemed small, so I enlarged them to 125% of their original size, then they seemed better proportioned to the western minis I used. So far I have built: Bank, Cafe, Imperial Saloon, J.H. McFarland Blacksmith, Livery & Feed Stable, McSweeny Dry Goods, Medical Building (doctor & dentist), Pioneer Hotel, Sheriff’s Office & Jail, Small Building Set 1 (bath house, small log cabin, two small sheds, and two privys). I also built a few watering troughs, some corral fencing, and couple of piles of lumber and a couple of wooden crates.

Whitewash City Sheriff's Office

Close up of the Whitewash City Sheriff’s Office

While the Whitewash City buildings are meant to be printed on cardstock, then cut out, folded, and glued together, I also added balsa/bassword/poplar wood as reinforcements for the corners and bottom edges. I also added some roof supports for large roofs, like with the Livery Stable building. While the Whitewash City buildings are not meant to have removable roofs, there are floor plans you can print of the interiors, and you can lift the entire building off its floor plan. I also glued the floor plans to foam-core board to keep them from warping, plus they won’t get bumped out of position as easily as if they were plain cardstock.

I also purchased a number of western miniature (mostly 25mm & 28mm) figures online from Noble Knight Games. Before Christmas 2016, Noble Knight had a sale on a whole passel of used, already painted, western minis, so I bought more than 50 minis. Being already painted saved me some time putting everything together. I also found some horses in about the right sizes from places such as Michaels crafts and Toys-R-Us, and they filled up the corral. I also made some hay bales from the “pluck foam” I plucked out of the foam carrying trays for the miniature figures.

OK, so I only had three players show up to play, P.J., Cory, and a youngster named Bryce. The premise of the game was that four Mexican banditos came to town to rob the bank. The Banditos were controlled by Cory, and the Banditos were named Juan, Squelch, Jueves, and Eral. P.J. represented the law in town, controlling sherriff Kathleen and her deputies Hoss and P.J. Bryce only wanted to play a single character, so he controlled the bounty hunter Bat, who sported twin six-shooters.

Shootout at Whitewash City

Shootout at Whitewash City

So, the Banditos strolled right down main street of Whitewash City, heading towards the bank. As they passed the Sheriff’s Office (the building at the far left of the above picture), deputy Hoss fell in behind the banditos. Bounty Hunter Bat, who had been talking with the proprietor of the Livery Stable at the other end of town (off the right side of the above picture), recognized one of the banditos as being wanted. Bat then ran to intercept the banditos before they reached the bank. At the same time, sheriff Kathleen and deputy P.J. came out of the sheriff’s office and also followed the bad-looking hombres in the street.

Bat came right up to the man he wanted to claim the bounty on, then Bat pulled out both his pistols and demanded the man (Juan) surrender). Juan put his hands in the air, but kept saying, “Why you want me? I am just going about my business, and not bothering anybody!” But then the other banditos pulled their pistols, as did the lawmen and lawwoman, and the shootout was on! When the hot lead stopped flying, all of the “White Hats” (Bat, Hoss, Kathleen, and P.J.) lay dead in the middle of the dusty street, as did three of the banditos (Juan, Jueves, and Eral). Only Squelch survived the shootout, but he was badly wounded. (The townsfolk had no trouble capturing Squelch, then hanged him with some vigilante justice.)

Dead minis in the streets of Whitewash City

Dead minis in the streets of Whitewash City

Just when the first character was wounded, I asked the players if they wanted to play the game “gory, or non-gory.” As I had expected, they all answered “gory!” so I started placing the “blood splatter” markers (the yellow markers in the street) at locations where characters were wounded.

I hope to run Gutshot again at the next MDG con in the summer of 2017. I hope to build more buildings, and hope to get more players for the game.

Main Street at Whitewash City

Main Street at Whitewash City – Yuh have to admit, cardstock buildings look pretty durn good, don’t they?

So, why did I decide to run a wild west shoot-’em-up game? About 10 years ago, probably the last time I attended a local gamecon, some other feller was running a similar game. He had a western looking town with 20 or 30 buildings in it (I believe they were actual wooden buildings, not cardstock), and the premise of his game was that 8 different gangs (each with four outlaws) all arrived in town at the same time with the idea of robbing the bank! Needless to say, there were multiple crossfires and dead bodies everywhere. I had a hoot of a time playing in that game, and always wanted to duplicate the experience. Well, now I can run my own games.

Using Miniature Figures

Sunday, July 24th, 2016

While fantasy role-playing games (FRGs) can be played merely by saying what everyone in the party is doing, most groups end up using some kind of miniature figures to mark the location of the character in certain situations. When I first started playing Dungeons & Dragons way back in 1979, players just gave verbal descriptions of where their character was located, especially in battles. Then we started using Legos and Lincoln Logs to mark the location of rooms and hallways, and used any kind of markers that were handy, such as coins, bottle caps, dice, etc, to mark where different characters and monsters were located.

Then I discovered “Zargonian Creatures,” which were 2-dimensional cardboard standup figures that slipped into plastic bases. When punched out of their cardboard frame, each (standard-sized) figure is 1.5 inches tall and 0.75 inch wide. You can find some of the Zargonian sets on eBay, but about the only place I found that still has stock on the original sets is Noble Knight Games.

Zargonian Creature Set 1-Dwarves-reduced quality

Zargonian Creatures (Dwarves).

However, when I stopped playing D&D in 1982, I loaned all of my Zargonian figures to a friend, and never asked for them back. Then, when I got back into playing D&D recently, I tried to track down that old friend, only to sadly find out he had died about 4 years before I tried to contact him. I was trying to contact him for 2 reasons, one, to try to get those Zargonian figures back, and two, to try to enlist him in the new D&D campaign, as he was a good D&D player. But neither of those was now an option.

Well, I still had several sets of plastic bases from the Zargonians, so I started using various cardstock figures that I could print on my color laser printer. These figures could be folded over and glued, and then inserted into the Zargonian bases. I found that most two-thickness cardstock was not thick enough to stay firmly stuck in the plastic bases, though, so added a few more layers of cardstock at the bottom of the figures so they would stay attached to the bases when you picked them up by the figure. There are plenty of places online to find various printable cardboard figures. Two of my favorite places to get cardboard figures are the Darios figures at Dark City Games, which are free, and the paid Cardboard Heroes from Steve Jackson Games.

Darios Adventurers

Darios Adventurers.


Cardboard Heroes

Steve Jackson Games Cardboard Heroes (sample).

The Darios and Steve Jackson figures also have some advantages over the old Zargonians in that they are two-sided, and you can tell a character’s front from its back. The Zargonians were just blank cardboard on their backs and so it was hard to tell which figure was which. The newer figures also have much more detail in their drawing, which is probably partly because the printing technology is better today.

There are various places you can buy plastic or wood bases for the cardboard figures online, also. The cardstock figures are good, too, for when you need a lot of some particular type of character or creature as you can print off extra sheets.

But recently I got into using some metal miniatures. I somehow or other accumulated about 5 or 6 metal (25mm or 28mm) miniatures over the years. I believe I accumulated them when helping the Metro Detroit Gamers clean up the venues at the end of their game conventions, finding them left behind on the floor. (I also own exactly one card (the Forest) for Magic: The Gathering, having also found that card on the floor while cleaning after a game con.) But I got the chance to buy about 40 or 50 old metal miniatures recently for only $10. They are mostly old Grenadier minis, but one set was from Ral Partha (although the figures were all intermixed). So then I borrowed my sister’s acrylic craft paints and started painting away. Fortunately, I am an old model builder from way back, although I haven’t painted anything for years, especially not anything as small as these figures.

I did read up on some mini painting techniques at the excellent web site at http://www.how-to-paint-miniatures.com/. I did wash the figures thoroughly, even had to remove some old paint using 91% isopropyl alcohol and a toothbrush (using an old aluminum pie pan). Of course I wore a latex examination glove to keep my skin oils off the minis. I then glued the minis to wooden bases, then painted each figure and its base with white acrylic primer, then after the primer was dry started painting. I kept using an exam glove on the hand that was holding the figure I was painting.

Painting table

Dining room table, used as a painting table.


Partially painted miniature figures

Partially painted miniature figures.

We then finally started using the metal minis in our D&D campaign on July 24, but only for the main characters. For NPCs and monsters we’re still using the cardstock figures. Here’s a picture taken by one of our players on their cellphone of the metal minis all bunched up. There are a couple of the cardstock figures in the background.

Metal minis (photo by PF Anderson).

Metal minis (photo by PF Anderson).

The three figures in the front are (from L-to-R), Opalent, Lightstep, and Vandin. Lightstep is not yet finished. I haven’t yet painted his eyes, nor some of the trim on his clothing and accessories.

Anyway, painting the minis is fun, although it can take a lot of time. I can only paint for about 30 minutes at a time, then my neck gets sore from being bent over. I have to use an Optivisor in order to see close enough to paint, and have to sometimes hold the figure and the brush close to my body to prevent wobbly painting. That’s what bothers my neck, as I have to lower my chin to my chest in order to focus with the Optivisor. When I was building models in my 20s, I had 20/13 vision (better than 20/20). I used to scoff, hah! who would need magnifying lenses! But when I hit my mid-40s, I suddenly noticed I had presbyopia and I needed reading glasses. I also found I needed stronger magnification in order to see fine details. I probably should buy a desktop lamp with a large magnifying lens, then I might not have to bend my neck so much.

— The Dungeon Master