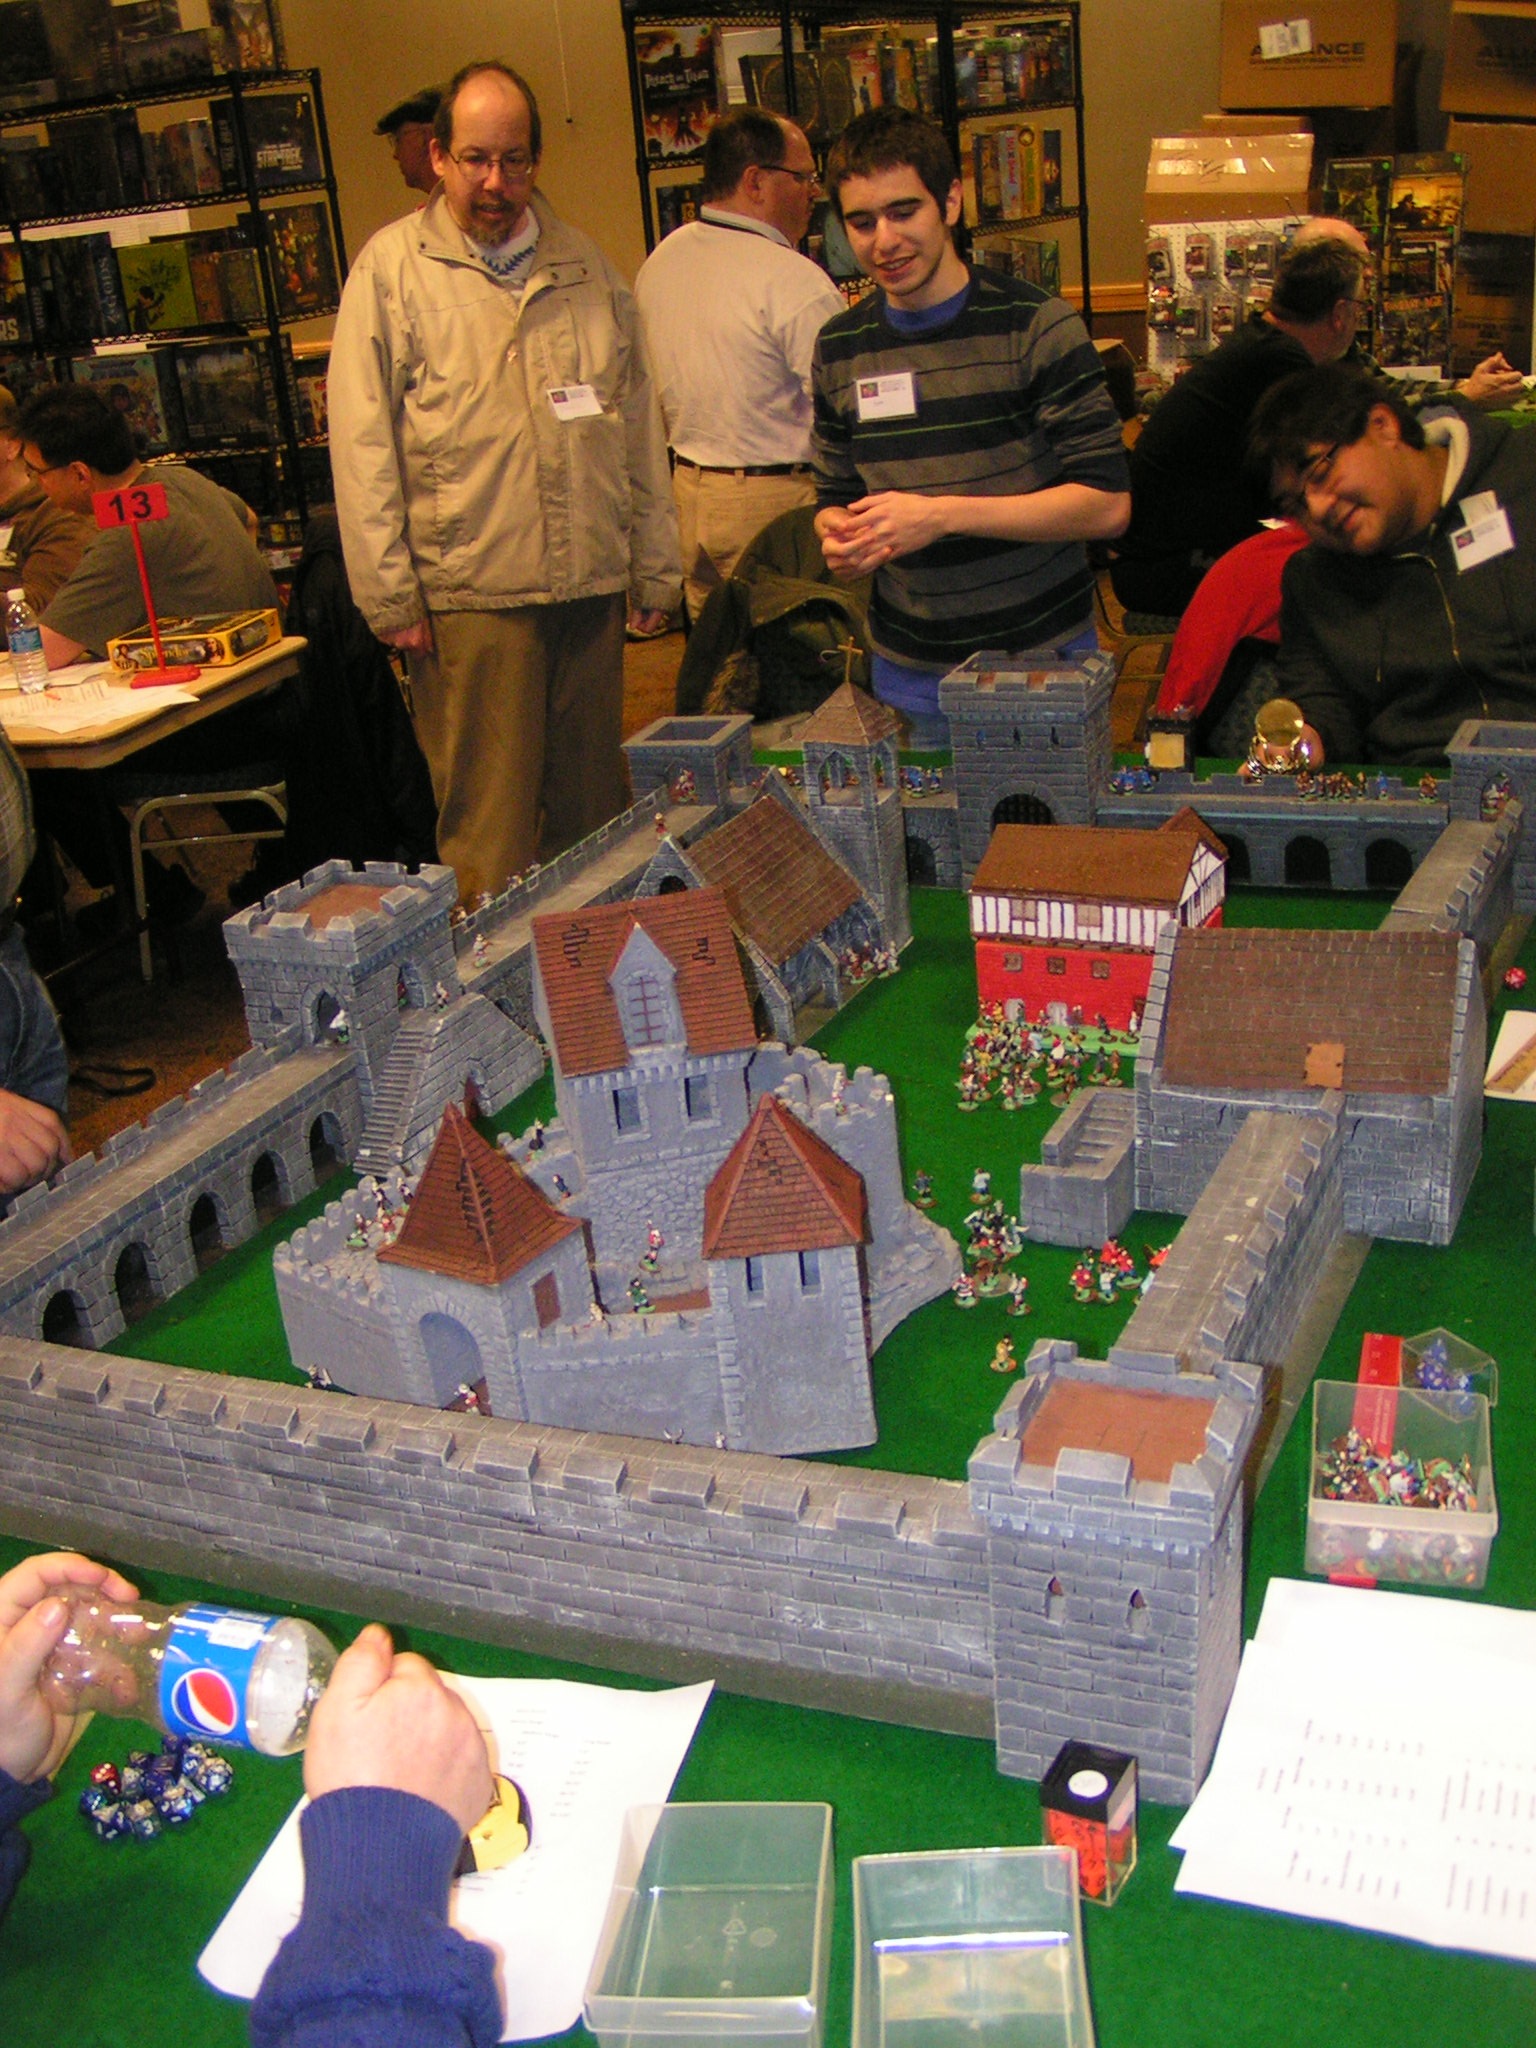
Saturday, February 9, 2019, saw another game of Close Action played in southeastern Michigan, this time at Flintcon 2019 in Flint, Michigan. We played Close Action scenario 17, “Santo Domingo.” In that scenario, five French ships, an 80-gun (Alexandre), a 120-gun (Impérial), and three 74-gun (Diomède, Jupiter, Brave) ships were trying to escape the map, and initially only three British 74-gun ships (Superb, Northumberland, Spencer) were on-board to try to stop the French. The British would also receive reinforcements: Canopus (80-gun) on game-turn 3; Donegal (74) on g-t 4; Atlas (74) on g-t 5; and Agamemnon (64) on g-t 10, although the French could be far away before the reinforcements could even think of catching up.
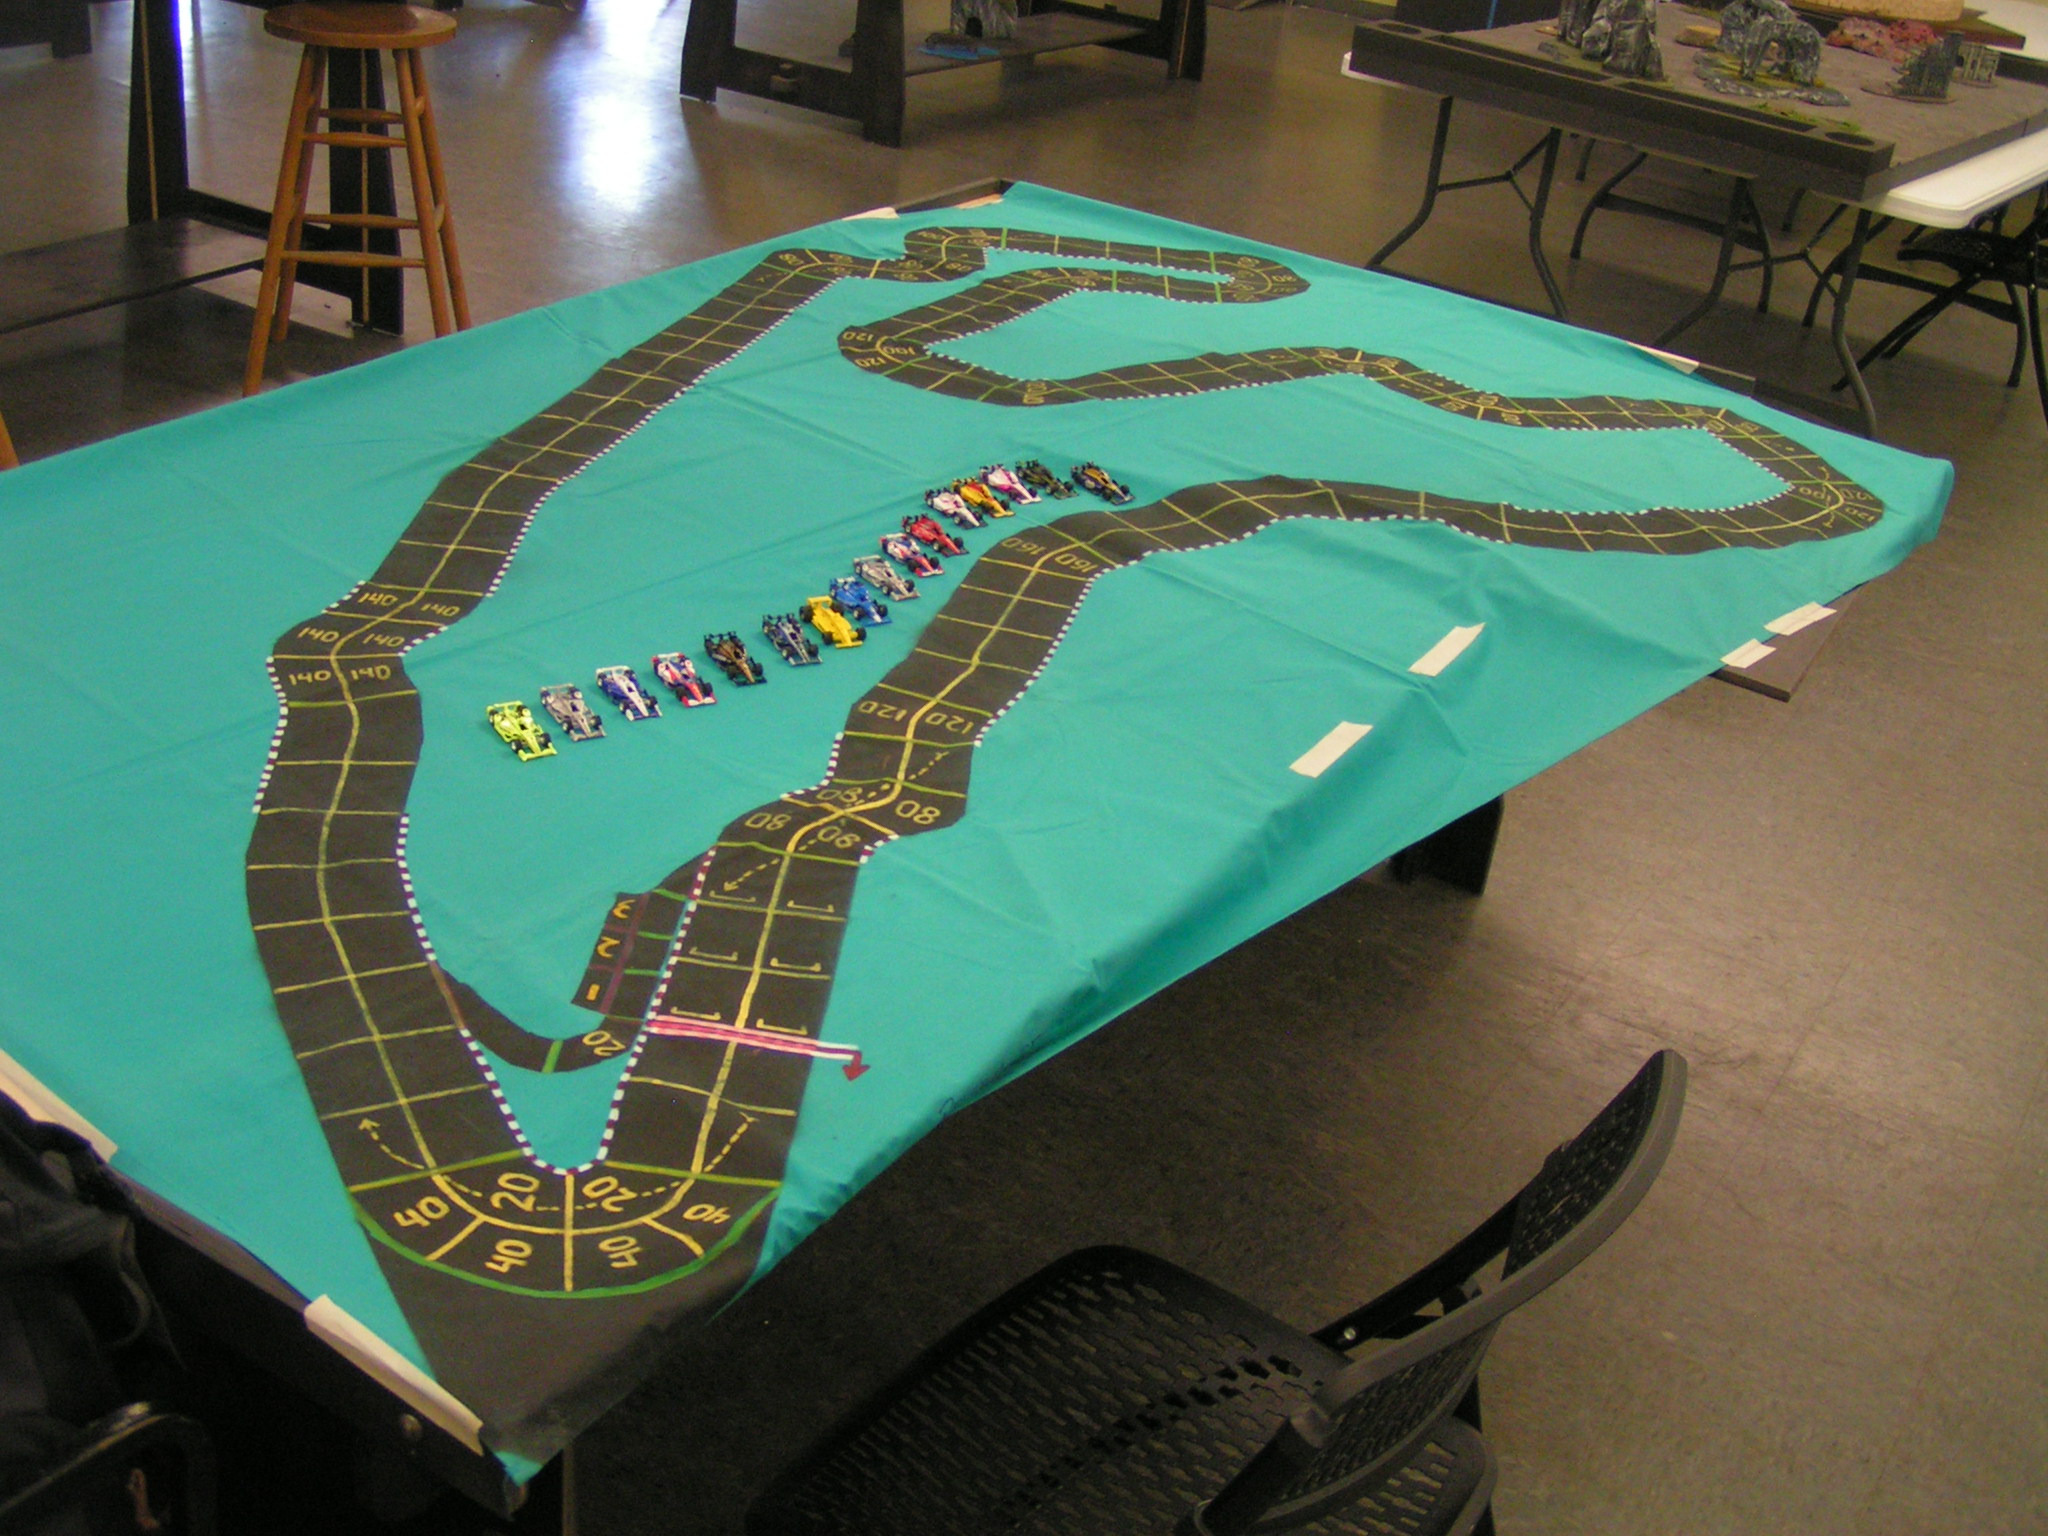
Starting Positions
British
Superb (74) – A1640:2
Northumberland (74) – A1544:2
Spencer (74) – A1450:2
French
Alexandre (80) – A3435:1
Impérial (120) – A3439:1
Diomède – A3443:1
Jupiter – A3448:1
Brave (74) – A3452:1
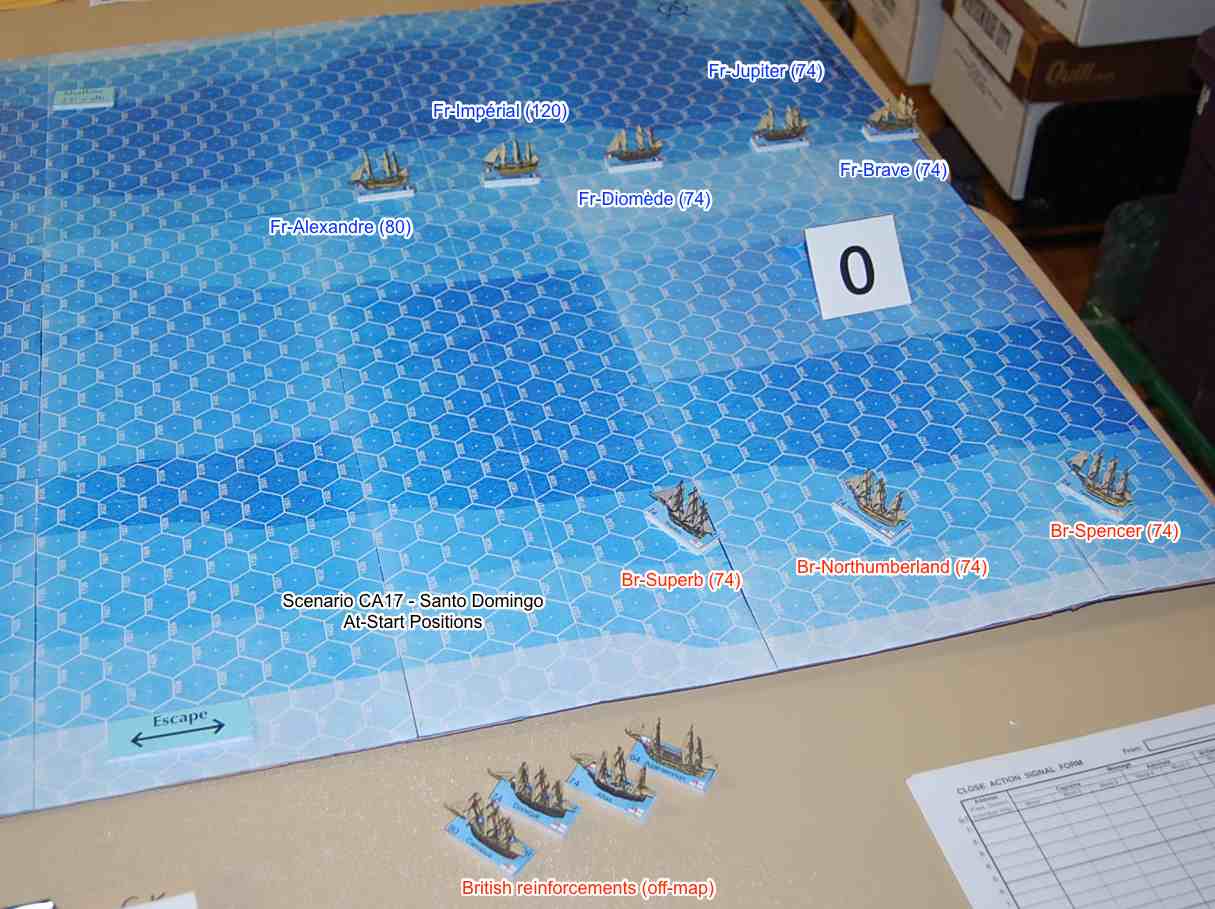
Santo Domingo starting positions: The French line is at the top of the picture, headed right-to-left. The British are at the bottom-right, headed at an angle towards the French. The wind is blowing right-to-left.
Jim Robinson, an experienced Close Action player, commanded the French ships from Impérial. Bill Worrel, who has played CA only once before, commanded the British aboard Superb. On the face of it, this scenario looked to be a tough one for the British to win. The French could escape not only from the far left map edge (there is another map board in that direction that is not pictured, and it’s a long way to that map edge), but could also escape off the long edge at the bottom of the above picture. Any French ship that escaped off the map would give 90% of its Victory Points (VPs) to the French, so the British somehow or another needed to stop three of the five French ships from exiting the map. The British would eventually receive four more ships as reinforcements: Canopus (80-gun) on game-turn 3; Donegal (74-gun) on g-t 4; Atlas (74-gun) on g-t 5; and Agamemnon (64-gun) on g-t 10. Of course, by the time Agamemnon got on the map, the French ships could be far away! So the first item of business for the British was to close the range to the French and to start shooting.
The Wind Speed and Sea State were both “2” at the start of the scenario, so that wouldn’t affect any ships adversely.
Game-Turn 1
The movement for the game-turn 1 was simple. All French ships were at plain sail status, and they all moved ahead 6 spaces, maintaining their line-ahead formation. The British were also at plain sail, and they moved ahead 8 spaces towards the French, due to the fact they were in a better attitude to the wind (the Brits were “broad-reaching,” while the French were “running” with the wind). Only one ship, the British Northumberland, announced “men-in-rigging” as it started changing from plain sail to medium sail status. That sail change would take two game-turns to complete.
Only one ship opened fire at the long range, and that was Brave firing at Spencer. The range was 12 hexes, too far for an initial broadside bonus, and Brave’s Basic Gunnery Number (BGN) was “12” at 12 hexes. Brave had a Crew Quality (CQ) of “D” and so it had a Gunnery Modifier of “0” (zero) for this shot due to being at plain sail. Greg Lim, the skipper of Brave, rolled a d6 and rolled a “2” while firing high (Brave had to fire high at ranges more than 9 hexes from the target). Spencer then received only a single hit on her rigging, due to being at plain sail herself. (It was later determined that the -1 mod for firing when at plain sail was missed, so Brave’s fire should have had a total of -1 in modifiers. C’est la vie!)
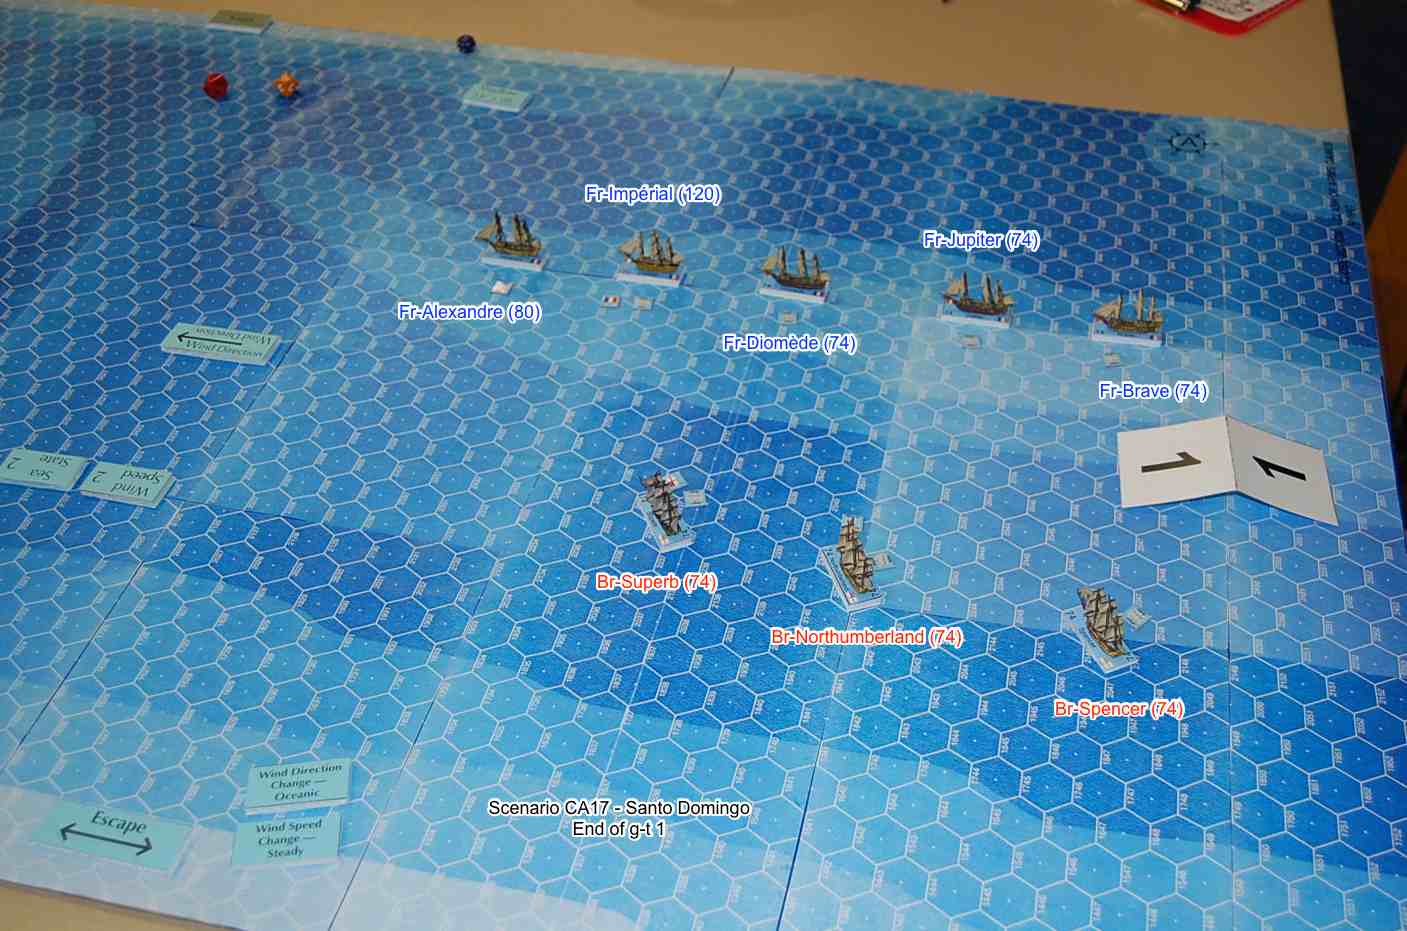
At the end of game-turn 1, the British have closed the range towards the French.
Ship positions at the end of game-turn 1:
British
Superb (74) – A2436:2
Northumberland (74) – A2340:2
Spencer (74) – A2246:2
French
Alexandre (80) – A3429:1
Impérial (120) – A3433:1
Diomède – A3437:1
Jupiter – A3442:1
Brave (74) – A3446:1
Although messages were written at the beginning of the game-turn, they were not received until the end of the g-t. The British admiral, Bill Worrel, in Superb, sent the message “STOP REAR THREE SHIPS”. The French commander, Jim Robinson, sent a rather frivolous message: “SET PHASERS DEEP FAT FRY”! Um, we’ll just ignore that message, eh?
Game-Turn 2
On game-turn 2, the French continued sailing in line-ahead formation, all ships moving 6 hexes ahead. The British Superb moved ahead 6, and the Northumberland and Spencer each moved “7P” to turn and head in the same direction as the French ships. All three British ships showed “men-in-rigging.”
Superb (5 hexes) and Northumberland (4 hexes) both fired their initial starboard broadsides at Jupiter, and Spencer (5 hexes) fired her initial starboard broadside at Brave. Diomède (4 hexes) shot at Superb, an initial port broadside and a bow rake; Jupiter (4 hexes) fired her intial port boardside at Northumberland; and Brave (5 hexes) fired at Spencer again.
Superb had a BGN of 22, with +4 for CQ and +1 for initial broadside, but one of the sailor crew sections was busy making changes to the sails, so that gave a -3, for a total Gunnery Modifier of +2. The dr was “3” so the damage inflicted on Jupiter was 2 rigging (one of the rigging lost was due to the target being at plain sail), 1 hull, and 1 sailor. Northumberland then had a BGN of 25 versus Jupiter, with a total of +3 in modifiers. A 1d6 dr of 6 gave a Final Gunnery Number (FGN) of 34, which yielded 3 rigging, 2 hull, and 2 sailors (although it was recorded as only 1 sailor lost). Northumberland also caused a critical (hull) hit on Jupiter, and that caused the “Wheel Shot Away” result. That meant that Jupiter could only make one 60° turn in a game-turn (instead of two turns), and had to roll on the “Poor Maneuvering” table any time she did try to pivot. Spencer then fired at Brave with a BGN of 23 and +2 in mods, with a dr of “5”, to inflict 2 rigging, 1 hull, and 1 sailor in losses.
The French return fire saw Diomède was a BGN of 26, +4 in mods (+2 each for initial broadside and rake), but as she was firing high and using dismantling shot, another +1 would apply (although it should have also had a -1 for shooting while at plain sail). In any event, the damage dished out was recorded as 5 rigging. A hull hit was ignored, as dismantling shot could not affect the hull. Jupiter fired high with dismantling shot at Northumberland, inflicting 3 rigging boxes of damage. Brave then fired at Spencer, firing high with dismantling shot inflicting 5 rigging and 1 marine boxes of damage, plus the “Braces Cut” critical hit. That meant that Spencer would not be able to accelerate or decelerate during game-turn 3.
In all, the British dished out 16 boxes of damage in g-t 2, while receiving 14 boxes of damage in return. Each side inflicted a critical hit on the other side. Both sides also forgot to apply the -1 modifier for firing when at plain sail. It should also be said that it is the GM’s fault for not remembering to apply the plain sail modifier, as most of the players either had zero or very little experience playing Close Action.
Ship positions at the end of game-turn 2:
British
Superb (74) – A3033:2
Northumberland (74) – A3037:1
Spencer (74) – A2942:1
French
Alexandre (80) – A3423:1
Impérial (120) – A3427:1
Diomède – A3431:1
Jupiter – A3436:1
Brave (74) – A3440:1
At the end of g-t 2, the French message from Jim Robinson (aboard Impérial) was revealed to the other French ships as “CHANGE SAIL STATE”. The British sent the message “CONCENTRATE FIREPOWER ON DIOMEDE”.
Game-Turn 3
At the beginning of the game-turn, the Wind Direction Change dice roll revealed that the wind would indeed change 60° counter-clockwise, to blow toward direction 6. But that change wouldn’t take effect until the beginning of g-t 4.
During game-turn 3, the French continued sailing straight-ahead, with all ships showing men-in-rigging. Alexandre moved 7 hexes; the other four ships moved 6 hexes ahead. Superb moved “3P2” which moved her right alongside Jupiter. Northumberland moved ahead 5, and Spencer plotted “2S4”. Spencer had to try to move 8 MPs in this game-turn as she had used 8 MPs in the previous g-t and suffered the “braces cut” critical hit in g-t 2, but as she started g-t 3 as “running” with the wind, her maximum movement was 7. So, Spencer moved as many MPs as she could. Superb and Spencer had men-in-rigging, and Northumberland was now at medium sail. Spencer was 1 hex short of raking the stern of Brave. The Brits got their first reinforcement; Canopus came on the board (in the lower right of the pictures) and moved 6 hexes ahead).
Only two pairs of ships fired at each other in g-t 3. Superb and Jupiter were right next to each other at range 1. Northumberland and Brave were on parallel courses, at range 4. Superb’s shot caused a loss of 3 rigging, 2 hull, 1 sailor, and 1 marine to Jupiter, and Jupiter’s shot caused a loss of 3 rigging, 1 hull, and 1 marine to Superb. Each ship lost its 1st section of rigging and had to make a rigging check 1d6 die roll. Jupiter rolled “Lines Jammed,” and that canceled her attempt at changing sail state from plain sail to medium sail. Jupiter also received a critical hit, but only lost -1 Guns Dismounted to her port side. Superb rolled “Braces Cut” and also would not be able to accelerate or decelerate in game-turn 4.
Northumberland had a very good shoot at Brave, causing a loss of 4 rigging, 3 hull, and 1 sailor, and inflicting a critical hit of “Leadership Casualties on the Quarterdeck” and so Brave also lost a marine box. Brave’s return fire at Northumberland only dinged 2 rigging boxes. Later, during the maintenance phase, Brave rolled a Morale Check (MC), and passed it. And Superb repaired her cut braces.
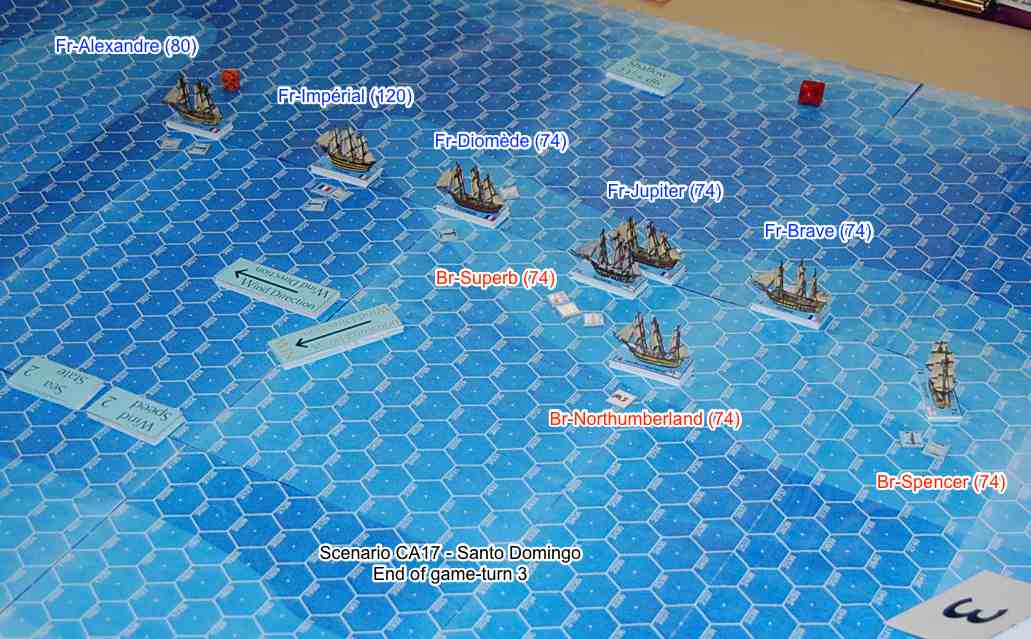
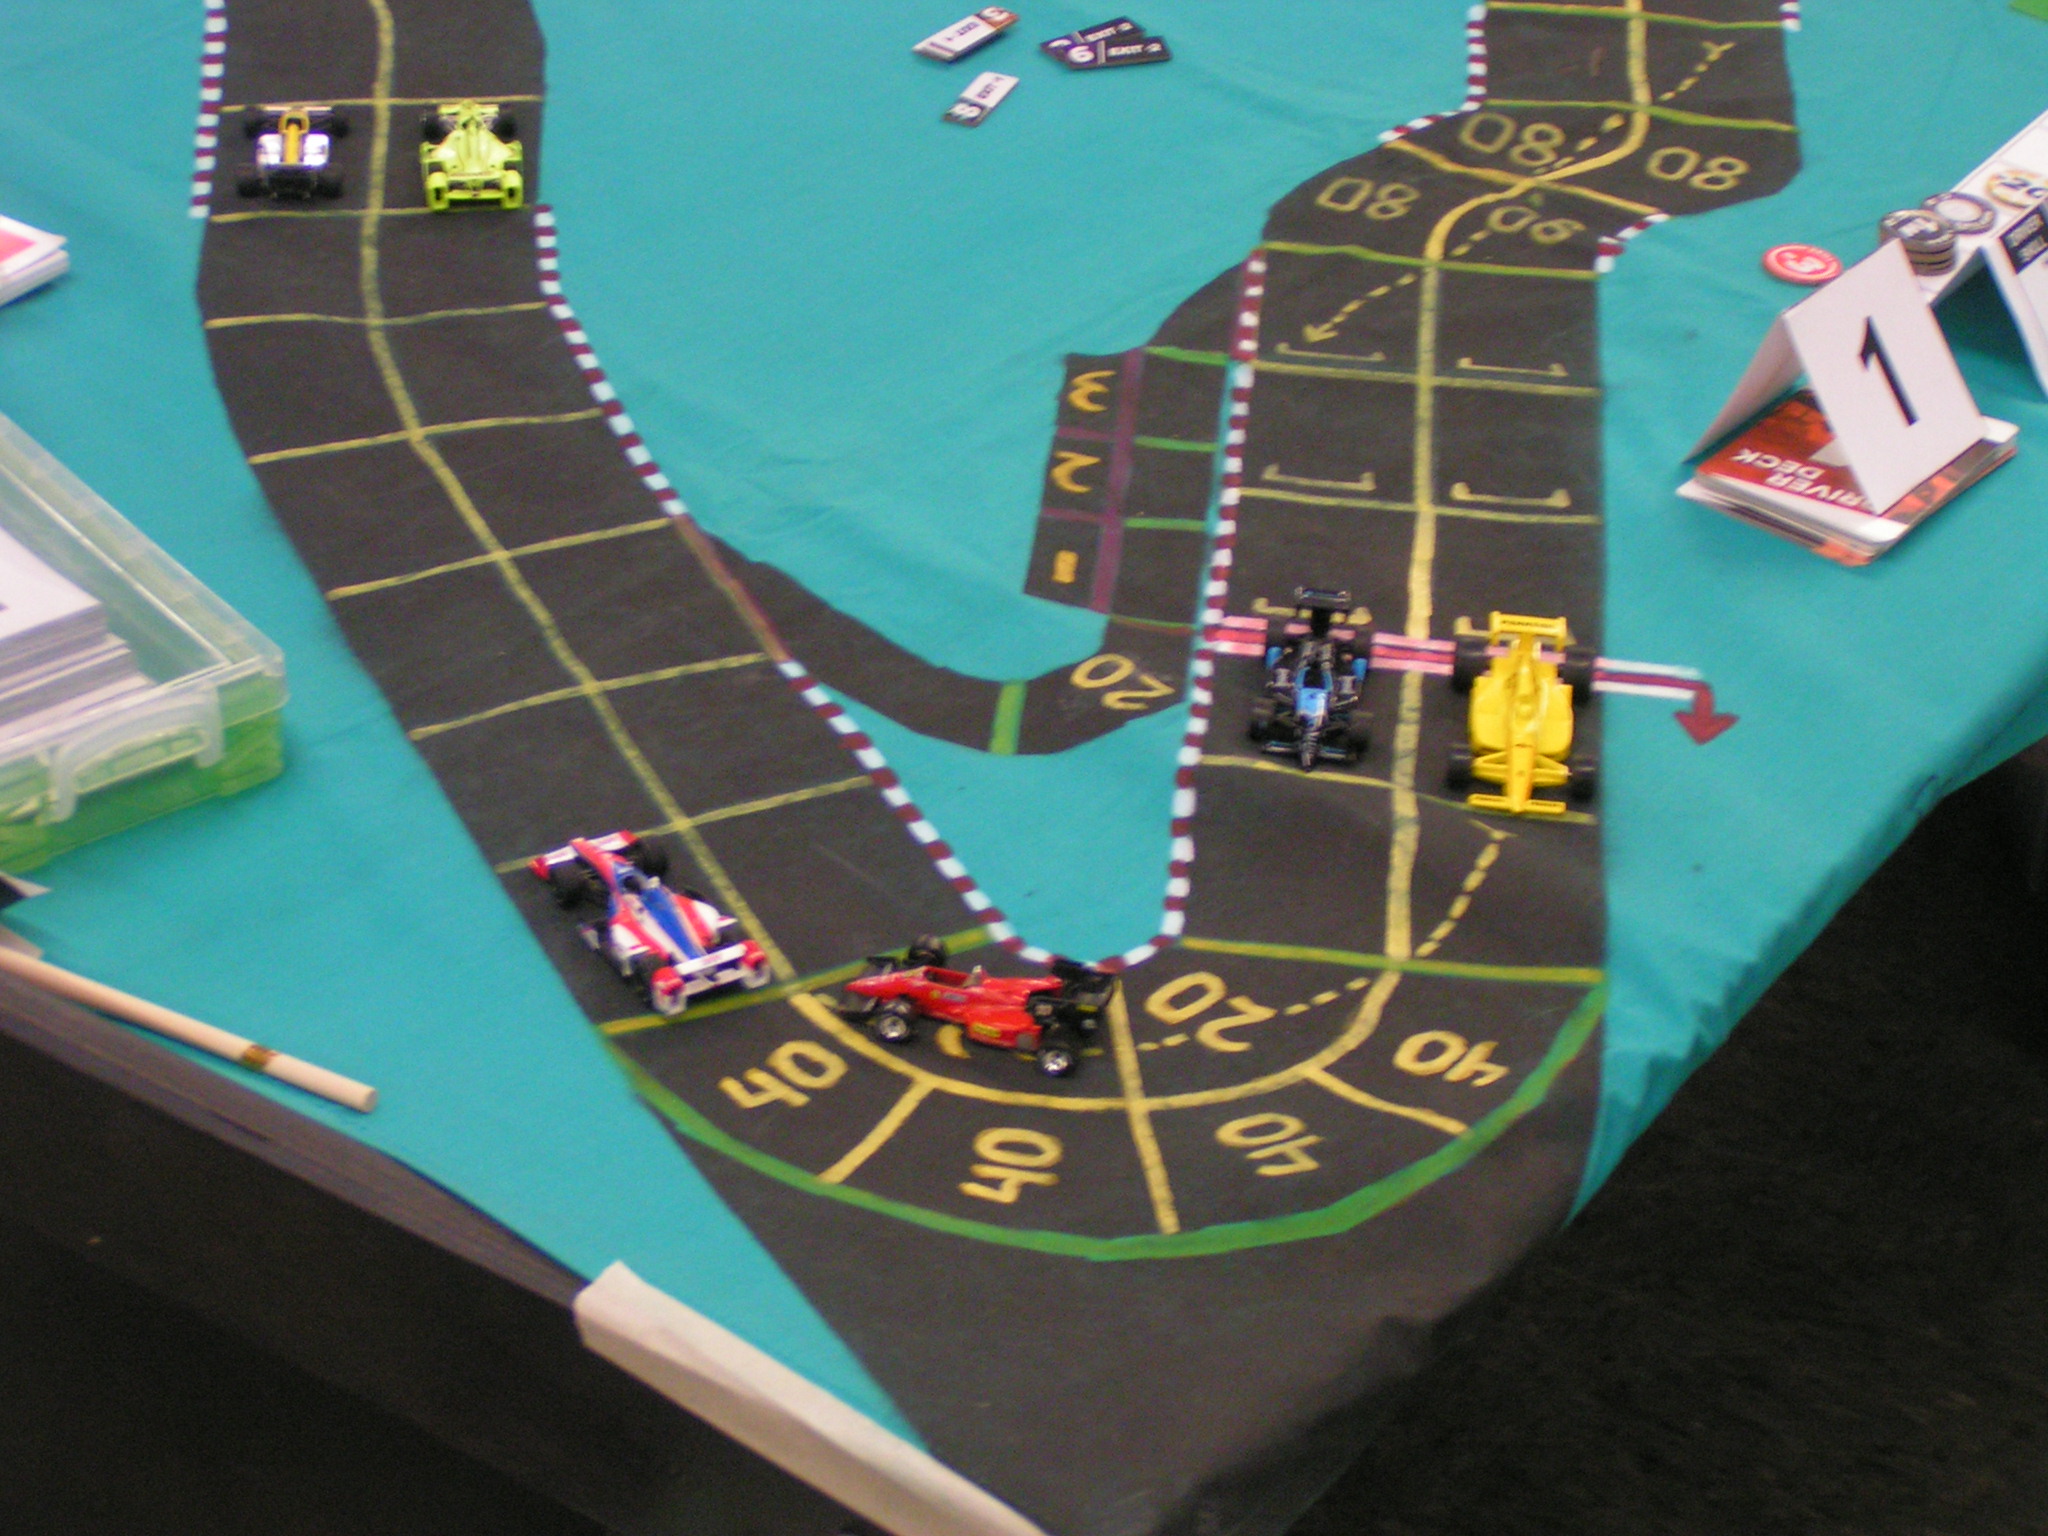
The ship positions at the end of game-turn 3. Superb is right next to Jupiter.
Ship positions at the end of game-turn 3:
British
Superb (74) – A3329:1
Northumberland (74) – A3032:1
Spencer (74) – A3338:2
Canopus (80) – A1146:1 (reinforcement that just entered the map)
French
Alexandre (80) – A3416:1
Impérial (120) – A3421:1
Diomède – A3425:1
Jupiter – A3430:1
Brave (74) – A3434:1
French message to all of their ships at the end of game-turn 3: “GOOD SHOOTING KEEP IT UP”. British message to all of their ships: “STOP DIOMEDE FROM ESCAPING”.
It should be stated that in the present position, the leading French ships should be able to escape from the British. That would have won the scenario for the French due to the special victory conditions. However, it would not look good if the French admiral simply abandoned his last two ships to the tender mercies of His Majesty’s Royal Navy!
Game-Turn 4
The wind had now changed; it was now blowing toward “direction 6,” which is to say it was blowing towards the starboard quarter of the French ships, so the French was now all “broad-reaching.” Three of the French ships turned to port and started making way for the nearest map edge where they could escape. The leading Alexandre moved “P6,” Impérial moved “5,” Diomède moved “6,” Jupiter moved “1P1,” and Brave moved “P5.” For the British, Superb moved 5 hexes straight ahead, Northumberland moved 6 hexes ahead, and Spencer moved “P2,” which left her a bit behind the French ship Brave. Donegal came onto the map to join Canopus as a reinforcement; both ships moved 7 hexes forward in direction 1.
All of the French ships were now at medium sail, except for the damaged Jupiter. Jupiter had her sail change canceled due to receiving battle damage in the last game-turn. Superb, Northumberland, and Spencer were all at medium sail, but Spencer had men in the rigging to get back to plain sail to close the distance back to the French ships. Canopus and Donegal were both flying plain sails so they could make all speed towards the enemy.
After movement, only three ships elected to fire at each other: Brave fired a 5-hex range stern rake on Northumberland; Jupiter fired a 3-hex range stern rake on Superb, but could only fire her forward starboard guns; and Northumberland had a 3-hex range bow rake on Jupiter, but could only fire her rear starboard guns. No other ships had a target with the arc of their broadsides.
Jupiter had a BGN of 26 for her shoot at Superb, but had a total of -2 in modifiers, and fired high. Jupiter did roll a 6, and that also caused a critical hit against Superb. Superb lost 3 rigging, and 1 sailor. The critical hit caused leadership casualties on the quarterdeck, which caused Superb to cross out a marine box. Superb then had to take a morale check during the maintenance phase, which she passed with her Morale Rating of “3”. Northumberland’s bow rake versus Jupiter started with a BGN of 25, but had a total of -4 in modifiers. Rolling a “4” caused a loss of 2 rigging and 1 sailor to Jupiter. Brave fired on Northumberland with a BGN of 23, -1 in mods, a dr of “5,” causing a loss of 2 rigging, 1 hull, and 1 sailor. Northumberland then lost her 1st rigging section. The resulting Rigging Check was for a “Mast May Fall” possibility, but fortunately for Northumberland the mast stayed upright.
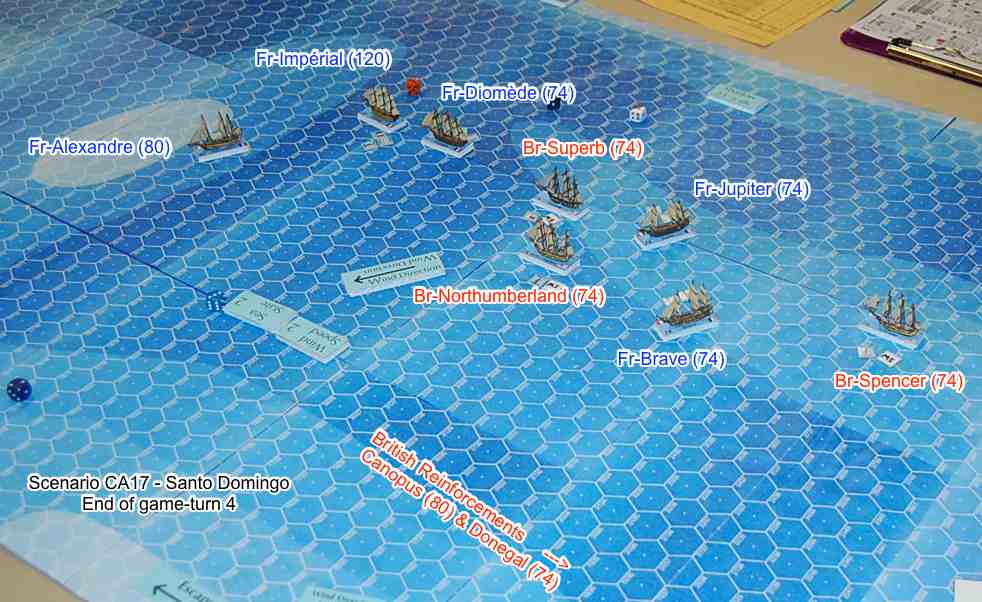
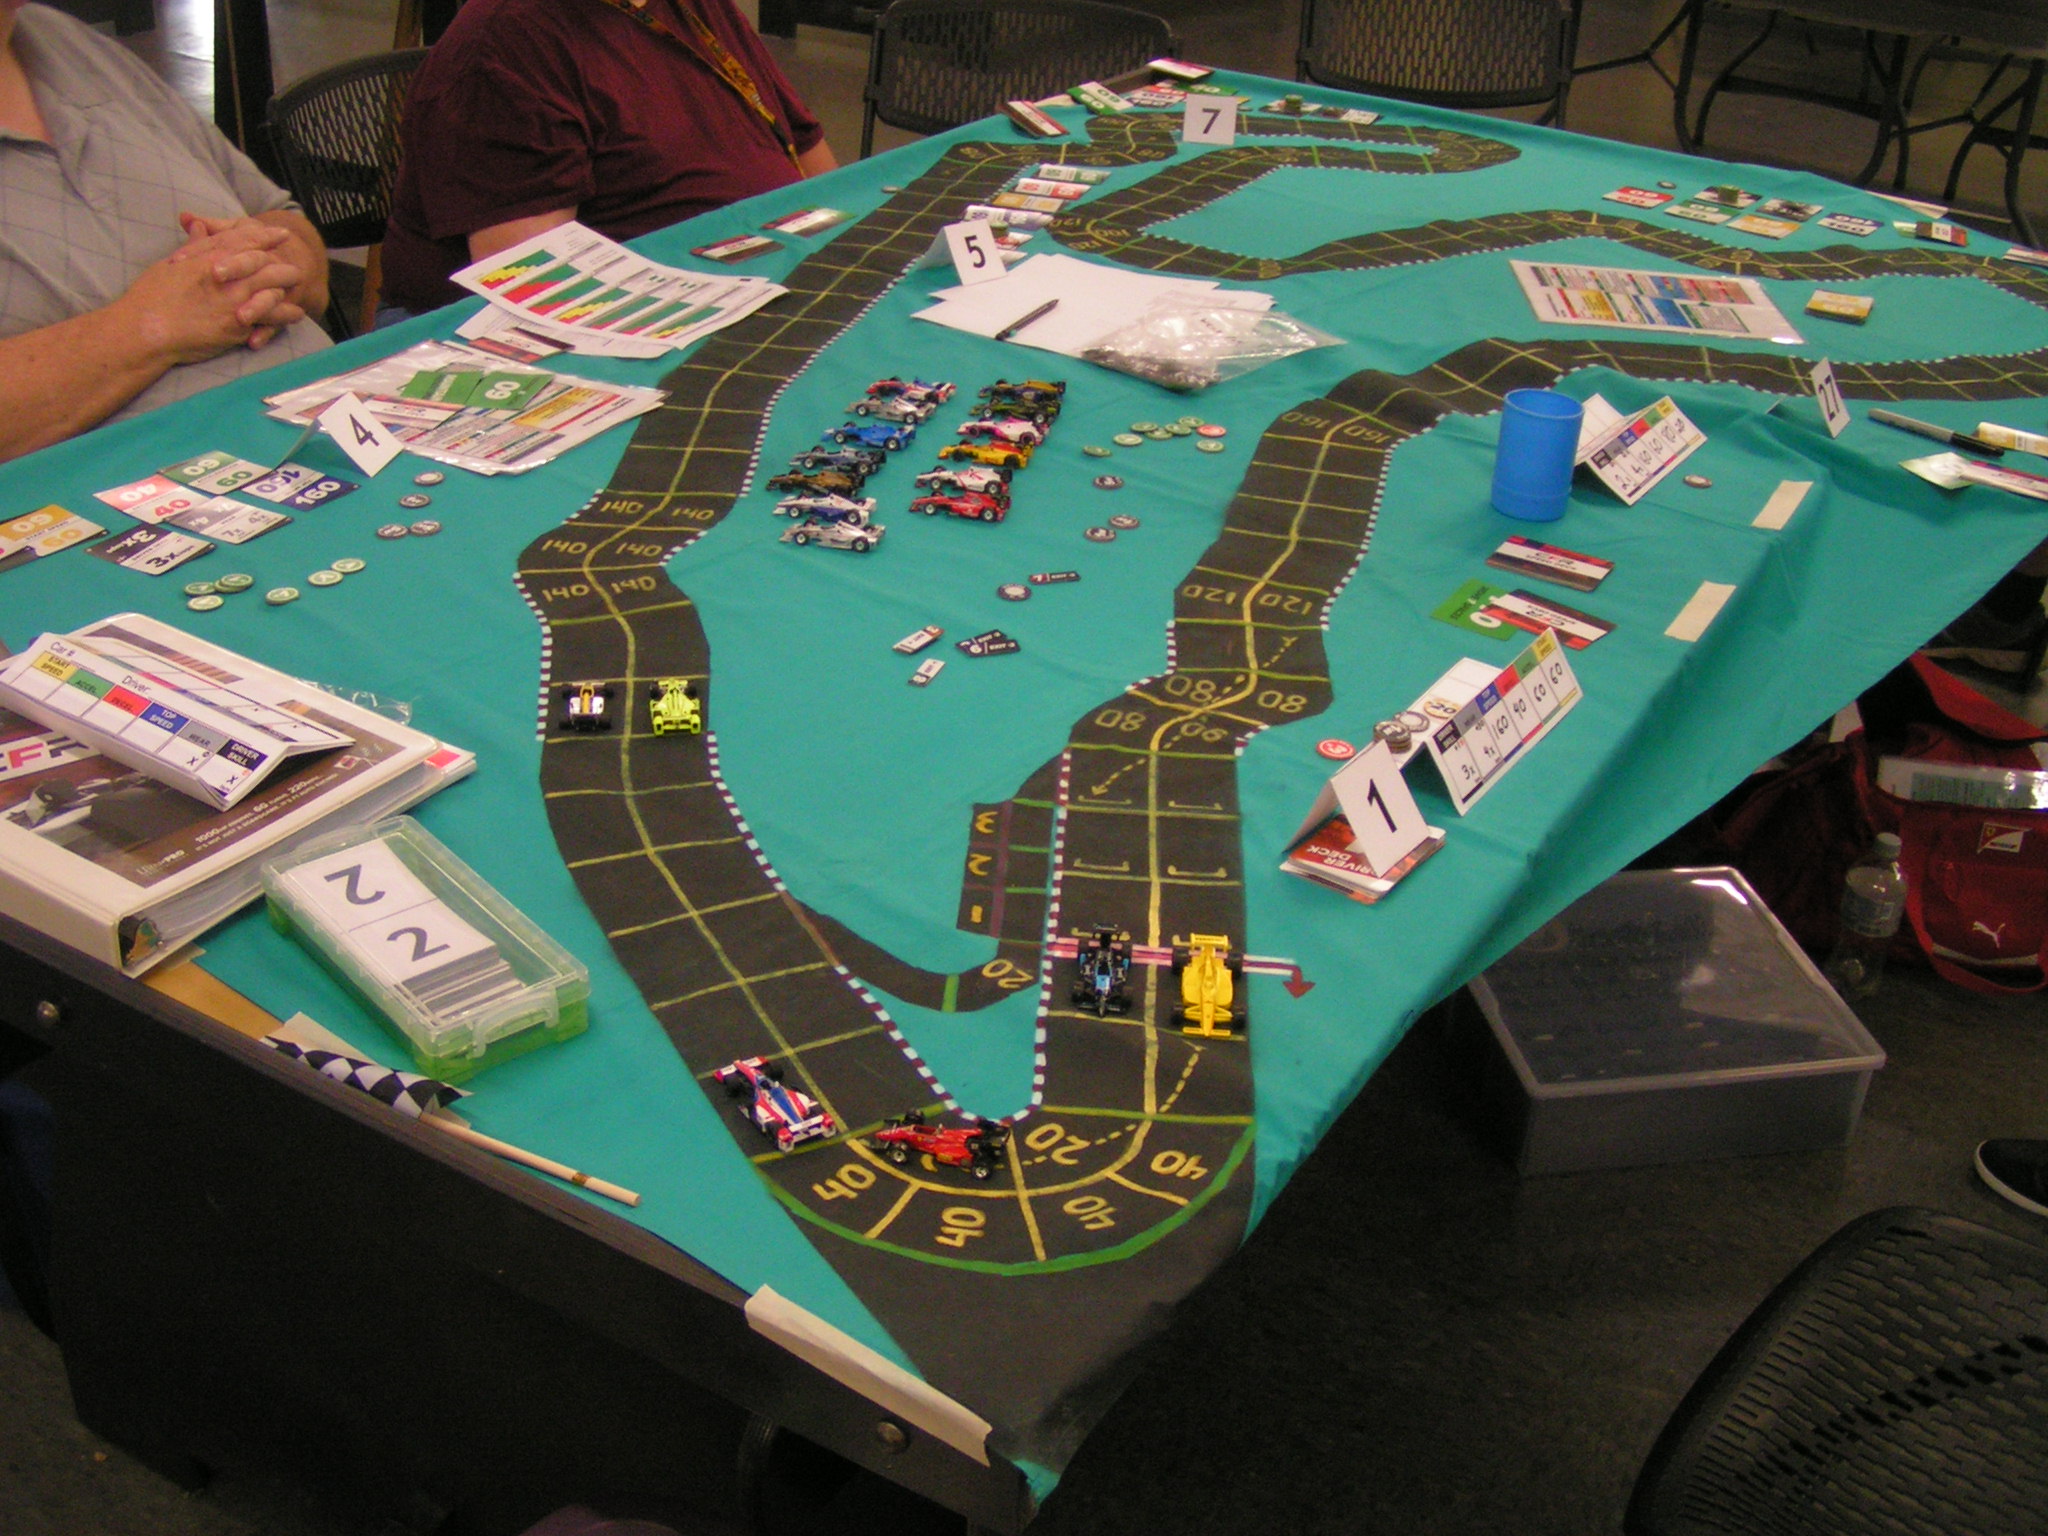
End of game-turn 4: Three of the French ships have turned to port, but the two rear French ships have been separated from their three other friendly ships.
Ship positions at the end of game-turn 4:
British
Superb (74) – A3324:1
Northumberland (74) – A3026:1
Spencer (74) – A3336:1
Canopus (80) – A1139:1
Donegal (74) – A1145:1 (reinforcement that just entered the map)
French
Alexandre (80) – A2813:6
Impérial (120) – A3416:1
Diomède – A3419:1
Jupiter – A3328:6
Brave (74) – A2931:6
The French message to their fleet that was revealed at the end of g-t 4 said “REAR TWO SHIPS TURN PORT”, although those ships had already executed that turn. The British showed a somewhat spurious message of “DAMN TORPEDOES FULL SPEED AHEAD”. The receiving ships were wondering what the heck was a torpedo?
Game-Turn 5
To begin g-t 5, all of the French ships were now at medium sail, except for Jupiter, which was still at plain sail status, although Jupiter could only move as fast as medium sail status due to having lost her 1st rigging section. Northumberland and Superb were at medium sail, as was Spencer, but Spencer still had men in the rigging to get back to plain sail. The British got a 3rd ship to add to their reinforcements, the Atlas, to join with Canopus and Donegal. All three of the reinforcement ships were at plain sail. Canopus and Donegal moved 7 hexes, and Atlas moved 8 hexes.
Spencer moved 6 hexes directly toward where the French line had been sailing. Superb turned to port to move “P3,” and Northumberland moved “P3P” to sort of head in the wrong direction from where the French were headed, although Northumberland did get a bow rake shot against Jupiter by turning in that direction. For the French, Alexandre moved ahead 5, Brave moved ahead 5, and Jupiter could only manage to move 3 hexes. Those three ships were headed diagonally toward the closest escape edge of the map. Impérial and Diomède both turned to port, both moving “3P”.
Auditing the ship’s logs after the game, there were some move “discrepancies” on this game-turn. Brave moved “5” but only had 4 MPs while running with the wind while at medium sail. So Brave moved one too many hexes forward. Spencer accelerated too much, using only 3 MPs on game-turn 4, and then using 6 MPs on this g-t. Also, while Spencer only used 3 MPs on g-t 4, she should have used at least 5 MPs on g-t 4, since she used 7 MPs on g-t 3! Impérial plotted “2P”, when the photographs were checked after the game, she had actually moved “3P” on the map. And, Canopus, in her first three g-t’s on the map, plotted “6,” “6,” and “7,” but her position on the map at the end of g-t 5 was two hexes to the rear of where she should have been on the map.
The British ships Northumberland and Superb both targeted Jupiter, and Spencer shot at Brave. The French returned fire with Diomède and Jupiter both shooting high at Superb, and Brave fired (low) at Northumberland.
Northumberland inflicted damage to the tune of 5 rigging, 2 hull, and 2 sailor boxes on Jupiter, and Superb dished out another 4 rigging, 2 hull, and 1 sailor to Jupiter, making a total of 9 rigging, 4 hull, and 3 sailor boxes lost. Jupiter lost her 1st hull section, taking a hull check and that directed her to take a rigging critical hit roll, which turned out to be “Shrouds Severed” which caused the loss of another rigging box. The hull check also meant a morale check later in the game-turn. Then, since the Jupiter had also lost her 2nd rigging section, she had to take a rigging check dice roll. Unfortunately for Jupiter, the rigging check was that a mast fell, and that caused the loss of the rest of rigging section 3 and another morale check. Also, Jupiter lost her 1st sailor section, meaning she had a permanent -3 modifier to gunfire, and she would have to take a 3rd morale check during the maintenance phase later in the game-turn.
Spencer’s shot at Brave yielded only 1 rigging and 1 sailor box checked off. Brave lost her 1st rigging section, and got “Braces Cut” for her rigging check, so her acceleration and deceleration would be zero for the next game-turn, and she had “-2 guns dismounted” on her starboard side. Jupiter’s simultaneous return shot at Superb caused the loss of 3 rigging and 1 sailor box, and Diomède’s shot at Superb only added 1 hull to the damage to Superb. Superb did lose her 2nd rigging section, and got “-2 broadside obscured” (from falling rigging) on her port side. Brave’s gunfire at Northumberland caused the loss of 1 rigging and 1 hull box.
Then, during the maintenance phase, Jupiter failed two of the three morale checks she had to make. That dropped her Crew Quality to “F”, which gave her another -5 modifier to all of her gunfire. Add in her -3 for missing sailor section 1, and her gunfire had to apply -8. She also had a “-2 broadside obstructed” to her starboard side due to the mast falling. At this time, Jupiter only had 6 boxes remaining unchecked in rigging section 4, and she could only move at fighting sail MP rate, although she would still take damage at the plain sail rate as she still hadn’t changed her sail state.
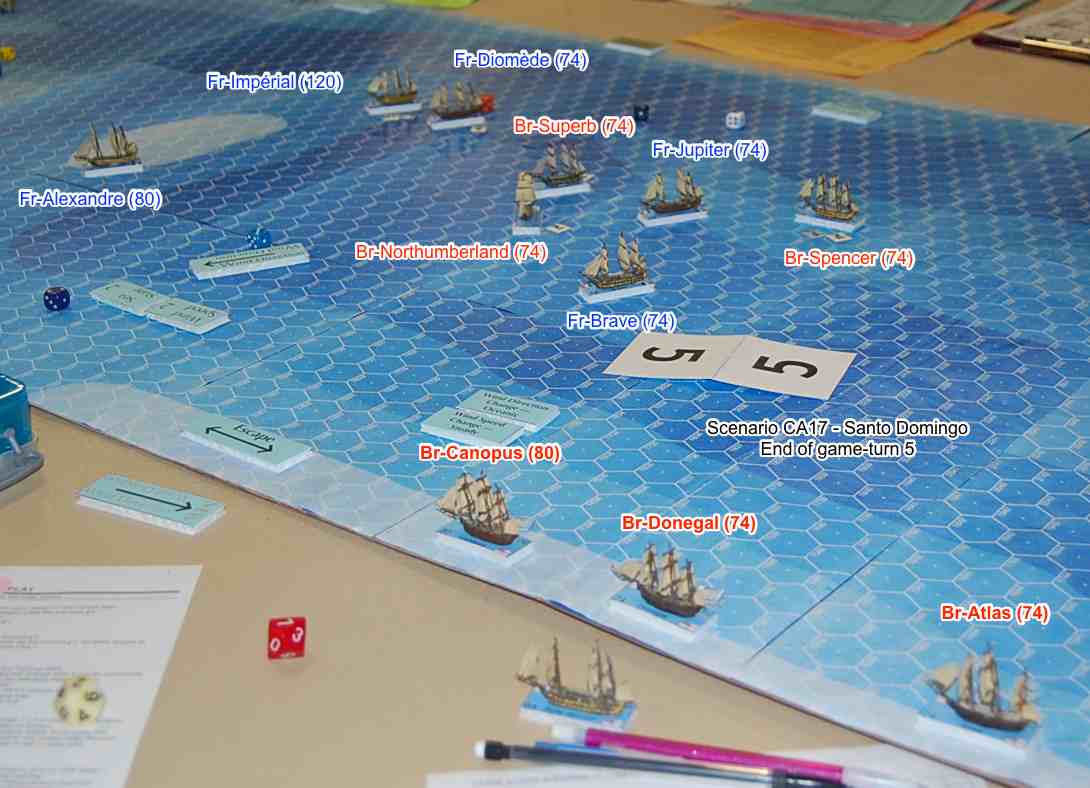
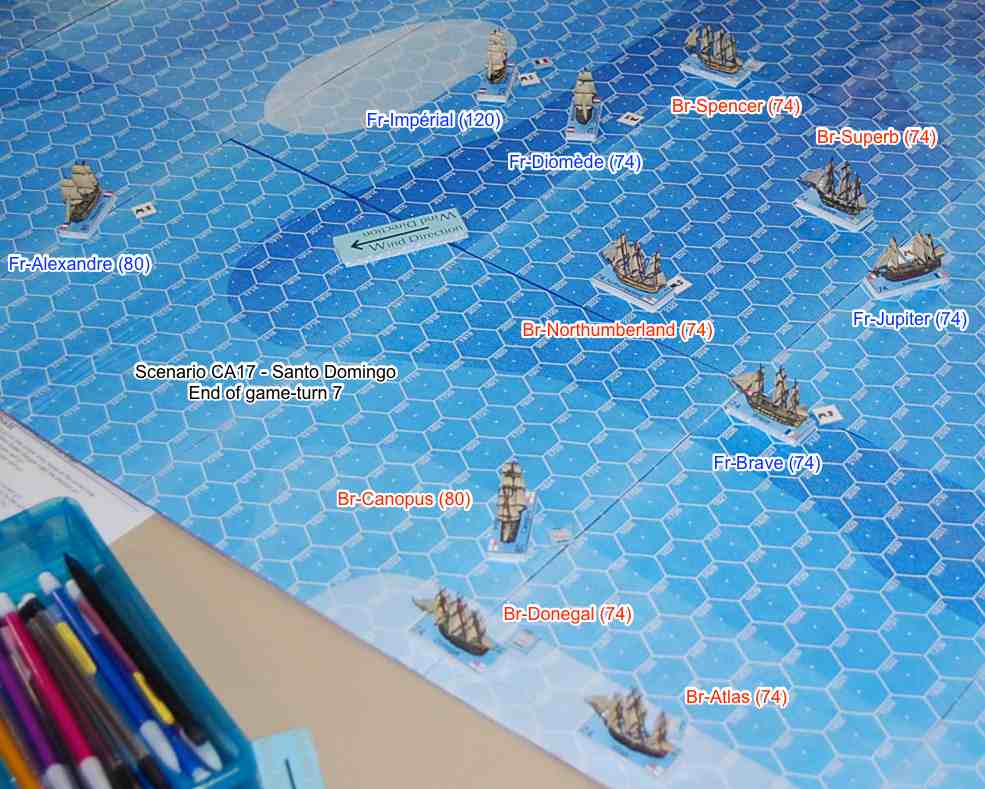
End of game-turn 5. Three British ships are rushing to help along the bottom edge of the map.
Ship positions at the end of game-turn 5:
British
Superb (74) – A3023:6
Northumberland (74) – A2724:5
Spencer (74) – A3330:1
Canopus (80) – A1132:1
Donegal (74) – A1138:1
Atlas (74) – A1144:1 (reinforcement that just entered the map)
French
Alexandre (80) – A2310:6
Impérial (120) – A3413:6
Diomède – A3416:6
Jupiter – A3027:6
Brave (74) – A2429:6
The French signaled ” FRONT THREE SHIPS TURN PORT” which they already did, and the British signaled “FREE FOR ALL”.
Game-Turn 6
For game-turn 6, four of the French ships were at medium sail, with only the battered Jupiter still being at plain sail status (although Jupiter could only move at fighting sail MPs, due to having already lost 3 of her 4 rigging sections). For the Brits, Northumberland and Superb were at medium sail; the rest of their ships were at plain sail. Superb had men in the rigging to change sail state.
Northumberland moved “1S3” which put her course on the same heading as Brave, although 5 hexes distant. Spencer moved 6 hexes straight ahead, which put her in position to fire at the stern of Jupiter (although it was not a rake). Superb plotted and moved “1” although she should have spent 2 MPs since she used 4 MPs in g-t 5 and her deceleration was “2”. The British reinforcements Canopus and Donegal moved ahead 7 hexes, and Atlas moved ahead 8 hexes.
Most of the French ships moved straight ahead. Alexandre moved 5, Diomède moved 3, Brave also moved 3 hexes. Jupiter plotted and moved 2, although with only 1 rigging section remaining she only had 1 MP available! Impérial moved “3P”, with her turn to port putting her aiming for a collision with Diomède.
Northumberland shot at Brave, and Spencer and Superb shot at Jupiter. The French Brave fired back at Northumberland, and Diomède and Jupiter both fired at Superb. Brave lost 3 rigging, 1 hull, and 1 marine box. Jupiter lost 4 rigging, 4 hull, 1 sailor, and 1 marine box, although they were not all checked off her ship’s log (in particular, 2 boxes in rigging section 4 were not checked off, nor was the marine box). The French return fire was rather light as to damage. Northumberland lost 2 rigging and 1 marine box, and Superb lost only 1 rigging and 1 sailor box.
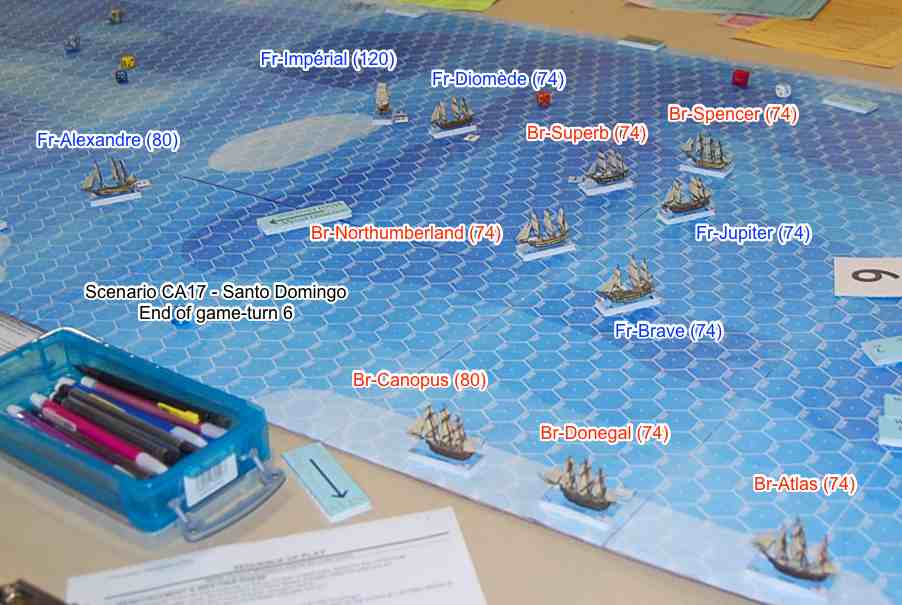
End of game-turn 6. Jupiter is being battered to pieces, and Brave is about to be surrounded by the British reinforcement ships at the bottom of the map.
Ship positions at the end of game-turn 6:
British
Superb (74) – A2922:6
Northumberland (74) – A2323:6
Spencer (74) – A3324:1
Canopus (80) – A1125:1
Donegal (74) – A1131:1
Atlas (74) – A1136:1
French
Alexandre (80) – A1808:6
Impérial (120) – A3111:5
Diomède – A3114:6
Jupiter – A2826:6
Brave (74) – A2127:6
Only the French admiral sent a message on g-t 6: “FRONT THREE SLOW TO ENGAGE”, meaning, of course, for Alexandre, Impérial, and Diomède to engage the British with the thought of trying to extricate Jupiter and Brave from the clutches of the enemy.
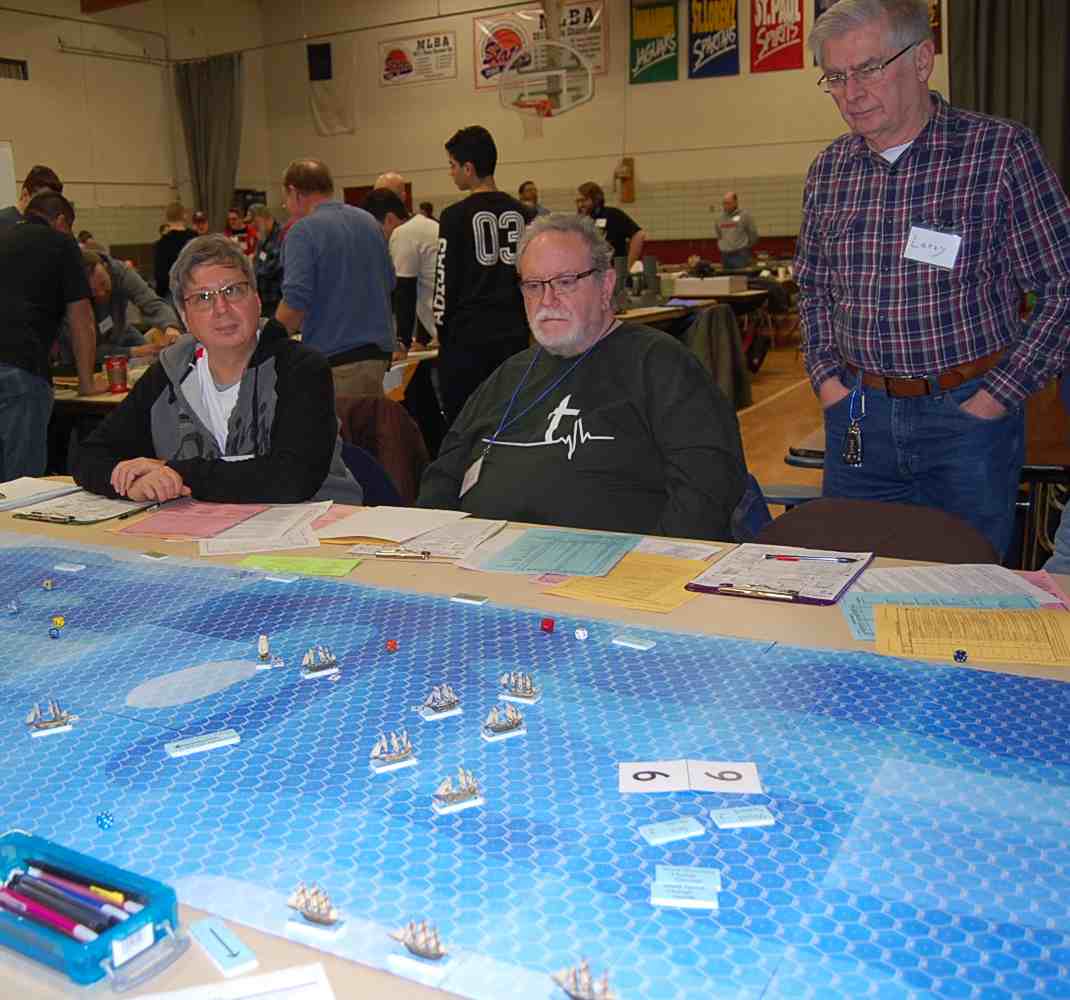
Three of the French ship commanders (left-to-right): Jack Beckman (Alexandre); Jim Robinson (Impérial); and Larry O (Jupiter).
Game-Turn 7
During game-turn 7, the mapboard began to look like giant melee. Spencer raced ahead 8 hexes and could loose a broadside against Diomède. Northumberland moved “S3,” and Superb just plotted “S”, a turn to starboard. Canopus moved “2S4” to try to cut off Brave; Donegal moved 7 and Atlas moved 8 ahead. For the French, Alexandre moved “P2” to start to head towards the British preparatory to doing battle. Impérial moved 3, and Diomède wisely turned to port, moving “P3”. Brave turned to starboard and moved “S2”, and Jupiter merely moved “1”, as fast as she could sail.
Fortunately for the French, only Spencer threw iron at Diomède. Canopus decided to hold her initial starboard broadside instead of firing a mere half-broadside at Brave. Donegal and Atlas decided to also hold their fire against Brave, and Superb and Northumberland didn’t have any enemy ship in their sights. Diomède and Jupiter both fired upon Superb, Jupiter getting a 3-hex stern rake, although she had -9 in modifiers to add to the +3 rake modifier. Brave fired upon Canopus at a 6-hex range, and Impérial fired her 60-gun initial port broadside at Spencer.
Diomède received damage to the tune of 2 rigging, 2 hull, and 1 sailor box. Canopus lost 2 rigging boxes, Superb lost 3 rigging and 1 hull box, and Spencer lost 4 rigging and a sailor box. Spencer lost her 1st rigging section, and the rigging check caused “braces cut” so her acceleration and deceleration for the next game-turn would be zero. Superb suffered a critical hit, also of “braces cut.”
Superb was subject to drifting, but did not drift, during the maintenance phase.
End of game-turn 7. The battle is about to turn into a free-for-all.
Ship positions at the end of game-turn 7:
British
Superb (74) – A2922:1
Northumberland (74) – A2320:1
Spencer (74) – A3316:1
Canopus (80) – A1521:2
Donegal (74) – A1124:1
Atlas (74) – A1128:1
French
Alexandre (80) – A1609:5
Impérial (120) – A2813:5
Diomède – A2816:5
Jupiter – A2725:6
Brave (74) – A2125:1
Once again, only the French admiral signaled to his ships, continuing the same message as before: “FRONT THREE SLOW TO ENGAGE”.
Game-Turn 8
All of the ships continued getting intermingled during game-turn 8. For the Brits, Superb moved “P1”; Northumberland moved “1P”; Spencer moved “2P2”; Canopus moved “4”; Donegal moved “7”; and Atlas moved “4S3”. For the French, Alexandre moved “4”; Impérial moved “2S”; Diomède moved “P3”; Jupiter continued moving “1”; and Brave moved “3”.
There was a lot of gunfire in this game-turn, as every ship on the map fired at some enemy ship. Atlas took a long-shot at Alexandre, inflicting a loss of 1 rigging box. Canopus and Northumberland shot at Brave, causing a loss of 7 rigging, 5 hull, 2 sailors, and 1 marine boxes. Brave also lost her 2nd rigging section, and suffered “sheets cut” during the resultant rigging check, and so she would lose 1 MP from her available MPs for next turn, as well as a -1 to her acceleration (for next turn only). Donegal fired at Impérial, nicking only a single sailor box. And Superb shot at Jupiter, causing losses of 1 rigging, 2 hull, and 1 sailor boxes. That shot reduced Jupiter to only having a single rigging box left in rigging section 4. One more hit to her rigging and she would be dead in the water.
For the French return fire at the British, Alexandre caused the loss of 1 rigging to Atlas. Brave fired away at Canopus, getting Canopus to check off 3 rigging, 1 hull, and 1 sailor. Diomède and Impérial blasted away at Northumberland, causing a loss of 4 rigging, 2 hull, and 2 sailor boxes. Northumberland also lost her 2nd rigging section and suffered “sheets cut.” And Jupiter shot at Superb, but only caused a loss of 1 sailor box.
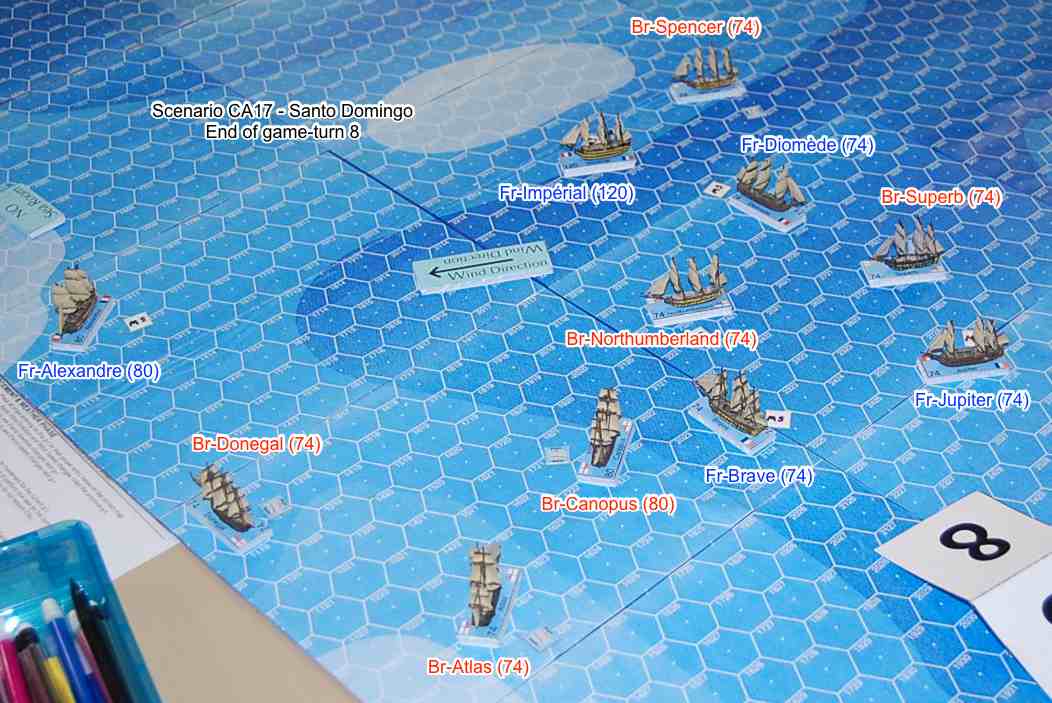
End of g-t 8: Jupiter is one rigging box away from being dismasted, and all ships fired their cannon during this game-turn.
Ship positions at the end of game-turn 8:
British
Superb (74) – A2822:6
Northumberland (74) – A2319:6
Spencer (74) – A3113:6
Canopus (80) – A1919:2
Donegal (74) – A1117:1
Atlas (74) – A1423:2
French
Alexandre (80) – A1211:5
Impérial (120) – A2614:6
Diomède – A2819:4
Jupiter – A2625:6
Brave (74) – A2122:1
No messages were sent during game-turn 8.
Victory Determination
At the end of game-turn 8, the time limit (four hours) for the scenario expired. Victory Points were tallied for each side. The French did not exit three ships off the map (Alexandre was the only ship close enough to escape), which they needed to do to earn enough VPs, so Victory would be determined by who inflicted more damage to the other side.
Damage to the British:
Atlas, Canopus, and Donegal (the reinforcement ships) did not lose any rigging, hull, or crew sections, and so yielded 0 VP.
Northumberland (worth 94 VP) lost 2 rigging sections. Each rigging section is worth 5% of her VP, so 10% x 94 = 9.4 VP.
Spencer (worth 95 VP) lost 1 rigging section, which was worth 5% x 95 = 4.75 VP.
Superb (worth 87 VP) lost 2 rigging sections, worth 10% x 87 = 8.7 VP.
Total VP awarded to the French: 9.4 + 4.75 + 8.7 = 22.85 VP.
Damage to the French:
Alexandre, Diomède, and Impérial did not lose any sections, for 0 VP.
Brave (worth 70 VP) lost 2 rigging sections, worth 70 x 10% = 7.0 VP.
Jupiter (worth 66 VP) lost 3 rigging sections, 1 hull section, and 1 sailor section, worth (3 x 5%) + 10% + 10% = 35% x 66 = 23.1 VP.
Total VP awarded to the British: 7.0 + 23.1 = 30.1 VP.
So the British led in VP, 30.1 to 22.85, making the damage (so far) fairly equal, with the British ahead.
In another game-turn or so, Jupiter would have lost her last rigging section, making her dead in the water. She would then have been pounded until she would have struck, giving all of her 66 VP to the British. But the leading French ships, the Alexandre, Impérial, and Diomède, were coming back to do battle, and they could have dished out some punishment to the British.
Aftermath
Now, the French could have easily sailed their leading three ships away and off the map, but that would have meant abandoning their trailing two ships to capture by the British. Although that could have earned the French enough VP to easily win the scenario, one would think there would have been repercussions to the French admiral when he got back to port, after abandoning 40% of his force!
For this scenario, I made up a form so the GM (myself) could keep track of things such as each ship’s plotted movement, their target, how may gunnery factors and modifiers, how much damage they dished out, and any special results like critical hits. But in spite of that, several times ships were moved a differing number of hexes than what was plotted, and there were other discrepancies, such as ships not keeping within their acceleration or deceleration limits, or sometimes using too many MPs for their sail state and attitude to the wind. Part of that was probably due to new players to the game who didn’t perfectly understand the rules, but I must also take some of the blame for not educating the players better. So, I will work on a handout to give out that will explain how the log sheets should be filled out properly, among other things.
In any event, I will run another Close Action scenario at the Metro Detroit Gamers’ Wintercon 2019 at Oakland University in Rochester, Michigan, on Saturday, March 9, 2019.