Posts Tagged ‘Joel Lauder’

CFR-Detroit 2019 Race #4: British Grand Prix

Thursday, August 8th, 2019

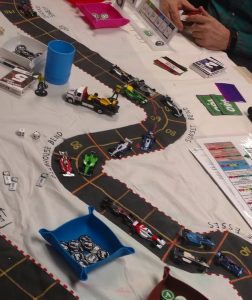
In a (boardgame) race that was held on Friday, May 10, 2019, Mickey Akins came from 13th place on the starting grid to pass the other 12 drivers to win the British Grand Prix. Mark Moellering and Mike Cook were the other podium finishers, in 2nd and 3rd places, respectively. The race was contested at Pandemonium Games & Hobbies in Garden City, Michigan. Eleven of the 13 cars finished the race. This was the 4th (of 10) races of the 2019 CFR-Detroit racing season.

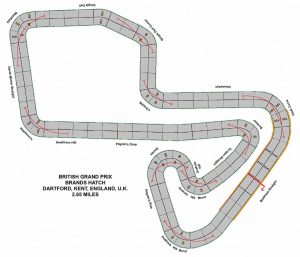
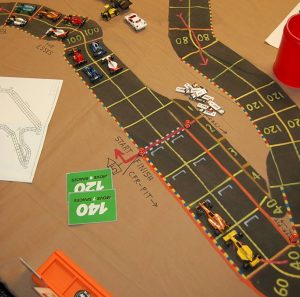
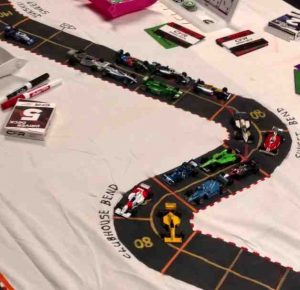
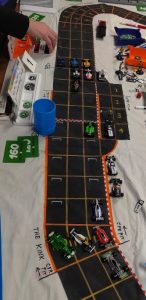
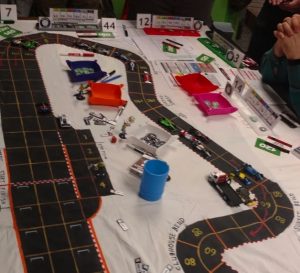
The race was on the Brands Hatch track. Our track was based on the old Avalon Hill Brands Hatch track design, except we modified the 2nd corner on the track to make it more logical than was its Avalon Hill design.

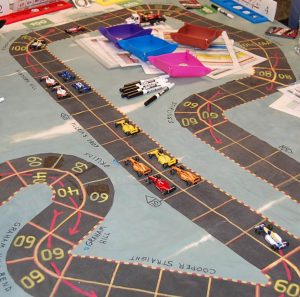
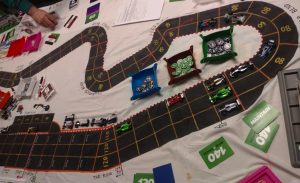
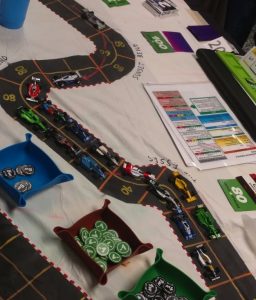
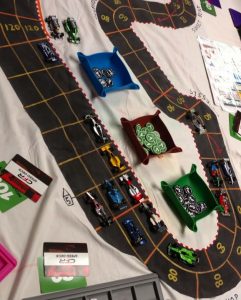
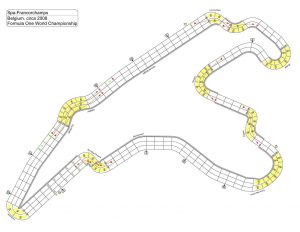
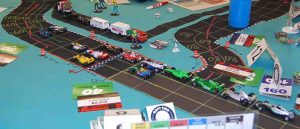
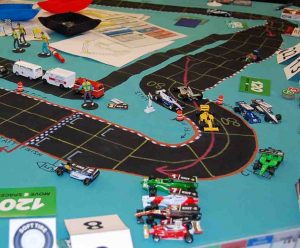
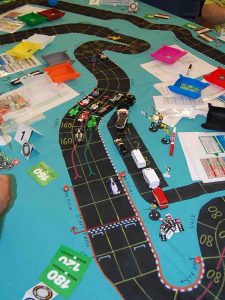
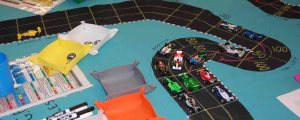
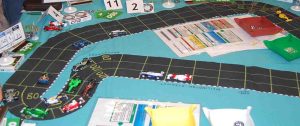
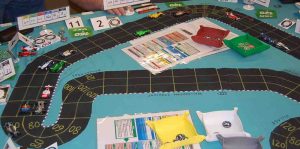
The modified Brands Hatch track

The modified Brands Hatch track.

We had not used the Brands Hatch track since our old Advanced Speed Circuit days in the late 1980s/early 1990s, so it needed a good going over. The lane and space dividing lines were originally painted red, and they had faded over the years to be now almost impossible to see. So those lane and space lines were re-painted in yellow. We added the red-and-yellow stripes to mark which side of the track is the inside at any particular point on the track. We also added the orange stripes alongside the track to denote the pit stop spaces. We also went over the numbers in the corners, and re-drew the red cornering arrows.

As a reminder, drivers bid for starting position by bidding some of their wear and/or skill chits, with each wear counting as 1.0 and each skill counting as 0.5 towards their qualifying bid.

Qualifying

Mark Moellering (4 wear + 18 skill) took his 2nd consecutive pole position with a bid of 13.0. Bill Worrel (6 wear + 12 skill) and Garry Kaluzny (3 wear + 18 skill) each bid 12.0. Kaluzny then rolled ’95’ on the ensuing percentage dice roll to break the tie, but Worrel rolled ’98’ and thus Worrel started 2nd and Kaluzny was relegated to 3rd. Richard White (5 wear + 13 skill) and Mike Cook (6 wear + 11 skill) each bid 11.5, with White rolling ’38’ to start 4th, while Cook rolled ’02’ to start 5th. Jack Beckman (5 wear + 7 skill) bid 8.5 to start 6th. Gary Sturgeon (0 wear + 15 skill) bid 7.5 and so he started in 7th position.

Greg Lim (5 wear + 2 skill) slotted into the 8th spot with a bid of 6.0. There were two bids of 5.0: Joel Lauder (1 wear + 8 skill) and Mike St. Peter (4 wear + 2 skill). Lauder rolled ’78’ to start 9th, and St. Peter rolled ’26’ to start 10th. Jim Robinson (0 wear + 7 skill) bid only 3.5, so he began 11th. Aric Parr (0 wear + 5 skill) started 12th with a bid of 2.5. Mickey Akins (0 wear + 3 skill) bid 1.5, so he began in the 13th and final position on the grid.

The starting grid for the 2019 British Grand Prix with their car specs:

 # Driver (Car)                    Start/Accel/Decel/Top/Wear/Skill/Tires
 4 Mark Moellering (Tyrrell)        100   20    40   140  5x   4x   soft
 1 Bill Worrel (Ferrari)            100   40    40   140  5x   3x   soft
 8 Garry Kaluzny (Marlboro McLaren)  60   40    20   140  5x   5x   soft
 7 Richard White (Marlboro McLaren)  60   40    40   140  5x   4x   soft
11 Mike Cook (Camel Lotus)          100   40    40   140  5x   3x   soft
 2 Jack Beckman (Ferrari)            60   60    40   140  5x   3x   soft
12 Gary Sturgeon (Camel Lotus)      100   40    20   140  5x   4x   soft
 0 Greg Lim (Williams)               60   60    40   140  5x   3x   soft
 3 Joel Lauder (Tyrrell)             60   40    40   160  5x   3x   hard
 9 Mike St. Peter (McLaren)          60   40    40   140  5x   4x   hard
 6 Jim Robinson (Williams)           60   40    40   140  5x   4x   hard
10 Aric Parr (McLaren)               60   40    60   140  5x   3x   hard
27 Mickey Akins (Fiat Ferrari)       60   40    40   160  5x   3x   hard

Start = Start Speed (in miles/hour); Accel = Acceleration (in mph); Decel = Deceleration (in mph); Top = Top Speed (in mph); Wear = # of Wear markers (per lap); Skill = # of Skill markers (per lap); Tires = hard or soft tires to begin the race.

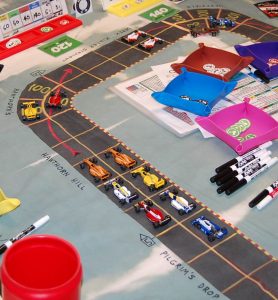
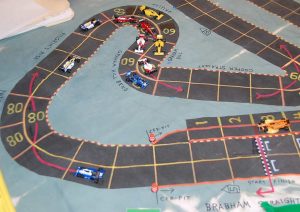
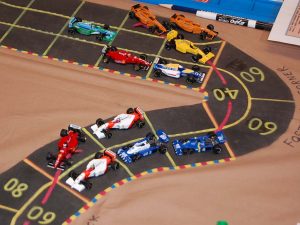
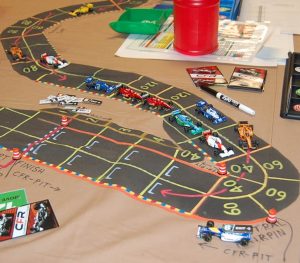
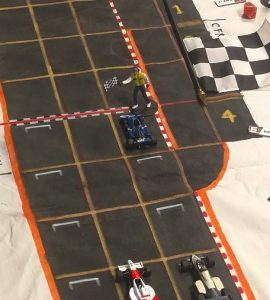
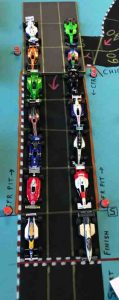
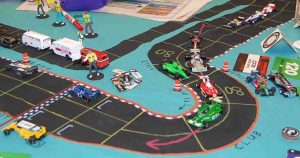
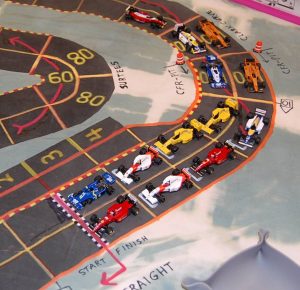
The starting grid at Brands Hatch

The starting grid at Brands Hatch: 1st row: Mark Moellering (blue Tyrrell) and Bill Worrel (red Ferrari); 2nd row: Garry Kaluzny (inside, #8) and Richard White (outside, #7); 3rd row: Mike Cook (yellow Lotus) and Jack Beckman (red Ferrari); 4th row: Gary Sturgeon (yellow Lotus) and Greg Lim (white/yellow/blue Williams); 5th row: Joel lauder (blue/white Tyrrell) and Mike St. Peter (orange McLaren); 6th row: Jim Robinson (white/yellow/blue Williams) and Aric Parr (orange McLaren); 7th row: Mickey Akins (red/white Fiat Ferrari).

1st Lap

At the start, the front row cars of Moellering and Worrel both zoomed away at 120 mph (they both used a wear to increase their start speeds by 20 mph each as they were both on soft tires.)  The 2nd row Marlboro McLarens of Kaluzny and White also each used a wear to increase their start speeds to 80 mph. Mike Cook was then balked — he plotted 100 mph (his car’s normal start speed) but had to slow down to 80 mph due to the McLaren roadblock ahead of him. (Hey — it’s not like the McLarens were going slow — they both increased their start speeds!) Beckman used a wear to increase his Ferrari’s start speed to 80 mph, so he kept pace with Cook’s Lotus. From the outside of row 5, St. Peter made a successful dice roll to increase his starting speed to 80 mph. Lauder, on the inside of row 5, failed his -1 start speed roll, mis-shifting and so he started at only 40 mph, 20 mph below his basic starting speed. That allowed Parr to pass Lauder into 10th place when Parr successfully made his start speed dice roll. Jim Robinson rolled his start speed increase attempt using two -1 skill modifiers, but he rolled an ’11’ which became a ‘9’ and so he too mis-shifted and only started at 40 mph instead of the 80 mph he had hoped for. Akins, from the 7th row, was content to start at his normal start speed of 60 mph; that allowed him to come up on Robinson’s left side.

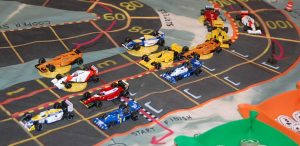
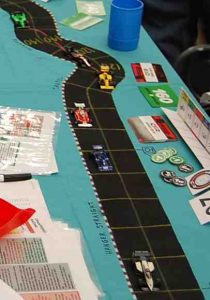
And away they go!

And away they go! At the start, Worrel and Moellering have opened up a 3-space lead, with Worrel taking the inside as Moellering chose to take the cornering arrow.

The cars roared around Paddock Hill Bend, Druids, and then Graham Hill Bend, with Moellering and Worrel racing wheel-to-wheel, each trying to wrest the lead from the other. When they got to the Surtees corner, Moellering had got in front of Worrel, and then two Marlboro McLarens of Kaluzny and White were right behind the leading duo. Then 3 spaces back came the rest of the pack.

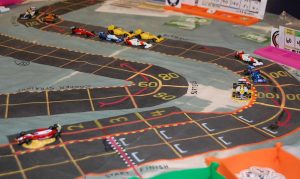
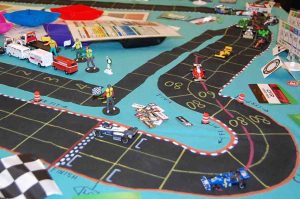
Moellering leads at Surtees

Moellering leads at Surtees from Worrel, Kaluzny, and White; then came Beckman, Cook, St. Peter, Sturgeon, Parr, Lim, Akins, Robinson, and Lauder.

The cars raced down Pilgrim’s Drop, and then through Hawthorn’s. Halfway through the 1st lap, it was still Moellering leading from Worrel, then Kaluzny, White, Beckman, Cook, St. Peter, Sturgeon, Parr, Kim, Robinson, Akins, and Lauder.

Then at the Westfield corner, Worrel had to slow down. He had used all 9 of his -1 skill markers and also his only -3 skill marker in bidding for starting positions, so he had no skill chits remaining. He rolled an unmodifed deceleration roll to get down to 120 mph, and then he rolled an unmodifed chance roll for the corner. He crashed, becoming the first retirement from the race, and classified in 13th place.

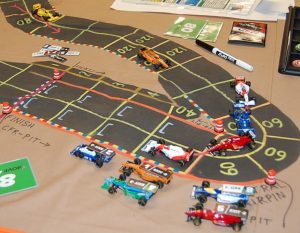
Moellering leads at Westfield

Moellering leads at Westfield (blue car in upper-right corner; however, Worrel’s Ferrari crashed at that corner (upside-down car next to Moellering. White and Kaluzny and now 2nd and 3rd, Beckman 4th, Cook 5th, then came St. Peter, Parr, Sturgeon, Robinson, Lim, Akins, and Lauder.

When Parr got to the Dingle Dell corner, he failed a deceleration roll. Parr’s deceleration rating was reduced from 60 to 40 mph. Moellering pulled out a 5-space lead over Kaluzny just before Moellering went into the Clark corner. On his next move, Moellering pulled into the pits, but Kaluzny was able to move at 140 mph and was then able to pit on the same game-turn, although Kaluzny pitted 5 spaces behind Moellering. On the next game-turn, the cars of White, Sturgeon, Parr, Cook, and Beckman also pitted. Then on the next game-turn, the cars of St. Peter and Lim pitted just as Moellering and Kaluzny were leaving the pits. Not pitting were Robinson, Akins, and Lauder.

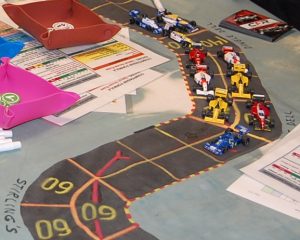
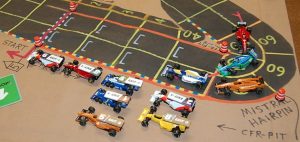
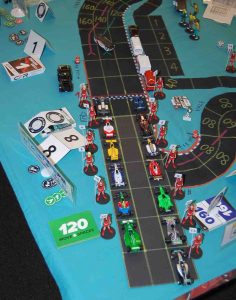
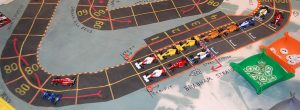
Pandemonium in the pits

Pandemonium in the pits (what did you expect at a place named Pandemonium Games?) Robinson has taken the lead on the track due to his not pitting, with Akins and Moellering right behind.

The official order at the end of the 1st lap was: Moellering (0); White (+2); Robinson (+8); Akins (+9); St. Peter (+5); Lauder (+3); Kaluzny (-4); Parr (+4); Sturgeon (-2); Cook (-5); Beckman (-5); and Lim (-4). Worrel (-11) was classified 13th due to his DNF because of the crash. The numbers in parentheses indicate how many positions a driver either gained (+) or lost (-) from their starting position.

When the pit stops were are resolved, the actual running order on the track was: Robinson; Akins; Moellering; Lauder; Kaluzny; White; Parr; Sturgeon; Cook; Beckman; St. Peter, and Lim.

2nd Lap

As the cars rounded the Surtees corner for the 2nd time, Robinson and Akins were sidepod-to-sidepod through Pilgrim’s Drop. Four spaces behind came Moellering, Kaluzny, Lauder, and White. Another 3 spaces back were Sturgeon, Cook, St. Peter, Beckman, and Parr, and Lim was another 2 spaces behind Parr.

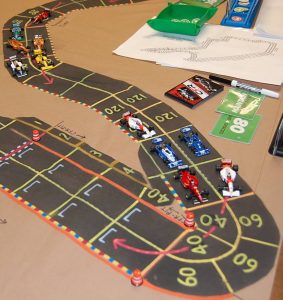
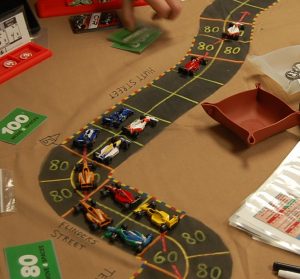
At the halfway mark of the race

At the halfway mark of the race, Akins (red & white car at the upper left) has taken the lead from Robinson (white car on the red arrow over the 80 space). The rest of the pack is strung out behind.

Then at Pilgrim’s Drop, Parr forced an unblocked pass on his teammate St. Peter. Parr and Cook both successfully rolled unmodified to increase their top speed on that same straightaway. But then at Dingle Dell corner, Parr again failed an unmodified deceleration dice roll; his brakes had now failed and he retired from the race in 12th place. Then St. Peter spun at Stirling’s corner just as Akins and Robinson had pulled into the pits.

Akins leads the 2nd lap

Akins leads the 2nd lap as he pulls into the pits. Robinson has also pitted, and St. Peter (orange car) has spun (upper left of picture).

The only other cars that pitted at the end of the 2nd lap were those of Lauder and St. Peter; the other cars all stayed on the track.

The official order at the end of the 2nd lap was: Akins (+12); White (+2); Moellering (-2); Sturgeon (+3); Kaluzny (-2); Cook (-1); Beckman (-1); Lim (0); Robinson (+2); St. Peter (0); and Lauder (-2). Parr was classified 12th when his brakes failed.

When the 2nd round of pit stops was over, though, the running order on the track was: White; Moellering; Sturgeon; Kaluzny; Beckman; Cook; Akins; Lim; Robinson; Lauder, and St. Peter.

3rd Lap

As the pack reached Graham Hill Bend early in the 3rd lap, White spun his car. He had been leading at the time, but dropped to 4th after recovering from the spin.

Richard White spins at Graham Hill Bend

Richard White (backwards facing white & orange McLaren) spins at Graham Hill Bend. Note that Mickey Akins is currently 7th.

Moellering then found himself in the lead, and he pulled out a 3-space lead over the now 2nd-place Kaluzny coming out of the Surtees corner. As the pack passed through Hawthorn’s corner for the last time, there was but a half-lap left to race. Moellering still led by two spaces from the pack of Kaluzny, Sturgeon, Cook, White, Beckman, and Akins, then behind that pack came Robinson, Lim, and Lauder, and then another 13 spaces back came St. Peter.

Going into the Westfield corner, Akins was 7th; coming out of Westfield, he was in 4th place. The rest of the pack had now caught up with Moellering. While most of the leading cars were discovering they had very few remaining wear, Akins still had a comfortable amount of wear. At Dingle Dell, Akins moved into 3rd, alongside the 2nd-place Cook.

Akins moves into 3rd place

Akins moves into 3rd place. The running order is: Moellering, Cook, Akins, Kaluzny, Sturgeon, Beckman, White, Robinson, Lauder, Lim, and St. Peter (not in the picture).

At the next corner, Stirling’s, Akins pulled up next to the race leader Moellering, and then Akins passed Moellering for the lead whilst on Clearways. Coming through the final corner, the Clark Curve, Akins was 2-spaces clear from Moellering.

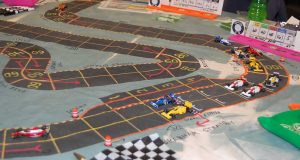
Akins takes the checkered flag

Akins (red & white Fiat Ferrari) takes the checkered flag to win the British Grand Prix.

At the checkered flag, it was Akins winning by 4 spaces from Moellering and Cook. The two team Marlboro McLarens of White and Kaluzny were drag-racing for 4th and 5th place. Kaluzny damaged his engine by over-revving it, and so White was 4th and Kaluzny had to settle for 5th. Jim Robinson came home in 6th, and Sturgeon was 7th. Greg Lim snagged 8th place, the final points paying position. Beckman was 9th, and Lauder was 10th. Lauder had tried a forced-pass on Robinson at the finish line, but was blocked. Lauder could not slow down, and so he spun right at the finish line. But Lauder kept his 10th place, because 11th place, St. Peter, was 8 spaces behind at that moment.

The official order at the finish of the British Grand Prix at Brands Hatch: 1st-Mickey Akins (+12); 2nd-Mark Moellering (-1); 3rd-Mike Cook (+2); 4th-Richard White (0); 5th-Garry Kaluzny (-2); 6th-Jim Robinson (+5); 7th-Gary Sturgeon (0); 8th-Greg Lim (0); 9th-Jack Beckman (-3); 10th-Joel Lauder (-1); 11th-Mike St. Peter (). Two DNFs were classified: Aric Parr (0) was 12th (brakes); and Bill Worrel (-11) was 13th (accident).

Aftermath

Points awarded at the 2019 British Grand Prix: Akins 15; Moellering 12; Cook 10; White 8; Kaluzny 6; Robinson 4; Sturgeon 2, and Lim 1.

Team points awarded at the 2019 British Grand Prix: Fiat Ferrari 15; Marlboro McLaren 14; Tyrrell 12; Camel Lotus 12; Williams 5.

The points standings of the 2019 CFR-Detroit season (after 4 of 10 races):

Place Driver (Car)                    Points
  1T  Richard White (Marlboro McLaren)  36
  1T  Garry Kaluzny (Marlboro McLaren)  36
  3   Mike Cook (Camel Lotus)           35
  4   Bill Worrel (Ferrari)             30
  5   Aric Parr (McLaren)               22
  6   Jim Robinson (Williams)           16
  7   Mickey Akins (Fiat Ferrari)       15
  8   Mark Moellering (Tyrrell)         14
  9   Greg Lim (Williams)                8
 10   Gary Sturgeon (Camel Lotus)        7
 11T  Joel Lauder (Tyrrell)              4
 11T  Jim Landis (Benetton)              4
 13T  Mike St. Peter (McLaren)           2
 13T  Jack Beckman (Ferrari)             2
 15   Brian Robinson (Benetton)          1

Drivers can only count their 7 best finishes out of the 10 races.

The team championship standings of the 2019 CFR-Detroit season (after 4 of 10 races):

Place Team              Points
  1   Marlboro McLaren    72
  2   Camel Lotus         42
  3   Ferrari             32
  4T  McLaren             24
  4T  Williams            24
  6   Tyrrell             18
  7   Fiat Ferrari        15
  8   Benetton             5

Teams can only count their 2 best finishing cars from each race.

Another Thought

It seems at most of our CFR-Detroit races, there is wild bidding to ensure starting up front. Most cars also start on soft tires to then can spend a wear to automatically increase their starting speed without having to roll dice (which could result in a stall!) Then it is a race on the first lap to get into the pits before anyone else, switch to hard tires, and try to eke out two laps on your remaining wear. It was refreshing to see Mickey Akins reverse that strategy. He bid only 3 skill, and started last on hard tires. He carefully nursed his wear through the first two laps, then pitted at the end of the 2nd lap. He emerged on soft tires, and while he had to pick his way through several cars that had got in front on him during his pit stop, has was able to use his extra wear on the final lap to guide his car to victory.

Akins set the CFR-Detroit record for winning from the lowest starting position (13th place). The previous record was winning from 7th place, by Jack Beckman at Abu Dhabi in 2018.

The next (5th) race of the 2019 CFR-Detroit racing season was on Saturday, July 13, at Guild of Blades in Clawson, Michigan. It was the Michigan Grand Prix, raced on the downtown Detroit track.

CFR-Detroit 2019 Race #1 – Australian Grand Prix

Tuesday, March 19th, 2019

Bill Worrel, the 2018 champion of the Championship Formula Racing-Detroit racing series, picked up right where he left off at the end of the 2018 season. After winning the season’s final race in 2018, he won the opening race of 2019, the Australian Grand Prix, beating 10 other drivers to the finish line. Garry Kaluzny and Richard White were the other podium finishers in 2nd and 3rd place, respectively. The race was on the Adelaide track, and the game-store venue this time was Pandemonium Games in Garden City, Michigan. The race date was February 9, 2019.

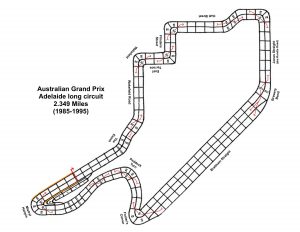
While the Adelaide track diagram was published by the old Avalon Hill game company in the late 1980s, I had designed that same track (for board-game use) around 1985, shortly after the first real Formula 1 race took place at the real Adelaide track. And, since my track design is more accurate than the AH version, we used my track design (not to mention that my track design had already been transferred to a bedsheet way back in 1985!).

Adelaide track diagram

Adelaide track diagram, a design by Garry Kaluzny from 1985.

This season, the CFR-Detroit racing series instituted a “team” championship to go along with the individual points championship. The new teams going into the 2019 season: Benetton: #5 Brian Robinson (and #20 Jim Landis, not racing in this race); Camel Lotus: #12 Gary Sturgeon (and #11 Mike Cook, absent from this race); Ferrari: #1 Bill Worrel and #2 Jack Beckman; Marlboro McLaren: #7 Richard White and #8 Garry Kaluzny; McLaren: #9 Mike St. Peter and #10 Aric Parr; Tyrrell: #3 Joel Lauder and #4 Mark Moellering; Williams: #0 Greg Lim (and #6 Jim Robinson, not present).

There were two other changes in store for the 2019 CFR-Detroit season. Points would now be awarded to the top eight finishers in each race on a 15-12-10-8-6-4-2-1 basis, instead of the first six finishers getting points on a 10-6-4-3-2-1 basis that was used for the first two seasons of CFR-Detroit racing. And, the Chance Table was changed to what it was in the old Advanced Speed Circuit days, with a 2d6 dice roll of 2 through 7 being success, instead of the CFR 2 through 6 being success.

After the teams were settled, it was time to bid for starting positions on the grid, with each driver secretly bidding a number of his wear and/or skill chits, with each wear chit counted as 1.0, and each skill chit counted as 0.5. Naturally, higher bids start in front of lower bids, with any ties resolved by rolling percentage dice (high rolls are better than low rolls).

Qualifying

Joel Lauder (3 wear + 8 skill) and Greg Lim (1 wear + 12 skill) each bid 7.0. Lauder won the percentage dice roll by “33” to “11” and so Lauder was on the pole position and Lim started next to him in the front row, in 2nd position. Bill Worrel (4 wear + 5 skill) bid 6.5 and started 3rd. Garry Kaluzny (4 wear + 4 skill) started 4th with a bid of 6.0. Richard White (4 wear + 3 skill) started 5th with a bid of 5.5.

Starting 6th was Gary Sturgeon (1 wear + 6 skill) with a bid of 4.0. Mark Moellering (2 wear + 2 skill) bid 3.0 to start 7th. McLaren teammates Aric Parr (0 wear + 4 skill) and Mike St. Peter (2 wear + 0 skill) each bid 2.0. Parr started 8th with a percentage dice roll of “84” and so St. Peter started 9th after rolling “43”. Brian Robinson (0 wear + 3 skill) bid 1.5 to start 10th, and Jack Beckman (0 wear + 1 skill) started 11th after only bidding 0.5.

The starting grid for the 2019 Australian Grand Prix with their car specs:

 # Driver (Car)                    Start/Accel/Decel/Top/Wear/Skill/Tires
 3 Joel Lauder (Tyrrell)             60   40    40   140  5x   4x   hard
 0 Greg Lim (Williams)               60   60    40   140  4x   4x   hard
 1 Bill Worrel (Ferrari)             60   40    40   140  5x   4x   soft
 8 Garry Kaluzny (Marlboro McLaren)  60   40    40   160  5x   3x   soft
 7 Richard White (Marlboro McLaren)  60   40    40   160  5x   3x   soft
12 Gary Sturgeon (Camel Lotus)       60   60    40   160  5x   2x   soft
 4 Mark Moellering (Tyrrell)         60   40    40   160  5x   3x   soft
10 Aric Parr (McLaren)               20   40    60   160  4x   4x   hard
 9 Mike St. Peter (McLaren)          60   40    40   140  5x   4x   soft
 5 Brian Robinson (Benetton)         20   60    60   160  4x   3x   hard
 2 Jack Beckman (Ferrari)            60   60    60   140  4x   3x   hard

Start = Start Speed (in miles/hour); Accel = Acceleration (in mph); Decel = Deceleration (in mph); Top = Top Speed (in mph); Wear = # of Wear markers (per lap); Skill = # of Skill markers (per lap); Tires = hard or soft tires to begin the race.

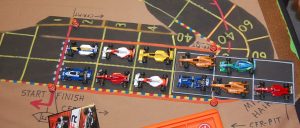
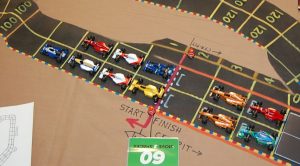
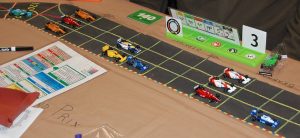
Starting grid for the 2019 Australian GP

Starting grid at 2019 Adelaide: Front row: Joel Lauder (blue/white Tyrrell) & Greg Lim (white/blue/yellow Williams); 2nd row: Bill Worrel (red Ferrari) & Garry Kaluzny (white/orange McLaren); 3rd row: Richard White (white/orange McLaren) & Gary Sturgeon (yellow Lotus); 4th row: Mark Moellering (blue Tyrrell) & Aric Parr (orange McLaren); 5th row: Mike St. Peter (orange McLaren) & Brian Robinson (blue/green Benetton); 6th row: Jack Beckman (red Ferrari). Note the temporary straight section used only for the start of the race.

1st Lap

The start of the 2019 Austrailan Grand Prix was a rather sane start, what with the track only being 2 lanes wide at the start/finish line. Most cars had a 60 mph start speed, although Aric Parr (starting in 8th place) and Brian Robinson (starting in 10th) had 20 mph start speeds. Most notably, the two cars on the front row, Joel Lauder and Greg Lim, were both shod with hard tires, so most drivers judged it unlikely that the front-row cars would try to boost their start speeds.

In the actual start, however, Joel Lauder did boost his speed to 80 mph with a dice roll, with Greg Lim moving his normal 60 mph and slotting in behind Lauder. From the 2nd row, Worrel increased to 80 mph and pulled alongside Lim. Kaluzny wisely moved just 60 mph, and pulled behind Lim, but White, from row 3, boosted his speed to 80 mph and pulled up next to his teammate Kaluzny. Sturgeon went 60 mph to pull up behind Kaluzny, and Moellering, from the inside of the 4th row, went 80 mph to pull alongside Sturgeon. Parr boosted his start speed to 40 mph, and his teammate St. Peter, from the row behind, went his normal 60 mph to pull alongside Parr. Brian Robinson increased his car to 40 mph, and Beckman moved his normal 60 mph to pull alongside B. Robinson.

Lauder leads away at the start

Lauder leads away at the start, followed by Lim, Worrel, Kaluzny, White, Sturgeon, Moellering, Parr, St. Peter, B. Robinson, and Beckman.

Worrel then passed Lim for 2nd at The Esses, while White managed to take the inside from his teammate Kaluzny, and Beckman got past Parr. Lauder continued to lead through the three slow corners around Wakefield, East Terrace, and Flinders Street. Racing down Hutt Street, the order was Lauder, Worrel, Kaluzny, White, Moellering, Beckman, Lim (having dropped to 7th after starting 2nd), Sturgeon, St. Peter, Parr, and B. Robinson. As the pack raced down Jones Straight and took the gentle right-hand bend onto the long Brabham Straight, the order was Lauder, Worrel, Kaluzny, White, Moellering, Lim, Sturgeon, Beckman, St. Peter, Parr, and B. Robinson.

Lauder leads down Brabham Straight on the 1st lap

Lauder leads down Brabham Straight on the 1st lap. The Ferrari of Worrel is racing three-abreast with the McLarens of Kaluzny and White, then is the other 6-wheeled Tyrrell of Moellering, and Sturgeon and Lim, then the plain-orange McLarens of St. Peter and Parr making a sandwich of Beckman’s red Ferrari, and then B. Robinson.

At the Foster’s Corner at the end of Brabham Straight, Worrel and Kaluzny caught Lauder, with their three cars playing “chicken” to see who would get through the corner first.

Worrel, Lauder, Kaluzny, and White all bunch up at the Foster's Corner

Worrel, Lauder, Kaluzny, and White all bunch up at the Foster’s Corner.

In the event, Kaluzny managed to take the lead after Foster’s Corner, with Worrel also passing Lauder.

Kaluzny and Worrel have passed Lauder

Kaluzny and Worrel have passed Lauder after Foster’s Corner; White and Moellering have joined the leading group. The next bunch of cars of Lim, Sturgeon, Parr, Beckman, St. Peter, and B. Robinson now have their turn to play “chicken” at Foster’s Corner!

Kaluzny led through the next couple of corners, and then Worrel ducked inside of Kaluzny at the Mistral Hairpin just before the start/finish straightaway. The two Tyrrells of Lauder and Moellering also got past White’s McLaren.

Worrel ducks to the inside of Kaluzny at the Mistral Hairpin

Worrel ducks to the inside of Kaluzny at the Mistral Hairpin.

As the five leading cars of Kaluzny, Worrel, Lauder, Moellering, and White traversed through the Mistral Hairpin, they all ducked into the pits for new tires. Lauder would switch from hard tires to soft, while the other four exchanged their soft tires for hard tires. (Note: The CFR-Detroit racing series has a rule that all cars must use both hard and soft tires in a race, which means all cars must make at least one pit stop during a race.) Shortly after, the cars of St. Peter and Sturgeon also headed into the pits for new tires (both exchanging soft for hard tires).

Most cars pitted at the end of the 1st lap

Most cars pitted at the end of the 1st lap, with Kaluzny, Worrel, Lauder, Moellering, St. Peter, White, and Sturgeon in the pits. Eschewing pit stops are Lim, B. Robinson, Parr, and Beckman.

The official order at the end of the 1st lap: Kaluzny (+3); Lim (0); B. Robinson (+7); Parr (+4); Beckman (+6); Worrel (-3); Lauder (-6); Moellering (0); White (-4); St. Peter (-1); and Sturgeon (-5). The numbers in parentheses indicate how many places a driver either gained (+) or lost (-) from their starting position. Kaluzny led the lap by virtue of pitting in the space directly at the start/finish line. After the pit stops were resolved, the running order on the track was: Lim; B. Robinson; Parr; Beckman; Kaluzny; Worrel; Lauder; Moellering; White; St. Peter; and Sturgeon.

The 1st round of pit stops are over

The 1st round of pit stops are over, and Lim and B. Robinson lead the field through The Esses.

2nd Lap

Lim continued to lead through the three slow corners, and managed to stretch out a lead of two spaces over B. Robinson as Lim made the right-hand turn onto Jones Straight. By the time Lim had made the turn onto the long Brabham Straight, he led by four spaces over B. Robinson and Parr.

Lim leads down Brabham Straight

Lim leads down Brabham Straight over B. Robinson and Parr, then came Kaluzny, Lauder, Worrel, Beckman, Moellering, White, St. Peter, and Sturgeon.

Lim led into and through Foster’s Corner, but B. Robinson and Parr had closed the gap, and Kaluzny and Lauder were right on the tailpipes of B. Robinson and Parr. Through Paddock Turn, Lim held his lead, with Parr now in 2nd, and Kaluzny managing to squeeze to the inside of B. Robinson to take 3rd place. As he entered the Mistral Hairpin turn, Lim pulled off the track to make his mandatory pit stop.

Lim pits at the end of Lap 2

Lim pits at the end of Lap 2. The other cars on the track are running in the order: Kaluzny; Parr; B. Robinson; Lauder; Worrel; Beckman; Moellering; White; St. Peter; and Sturgeon.

Shortly after Lim pulled into the pits, he was joined by the cars of Lauder (pitting for the 2nd time), Parr, B. Robinson, and Beckman. The remaining cars, having already pitted once earlier in the race, stayed on the track.

Lauder, Parr, B. Robinson, and Beckman join Lim in the pits

Lauder, Parr, B. Robinson, and Beckman join Lim in the pits. Kaluzny is the new leader on the track, followed closely through the Mistral Hairpin by Worrel, Moellering, and White. St. Peter and Sturgeon trail behind.

The official order at the end of the 2nd lap: Kaluzny (+3); Worrel (+1); Moellering (+4); White (+1); Lim (-3); St. Peter (+3); Sturgeon (-1); Lauder (-7); Parr (-1); B. Robinson (0); and Beckman (0). After the pit stops shook out, the order on the track was Worrel, Kaluzny (both vying fiercely for the lead), Moellering, White, Lim, St. Peter, Sturgeon, Lauder, Parr, B. Robinson, and Beckman.

3rd Lap

Early in the 3rd lap, Kaluzny figured he had no chance to hang onto the lead, as Worrel had several more wear chits remaining than Kaluzny, but Kaluzny resolved to try to make it tough for Worrel to get past. It should be noted that during the 2nd lap, Kaluzny had been racing with the cars that would need to make a 2nd pit stop, with the idea being that if he could have got by them he would have made a 2nd stop. He thus used more wear than Worrel, who was driving more conservatively. But when it became evident to Kaluzny that he would not be able to get by the soon-to-pit cars, he belatedly backed off a bit to attempt to save some wear for the final lap. Kaluzny then did take the inside and the lead from Worrel at the Wakefield corner.

Kaluzny leads down Hutt Street

Kaluzny leads down Hutt Street from Worrel. The rest of the pack is bunched tight in the order: Moellering; White; Lauder; Lim; St. Peter; Beckman; Parr; Sturgeon; and B. Robinson.

Down Hutt Street, White passed Moellering for 3rd place, and Parr passed his teammate St. Peter (and Beckman) for 7th place. Kaluzny continued leading Worrel down the Jones Straight and onto the Brabham Straight, then Worrel pulled alongside Kaluzny half-way down the Brabham Straight, with Worrel trying to pass on the inside just before the Foster’s Corner.

Worrel tries to pass on the inside at Foster's Corner

Worrel tries to pass Kaluzny on the inside at Foster’s Corner. The other cars are running in the order White, Lauder, Moellering, Parr, Lim, Beckman, St. Peter, B. Robinson, and Sturgeon.

But not to be denied, Kaluzny held the lead out of Foster’s Corner. But then Kaluzny had to pull up short at the final Mistral Corner (moving at only 80 mph) due to lack of wear, while Worrel passed Kaluzny at that corner, traveling 120 mph and using a wear and successfully making a -3 chance dice roll around the outside lane.

Worrel takes the lead at Mistral

Worrel takes the lead at Mistral Corner from Kaluzny. White is 3rd, then Lauder, Parr, Moellering, and Lim are battling for 4th, followed by Beckman, B. Robinson, St. Peter, and Sturgeon in a fight for 8th (the last points-paying position).

Worrel then continued moving at 120 mph in his next move, thus reaching the start/finish line and winning the race. Kaluzny could only move at 80 mph, thus being relegated to 2nd place.

Worrel takes the checked flag

Worrel takes the checked flag to win at Adelaide, making it two consecutive race wins (going back to the final race of 2018).

The official finishing order at the 2019 Australian Grand Prix: 1st-Bill Worrel (+2); 2nd-Garry Kaluzny (+2); 3rd-Richard White (+2); 4th-Aric Parr (+4); 5th-Greg Lim (-3); 6th-Joel Lauder (-5); 7th-Mark Moellering (0); 8th-Brian Robinson (+2); 9th-Jack Beckman (+2); 10th-Gary Sturgeon (-4); 11th-Mike St. Peter (-2). Several cars made chance rolls in the Mistral Hairpin corner, using their -3 skill modifier chits. All of the cars made their rolls except for St. Peter, who spun. It didn’t affect St. Peter’s placing, though, as he was running last when he spun.

Aftermath

Points awarded at the 2019 Australian Grand Prix: Worrel 15; Kaluzny 12; White 10; Parr 8; Lim 6; Lauder 4; Moellering 2; and B. Robinson 1.

Team points awarded at the 2019 Australian Grand Prix: Marlboro McLaren 22; Ferrari 15; McLaren 8; Williams 6; Tyrrell 6; Benetton 1.

The Marlboro McLaren team was satisfied with the outcome of the race, finishing in 2nd and 3rd place, and taking the lead in the team championship standings. Aric Parr had a nice drive, finishing 4th after starting 8th.

The points standings of the 2019 CFR-Detroit season (after 1 of 10 races):

Place Driver (Car)                    Points
  1   Bill Worrel (Ferrari)             15
  2   Garry Kaluzny (Marlboro McLaren)  12
  3   Richard White (Marlboro McLaren)  10
  4   Aric Parr (McLaren)                8
  5   Greg Lim (Williams)                6
  6   Joel Lauder (Tyrrell)              4
  7   Mark Moellering (Tyrrell)          2
  8   Brian Robinson (Benetton)          1
  9T  Jack Beckman (Ferrari)             0
  9T  Gary Sturgeon (Camel Lotus)        0
  9T  Mike St. Peter (McLaren)           0

Drivers can only count their 7 best finishes out of the 10 races.

The team championship standings of the 2019 CFR-Detroit season (after 1 of 10 races):

Place Team              Points
  1   Marlboro McLaren    22
  2   Ferrari             15
  3   McLaren              8
  4T  Williams             6
  4T  Tyrrell              6
  6   Benetton             1
  7   Camel Lotus          0

Teams can only count their 2 best finishing cars from each race.

The next race of the 2019 CFR-Detroit racing series was at the Guild of Blades game store in Clawson, Michigan, on Saturday, March 16, 2019. As always, keep up to date with the CFR-Detroit racing series at the home page at http://michigumbo.com/cfr/.

Close Action at Spartacon 2019: scenario RS13 — Winter Interception

Thursday, February 7th, 2019

Spartacon 2019 was held in Lansing, Michigan, on Saturday, January 12, 2019. I ran a scenario of Close Action (from Clash of Arms games) there, using the Rebel Seas scenario 13, entitled “Winter Interception.” This scenario was from January 21, 1781, during the American Revolutionary War vs. England, and had a total of seven ships, three British and four French. Basically, the French have two 32-gun frigates, the Gentille and Surveillante, plus two 64-gun ships-of-the-line (SOL), the Eveillé and Ardent (the Ardent being an ex-British ship). The French can win by exiting all four of their ships off the far end of Map A, but a complication is that none of their ships can lose more than one of their rigging sections (each ship has four rigging sections). Else, the scenario would be won by which side caused more damage to the other. In opposition, the British have the 50-gun Adamant, the 64-gun America, and the 74-gun Bedford to try to stop the French. Jim Robinson was the French commander aboard Eveillé, and Joel Lauder commanded the British side from the deck of the Bedford.

The situation at the start:
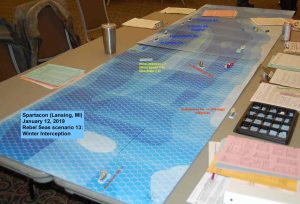
The At-Start situation for Winter Interception

The At-Start situation for Winter Interception. The French ships are in line, with two scattered British ships in opposition. (Click the picture to enlarge it.)

In the above picture, the French ships are in the order Gentille, Surveillante, Eveillé, and Ardent. They are indicated by the blue text, and are heading towards the left narrow side of the map. The British Adamant is near the edge that the French are heading towards, and the America is almost in the exact center of the mapboard, heading towards the French on an angle. The British ship Bedford is off the map, and won’t appear on the map until game-turn 5 (aka g-t 5) of the scenario. All of the ships on the board at start are flying medium sails.

Starting positions

British
America (64) – A2445:3
Adamant (50) – A2004:4
Bedford (74) – (off map, near hex A1126, won’t enter until game-turn 5)

French
Gentille (32) – B4405:1
Surveillante (32) – B4411:1
Eveillé (64) – B4423:1
Ardent (64) – B4429:1

In the above hex locations, “A” or “B” gives the map board the ship started on. In the above picture, Map A is the near map, and Map B is the map that is farther away. Then the hex number is given for that map (example: “2445”) which tells which hex that ship’s bow is placed in. And then, since each ship’s counter covers two hexes, we need to know which way the ship is pointing. The number after the colon (example: “:3”) tells us which way the ship is pointing. The maps have a compass “rose” printed on them. Direction “1” is pointing directly towards the near narrow map edge (off the near side of the table). Direction “2” is one hex clockwise from Direction 1, etc. The wind is blowing toward direction 5, sort of from the near-left corner toward the far-right corner of Map A.

There are a couple of complications with this situation. Although the Wind Speed = 4 (high winds), the America is sailing “close-hauled” into the wind. But the America is flying “medium sails” and so can move four hexes in that wind attitude. But the danger is if that one British ship tries to intercept the French by itself — the four French ships could gang up on the solo Brit and cripple her before the other British ships come up to do battle. Also, with the high winds come high seas (Sea State = 4). This means that all of the ships other than the two frigates will lose some gunnery factors when they are firing their guns downwind, due to having to close the lowest deck’s gun ports to keep the high waves from flooding into the ships. Also, the French are also sailing close-hauled into the wind, and that will slow their progress. Their two 64-gun SOLs can only move 4 hexes per game-turn in that heading, although their two 32-gun frigates can move 5 hexes at medium sail in that heading.

Game-Turn 1

During game-turn 1, Gentille moved ahead 2 hexes, Surveillante moved ahead 3 hexes, Eveillé moved ahead 4 hexes, and Ardent also moved ahead 4 hexes. Adament turned 60-degrees to port (due to the limitations of the hex-grid) and then moved ahead 4 hexes. America moved ahead 4 hexes to close the range towards the enemy. Ardent and Eveillé placed “men in rigging” markers to show they were changing from medium sail to some other sail state. A casual observer would probably think they were going to put up more sails, to go to “plain sail” status, to increase their movement allowance. On the British side, both Adamant and America also placed “men in rigging” counters. No ships fired on g-t 1.

Ship positions at the end of game-turn 1:

British
America (64) – A2847:3
Adamant (50) – A2406:3
Bedford (74) – (off map, near hex A1126, won’t enter until game-turn 5)

French
Gentille (32) – B4403:1
Surveillante (32) – B4408:1
Eveillé (64) – B4419:1
Ardent (64) – B4425:1

The French flagship, Eveillé, signalled to the French fleet: “CLOSE UP THEN COMBINE”.

Game-Turn 2

During game-turn 2, Gentille and Surveillante each moved 2 and 3 hexes straight ahead, respectively, the same as in game-turn 1. Eveillé and Ardent each moved 4 hexes ahead, to try to close the gap between them and their leading frigates. The British Adamant moved four hexes ahead. as did America. Eveillé and Ardent still had men in their rigging, as did Adamant and America. On this turn, the two French frigates also showed men-in-rigging. So all of the ships on the map were changing the status of the sails. Once again, there was no gunfire. At the end of the game-turn, during the maintenance phase, the ships announced their new sail status. Gentille and Surveillante had gone to “fighting sail,” meaning they were flying the minimum amount of sails so as to minimize any damage they might receive from enemy fire. Eveillé and Ardent had gone the other way, to “plain sail” and were now flying as many sails as they could get aloft, so to increase their movement allowance. On the British side, both Adamant and America were now flying plain sail.

It should be noted that changing sails requires either one or two crew sections to be plotted to accomplish that task, depending on what sail-state the ship is changing to. Also, the amount of time is slightly variable per ship, depending on the quality of a ship’s crew. Better quality crews can change sails faster than lower quality crews. Quelle surprise, n’est-ce pas?
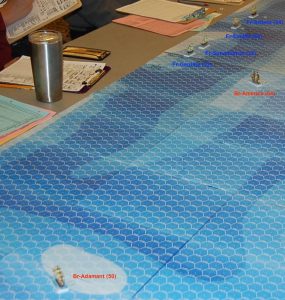
The map after game-turn 2

The map after game-turn 2. The America has closed the range towards the French, and the Adamant (in the foreground) has turned to port to try to get in front of the French.

Positions of ships at the end of game-turn 2:

British
America (64) – A3249:3
Adamant (50) – A2808:3
Bedford (74) – (off map, near hex A1126, won’t enter until game-turn 5)

French
Gentille (32) – A4453:1
Surveillante (32) – B4405:1
Eveillé (64) – B4415:1
Ardent (64) – B4421:1

The French flagship, Eveillé, signalled to the French fleet: “FIRE WHEN YOU CAN”.

Game-Turn 3

During g-t 3, both British ships could now move faster while close-hauled toward the wind due to their increased amount of sails, and Adamant and America both moved 6 hexes ahead. Gentille, the leading French frigate, plotted and moved “P3” which means she turned to port, then moved ahead 3 spaces. While the turn to port put Gentille into a more favorable wind attitude of a “broad-reach,” ships are limited by acceleration and deceleration factors from one turn to another. A large sailing warship just can’t accelerate like a race horse! This turn put Gentille on a near-collision course with America. Surveillante was content to just move ahead 3 hexes. Eveillé moved ahead 6 hexes, and Ardent moved ahead 5 hexes. Adamant declared “men in rigging” again, as did Eveillé and Ardent. America also had men in her rigging.

The situation on the map after movement in game-turn 3:
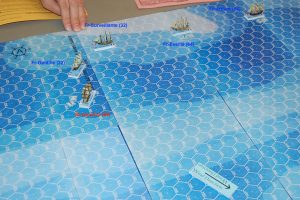
Gentille and America head towards each other

Gentille and America head towards each other. Neither of those ships can bring their guns to bear on each other in this game-turn.

While Gentille and America were near each other, neither ship could fire at the other; however, Surveillante could bring her guns to bear on America, and so Surveillante, commanded by Bill Worrel (playing in his first game of Close Action), opened fire at a range of 6 hexes. At a 6-hex range, Surveillante had a “7” as its Basic Gunnery Number (BGN). It got to add a “+2” for its Crew Quality (CQ) Gunnery Modifier, to give her a Modified Gunnery Number (MGN) of “9”, but was just out of range to get a “rake” or an initial broadside bonus to her gunfire. The result of the gunfire was that America lost 2 rigging boxes (out of 6) in her first rigging section, and also lost a crew box from her marines. So Surveillante had the honor of drawing “first blood” even though the wound was only a “dice wound.” All ships were too far away for any shipboard marines to fire at each other.

Positions of ships at the end of game-turn 3:

British
America (64) – A3852:3
Adamant (50) – A3411:3
Bedford (74) – (off map, near hex A1126, won’t enter until game-turn 5)

French
Gentille (32) – A4151:6
Surveillante (32) – B4402:1
Eveillé (64) – B4409:1
Ardent (64) – B4416:1

The French flagship, Eveillé, signalled to the Surveillante: “GOOD START”.

Game-Turn 4

America (with men still in the rigging) now decided to try to turn to port, to head in the same direction as were the French SOLs. That meant she would have to tack through the facing wind. So America turned to port, and then had to stop, as she was now “luffing” straight into the wind. America had used 6 Movement Points (MPs) in her previous turn, which meant she ordinarily would have had to use at least 4 MPs in this turn due to her deceleration rating of 2. But when a ship turns directly into the wind, it immediately stops. America moved another 6 hexes straight ahead, still angling to get in front of the French ships. The French ship Gentille, commanded by Mike St. Peter, moved “2P1” which meant it moved 2 hexes ahead, then turned 60-degrees to port, then moved 1 more space ahead. This put Gentille’s port bow adjacent to America’s port bow. Surveillante now also peeled out of the French line, plotting and moving “1P2”. Eveillé and Ardent, both still with men in rigging, moved 6 and 5 hexes ahead, respectively. This was opening a bit of a gap between the two 64-gunned vessels.

A note about combat in Close Action (of course, anyone who knows how to play Close Action will know this, but this blog post is mostly written for novices to follow along with play). Like, movement, ships simultaneously plot which ship they will fire at, if any. Then all ships will reveal their targets. Ships also calculate their MGN (Modified Gunnery Factor) and should also write that down. All gunfire (and marine fire) is considered to be simultaneous, and so each ship needs to know what its MGN was at the beginning of combat, as damage received can cause a ship’s gunnery to be lessened.

America could now fire a half-(initial) broadside from its port bow battery at Gentille; Gentille suffered a rigging and a hull hit. Gentille’s initial (half) broadside from its port bow battery returned fire, but did no damage to America. Marine fire between the two ships was ineffective.

During the maintenance phase to end the game turn, America drifted 1 hex to leeward (that’s downwind for you land-lubbers). Although America pivoted (turned), she did not move ahead, so that was considered that she did not move during the turn. Ships that don’t move during a game-turn are subject to drifting, and with high winds in a scenario like this one, they will drift more often than not.
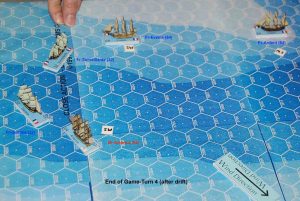
Situation at the end of game-turn 4

Situation at the end of game-turn 4. America was one hex further forward, but has drifted backwards one hex after exchanging gunfire with Gentille.

Positions of ships at the end of game-turn 4:

British
America (64) – A3852:2 (for combat, then drifted to hex A3752:2)
Adamant (50) – A4014:3
Bedford (74) – (off map, near hex A1126, won’t enter until game-turn 5)

French
Gentille (32) – A3851:5
Surveillante (32) – A4252:6
Eveillé (64) – B4403:1
Ardent (64) – B4411:1

Also, at the end of g-t 4, America announced it was now back at medium sail; Eveillé and Ardent also announced they were back at medium sail. HMS Bedford, the British flagship, sent a message to Adamant, saying “COME HERE FASTEST”. This message was sent, even though the flagship was still off the board (but would enter the game map the next turn). The French flagship, Eveillé, signalled to the French fleet: “ROUND SHOT AT SAILS”.

Game-Turn 5

America now rolled to see if she could successfully complete the tack to port this turn. After taking the required two d10 dice rolls on the tacking table, it was found that she did complete the tack, so her move for g-t 5 was plotted as “P”. She did have 3 crew sections plotted to help with the tacking maneuver, so her gunfire for this game-turn would have a -9 modifier applied (-3 per each missing crew section—they’re “missing” from manning the guns because they’re playing with the sails). Adamant plotted “3S2” and was now headed directly at the French, from dead-ahead of their SOLs. And the Bedford, a 74-gun SOL, was finally able to enter the board (in plain sail), moving 5 hexes towards the French.

For the French moves, Gentille moved ahead 2 spaces, Surveillante moved ahead 3 spaces, Eveillé moved ahead 4 hexes, and Ardent moved “P2S,” to sort of side-slip a bit to the left of Eveillé.

America fired at Eveillé, while the Eveillé, Gentille, and Surveillante all fired at America. America did no damage to Eveillé, but America suffered a combined loss of 1 rigging, 1 hull, and 1 sailor boxes. In addition, America suffered a critical hit of waterline damage, and had to send another 3 boxes of sailors to “man the pumps” to keep out the water below. This meant that America lost its first crew section, which gave it a permanent -3 modifier to all gunfire (from the main guns, not from marine fire). America also had to take a morale check (MC) at the end of the game-turn, but with a morale rating of “3”  was able to pass the MC.

Positions of ships at the end of game-turn 5:

British
America (64) – A3752:1 (for combat, then drifted to A3653:1)
Adamant (50) – A4317:4
Bedford (74) – A1629:3

French
Gentille (32) – A3652:5
Surveillante (32) – A3950:6
Eveillé (64) – A4451:1
Ardent (64) – B4210:1

Bedford (the British flag) signaled to Adamant: “MOVE TO JOIN AMERICA”. The French flagship, Eveillé, signalled to the French fleet: “FIRE EVERY TIME”.

Game-Turn 6

America having completed her tack during game-turn 5, was facing toward board edge “1,” and was facing directly toward Gentille. Not wanting to risk colliding with Gentille, America wisely plotted “0” and so did not move. Adamant, under plain sail, in a broad-reach attitude to the wind, raced along at 9 hexes toward the French. Adamant also had men in the rigging. (Upon examination of the ships’ log for Adamant after the game, Adamant should have only moved 8 hexes, due to its acceleration of “2” and the fact it used only 6 MPs in the previous g-t.) Bedford, being close-hauled, moved 5 hexes towards the French. Gentille moved “1P2” which brought her port side up against the port side of America. Surveillante moved “P2S1” to gain a bow-rake on America. Eveillé moved 2 spaces ahead. Ardent moved 4 spaces ahead.

America plotted to fire at Gentille; the other two British ships were still well out of range of the French. But America was in a sort of vise, drawing the fire of Gentille (1-hex range), Surveillante (2-hex bow rake), and Eveillé (9-hex range). After all gunfire was resolved, amazingly, America had only sustained damage to the amount of 2 rigging boxes and 2 hull boxes and 1 sailor box. Gentille sustained damage of 1 rigging and 1 hull box.
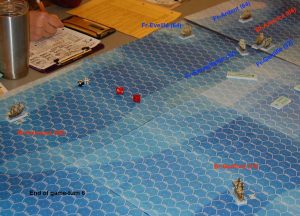
The situation at the end of game-turn 6

The situation at the end of game-turn 6: British ship America is trapped between the ships of the French squadron.

Positions of ships at the end of game-turn 6:

British
America (64) – A3653:1
Adamant (50) – A4326:4
Bedford (74) – A2131:3

French
Gentille (32) – B3502:4
Surveillante (32) – A3651:6
Eveillé (64) – A4449:1
Ardent (64) – B4206:1

The French flagship, Eveillé, signalled to the French fleet: “FIRE AT RIGGING”.

Game-Turn 7

For game-turn 7, Adamant, still with men in the rigging, continued to make haste, moving 9 more hexes closer to the French. Bedford moved 5 hexes closer to the French, coming in from an angle. America, effectively not moving at all last turn while completing her tack, could only accelerate to 2 MPs, so she moved 2 hexes straight ahead. Gentille had been passing by America, so plotted “P1” to turn to port behind America and so gained a stern rake shot. Surveillante plotted “1S1” and so turned to starboard and was now on a parallel course with America, although slightly ahead, so Surveillante could still shoot her starboard stern guns at America. Although, in the end, Surveillante passed on the low-odds shot in order to not fatigue her gun crews for no result. Eveillé continued to move 2 hexes forward, and Ardent moved 4 hexes forward.

Once again, America was the only British ship that could fire at the French, so America fired at Adamant, who was 6 hexes away on her starboard side, rather than take a 1-hex range half-broadside at Surveillante. Gentille, Eveillé, and Ardent all fired at America. America managed to inflict damage on 1 rigging and 1 hull and 1 sailor on Ardent. In return, America suffered damage of 1 rigging (losing her 1st rigging section and having to take a rigging check die roll, which resulted in “sheets cut”), and 1 sailor. So, in spite of having 3 ships firing at her, America dished out 3 boxes of damage while only receiving 2 boxes of damage in return. Perhaps more importantly, America was holding the French in combat, instead of them sailing toward the board edge they needed to exit from.

At the end of the turn, Adamant announced she had changed to medium sail (from plain sail).
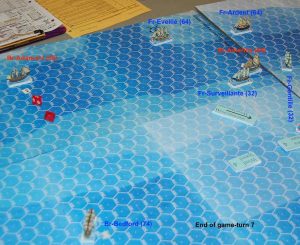
Situation at the end of game-turn 7

Situation at the end of game-turn 7. Will America be able to escape the French trap?

Positions of ships at the end of game-turn 7:

British
America (64) – A3651:1
Adamant (50) – A4335:4
Bedford (74) – A2634:3

French
Gentille (32) – B3603:3
Surveillante (32) – A3549:1
Eveillé (64) – A4447:1
Ardent (64) – B4202:1

The French flagship, Eveillé, signalled to the Gentille: “TURN AROUND”.

Game-Turn 8

America now appeared to get entirely out of the French trap, as she only plotted “2” to move ahead 2 hexes. Bedford continued to close with the enemy by moving forward 5 hexes, and with men in the rigging. And Adamant, now at medium sail, moved forward 7 hexes.  Gentille moved ahead 4 hexes. Gentille also had men in the rigging (sailor crew section 4), wanting to put up more sails to try to get back into the fight, as her sailing had now taken her a bit in the wrong direction. Gentille also had her marines working at repairing rigging. Surveillante moved ahead 2 hexes, keeping America on her starboard quarter. Eveillé moved ahead 2 hexes, and Ardent moved ahead 4 hexes. America set her marines to work at repairing her rigging.

America once again chose to fire a full broadside at Ardent, rather than a half-broadside at the closer Surveillante. Neither of the other British ships fired. Ardent and Eveillé returned fire at America. America received only a “canvas wound,” i.e., a hit to a single rigging box, while America dished out 2 boxes of damage to Ardent, to a rigging and to a marine box.

During the maintenance phase, Gentille switched from fighting sail to medium sail. America, having fired her guns 5 times, now added a -1 “fatigue” factor to all future gunnery.

Positions of ships at the end of game-turn 8:

British
America (64) – A3649:1
Adamant (50) – A4342:4
Bedford (74) – A3136:3

French
Gentille (32) – B4005:3
Surveillante (32) – A3547:1
Eveillé (64) – A4445:1
Ardent (64) – B4250:1

The French flagship, Eveillé, signalled to the French fleet:”CLOSE UP WHEN POSSIBLE”.

Game-Turn 9

America slowed to only 1 hex forward movement, while her marines were still working at repairing the rigging. (After the game, while perusing the ship’s log from America, she was repairing rigging while at medium sail. That is a big no-no! Ships must be at fighting sail or have their sails furled, or even dismasted, to be able to repair rigging! As a GM, I must check their logs more closely during the game.) Bedford got another 5 hexes closer to the enemy French, still with men in the rigging. And Adamant plotted “1S1P1” to sort of side-saddle move to starboard.

Eveillé moved 4 hexes forward. Surveillante moved 2 hexes forward, which put America behind her starboard quarter so now neither of those ships would be able to fire at each other. Gentille moved ahead 4 hexes, then turned to port, directly into the wind, preparing to tack to a new course. Gentille had effectively sailed completely around America (the ship, not the country!). Ardent continued moving ahead, 4 more hexes worth. This put Ardent on a direct collision course with Adamant! They were facing each other in adjacent hexes.

America again targeted Ardent, and now the HMS Adamant opened fire on Surveillante. Ardent returned fire at America, and Eveillé fired at Bedford. Ardent received a hull hit, while Surveillante was unscathed. America sustained a hull hit, and Bedford dodged any damage.
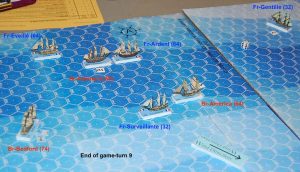
End of game-turn 9

End of game-turn 9: HMS Adamant and the French SOL Ardent are on a collision course!

Positions of ships at the end of game-turn 9:

British
America (64) – A3648:1
Adamant (50) – A4245:4
Bedford (74) – A3639:3

French
Gentille (32) – B4407:2
Surveillante (32) – A3545:1
Eveillé (64) – A4441:1
Ardent (64) – B4246:1

Bedford dropped from plain sail to medium sail during the maintenance phase. The French ship Surveillante signalled to the French fleet:”FIRE AT HULL”.

Game-Turn 10

The first order of business for game-turn 10 was to resolve the possible collision between Adamant and Ardent. Ardent made a turn to port, which was prudent, as if she had turned to starboard she would have turned into the wind and would have lost all headway. So, one would have thought that the captain of Adamant would have realized this and so would have turned to port, but instead the Adamant turned to starboard, and that put the two ships on a collision course, only in a different hex! Besides gnashing of teeth, there was dice-rolling to see which ship got to move first and take possession of hex A4145, and it was the French ship Ardent that got to move first into A4145. Now, sometimes, a ship can attempt to “bear off” by making an emergency turn in a game of Close Action in order to try to avoid a collision. But in this case, since Adamant had just made a turn, and had plotted to move “S1P1S” (which was also an illegal plot, as ships cannot pivot more than twice in a game-turn), she could not turn again immediately. Instead, she rammed into the starboard bow of Ardent. In Close Action, the ramming ship takes damage to its sails, depending on how many sails are flying, when it rams another ship, but the ship that is rammed into does not get any damage. So, in this collision, Adamant lost 5 rigging boxes. That wiped out Adamant’s entire first rigging section (of 5 boxes), necessitating a rigging check, which took out two more rigging boxes in rigging section 2. And, to top things off, the two ships became fouled together, so neither would be able to move away from the other.

For the other ships’ moves, America moved 2 ahead then turned to port. As Surveillante only moved 1 hex ahead, that put Surveillante in position for a bow rake on America. Bedford moved “S2P” and had a bow rake shot on Surveillante from 4 hexes distant. Gentille rolled dice to attempt to continue tacking to port, but the tack’s completion would be delayed for a turn, so Gentille stayed facing into the wind. Eveillé turned to port and then moved 3 hexes ahead, which put her in position for a 9-hex ranged shot versus America, although in the event Eveillé instead fired a half-broadside at range 5 versus Adamant.

During combat, America fired at Ardent, and Bedford fired its initial starboard broadside with a bow rake at Surveillante. The French returned fire with Surveillante firing its half-broadside bow rake at America, and Eveillé and Ardent both shot at Adamant. America suffered only 1 hull hit, but Adamant took a pounding, losing 3 hull and 4 sailor boxes, to go with the 7 rigging boxes Adamant lost during movement. Losing the crew section triggered a morale check for Adamant, which she failed, dropping her crew quality to  “E” which also yielded a “-2” to future gunfire. Surveillante lost only 1 sailor box, and Eveillé lost 2 rigging boxes.
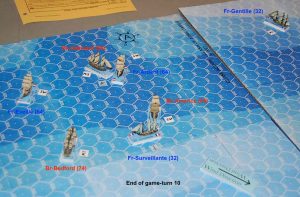
Situation after game-turn 10

Situation after game-turn 10. Adamant has rammed and fouled with Ardent.

Positions of ships at the end of game-turn 10:

British
America (64) – A3646:6
Adamant (50) – A4245:5 (fouled with Ardent)
Bedford (74) – A3641:3

French
Gentille (32) – B4407:2
Surveillante (32) – A3544:1
Eveillé (64) – A4139:6
Ardent (64) – B4145:6 (fouled with Adamant)

The French ship Surveillante signalled to the French fleet:”GO DOWNWIND ENEMY”.

Game-Turn 11

Gentille completed its tack, and simply pivoted to port. It drifted later (1 hex downwind), during the maintenance phase. Surveillante moved 3 hexes forward. Eveillé moved 6 hexes forward. Ardent was still fouled with Adamant, so neither of those ships moved. America merely moved 1 hex forward, which put her in position for a 3-hex range stern rake of Surveillante. Bedford moved “1S1P” which put her stern in position to be raked by Surveillante. Bedford would return fire at Surveillante, but could only use her starboard stern battery. Eveillé fired at Bedford, but could only use her port stern guns. Ardent delivered another bow rake on Adamant, but this time, Adamant returned fire with her port bow guns.

Adamant lost 2 rigging, 2 hull, a sailor, and a marine box. Bedford lost a hull and a sailor box. Surveillante lost 1 rigging, 1 hull, 1 sailor, and 1 marine. Losing the sailor meant that Surveillante lost her entire first crew section, so future gunfire would have a -3 modifier, and she also had to take a morale check later in the turn (which she passed, having a morale rating of “4”). Ardent lost a rigging, a hull, a sailor, and a marine, although no full sections were lost (yet).

During the maintenance phase, Gentille drifted, as did the fouled duo of Adamant and Ardent.

Positions of ships at the end of game-turn 11:

British
America (64) – A3545:6
Adamant (50) – A4245:5 (fouled with Ardent) (drifted to A4145:5)
Bedford (74) – A3742:3

French
Gentille (32) – B4407:1 (then drifted to B4307:1)
Surveillante (32) – A3541:1
Eveillé (64) – A3536:6
Ardent (64) – B4145:6 (fouled with Adamant) (drifted to A4046:6)

The French ship Surveillante signalled to the French fleet:”RUN OR FIGHT”, evidently wanting to know what the admiral wanted the French to do. At the same time, the French flagship, Eveillé, sent aloft the signal flags that stated “SHOOT AT AMERICA”.

Game-Turn 12

Now the French 64-gun Ardent began to worry. It was still fouled to Adamant, and now Bedford was closing in for a bow rake on Ardent. Bedford moved “1S2” but was only in position to rake the Ardent with her port bow guns. America moved 3 spaces ahead, moving once again in uncrowded water. Gentille accelerated at her maximum rate of “2” and so moved two spaces ahead after finally completing her port tack. Surveillante moved 5 spaces ahead to move away from the nearest British ships, and Eveillé moved 6 spaces ahead.

America fired at the retreating Surveillante at 8-hex range, too far for a rake of the Serveillante’s stern. Adamant, still fouled to Ardent, fired her port bow battery at Ardent. Bedford also fired her port bow guns at Ardent, a half-broadside bow rake. Ardent was the only French ship to return the British fire, firing a 1-hex range bow rake at Adamant.

Surveillante took only 1 hull hit, but Ardent got pummeled to the tune of 3 rigging and 3 hull. Adamant lost 2 rigging (causing the loss of her 2nd rigging section), 1 hull (causing the loss of her 1st hull section), and 1 sailor (losing the 2nd sailor section). So, Adamant had to take another rigging check, a hull check, and two morale checks. In addition, she added a -1 modifier for “guns dismounted” from both the port and starboard broadsides, and all gunnery also got a second -3 modifier for the extra missing crew section (making the “missing crew” gunnery modifier -6 in total). Damage was really beginning to add up against the Adamant.

During the maintenance phase, the Adamant kept trying to grapple the Ardent, to keep her from being able to sail away, especially now that the Bedford was coming up to aid the Adamant. Although the grappling attempts kept failing, the Ardent was also unable to unfoul the ships, and so couldn’t get away.

Positions of ships at the end of game-turn 12:

British
America (64) – A3244:6
Adamant (50) – A4145:5 (fouled with Ardent) (drifted to A4046:5)
Bedford (74) – A3845:4

French
Gentille (32) – B4305:1
Surveillante (32) – A3536:1
Eveillé (64) – A2933:6
Ardent (64) – B4046:6 (fouled with Adamant) (drifted to A3946:6)

The French flagship, Eveillé, signaled “CLOSE UP UNTIL GENTILLE” to her squadron. The British flagship, Bedford, signaled to the ship America “TARGET FRIGATE IF POSSIBLE”, but did she mean the retreating Surveillante or the approaching Gentille?

Game-Turn 13

The British Adamant and the French Ardent were still fouled together and so couldn’t move, and now Bedford moved 2 spaces ahead to have a better bow rake on Ardent. America moved 3 spaces ahead, not sure whether to go and help finish off Ardent or to pursue the Surveillante and Eveillé. Eveillé turned to starboard and then moved 3 spaces directly toward the board edge where she could escape from the British. Surveillante turned to port and moved 2 spaces ahead, so she would be able to shoot at America. Gentille accelerated to 4 MPs, and moved straight ahead.

For the combat phase, America and Surveillante traded broadsides, although Surveillante, being only a 32-gun frigate with a missing crew section and whose remaining crew was slightly fatigued, could only manage a MGN of “0” (zero), to  which of course a 1d6 would be added. Ardent continued to bow rake Adamant, and while Adamant returned fire at Ardent as best she could, Bedford now had a full 1-hex range bow rake on Ardent.

America managed to hit a single sailor box on Surveillante; the return broadside did no damage. Ardent’s bow rake at Adamant caused damage to 3 rigging, 1 hull, and 1 sailor. The return fire from Adamant and Bedford to Ardent caused damage to 1 rigging (taking out rigging section 1 and causing a rigging check), 2 hull (wiping out hull section 1 and causing a hull check and a morale check), and 2 sailor boxes.
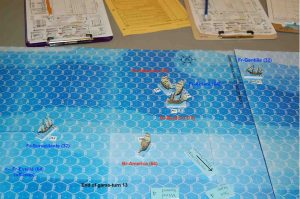
The end of game-turn 13

The end of game-turn 13. The French ship Ardent is now caught in a vise between Adamant and Bedford. Eveillé has moved to the left, out of the picture, and Surveillante also has a clear path to escape to the left. Gentille, at the top-right of the picture, should be able to cruise past Adamant and Bedford to escape.

Positions of ships at the end of game-turn 13:

British
America (64) – A3143:6
Adamant (50) – A4046:5 (fouled with Ardent)
Bedford (74) – A3847:4

French
Gentille (32) – B4301:1
Surveillante (32) – A3335:6
Eveillé (64) – A2930:1
Ardent (64) – B3946:6 (fouled with Adamant)

During maintenance, Ardent still was unable to unfoul from Adamant, meaning Ardent was in a very precarious position. The British flag in Bedford sent the message to all British ships, “FOCUS ON ARDENT KILL”. I guess you can’t make it any plainer than that, that you want to wipe out an enemy ship!

Game-Turn 14

During game-turn 14, the French ships Eveillé and Surveillante continued to move toward the escape map edge. Eveillé moved 4 hexes straight toward that map edge, and Surveillante moved 7 hexes while on a broad-reach, in the general direction of that map edge. Gentille accelerated to “5”, the most speed she could go while close-hauled with medium sails. She also had men in the rigging, trying to raise more sails, although that would take two turns to accomplish. For the Brits, America merely moved 2 spaces ahead. Adamant was still fouled with Ardent and so couldn’t move, and Bedford did not move at all, so to keep the perfect bow rake position on Ardent.

Only two ships fired during combat: Ardent had a bow rake on Adamant, and Bedford had a bow rake on Ardent. But, it seems, the game was ended just at this moment, as no damage was recorded for game-turn 14.

Victory Determination

The French did not fulfill their special victory condition of exiting all four of their ships off a particular map edge, so the scenario would be decided by damage inflicted upon the enemy.

Damage to the British:

America (worth 72 Victory Points) lost 7 rigging boxes (1 was then repaired), 5 hull boxes, 6 sailor boxes, and 1 marine box. She only lost one rigging section, though. That rigging section was worth 5% of her total VPs, so the French earned 3.6 VP for America.

Adamant (worth 45 VP) lost 14 rigging boxes, 7 hull boxes, 7 sailor and 1 marine boxes, which was a loss of 2 rigging sections (2 x 5% of VPs), 1 hull section (10% of VPs), and 2 sailor sections (2 x 10%). So Adamant was worth 40% of her 45 VPs, or 18 VP.

Bedford (worth 70 VP) lost only 1 hull and 1 sailor box, and no sections, so she yielded 0 VP to the French.

So the French amassed a total of 18 + 3.6 = 21.6 VP.

Damage to the French:

Gentille (worth 28 VP) lost 2 rigging boxes, 2 hull boxes, and no sections, so she yielded 0 VP to the British.

Surveillante (worth 27 VP) lost 2 rigging boxes, 2 hull boxes, 3 sailor boxes (1 crew section), and 1 marine box. So her 1 crew section was worth 10% of her VP, or 2.7 VP.

Eveillé (worth 62 VP) lost 2 rigging boxes only (no sections were lost), so she yielded 0 VP.

Ardent (worth 62 VP) lost 6 rigging boxes (1 rigging section), 8 hull boxes (1 hull section), 4 sailor boxes, and 2 marine boxes, so her 1 rigging section is worth 5%, and the hull section is worth 10%. So 15% of 62 = 9.3 VP.

So the British earned 12.0 VP from the French.

The French had a VP lead of 21.6 to 12.0, so on the face of it, the French earned a slight victory. However, if the scenario had continued, I believe that Ardent would have eventually surrendered, or would have been battered to pieces, so I would say that the British won this scenario as it seemed the other three French ships were mostly concerned with getting away. The other French ships could have come back to help Ardent, but by the time Eveillé could have turned around and come to Ardent’s aid, Ardent would have not been in very good fighting condition.

British ship Bedford still had all of its gunnery factors; if it continued to pour in bow rakes at Ardent, it would usually have a BGN of close to 30 from 1-hex range. Even at 5-hexes, Bedford’s BGN would be just more than 20. Firing 30 (plus the d6 die roll) gunnery factors should inflict 4 to 7 points of damage per turn. Firing 20 (+ d6) factors should inflict 1 to 3 factors of damage per turn (not counting any critical hits, of course). However, the other British ships were not in great shape. The Adamant would have to apply -10 or -11 to all of her shots, and maybe more negatives. America had a total of -6 or -8 in modifiers, but she still had a Crew Quality of B, so that added +4, making the total gunnery modifier only -2 to -4. So America would have been able to make some effective gun attacks versus Ardent.

But Ardent wasn’t in any immediate danger of being boarded and captured. At the time the scenario was suspended, Ardent still had 17 sailor boxes and 3 marine boxes, more than enough bodies to repel boarders. But she would probably lose those bodies at the rate of 1 or 2 boxes per turn of gunnery fire against her.

Of course, Ardent may have been able to unfoul from Adamant, and if Bedford drifted away, then Ardent could try to make a run for it. But Ardent had lost one rigging section, so she then couldn’t raise sails any more than medium sails, meaning that if was sailing close-hauled toward the exit map edge, she could only move 3 hexes per turn. If Bedford stayed with medium sails, she could move 4 hexes close-hauled, and so could catch Ardent. Although, America had lost one rigging section, and so her fastest speed while close-hauled with medium sails was also only 3 hexes. And Adamant had lost 2 rigging sections, so could only make 1 hex per turn while close-hauled, as she could only fly fighting sails.

So, perhaps Ardent could have escaped? I have all of the logs, maybe some day we can get some folks together and play out the rest of the scenario?

Aftermath

This was a sort of hectic scenario, in that we only got 14 game-turns played (well, we got 13.5 game-turns completed). We would have liked to have played 30 game-turns or so, but we had three players who were new to Close Action. And one of them arrived to play after we had started the scenario, and so Joel and myself (mostly) were trying to explain the game to him. As the GM, I was also trying to take lots of notes and pictures to help with this write-up, although I forgot to take pictures after some of the game-turns. And that record-keeping slightly slowed up play, also.

Some of the logs were not filled in correctly, but that is to be expected, especially with novices playing. One of my goals of running Close Action scenarios is to educate folks how to play the game, so we will have a larger pool of experienced players available so we can try to (eventually) play some of the larger scenarios. There were also two times where captains had crew working at repairing rigging damage, but the ships were at medium sail. I will have to remember to check the status of ships’ sails during rigging repairs in the future.

But there are bound to be mistakes, especially playing at a game-con where you have a limited amount of time. We had four hours available for this scenario, but probably 30 minutes of that was used in explaining things to new players at the beginning, and the “command conferences” where each admiral explained their plan to their subordinate captains of course took some time.

Future Close Action games

I am running another scenario of Close Action at Flintcon in Flint, Michigan, on Saturday, February 9, 2019. The Close Action game will begin at 0900 (9:00 am for land-lubbers) and will run until 1300 (1:00 pm). The game con is at St. Paul’s Lutheran Church and School, 402 S. Ballenger Highway. The scenario is “Santo Domingo,” Close Action scenario 17. Five French ships are trying to escape from seven British ships, although only three British ships are on the map at the beginning of the scenario (the other five Brits enter later as reinforcements). So up to 12 players can play! Come and check it out!
CFR-Detroit 2018 Championship race – South African Grand Prix

Tuesday, February 5th, 2019

The eighth and final race of the 2018 CFR-Detroit season was held at Pandemonium Games in Garden City, Michigan, on Friday, December 14, 2018. Fifteen drivers contested the race, with five of those drivers having a chance to win the points championship. When all was said and done, Bill Worrel finally drove to his first race win in CFR, and that earned him the championship over Mike Cook, Garry Kaluzny, Richard White, and Jack Beckman. Finishing 2nd at Kyalami was Richard White, and Gary Sturgeon finished on the podium in 3rd place after passing Kaluzny just before the finish line.

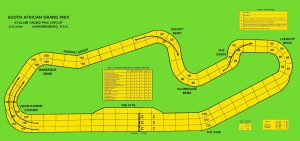
The race was held on the Kyalami track, from an old Avalon Hill design from Speed Circuit. This was the first time this track was used in the CFR-Detroit racing series, although it had been used in the old Advanced Speed Circuit races in the Detroit area back in the 1980s/1990s. Of course, we raced on a large-scale track that had been painted on a bedsheet so we could use our 1:64 scale cars.

Kyalami race track of the South African Grand Prix.

Kyalami race track of the South African Grand Prix. This was from the old Speed Circuit game and was available as an extra item from Avalon Hill.

After the drivers set up their car’s specs, the drivers secretly bid for starting positions. Each wear chit counted as 1.0, and each skill chit counted as 0.5. Higher bids started in front of lower bids. Ties were resolved by rolling percentage dice, high rolls favored over low rolls.

The four main contenders for the title, Cook, Worrel, Kaluzny, and White, all wanted to start near the front of the large pack of 15 cars. A “wild card” in this race was Louye Padol. Padol had raced in some old Advanced Speed Circuit races in the Detroit area near the end of that series in the early 1990s. Padol further stated that since he had never won a race in that old ASC series that he wanted to win a CFR race. Of course, he knew his work was cut out for him, what with the hungry drivers who really wanted to win the championship.

Qualifying

There were some high bids for pole position. Mike Cook snatched the pole with a bid of 9.5 (6 wear + 7 skill). It was Cook’s 8th pole in the 15 races he has participated in, the most of any driver. (Jim Robinson and Bill Worrel each have 2 CFR-Detroit career pole positions.) Louye Padol also started in the front row, in 2nd place, with a bid of 9.0 (8 wear + 2 skill). Garry Kaluzny started in 3rd with a bid of 8.5 (6 wear + 5 skill). Bill Worrel started 4th with his bid of 7.0 (5 wear + 4 skill). Greg Lim (3 wear + 6 skill) and Gary Sturgeon (3 wear + 6 skill) each bid 6.0. Lim started 5th after his percentile dice roll of “73” to Sturgeon’s dice roll of “06,” thus relegating Sturgeon to 6th place on the grid.

Richard White bid 5.5 (4 wear + 3 skill), so he started in the 4th row, in 7th place. Beside White, in 8th place, was Mike St. Peter with his bid of 4.5 (4 wear + 1 skill). Brian Robinson (1 wear + 5 skill) and Jack Beckman (2 wear + 3 skill) each bid 3.5 and so they had a “dice-off” for 9th and 10th place on the starting grid. Brian Robinson started 9th after rolling “63,” and Beckman started 10th after rolling “52.”

Jim Robinson was the 11th place starter with a bid of 2.5 (0 wear + 5 skill). Aric Parr (1 wear + 2 skill) and Jim Landis (1 wear + 2 skill) each bid 2.0. Parr won the dice-off by “45” to “26” and so Parr started 12th, and Landis started 13th on the grid. Joel Lauder bid only 1.0 (0 wear + 2 skill) to start 14th, and P.J. Norton (0 wear + 0 skill) bid nothing and was content to start 15th.

The starting grid for the 2018 South African Grand Prix with their car specs:

 # Driver (Car)                    Start/Accel/Decel/Top/Wear/Skill/Tires
11 Mike Cook (Camel Lotus)          100   40    40   140  5x   3x   soft
25 Louye Padol (Ligier)             100   40    40   160  5x   2x   soft
 8 Garry Kaluzny (Marlboro McLaren) 100   40    40   140  5x   3x   soft
 4 Bill Worrel (Tyrrell)             60   40    40   160  5x   3x   soft
13 Greg Lim (GoDaddy)                60   60    40   160  4x   3x   soft
22 Gary Sturgeon (McLaren)          100   40    40   160  5x   2x   soft
 1 Richard White (Brabham)           60   40    40   160  5x   3x   soft
44 Mike St. Peter (Mercedes)         60   40    40   160  5x   3x   hard
 5 Brian Robinson (Walker Racing)    20   60    60   140  5x   3x   soft
12 Jack Beckman (Ferrari)            60   40    40   160  5x   3x   soft
 2 Jim Robinson (Williams)           60   40    40   160  5x   3x   soft
14 Aric Parr (Motul BRM)             60   40    60   160  5x   3x   hard
20 Jim Landis (Benetton)             60   60    60   160  4x   2x   hard
 7 Joel Lauder (HSBC Jaguar)         60   60    60   180  3x   2x   hard
 3 P.J. Norton (Tyrrell)             60   40    40   160  5x   3x   hard

Start = Start Speed (in miles/hour); Accel = Acceleration (in mph); Decel = Deceleration (in mph); Top = Top Speed (in mph); Wear = # of Wear markers (per lap); Skill = # of Skill markers (per lap); Tires = hard or soft tires to begin the race.

The starting grid at Kyalami

The starting grid at Kyalami: 1st row: Cook (yellow car) & Padol (blue car); 2nd row: Kaluzny (orange/white) & Worrel (blue); 3rd row: Lim (green) & Sturgeon (black/silver); 4th row: White (white/blue) & St. Peter (silver); 5th row: B. Robinson (white/blue) & Beckman (red); 6th row: J. Robinson (white/yellow/blue) & Parr (gray); 7th row: Landis (green/red/blue) & Lauder (green); 8th row: Norton (blue/white). (Bill Worrel photo)

1st Lap

At the start, pole-sitter Cook surprised the field by using his -3 skill chit and rolling dice to boost his car’s start speed to 120 mph, giving up the opportunity to use a wear (since he was on soft tires) to get the automatic 20 mph increase to his start speed. Of course, the fact Cook had bid 6 of his available 15 wear to get the pole position might have influenced his choice, since he only started the race with 9 wear. Padol and Kaluzny, both on soft tires, each used a wear to start at 120 mph. Worrel, who was starting the race with 10 wear after bidding 5 wear for qualifying, rolled dice (using two -1 skill chits) to start at 80 mph. Sturgeon was content to just start at his car’s 100 mph start speed; that allowed him to pull alongside Worrel’s blue Tyrrell. Lim used a wear to get to 80 mph; he slotted himself right behind Worrel. White, starting on the inside of the 4th row, also rolled a -2 modified start speed roll, making the roll and thus starting at 80 mph and pulling right behind Lim. St. Peter, starting on hard tires, was content to just start at 60 mph. That allowed Beckman to pull alongside St. Peter after Beckman used a wear to start at 80 mph. J. Robinson used a wear to start at 80 mph, thus leap-frogging B. Robinson who had used a wear to increase his start speed to 40 mph. Parr, starting in 12th, decided to make an unmodified start speed dice roll. Parr rolled an ‘8’ and thus started at only 40 mph, 20 mph below his car’s normal 60 mph start speed. Landis and Lauder started at their normal 60 mph start speed, and they both pulled even with Parr. Norton, making his first official start in the CFR-Detroit races, was content to start at his normal 60 mph speed.

The pack roars away!

The pack roars away at the start! The order is Cook, Padol, Kaluzny, Worrel, Sturgeon, Lim, White, St. Peter, Beckman, J. Robinson, B. Robinson, Parr, Landis, Lauder, and Norton. (Bill Worrel photo)
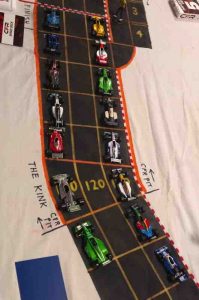
On the 2nd move of the game, the leading trio of Cook, Padol, and Kaluzny all increased their speed to 140 mph through the Crowthorne Corner. Worrel spent a -1 skill marker and successfully rolled dice to increase his acceleration. J. Robinson rolled a -2 acceleration roll (and made it). Most of the following cars maintained their order, although Beckman got by St. Peter, and J. Robinson pulled to the inside of St. Peter. Landis got by Parr, and Lauder pulled alongside B. Robinson. As the leaders approached the Jukskei Sweep, Worrel and Sturgeon had caught up to the leading trio. Lauder moved to the inside of White.

Going into Clubhouse Bend, Kaluzny passed Padol for 2nd, and the pack was all bunched up again.

Cook still leads at Clubhouse Bend

Cook still leads at Clubhouse Bend, followed by Kaluzny, Padol, Worrel, Sturgeon, Lim, White, Beckman, J. Robinson, Lauder, St. Peter, B. Robinson, Landis, Parr, and Norton. (Bill Worrel photo)

St. Peter spent two wears and two -1 skill markers (making a chance roll) going through The Esses at 120 mph. Parr tried to force a pass by Landis through Clubhouse Bend, but was balked. Parr then had to scrub off 40 mph to reduce his speed to 60 mph.

Going through Leeukop Bend, Cook was able to get clear of the pack, opening a 3-space lead over Kaluzny. Cook was one space shy of The Kink, though, and so he was unable to enter the pits before his following competitors. Then on the next move of the race, Cook did pull into the pits just after crossing the start/finish line. It was the 17th lap Cook has led in his CFR-Detroit driving career, far and away the most of any driver. (Cook has led 38% of the laps he has raced.) Also pitting were Kaluzny, Worrel, Sturgeon, White, and Padol. Lim accelerated to 160 mph out of Leeukop, but then had to roll a -2 deceleration roll to reduce his speed to 140 mph as he didn’t have any wear remaining and so would not have been able to enter The Kink at 160 mph. That left Lim one space shy of getting into the pits on that move.

Cook leads the 1st lap

Cook (just past the start-finish line) leads the 1st lap, pulls into pits. (Bill Worrel photo)

During the immediately succeeding move, the cars of Lim, Beckman, and B. Robinson joined the other cars in the pits; they were eventually joined in the pits by Parr. B. Robinson made a -2 chance roll going through The Kink so he could get into the pits at a higher speed. Not pitting were Lauder, J. Robinson, St. Peter, Norton, and Landis. Lauder was then the leader on the track due to his staying out of the pits.

The official order at the end of the 1st lap: Cook (0); Lim (+3); Lauder (+11); J. Robinson (+7); St. Peter (+3); Norton (+9); Worrel (-3); Kaluzny (-5); Sturgeon (-3); White (-3); Padol (-9); Landis (+1); Beckman (-3); B. Robinson (-5); and Parr (-3). The numbers in parentheses indicate how many places a driver either gained (+) or lost (-) from their starting position. After the pit stops were resolved, the running order on the track was Lauder, J. Robinson, St. Peter, Norton, Cook, Worrel, Kaluzny, Sturgeon, White, Padol, Landis, Lim, Beckman, B. Robinson, and Parr.

2nd Lap

Coming out of the pits, Worrel made a -1 modified dice roll to boost his top speed to 180 mph. Kaluzny also used a -1 modifier to increase his top speed to 160 mph. Since the top four contenders basically needed to win the race to also win the championship, they knew going in to this race that they would need to roll some dice! Going into Sunset Bend, Cook made a -1 deceleration roll, and St. Peter used 2 wear and made a -2 chance roll. Then going through Clubhouse Bend, J. Robinson took the lead from Lauder. White then made a forced pass of Worrel coming out of Clubhouse Bend.
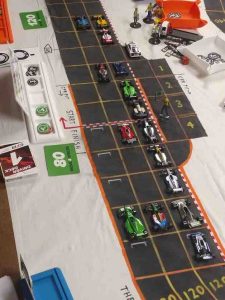
Jim Robinson takes the lead

Jim Robinson takes the lead. Following are Norton, Lauder, St. Peter, Cook, Kaluzny, White, Padol, Worrel, Sturgeon, Landis, Lim, Beckman, B. Robinson, and Parr. (Bill Worrel photo)

Jim Robinson managed to gain a 2-space lead over Norton and Lauder coming out of Leeukop, but J. Robinson had to make a -3 chance roll to gain that advantage. Cook had to make a -1 deceleration roll going into Leeukop (dropping to 80 mph from 100 mph), as the road ahead was blocked by Norton’s Tyrrell. In the process, Cook used his last skill modifier, leaving him with no more skill markers, and there was still a little more than a lap left to race.

Now the dice started really flying. Jim Robinson needed to pit, and he wanted to pit on his current move, so he rolled a -2 chance at The Kink, but he spun. He had to roll as he was out of wear. Then Lauder tried to get into The Kink at 160 mph, so he used a wear and also rolled a -2 chance. Lauder also spun. Although spun, both J. Robinson and Lauder’s cars were placed into the pits, as The Kink corner was the first space where cars could pit. Norton made a -2 acceleration roll coming out of Leeukop so he could go 140 mph. That left him once space short of The Kink, meaning he couldn’t get into the pits on this move.

J. Robinson and Lauder both spin going into the pits

J. Robinson and Lauder both spin going into the pits (so their cars are both facing backwards to indicate they have spun). Other cars on the track are Norton, St. Peter, Cook, Kaluzny, Padol, Sturgeon, White, Worrel, Lim, Beckman, Landis, B. Robinson, and Parr. (Bill Worrel photo)

During the next move, Norton and St. Peter made it through The Kink, then they both pulled into the pits. Cook, Padol, Kaluzny, and Worrel all made it through The Kink, and Sturgeon and White were in The Kink. That meant all six of those cars could accelerate down the long straight. Cook made an unmodified top speed roll to move at 160 mph. Worrel made an unmodified top speed roll to move at 180 mph. Kaluzny wanted to move at 160 mph, and had to roll for his top speed. In spite of using a -1 skill modifier, Kaluzny failed the roll. He moved this turn at 140 mph, and his future top speed was now only 120 mph. So he knew his shot at the championship was doomed. Landis pulled his car into the pits, as he was the last of the cars that had not yet pitted.

Cook, Padol, and Worrel vie for the lead

Cook, Padol, and Worrel vie for the lead to begin the 3rd lap. (Their cars are near the Monty Python-esq hand of Kaluzny.) Kaluzny and White are right behind the leaders, and Sturgeon is also right behind. Lim is just crossing the start/finish line. B. Robinson is just in front of Beckman who is just in front of Parr. The cars of J. Robinson and Lauder have come out of the pits to be placed back in the track in The Kink, but are facing backwards to show they have spun. In the pits are Norton, St. Peter, and Landis. (Bill Worrel photo)

P.J. Norton (+14) was the official leader of the 2nd lap, although he was in the pits when he achieved that honor. The rest of the official order for the 2nd lap: Cook (-1); Padol (-1); Worrel (0); Kaluzny (-2); White (+1); Sturgeon (-1); Lim (-3); B. Robinson (0); Beckman (0); Parr (+1); St. Peter (-4); Lauder (+1); J. Robinson (-3);  and Landis (-2).

3rd Lap

Worrel made a daring move to take the lead going into Crowthorne Corner at the end of the long straight. Since he was on the outside of the track, and would have moved after other cars that plotted the same speed, Worrel plotted 180 mph, made his top speed dice roll, but then slowed to 160 mph before actually entering the corner. That let Worrel move before Cook and Padol. Cook did move alongside Worrel in Crowthorne, with Padol right behind them in 3rd. Kaluzny and White were side-by-side behind Padol, and Sturgeon was behind White.

Worrel and Cook were side-by-side racing through Barbeque Bend and the Jukskei Sweep. Kaluzny, with his damaged top speed, moved to the outside in Barbeque Bend, letting White pass on the inside. Kaluzny did not want to hold up a competitor who had a chance for the championship.

Then came the stunning event of the race. Cook made an unmodified top speed roll to move at 160 mph (so he could move before Worrel) headed into Sunset Bend, and then Cook made an unmodified deceleration roll to get down to 140 mph for the corner. Cook then used 2 wear and rolled an unmodified chance (Cook was on hard tires and so couldn’t use 3 wear, and he was out of skill markers). Unfortunately for Cook, he crashed and was suddenly out of the race, just when he was going for the lead! (Note that if Cook had made the roll successfully, it would have been a piece of “brilliant driving” and might have won the game for him.) Worrel’s car pulled up just short of Sunset, and he took the inside lane, eschewing the cornering arrow that was in the outside lane. Padol then pulled alongside Worrel and took the arrow. White pulled ahead of Kaluzny, and Sturgeon pulled alongside Kaluzny.

Cook has crashed in Senset Bend

Cook has crashed in Sunset Bend (upside down yellow car next to the flat-bed truck). Worrel and Padol are side-by-side just before Sunset Bend, followed by White, Kaluzny, Sturgeon, Lim, Beckman, B. Robinson, Norton, Parr, St. Peter, Lauder, J. Robinson, and Landis. (Bill Worrel photo)

Now Worrel and Padol had a spirited battle on the track. Worrel spent 3 wear through Sunset and Clubhouse, leaving him with only 3 wear remaining for the rest of the race (and with three more corners to go). Worrel then pulled ahead of Padol at The Esses, as Worrel used a wear and made an unmodified chance roll. (It goes without saying that White, Padol, and Kaluzny were hoping for a spin or crash!) As Padol had taken the line behind Worrel, White had to go off-line at The Esses, using 2 wear and making a -2 chance roll so he could be at 100 mph.

Worrel moves in front at The Esses

Worrel moves in front at The Esses. Padol and White are right behind, then are Kaluzny, Sturgeon, Lim, Beckman, B. Robinson, Norton, St. Peter, Lauder, Parr, J. Robinson, and Landis. Cook’s crashed Camel Lotus has been loaded on the flat-bed truck, and the flagman is waving the yellow caution flag just before Sunset Bend. (Bill Worrel photo)

Worrel then pretty much wrapped up the race victory and the championship at Leeukop, as he was the only car that made it to the end of the corner where he would be able to accelerate out of that corner in the next move.

Worrel continues to lead at the exit of Leeukop

Worrel continues to lead at the exit of Leeukop. White is 2nd, Kaluzny has taken the inside and 3rd place from Padol (who is 4th). Sturgeon is 5th, and Beckman (red Ferrari) has just passed Lim for 6th place in The Esses. (Bill Worrel photo)

From that point on, the race to the finish line was an anti-climax, as Worrel crossed the line 3 spaces ahead of White and Kaluzny to win the race and the 2018 CFR-Detroit championship! Kaluzny had used a slip to pull alongside White, especially as Kaluzny didn’t dare roll for his top speed again.

Worrel wins the race and the title!

Worrel takes the checkered flag to win the 2018 South African Grand Prix and also winning the 2018 CFR-Detroit points championship. (Bill Worrel photo)

There was still a race on for other positions. Beckman made a -3 chance roll at Leeukop, and Brian Robinson used 2 wear and made a -3 chance roll, also at Leeukop. At some point late in the 3rd lap, Padol failed a top speed or acceleration roll, although it wasn’t recorded when it happened. Failing that roll cost Padol a couple of positions at the finish, at least. Also, Sturgeon was able to pass Kaluzny as they crossed the finish line, thereby earning a podium finish in 3rd for Sturgeon.

The official finishing order at the 2018 South African Grand Prix: 1st-Bill Worrel (+3); 2nd-Richard White (+5); 3rd-Gary Sturgeon (+3); 4th-Garry Kaluzny (-1); 5th-Louye Padol (-3); 6th-Jack Beckman (+4); 7th-Greg Lim (-2); 8th-P.J. Norton (+7); 9th-Brian Robinson (0); 10th-Mike St. Peter (-2); 11th-Joel Lauder (+3); 12th-Jim Robinson (-1); 13th-Aric Parr (-1); 14th-Jim Landis (-1). Classified in 15th with a DNF was Mike Cook (-14).

Aftermath

Louye Padol had a nice drive for his first race using the CFR rules. He was in contention, but he seemed to not want to interfere with the four-way battle for the lead amongst the main contenders for the title. And P.J. Norton, although he had previously raced in a few demo races, performed well in his first official CFR race, moving up 7 places from his starting position to finish in 8th place.

Points awarded at the 2018 South African Grand Prix: Worrel 10; White 6; Sturgeon 4; Kaluzny 3; Padol 2; Beckman 1.

The final points standings of the 2018 CFR-Detroit season (after eight of eight races):

Place Driver (Car)                    Points
  1   Bill Worrel (Tyrrell)             37*
  2   Richard White (Brabham)           32
  3   Garry Kaluzny (Marlboro McLaren)  30
  4   Mike Cook (Camel Lotus)           29
  5   Jack Beckman (Ferrari)            20
  6   Jim Robinson (Williams)           18
  7   Gary Sturgeon (McLaren)           14
  8   Mike St. Peter (Mercedes)          9
  9T  Brian Robinson (Walker Racing)     4
  9T  Aric Parr (Motul BRM)              4
  9T  Jim Landis (Benetton)              4
 12T  Joel Lauder (HSBC Jaguar)          2
 12T  Greg Lim (GoDaddy)                 2
 12T  Louye Padol (Ligier)               2
 15T  Mark Moellering (McLaren)          0
 15T  Gary Kempen (Williams)             0
 15T  Chuck Modzinski (Arrows)           0
 15T  Jim Lauder (Shadow)                0
 15T  P.J. Norton (Tyrrell)              0

* Drivers could only count their 6 best finishes out of the 8 races. Bill Worrel had to forfeit 1 point (from a 6th place at Monaco) due to his having earned points in 7 races. (Worrel did earn 38 points, but could only count 37 of them.)

After the race, Bill Worrel was awarded the 2018 CFR-Detroit Individual Points Championship trophy from outgoing race steward Garry Kaluzny. Kaluzny was then surprised when the rest of the drivers gave Kaluzny a trophy for the appreciation the drivers had for his organizing and running the race series for 2017 and 2018.

Worrel and Kaluzny receive trophies

Bill Worrel with his 2018 CFR-Detroit championship trophy (left), and Garry Kaluzny with his appreciation trophy (right).

After the championship trophy presentation, the drivers continued to uphold an old tradition dating back to the Advanced Speed Circuit days in Detroit–they voted to award the “Tom Kane Memorial Award” to the most sportsmanlike driver of 2018. Each driver got to vote for one driver, via secret ballot. The voting tallies were:

Jim Landis – 7
Jim Robinson – 3
Jack Beckman – 2
Greg Lim – 2

Thus, Jim Landis was voted the Most Sportsmanlike driver of 2018 and was awarded the Tom Kane Memorial Award trophy.

Jim Landis receives the Sportmanship trophy

Jim Landis (right) receives the Tom Kane Memorial Award trophy as the CFR-Detroit Most Sportsmanlike driver of 2018. Presenting the award is the 2017 Most Sportsmanlike driver, Greg Lim (left). (Bill Worrel photo)

In the 2018 CFR-Detroit racing season, a total of 20 different drivers took part in the eight races. The most drivers at any race was 15, at both the Belgian and South African Grand Prix. The fewest drivers in any race was 11, at both the Italian and German Grand Prix. The average number of drivers for the season was 12.8 drivers per race. This was an increase from the average of 10.3 drivers per race in 2017.

For the 2019 CFR-Detroit racing season, Jack Beckman will be the race steward. There will also be a “team championship” award added, and already the drivers have mostly formed teams for 2019.

As always, keep up to date for the CFR-Detroit schedule at the CFR-Detroit home page at http://michigumbo.com/cfr/.

A demo race will take place at Flintcon (in Flint, Michigan) on Saturday, February 9, 2019, using the Indianapolis road course. The actual 2019 CFR-Detroit schedule begins on Friday, February 15, 2019, at Pandemonium Games in Garden City, Michigan. We will race the Australian Grand Prix using the Adelaide track. Qualifying begins at 6:45pm. No experience is necessary; you are welcome to join us!

CFR-Detroit 2018 Race #3 – Belgian Grand Prix

Wednesday, December 5th, 2018

Richard White won the 2018 Belgian Grand Prix, his second consecutive victory of the 2018 campaign. It was the third race of the 2018 season, and was contested at Pandemonium Games in Garden City, Michigan, on Friday, July 13. Jim Robinson and Brian Robinson also placed in the podium, in 2nd and 3rd positions, respectively. A record high (for the CFR-Detroit racing series) of 15 drivers competed for the win.

While last year’s Belgian Grand Prix was contested a Spa-Francorchamps track of independent design (from the 1980s), the 2018 race was held on the Spa-Francorchamps track of CFR design.

The Spa-Francorchamps CFR track

The Spa-Francorchamps CFR track, raced in 2018.

After the drivers had set up their car’s specifications, all drivers secretly bid for starting positions. Each wear bid counted as 1.0, and each skill marker bid counted as 0.5. Higher bids started in front of lower bids. And ties were resolved by rolling percentage dice, high rolls favored over low rolls.

Jim Robinson (2 wear + 7 skill) and Richard White (5 wear + 1 skill) each bid 5.5. J. Robinson took the pole position with a percentage dice roll of ’86,’ while White only rolled ’31’ and so started 2nd. Jack Beckman (3 wear + 4 skill) and Garry Kaluzny (4 wear + 2 skill) each bid 5.0, with Beckman starting 3rd with a roll of ’92’ while Kaluzny started 4th with a roll of ’52.’ Bill Worrel (4 wear + 0 skill), Mike St. Peter (3 wear + 2 skill), and Gary Sturgeon (1 wear + 6 skill) each bid 4.0. Worrel rolled ’84’ to start 5th, St. Peter rolled ’41’ to start 6th, and Sturgeon rolled ’24’ to start 7th. Brian Robinson (0 wear + 5 skill) and Joel Lauder (1 wear + 3 skill) each bid 2.5, with B. Robinson winning the dice-off by ’92’ to ’29’ and so B. Robinson was 8th on the grid and Joel Lauder was 9th. Joel’s brother Jim Lauder started 10th with a bid of 1.5 (1 wear + 1 skill).

Newcomer Mark Moellering started 11th with a bid of 1.0 (0 wear + 2 skill). Jim Landis and Chuck Modzinski each bid 0.5 (0 wear + 1 skill). Landis rolled ’87’ to start 12th, and Modzinski rolled ’57’ to start in 13th place. Modzinski had raced some in the old Advanced Speed Circuit series in the late 1980s/early 1990s, but this was his first foray into racing with the Championship Formula Racing rules. Greg Lim started in 14th place after bidding nothing. And, after the field was set, but before the green flag dropped, Gary Kempen was added to the field in 15th place as a provisional starter.

The starting grid with their car specs:

 # Driver (Car)                    Start/Accel/Decel/Top/Wear/Skill/Tires
 2 Jim Robinson (Williams)           60   40    40   160  5x   3x   soft
 1 Richard White (Brabham)           60   40    40   160  5x   3x   soft
12 Jack Beckman (Ferrari)            60   60    60   160  4x   2x   soft
 8 Garry Kaluzny (Marlboro McLaren)  60   60    40   160  5x   2x   soft
 4 Bill Worrel (Tyrrell)            100   40    40   160  5x   2x   soft
44 Mike St. Peter (Mercedes)         60   40    40   160  4x   4x   hard
22 Gary Sturgeon (McLaren)           20   60    60   160  5x   2x   soft 
 5 Brian Robinson (Walker Racing)    20   60    40   160  5x   3x   soft
 7 Joel Lauder (HSBC Jaguar)         60   60    60   160  4x   2x   soft
17 Jim Lauder (Shadow)               60   40    40   160  5x   3x   hard
10 Mark Moellering (McLaren)         20   80    60   200  2x   2x   soft
20 Jim Landis (Benetton)             60   40    40   160  5x   3x   hard
 9 Chuck Modzinski (Arrows)          60   40    40   140  5x   4x   soft
13 Greg Lim (GoDaddy)                20   60    40   160  4x   4x   hard 
 0 Gary Kempen (Williams)            20   60    40   160  5x   3x   hard

Start = Start Speed (in miles/hour); Accel = Acceleration (in mph); Decel = Deceleration (in mph); Top = Top Speed (in mph); Wear = # of Wear markers (per lap); Skill = # of Skill markers (per lap); Tires = hard or soft tires to begin the race.

Ten of the 15 cars, including the top 5 starters, began the race on soft tires; five drivers chose the hard tire compound to begin the race. The top 4 starters had 60 mph start speeds; 5th place starter Bill Worrel had a 100 mph start speed. Five drivers had 20 mph start speeds; they all started in 7th place or lower.

The field is all lined up for the start of the Belgian Grand Prix

The field is all lined up for the start of the Belgian Grand Prix. Jim Robinson (white/yellow/blue car) is on the pole position (inside of the track with the red & white striped line). (Greg Lim photo)

When the green flag dropped, both J. Robinson and White spent a wear to boost their start speed from 60 mph to 80 mph. Robinson moved first and placed his car in the middle of the track to give himself the option of either lane to take in his next move through the La Source hairpin corner. White naturally took the inside lane. Bill Worrel, starting in the 3rd row, also used a wear (since he was also on soft tires and could also use a wear to increase his start speed instead of having to roll dice) to increase his start speed from 100 mph to 120 mph, thus passing both Beckman and Kaluzny and moving into 3rd place alongside White and J. Robinson.

Worrel then got through La Source first, and led into Eau Rouge. White and J. Robinson were one space behind Worrel, and Beckman and Kaluzny were two spaces behind the leader. Then a couple of more spaces behind came Jim and Joel Lauder, and then behind them was St. Peter.

When the pack got to Les Combes, Beckman passed Worrel for the lead, with J. Robinson 3rd and White 4th. Then coming out of Les Combes, J. Robinson made a forced-pass through Beckman and White to take the lead. Jim Lauder spun at Bruxelles, dropping him from 5th down to 10th place by the time he got going again. Then on the long straight between Stavelot and through Blanchimont, Worrel regained the lead just before the Bus Stop Chicane. J. Robinson, Beckman, and White were all in a line right behind Worrel, and they were followed closely by Joel Lauder and B. Robinson.

Although Worrel led through the Bus Stop, he pulled into the pits. He was then followed by all of the leading cars of J. Robinson, Beckman, White, B. Robinson, Joel Lauder, and Kaluzny. A moment later and Sturgeon, St. Peter, and Moellering also pulled into the pits. That allowed Jim Lauder to take the lead, as he did not pit. Jim Lauder had Chuck Modzinski right next to him in 2nd place as they both headed into the La Source hairpin. Also staying out on the track were the cars of Gary Kempen, Jim Landis, and Greg Lim. Most of the cars that did not pit were on hard tires and regained 2 or 3 wear as they crossed the start/finish line, but Modzinski’s car was on soft tires and so did not gain any wear.

The official order at the end of the 1st lap was: Jim Lauder (+9); Modzinski (+11); Beckman (0); J. Robinson (-3); Worrel (0); Kempen (+9); White (-5); B. Robinson (0); Joel Lauder (0); Kaluzny (-6); Landis (+1); Lim (+2); Sturgeon (-6); St. Peter (-8); and Moellering (-4). The numbers in parentheses indicate how many places a driver either gained (+) or lost (-) from their starting position.

Modzinski took the lead from Jim Lauder through La Source, and the cars that had just exited the pits were right on the tailpipes of the leaders. Modzinski continued to lead through Bruxelles, and Jim Robinson took 2nd place from Jim Lauder. Worrel then took 3rd place from Jim Lauder when Lauder spun at Pouhon. Then the leader, Modzinski, spun in Campus corner, as his car was about out of wear and he was trying desperately to stay in front of Jim Robinson and Worrel. Just about the time Modzinski spun, Jim Lauder parked his car off the side of the track, retiring from the race in 15th place, due to handling issues. Kaluzny then also spun in Campus while he was trying to force a pass by White’s car. Kaluzny fell from 6th to 8th place.

As the leaders went through Blanchimont for the 2nd time, the running order was: Worrel; Jim Robinson; Joel Lauder; Modzinski; Kempen; Landis; Kaluzny; Brian Robinson; Beckman; Sturgeon; St. Peter; Lim; and Moellering.

Now, at the end of the 2nd lap, some cars had to make their pit stops, while some cars stayed out on the track. Worrel, J. Robinson, and White all stayed out on the track in 1st through 3rd positions, while Joel Lauder made his 2nd pit stop. Other cars that stayed out on the track were: Beckman; Kaluzny; B. Robinson; Sturgeon; Moellering; and St. Peter. All of the cars that stayed on the track were on hard tires and so added a couple of wear markers, except for St. Peter who was trying to coax another lap out of his soft tires. Other cars that pulled into the pits were: Landis; Kempen; Modzinski; and Lim. The cars that changed tires in the pits all switched from hard to soft tires, excepting Modzinski who changed from soft to hard tires.

The official order after two laps: Worrel (+4); J. Robinson (-1); White (-1); Beckman (-1); Kaluzny (-1); B. Robinson (+2); Sturgeon (0); Joel Lauder (+1); Moellering (+2); St. Peter (-4); Landis (+1); Kempen (+3); Modzinski (0); and Lim (0).

Unfortunately, there are no pictures of the 3rd lap of the race. Richard White (+1) passed the competition to take the checkered flag. Jim Robinson (-1) came in 2nd, and Brian Robinson (+5) passed Bill Worrel (+1) for 3rd place, Worrel finishing 4th. Gary Sturgeon (+1) tried to overaccelerate on his final move, but failed the dice roll, and that allowed Joel Lauder (+4) to pass and to grab 5th place from Sturgeon (who finished 6th). Positions 7 through 14: 7th-Jack Beckman (-4); 8th-Mark Moellering (+3); 9th-Garry Kaluzny (-5); 10th-Gary Kempen (+5); 11th-Jim Landis (+1); 12th-Mike St. Peter (-6); 13th-Greg Lim (+1); and 14th-Chuck Modzinski (-1). Modzinski spun for the 2nd time at Campus corner during the last lap, and that dropped him from 12th to last place. Classified 15th with a DNF was Jim Lauder (-5).

Richard White with the checkered flag

Richard White with the checkered flag. (Greg Lim photo)

Points awarded at the Belgian Grand Prix: White 10; J. Robinson 6; B. Robinson 4; Worrel 3; Joel Lauder 2; Sturgeon 1.

The points standings of the 2018 CFR-Detroit season after three of eight races:

Place Driver (Car)                    Points
  1   Richard White (Brabham)           23
  2   Jim Robinson (Williams)           12
  3   Garry Kaluzny (Marlboro McLaren)  10
  4   Bill Worrel (Tyrrell)              9
  5   Mike Cook (Camel Lotus)            7
  6T  Jack Beckman (Ferrari)             4
  6T  Brian Robinson (Walker Racing)     4
  6T  Gary Sturgeon (McLaren)            4
  9T  Aric Parr (Motul BRM)              2
  9T  Joel Lauder (HSBC Jaguar)          2
  11  Mike St. Peter (Mercedes)          1
  12T Greg Lim (Marlboro McLaren)        0
  12T Jim Landis (Benetton)              0
  12T Mark Moellering (McLaren)          0
  12T Gary Kempen (Williams)             0
  12T Chuck Modzinski (Arrows)           0
  12T Jim Lauder (Shadow)                0

The next race of the 2018 CFR-Detroit racing campaign is the Monaco Grand Prix, to be held at Imperium Games in Wixom, Michigan, on Saturday, August 11.

CFR-Detroit 2018 Race #2 – British Grand Prix

Wednesday, December 5th, 2018

The second race of the 2018 CFR-Detroit racing series, the British Grand Prix, was held on the evening of Friday, June 8, at RIW Hobbies & Games in Livonia, Michigan. Thirteen drivers competed, and when the dust settled it was Richard White (Brabham) who earned the victory over his rivals. Joining White on the podium, in 2nd and 3rd places, were Bill Worrel (Tyrrell) and Jack Beckman (Ferrari). With the victory, White vaulted into 1st place in the points standings with 13 points.

The race was held on the Silverstone, England, track, using a recent track configuration of a CFR design. This is the same track that was raced in the 2017 CFR-Detroit racing series.

Silverstone (2011) track diagram

Silverstone (2011) track diagram, as designed for use with the Championship Formula Racing board game.

Once again, the field of drivers used the standard “bid for qualifying position” rules of the Championship Formula Racing game. Each Wear marker bid counts as 1.0, and each Skill marker bid counts as 0.5. Bill Worrel won the pole with a bid of 6.0 (6 wear + 0 skill). Richard White started 2nd with a bid of 5.5 (5 wear + 1 skill). Gary Sturgeon (1 wear + 6 skill), Garry Kaluzny (3 wear + 2 skill), and Jim Robinson (1 wear + 6 skill) all bid 4.0, so they rolled percentage dice for starting positions. Sturgeon rolled a 75 so he started 3rd, Kaluzny rolled 70 so he was 4th, and J. Robinson started 5th after rolling 51. Mike Cook started 6th with a bid of 3.5 (1 wear + 5 skill). Jack Beckman (1 wear + 3 skill) and Brian Robinson (0 wear + 5 skill) each bid 2.5, with Beckman rolling an 80 to start 7th, and B. Robinson rolling an 03 to start 8th. Greg Lim bid 2.0 (0 wear + 4 skill) so he started 9th. Jim Landis started 10th with a bid of 0.5 (0 wear + 1 skill). Aric Parr, newcomer Joel Lauder, and Mike St. Peter each bid nothing. Parr won the dice-off with a roll of 60, so he was 11th on the starting grid. Lauder started 12th with a roll of 47, and St. Peter started in 13th with a roll of 29.

The starting grid with their car specs:

 # Driver (Car)                    Start/Accel/Decel/Top/Wear/Skill/Tires
 4 Bill Worrel (Tyrrell)             60   40    40   160  5x   3x   soft
 1 Richard White (Brabham)           60   40    40   160  5x   3x   soft
22 Gary Sturgeon (McLaren)           20   60    40   180  5x   2x   soft
 8 Garry Kaluzny (Marlboro McLaren)  20   60    40   180  5x   2x   soft
 2 Jim Robinson (Williams)           60   40    40   160  5x   3x   soft
11 Mike Cook (Camel Lotus)           60   60    60   160  4x   2x   hard
12 Jack Beckman (Ferrari)            60   60    40   160  5x   2x   soft 
 5 Brian Robinson (Walker Racing)    20   60    60   160  4x   3x   soft
13 Greg Lim (GoDaddy)                20   60    40   180  4x   3x   soft
20 Jim Landis (Benetton)             60   40    40   160  5x   3x   soft
14 Aric Parr (Motul BRM)             20   60    40   180  5x   2x   hard
 7 Joel Lauder (HSBC Jaguar)         20   60    40   180  5x   2x   soft 
44 Mike St. Peter (Mercedes)         20   40    40   160  5x   4x   hard

Start = Start Speed (in miles/hour); Accel = Acceleration (in mph); Decel = Deceleration (in mph); Top = Top Speed (in mph); Wear = # of Wear markers (per lap); Skill = # of Skill markers (per lap); Tires = hard or soft tires to begin the race.

British GP 2018 starting grid

The cars are lined up for the start of the 2018 British Grand Prix. The Grid Girls are in position, and (paying homage to the crashed “safety” car at the recent “real life” Detroit Grand Prix) the safety car has crashed in front of the grid, holding up the start of the race! Note the temporary starting grid to ease starting on a corner.

Ten of the 13 cars started with soft tires; only the cars of  Cook, Parr, and St. Peter were shod with hard tires. It was noted that the front row starters (Worrel, White) both had 60 mph start speeds, while the 2nd row starters (Sturgeon, Kaluzny) only had 20 mph start speeds. The rest of the pack was fairly split between cars with 60 mph start speeds (J. Robinson, Cook, Beckman, and Landis), and cars with 20 mph start speeds (B. Robinson, Lim, Parr, Lauder, and St. Peter).

When the green flag dropped to start the race, pole-sitter Bill Worrel used a wear to increase his start speed to 80 mph; he then took the green arrow leading into the first corner. Richard White, also in the front row, also used a wear to go 80 mph, and he took the inside of the track to take the lead. Jim Robinson also boosted his start speed to 80 mph, thus passing both Gary Sturgeon and Garry Kaluzny who had both started a row in front of J. Robinson. Mike Cook was content to just start at 60 mph and so he pulled alongside Sturgeon and Kaluzny.

The pack is away

The pack is away! The running order is: White; Worrel; J. Robinson; Sturgeon; Kaluzny; Cook; Beckman; B. Robinson; Landis; Lim; Lauder; Parr; and St. Peter.

Through the first few corners, White steadily increased his lead over Worrel, and then J. Robinson also passed Worrel on Wellington Straight. Just before Brooklands corner, Lauder had moved up to 5th, after starting 12th.

White leads through Brooklands

White leads through Brooklands, followed by J. Robinson, Worrel, Cook, Lauder, Sturgeon, Beckman, Kaluzny, Lim, Landis, Parr, B. Robinson, and St. Peter.

As the pack wound its way around the track, Worrel moved up to challenge White for the lead, actually taking the lead from White through the Stowe corner at the end of Hangar Straight. Lauder had moved up to 3rd at that point.

Worrel takes the lead

Worrel takes the lead in the 6-wheel Tyrrell (at the far right of the picture, near the “22” sign). Pictured (left-to-right) are Aric Parr (playing a card to the table), Joel Lauder (Navy cap), Jim Landis (yellow striped shirt), and Brian Robinson (from the chin down, at least).

Shortly after, cars started making pit stops. Worrel and White were the first two cars to pull into the pits, followed by J. Robinson, Lauder, Kaluzny, Sturgeon, Beckman, Lim, and B. Robinson. Aric Parr managed to spin at Vale, but he stayed on the track after the spin. Also staying on the track was Cook, and he became the leader on the track when he crossed the line at the end of the 1st lap. Landis and St. Peter also eschewed making pit stops.

First pit stops

Most of the cars have stopped in the pits at the end of the 1st lap, although Cook (yellow car) is staying on the track and will become the race leader. We have added orange lines next to the track to denote the pit area where cars can pull off the track to make a pit stop.

At the end of the 1st lap, the official order was: Cook (+5); B. Robinson (+6); Worrel (-2); White (-2); Parr (+6); Landis (+4); Kaluzny (-3); J. Robinson (-3); Sturgeon (-6); Lauder (+2); Beckman (-4); Lim (-3); and St. Peter (0). The numbers in parentheses indicate how many places a driver either gained (+) or lost (-) from their starting position. After the pit stops were all resolved, the running order on the track was: Cook; White; Worrel; Landis; Parr; Kaluzny; J. Robinson; Sturgeon; Lauder; Beckman; Lim; St. Peter; and B. Robinson.

Cook leads after the pit stops

Cook (yellow car) leads after the pit stops. Most of the pack (9 cars) are bunched together in Abbey corner.

Down Wellington Straight, Cook’s lead was 8 spaces over White, although Cook had not yet made his pit stop. Kaluzny tried to make a daring move at Village corner. He went 140 mph into the 80 mph spaces, using 2 wears and two -1 skill markers. Alas for Kaluzny, he rolled an 11 (which was modified to a 9), and he spun out. What with his car only having a 20 mph start speed, it took forever for his car to get back up to speed, and he dropped to last place.

Kaluzny spins at Village

Kaluzny (orange and white McLaren) spins in the middle of Village corner.

Cook had a 6-space lead over White and Worrel through Brooklands and Luffield, then Cook stretched his lead to 8 spaces as he passed through Copse corner. Just as Cook was passing though Copse, Jim Robinson spun at Luffield. J. Robinson drove at 120 mph through the inside of the corner, using 2 wears and rolling a chance through the 60 mph space. Although J. Robinson used his -3 skill marker to modify the chance dice roll, he rolled a ’12’ which even when reduced to a ‘9’ resulted in the spin.

Cook leads through Copse

Mike Cook (yellow car at upper right) leads through Copse while Jim Robinson spins at Luffield (lower left).

After Jim Robinson recovered from his spin, he had fallen from 5th place down to 11th.

As Cook came around Club corner at the end of the 2nd lap, he had to pit to change tires as he did not pit after the 1st lap. Cook’s lead was down to 5 spaces over White at the moment of pitting.

As Cook was having his tires changed from hard to soft in the pits, White and Worrel sailed by, White in the lead. Most of the rest of the field was also able to pass Cook before he re-entered the track, although Landis, St. Peter, and Parr also had to make their pit stops. Cook, however, was the official leader of the 2nd lap.

Cook pits; White takes the lead with Worrel in 2nd place

Cook pits; White takes the lead with Worrel in 2nd place.

The official running order after the 2nd lap was: Cook (+5); White (0); Worrel (-2); Lauder (+8); Beckman (+2); Parr (+5); Lim (+2); Sturgeon (-5); J. Robinson (-4); Kaluzny (-6); B. Robinson (-3); St. Peter (+1); and Landis (-3). After the pit stops were sorted out, though, the running order on the track was: White; Worrel; Lauder; Beckman; Sturgeon; Lim; Cook; J. Robinson; Kaluzny; B. Robinson; St. Peter; Landis; and Parr.

During the final lap, Worrel pulled alongside White coming out of Luffield. Worrel had to use 2 wears and roll (and make) a -3 chance roll to accomplish that feat. At that moment, Worrel had 6 wear remaining for the rest of the race, while White had only 5 wear left. The duo of White and Worrel dragged each other through the old Woodcote corner and down the straight to the Copse corner.

Worrel pulls even with White through Luffield

Worrel (solid blue car) pulls even with White (white and blue car) through Luffield corner. Lauder (backwards facing green car) has spun in Luffield. Bill Worrel (solid blue shirt) and Mike Cook (green shirt) watch the action on the track.

White pulled ahead of Worrel at Copse. White went 160 mph on the green arrow through the inside lane, using 1 wear. Although he had the inside of the track leading into Copse, Worrel could not get to the green arrow, so he reduced his speed to 140 mph and cornered through the inside lane of Copse, but had to use 2 wears because of not having the arrow. This left both White and Worrel with 4 wears remaining until the finish.

White retakes the lead through Copse

White retakes the lead over Worrel through Copse. The other positions: Beckman; Sturgeon; Cook; Lim; J. Robinson; Lauder; B. Robinson; Kaluzny; Parr; Landis; and St. Peter.

White next played a CFR-veteran’s move. White moved at 140 mph into the Maggots/Becketts/Chapel corners, using 1 wear in the process (and leaving him with 3 wear). Worrel also moved at 140 mph, but got stuck in the corner despite not using any wear. Meanwhile, Beckman, in 3rd place, was only 2 spaces behind Worrel.

White still leads at Chapel

White still leads at Chapel. Worrel and Beckman are close behind.

White then pushed his car to 180 mph coming out of Chapel corner, while Worrel only went 120 mph to complete moving through Chapel corner, thereby not using any wear. Worrel was now 4 spaces behind White, although Worrel had a 4-wear to 3-wear  advantage over White.

White stretches his lead down Hangar Straight

White stretches his lead down Hangar Straight.

But then what had been a fine battle for the lead on the track between White and Worrel became anti-climactic. Worrel tried to push his top speed to 180 mph down Hangar Straight in an attempt to close up on White, but failed the dice roll. Worrel used a -1 skill modifier for that top speed dice roll, but rolled a ’12’ and so the modifier didn’t make any difference. That meant that Worrel only moved 160 mph, and his top speed until the end of the race was now only 140 mph. Shortly after, Cook also blew a -1 top speed roll on Hangar Straight in his attempt to move 180 mph. Cook also only moved at 160 mph and had his top speed reduced to 140 mph. And then Joel Lauder in the HSBC Jaguar rolled the dice in an unmodified attempt to slow down whilst approaching the Stowe corner at the end of Hangar Straight. He failed the roll, leaving his deceleration at only 20 mph until the end of the race. Fortunately for these cars, the race was almost over.

Kaluzny, last season’s race-winner at Silverstone who was trying to desperately get back into the points for this race,  also rolled dice down Hangar Straight. He made a normal top speed roll to move at 200 mph, then had to make an unmodified deceleration roll to get down to 180 mph when the road was blocked by the cars of Lim and Parr. Kaluzny’s next move saw him try to force-pass Lauder at Stowe, but Kaluzny spun. Brian Robinson was then successful in forcing a pass by Jim Robinson on the outside of Stowe.

In the meantime, Richard White (+1) cruised to the victory by 2 spaces over Bill Worrel (-1). Jack Beckman (+4) rounded out the podium with a 3rd place finish. Other finishers: 4th-Mike Cook (+2); 5th-Aric Parr (+6); 6th-Gary Sturgeon (-3); 7th-Greg Lim (+2); 8th-Jim Landis (+2); 9th-Mike St. Peter (+4); 10th-Joel Lauder (+2); 11th-Brian Robinson (-3); 12th-Jim Robinson (-7); 13th-Garry Kaluzny (-9). St. Peter moved up from 12th to 9th due to a daring forced-pass of Jim Robinson at the Vale corner, and that move gave St. Peter enough momentum to also pass B. Robinson and Lauder before the end of the race.

White wins the 2018 British Grand Prix

White wins the 2018 British Grand Prix.

Points awarded at the British Grand Prix: White 10; Worrel 6; Beckman 4; Cook 3; Parr 2; Sturgeon 1.

The points standings of the 2018 CFR-Detroit season after two of eight races:

Place Driver (Car)                    Points
  1   Richard White (Brabham)           13
  2   Garry Kaluzny (Marlboro McLaren)  10
  3   Mike Cook (Camel Lotus)            7
  4T  Jim Robinson (Williams)            6
  4T  Bill Worrel (Tyrrell)              6
  6   Jack Beckman (Ferrari)             4  
  7   Gary Sturgeon (McLaren)            3
  8   Aric Parr (Motul BRM)              2
  9   Mike St. Peter (Mercedes)          1
  10T Greg Lim (Marlboro McLaren)        0
  10T Brian Robinson (Walker Racing)     0
  10T Jim Landis (Benetton)              0
  10T Joel Lauder (HSBC Jaguar)          0

The next race of the 2018 CFR-Detroit racing campaign is the Belgian Grand Prix, to be contested at Pandemonium Games in Garden City, Michigan, on Friday, July 13.